Posts for: northshore
Oct 14, 2012 09:50:06 #
#1 wins hands down-- wonderful shot! The angle of the boats makes it move, and draws me down (up?) the Seine, whereas the next shot is more static because of the change in position as your boat moved. The clouds add to the motion, and I'd agree that the rule of thirds is only a suggestion. You have broken it to much better effect.
Aug 13, 2012 08:50:01 #
Jay Pat wrote:
Go with the 30D for the bigger screen on the back!!!!
The 20D back screen is very small.....Real small.......
I have both and that is the "big" difference to me.
Pat
The 20D back screen is very small.....Real small.......
I have both and that is the "big" difference to me.
Pat
My sentiments exactly! The 20D is a fine camera, but the little screen is SO little in comparison-- my older eyes really appreciate more visual real estate.
Aug 8, 2012 08:06:39 #
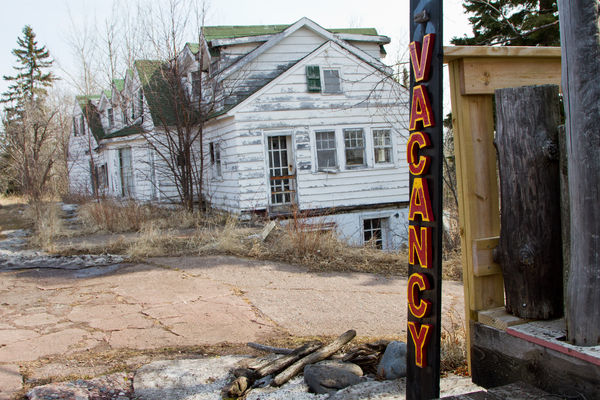
Great interior shots-- evocative and haunting. And maybe haunted...? Beautiful capture! And from the look of the place, I hope you wear a hard hat when you go in there. We don't want traumatic encephalopathy in Hedgehogs!
Jul 18, 2012 11:00:30 #
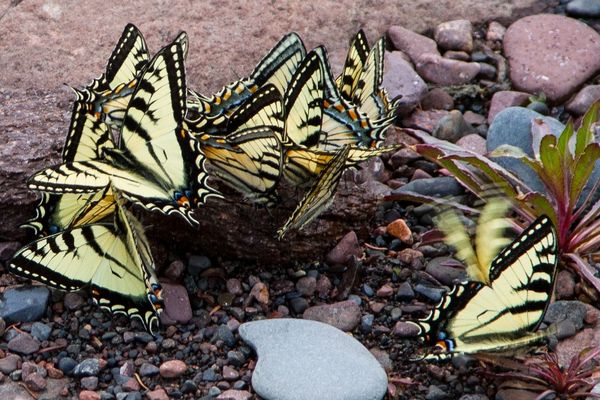
Many good wishes for rapid healing-- hope all these photos help. These are Tiger Swallowtails "puddling" near Lake Superior.
Jul 18, 2012 10:31:34 #
The proper terminology is "expose to the right"-- if you Google that, you'll find lots of explanations. The quickie from Wikipedia: "ETTR is founded upon the linearity of CCD and CMOS sensors, whereby the electric charge accumulated by each subpixel is proportional to the amount of light it is exposed to (plus electronic noise). Although a camera may have a dynamic range of 5 or more stops, when image data is recorded digitally the highest (brightest) stop uses fully half of the discrete tonal values. This is because a difference of 1 stop represents a doubling or halving of exposure. The next highest stop uses half of the remaining values, the next uses half of what is left and so on, such that the lowest stop uses only a small fraction of the tonal values available. This may result in a loss of tonal detail in the dark areas of a photograph and posterization during post-production. By deliberately exposing to the right and then stopping down afterwards (during processing) the maximum amount of information is retained.
The technique was first described in 2003 by Michael Reichmann on his website,[1] after purportedly having a discussion with software engineer Thomas Knoll, the original author of Adobe Photoshop and developer of the Camera Raw plug-in."
The technique was first described in 2003 by Michael Reichmann on his website,[1] after purportedly having a discussion with software engineer Thomas Knoll, the original author of Adobe Photoshop and developer of the Camera Raw plug-in."
Jul 11, 2012 19:00:24 #
You might do better setting the shutter speed to 250-500 if it's reasonably bright, and let the camera set the aperture. Then look at the first few pictures you take, and see whether you're getting good shots. The farther away your subject is, the better it will turn out, because the movement will be relatively slower. Things close to the bus may be going by too fast to get a clear photo, but sometimes a good blur can be fun.
Check to see if the windows are tinted-- that can affect the color you end up with. And if they are tinted, see if they can be opened.
Of course you won't be on the bus all the time, so be prepared to make adjustments to your settings if you are in a darker place. And have a great time!
Check to see if the windows are tinted-- that can affect the color you end up with. And if they are tinted, see if they can be opened.
Of course you won't be on the bus all the time, so be prepared to make adjustments to your settings if you are in a darker place. And have a great time!
Jun 13, 2012 07:25:09 #
I lived in Canada (Ottawa) from 11-17 (grades 7-13). It took a little while to adjust, but I made wonderful friends, and I wouldn't trade the experience for anything! I have always been grateful for my Canadian education, and for the expansion of my worldview. Kids are resilient, and family is important. Good luck, and bon voyage.
Jun 13, 2012 00:11:30 #
nikonshooter wrote:
quote=wevans410 Nikon Shooter - that's amazing, y... (show quote)
One small problem-- the sun is setting behind the hawk while shining on his breast...
Jun 10, 2012 08:02:50 #
Stacy88 wrote:
I have a Nikon D3100 also, I think for the sunset I did automatic and for the firepit I used the "guide" mode on the camera and where it says slow water fall, I just kept playing around and changing it and taking pic. I am very new to all this and I am thinking about buying one of those dummy books. Sometimes I think I am not good enough to be on UHH.
Playing around is a great way to see what different settings do, and with digital, it costs nothing! It's a great way to get immediate feedback (unlike film), and each photo has stored all the information about settings, so you can review what you did and how it turned out.
I would highly recommend "Understanding Exposure" by Bryan Peterson-- it is a great way to learn what the different settings do, with lots of examples, written in clear English by someone who obviously loves photography.
And nobody is "not good enough to be on UHH"! This is a site for anyone who wants to learn, and there are many good teachers here who want to help. So keep shooting and posting and asking, and you'll learn a lot. Those are very good shots, so you are well on your way.
May 22, 2012 07:12:10 #
I found that removing my UV filter improved my sharpness significantly (and my photos are better too!). It would also help to get a cable release rather than manually pressing the shutter button.
May 20, 2012 14:30:56 #
Getting closer is almost always good advice, but with wary subjects, that usually means using a longer lens, or setting up a blind, which then requires the bird to come to you.
The one difficulty with the photo of the Pileated Woodpecker is the background. The bright sky makes it difficult to see detail, and takes away from an otherwise good capture. Of course, I've never figured out how to persuade birds to move to a better spot for me-- they seem quite intent on their own agenda! Sometimes, though, patience and stealth are rewarded.
The frog is very cute. And while centering the subject is often not the most pleasing composition, I really like it here. Keep up the good work.
And Cecil, I think your brightening washes the woodpecker out too much. The original photo is much closer to reality.
May 11, 2012 09:02:03 #
Congratulations on moving from Auto everything to Aperture priority! It is a huge step toward taking creative control of your photography. I would heartily agree with the recommendation of "Undrestanding Exposure"-- it is extremely helpful in understanding how all the elements fit together.
And I love your second picture! It looks as if you got the focus just where you need it, and captured the bluebird in a unique pose.
And I love your second picture! It looks as if you got the focus just where you need it, and captured the bluebird in a unique pose.
Apr 28, 2012 23:56:55 #
I grew up on Mackinac Island, so that photo has a special appeal to me, but the butterfly wins for a contest. Thanks for the memories!
Apr 27, 2012 09:22:54 #
Just to add to the mix, OnOne is offering their Perfect Layers 2 as a free download-- it alows you to do layers in Lightroom, without having to go to Photoshop. I haven't used it yet, but for those who don't want to pay for one of the photoshop versions, it offers a way to do things Lightroom can't.
Apr 20, 2012 08:42:17 #