Shooting to the Right
Jul 17, 2012 13:04:13 #

In reading about another photographer and his methods he made the statement "I always shoot to the right." That's a term I had never heard before. A search of UHH former posts turned up nothing. A Google search found several items, the following typical from dpreview.com. Any other thoughts on this?
"Do professional photographers shoot to the right? I was told by an instructor who is also a professional photographer that he always shoots in manual mode and shoot to the right such that the historgram is skewed to the right hand side but just before clipping. In changing light conditions, do you keep checking histogram and adjusting the exposure setting? Does that affect the speed of your shooting?
Thanks.
Joe"
Extensive comments follow in his post on dpreview.
Jul 17, 2012 13:15:10 #

It means that he always tries to get the histogram as far to the right as possible without inducing clipping. You actually answered your own question in your post.
Jul 17, 2012 14:17:11 #
sbesaw
Loc: Boston
nolte1964 wrote:
It means that he always tries to get the histogram as far to the right as possible without inducing clipping. You actually answered your own question in your post.
Thought it meant he was a consevative while shooting to the left means you are liberal. Think your answer makes more sense :-D
Jul 17, 2012 14:23:58 #
this is especially useful if you shoot Raw. With Raw capture you can recover blown highlights easier than blown shadows.
Jul 17, 2012 14:41:01 #
glojo
Loc: South Devon, England
sinatraman wrote:
That is news to me and I am a complete amateur.this is especially useful if you shoot Raw. With Raw capture you can recover blown highlights easier than blown shadows.
How do you recover a blown out object.. I can recover something that is dark.
Have you got an example of recovering something that is burnt out as I thought once it was gone, it was gone.
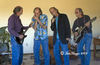
The attached picture shows what I am rambling on about.

Jul 17, 2012 14:42:30 #
Expose for the highlights. Yes for clipping, but also by pushing the histogram to the right pulls in more of the dark. Better for detail and noise in the dark areas..
Expose for the highlights, process for the shadows.
Expose for the highlights, process for the shadows.
Jul 17, 2012 14:44:50 #
glojo wrote:
How do you recover a blown out object.. I can recover something that is dark.
Have you got an example of recovering something that is burnt out as I thought once it was gone, it was gone.
The attached picture shows what I am rambling on about.
sinatraman wrote:
That is news to me and I am a complete amateur.this is especially useful if you shoot Raw. With Raw capture you can recover blown highlights easier than blown shadows.
How do you recover a blown out object.. I can recover something that is dark.
Have you got an example of recovering something that is burnt out as I thought once it was gone, it was gone.
The attached picture shows what I am rambling on about.
Now that's a picture in need of a caption.
"Hey, beautiful, you come around here often."
"Man, I'd like to ruffle her feathers."
"Excuse me, but I think a bird pooped on your head."
Jul 17, 2012 15:04:45 #
glojo
Loc: South Devon, England
jerryc41 wrote:
quote=glojo quote=sinatraman this is especially ... (show quote)
:thumbup: Nice.
I want to see how folks can recover burnt out information and I say that because I would love to learn that skill.
I do not doubt them and I am looking forward to seeing how it is done.
Jul 17, 2012 15:13:35 #
If you shoot in raw you have a better chance of recovering something that was blown. I don't know if it's a Nikon thing, but the first channel to blow is the red channel for me. There are ways to fix it, but sometimes it is too far gone.
Jul 17, 2012 15:35:00 #
You can't recover something that is totally blown but Adobe Camera Raw has a tool called the 'Adjustment Brush' that will bring out a lot of detail in lightened areas or in darkened areas by adjusting the exposure of the area the brush is used on. Also the sliders in the 'Basic' tool will help to achieve the same thing. You can use it on jpeg but as previously stated it works much better on raw format photos because they carry more information. I hope this helps some.
Jul 17, 2012 15:35:35 #
ohallboyz wrote:
If you shoot in raw you have a better chance of recovering something that was blown. I don't know if it's a Nikon thing, but the first channel to blow is the red channel for me. There are ways to fix it, but sometimes it is too far gone.
The channel furthest to the right depends on what you shoot. For example if you're shooting a water scene, blue will be your dominant channel. If you shoot RAW, as you said, your chances of recovering highlights is much greater. However, if they are really blown then all you can recover is white without detail.
Jul 17, 2012 15:38:27 #
BigBear wrote:
quote=ohallboyz If you shoot in raw you have a be... (show quote)
Yes, totally blown you're out of luck.....chances are better if it's almost blown. Recovery slider can help with that.
Jul 17, 2012 15:51:59 #
glojo
Loc: South Devon, England
I think we are all in agreement and there is a whole World of difference between over exposed and burnt out!!
Am I correct to say that in over exposure we might be able to work on information we can see, but once it is burnt out it is gone forever?
When underexposed it is surprising what information is hiding in the shadows :)
Am I correct to say that in over exposure we might be able to work on information we can see, but once it is burnt out it is gone forever?
When underexposed it is surprising what information is hiding in the shadows :)
Jul 17, 2012 18:13:10 #
I am still learning raw, but i will try to explain as best I can. highlights can be rovered sometimes with adobe camera raw by use of the recovery,exposure, and white balance sliders if the area isn't totaly blown out and if there is still some recoverable data in 2 of the three channels according to the book camera raw with adobe photoshop cs3, "most cameras will let you recover at least a quarter stop of highlight data if you are willing to compromise a little on thewhite balance. many cameras will let you recover at least one stop." basicaly you need to adjust the sliders mentioned. Adjuting may make the photo a little flat so you may have to touch up the contrast a bit, as well as midtones. Keep your eye on the histogram and how your image is looking what i have read also that is you slightly underexpose to keep your highlights, it tends to introduce noise in the shadow areas. As a last ditch, if the overexposure is sky, I use the smart brush "make skys bluer"' to reduce the look of overexposure. hope this helps.
Jul 17, 2012 18:31:40 #
If you want to reply, then register here. Registration is free and your account is created instantly, so you can post right away.