Posts for: AlMac
Oct 10, 2016 08:59:51 #
Nice work. Did you use a displacement map to apply the pattern?
Alan
Alan
Oct 9, 2016 11:14:37 #
Shakey wrote:
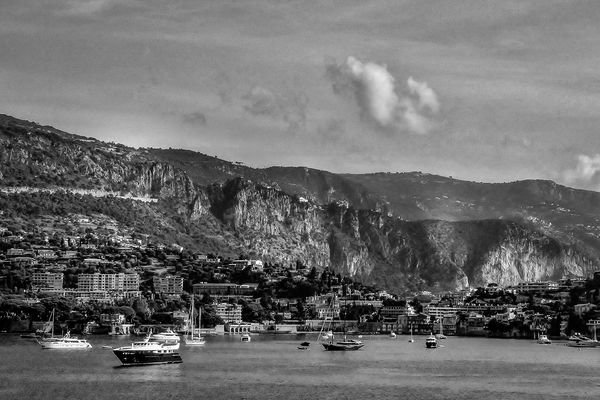
Here's a shot of the South of France taken in B&W. The foreground is fine but the background is almost one continuous tonal value, which lacks the impact of the foreground. No, it's not a composite. You handle it in any way you want to improve the image. Have fun.
Here's my go Shakey, all in Lightroom. Mainly with brush tool.
Alan.
Sep 7, 2016 10:49:35 #
Shakey wrote:
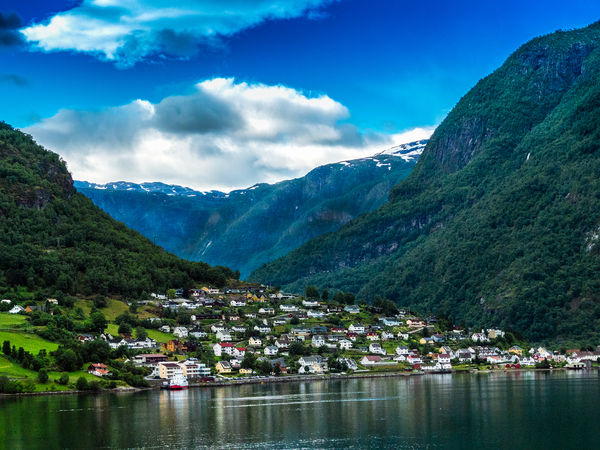
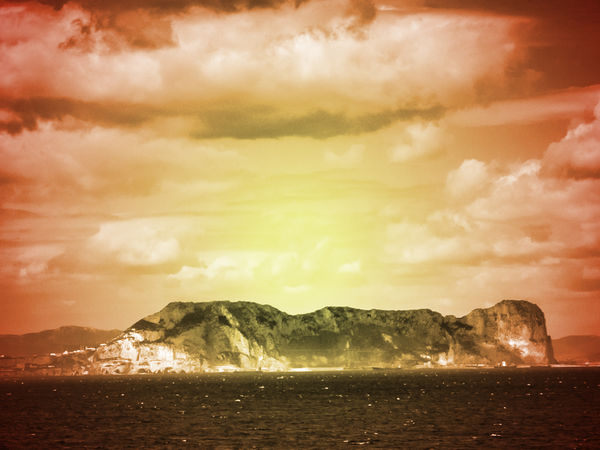
I had set my camera to shoot the sky. While I was sky gazing this village came into view. We were sailing quite fast, I grabbed the shot but there was no time to adjust the settings. Handle it in any way you want, just have fun.
The original was shot in RAW and is attached if you wish to use it. The jpg image has not been processed other than being made from the RAW file.
The original was shot in RAW and is attached if you wish to use it. The jpg image has not been processed other than being made from the RAW file.
Here's my go Shakey.
Started in Lightroom but after getting so far with lifting the shadows, the highlights started to blow out.
Had to take it into Photoshop to use layers and masks.
If you had had the time to take the other shot, exposed for the land and merged in photoshop, the results would have been better.
Still - half a shot is better than no shot at all. Well done!
Thanks for letting me play
Alan.
Aug 23, 2016 19:36:03 #
R.G. wrote:
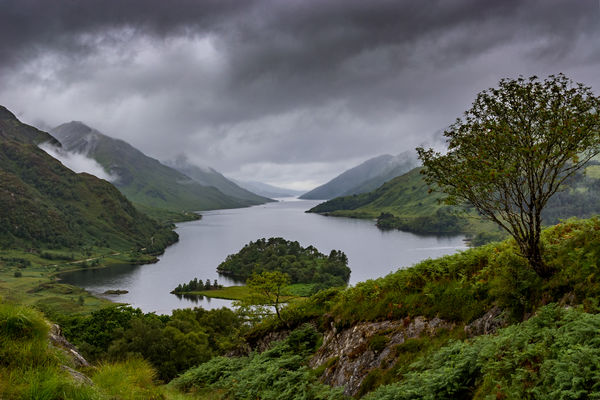
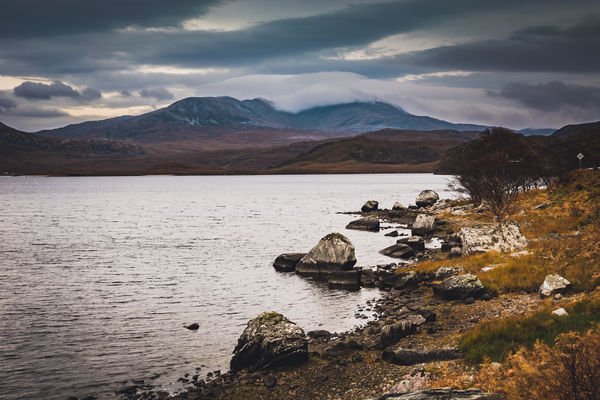
Delving into my plentiful supply of misty, louring shots, I thought this might be a good candidate for some editing (it's a two-shot merge as described in other threads).
(Link to DNG under the JPG).
-
(Link to DNG under the JPG).
-
Here's my go R.G. Started in Lightroom with my usual adjustments then took it into photoshop to remove the power lines. Added a levels layer and a gradient on the clouds.
Thanks for letting us play.
Alan.
Aug 19, 2016 10:54:59 #
kibbles304 wrote:
This is a saved photo from facebook. I think it is a smart phone photo. I have tried (with my limited knowledge) to adjust the colors to make it better with very little success. I am hoping someone will help me out. I am sure many of you have spent the time and effort to learn post processing. I am at that stage of my interest in photography that I should start the process...but, until then...help? Thanking you in advance!A
In Photoshop, made a selection of the people then removed the colour cast.
http://www.youtube.com/watch?v=09XC9WGTLyc

Aug 14, 2016 10:06:35 #
R.G. wrote:
The last two upgrades from Adobe have included that feature. I can only speak for Lightroom, but if you open and activate the grad filter you should see a Brush option at the top of the tool area where it says New | Edit | Brush. Click on Brush and you can use the brush to exclude areas selected by the grad filter.
It works the same in photoshop.
Aug 14, 2016 10:02:25 #
R.G. wrote:
The point I'm trying to make is that even if you d... (show quote)
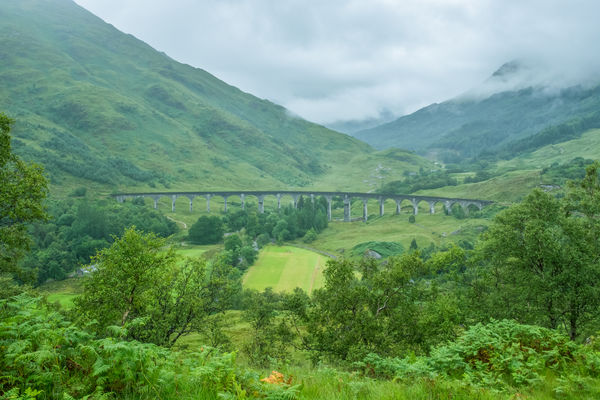
I agree with you R.G. The single and triple exposure seems to present you with highlights that draw your eye to the bright spots.
I could not download the DNG files for the bracketed shots so I had to work on the jpgs.
All in Lightroom.
Started off with my usual edits, reduce highlights (-70) increase shadows (+70) and set my black & white points. Increased the clarity (+19) and vibrance (+25) a touch.
Added a graduated filter starting about ½" from the top to the bridge and reduced the exposure (-25) and highlights (-16) and increased the contrast (+19).
Tried loads of things that just didn't work then came up with split toning.
On the highlights I set the hue to 200 and the saturation to 20 to give a bit of coolness to the mist. On the shadows, brought the hue to 150 and the saturation to 11 to bring back a bit of warmth and colour to the foreground.
After a touch of noise reduction and sharpening, brought the overall contrast up a touch (+19).
Personally this is as far as I would take it in Lightroom. Any further adjustments would be local adjustments done with layers in photoshop but time is against me (the wife is growling at me from across the room).
Alan.
Aug 13, 2016 09:32:11 #
R.G. wrote:
There's probably a presentable shot in there somewhere, if you can do something about the unfavourable lighting.
(Link to DNG below the JPG).
-
(Link to DNG below the JPG).
-
Let's try a colour blast, all in Lightroom.
Thanks for letting us play with your image. I enjoy trying different effects in p.p.
I have just moved house and have been without internet for a bit. Started getting the heebie-jeebies, withdrawal can be a terrible thing.

Aug 13, 2016 07:58:56 #
bcrawf wrote:
What is the filter (or procedure) of adding a gritty black coal-dust-looking graininess to shadow parts of images? I suppose the intent is to give an "antiqued" effect. The appearance is somewhat like noise, but all black and more coarse. (I'd ask the individual, but an earlier constructive comment I offered (assuming people here wanted ideas for improving their work) was not liked and I am blocked from that discussion.)
I use the Dragan presets in Lightroom.
Here is a link to how to create the effect along with a free download to the effect. The full set costs $19.
http://photographypla.net/dragan-effect-tutorial-and-preset/
Alan.
Jul 9, 2016 06:01:24 #
IsoBob wrote:
Use a drawer liner or some kind of rubbery sheet. Place camera with lens filter side down on this material and turn. This seems to work because you are not squeezing the sides of the filter. I read this a short time ago and they say it works really well. Good luck.
Bob
Bob
Just watched this last week.
http://www.picturecorrect.com/tips/how-to-remove-a-stuck-lens-filter/
Jul 5, 2016 07:49:02 #
I have had 4 Seagate external drives fail on me. Now using WD and had no bother up to now.
Jun 24, 2016 06:35:08 #
I think the drop in the economy is a price worth paying viscountdriver.
It boiled my p**s when a decision was made by the Supreme Court of Appeal (the highest court in the land), only to have it overturned by the unelected quango in the European Courts.
We can now take back control of our country and make Britain great again.
It boiled my p**s when a decision was made by the Supreme Court of Appeal (the highest court in the land), only to have it overturned by the unelected quango in the European Courts.
We can now take back control of our country and make Britain great again.
Jun 23, 2016 06:36:41 #
infocus wrote:
Last night I had an automatic update to PS CC. br ... (show quote)


I lost all my plug-ins, actions, brushes & everything else I installed over the basic download.
If you look in the Program Files, in my case Windows (C)> Program Files> Adobe (don't know about Mac), you will notice that Adobe Photoshop CC 2015 is still there as well as CC 2015.5.
Copy your plug-ins from CC 2015 and paste them into the Plug-ins folder in CC 2015.5. They will the work.
Do the same for any brushes or actions etc, that you had installed and you will find that everything will be up and running again.
Hope this helps
Alan.
Jun 4, 2016 17:59:07 #
Went for a moody look. All in Lightroom.
Thanks again RG.
Thanks again RG.
Jun 3, 2016 16:18:00 #
Here's my go Shakey. Started in lightroom then into photoshop.
Took the short way and used Smart Photo editor.
Took the short way and used Smart Photo editor.