Clipping Masks - please share your tips and pics
Jun 26, 2020 07:38:17 #

I have thought about clipping masks off and on since Guyserman's tutorial here in 2019, and believe I finally "get" it 
Below is one simple use, and I would love to have others demonstrate more.
In the past I have used my home-made brushes (see this thread for how) as solid color "stamps." With a clipping mask I can easily change a solid color to a design.
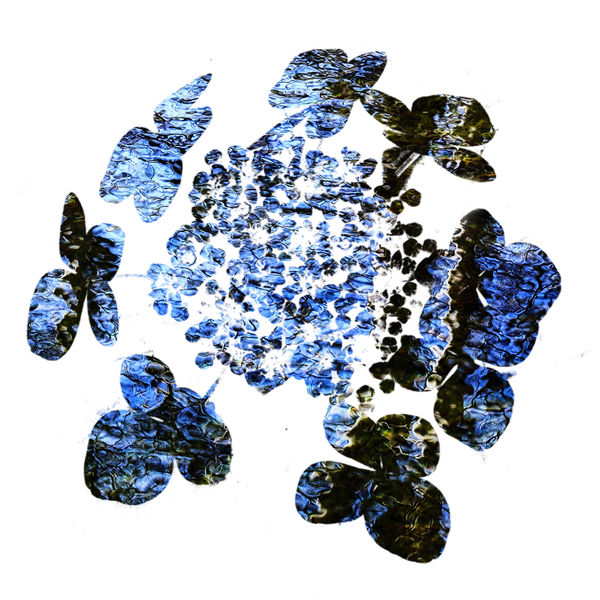
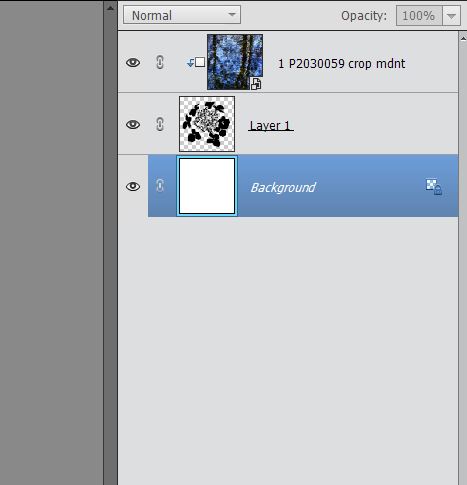
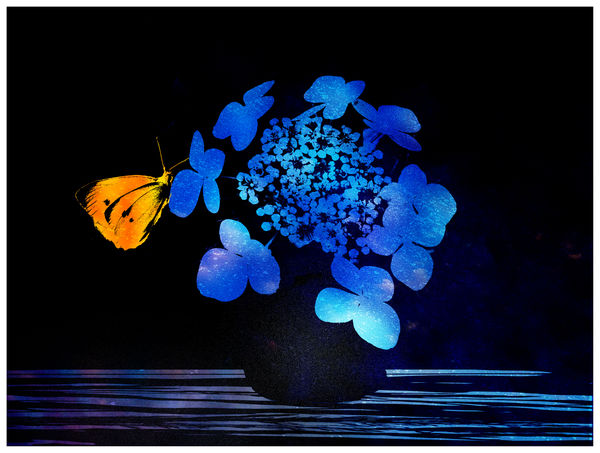
Here is a white background onto which I stamped a brush I made of hydrangeas. Note that it is on its own empty layer. I then added a colorful texture-like composite as the top layer. The clipping mask restricts the composite to the confines of the shape of the brush/stamp.
Feel free to post your own examples!
Below is one simple use, and I would love to have others demonstrate more.
In the past I have used my home-made brushes (see this thread for how) as solid color "stamps." With a clipping mask I can easily change a solid color to a design.
Here is a white background onto which I stamped a brush I made of hydrangeas. Note that it is on its own empty layer. I then added a colorful texture-like composite as the top layer. The clipping mask restricts the composite to the confines of the shape of the brush/stamp.
Feel free to post your own examples!
(Download)
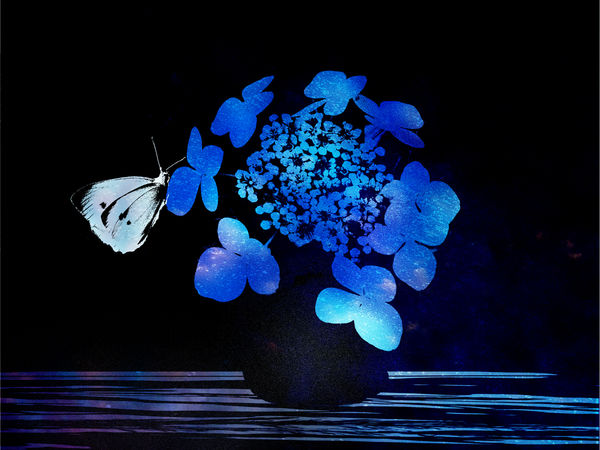
The "table" and butterfly are brushes, as are the sparkles (close-up of sun on ice). Two or three clipping masks used on individual elements.
(Download)
Jun 26, 2020 10:18:35 #
Here is my example.
Started out with a white canvas.
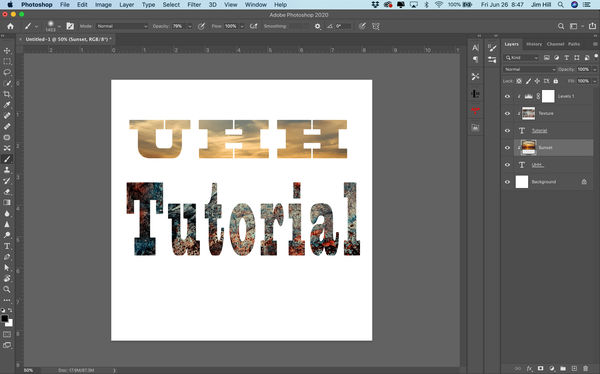
First layer is just black type, UHH.
Second layer is a sunset scene picture. When I placed it the scene covered the top 2/3 of the page. On a mac you can position your cursor right between the type layer and the ice scene layer hit the option key and click, on a windows Alt key and click, turning the sunset layer into a clipping path layer and only applying the scene to the type.
Next I made another type layer, Tutorial,
Next layer is a texture, I did the same thing to make it a clipping path to affect only the word Tutorial.
Last layer is a Levels layer. I wanted to darken the texture layer only. If I would have not made a clipping path out of the layer it would have darkened all layers below it including the UHH layer. You can clip the layer as described above, or, when the layer is first placed and sliders are in view you can see a downward pointed arrow with a box to the right of it on the bottom bar, click it and it now becomes a clipping path layer only affecting the layer directly below it.
Since the layer below the Levels 1 layer, Texture, has been clipped it will also be the one it is clipped to. Now showing the darkening effect to the word Tutorial.
Started out with a white canvas.
First layer is just black type, UHH.
Second layer is a sunset scene picture. When I placed it the scene covered the top 2/3 of the page. On a mac you can position your cursor right between the type layer and the ice scene layer hit the option key and click, on a windows Alt key and click, turning the sunset layer into a clipping path layer and only applying the scene to the type.
Next I made another type layer, Tutorial,
Next layer is a texture, I did the same thing to make it a clipping path to affect only the word Tutorial.
Last layer is a Levels layer. I wanted to darken the texture layer only. If I would have not made a clipping path out of the layer it would have darkened all layers below it including the UHH layer. You can clip the layer as described above, or, when the layer is first placed and sliders are in view you can see a downward pointed arrow with a box to the right of it on the bottom bar, click it and it now becomes a clipping path layer only affecting the layer directly below it.
Since the layer below the Levels 1 layer, Texture, has been clipped it will also be the one it is clipped to. Now showing the darkening effect to the word Tutorial.
Jun 26, 2020 11:40:01 #
Jim-Pops wrote:
Super tip about adjustment layers and clipping masks. I tried a gradient map on the butterfly - easy peasy ...Since the layer below the Levels 1 layer, Texture, has been clipped it will also be the one it is clipped to. Now showing the darkening effect to the word Tutorial.

Many thanks for your time, Jim!
Jun 26, 2020 12:27:28 #
You're welcome Linda. It took me years before I ever used layers and now they are on each and every photo I process. So easy to use one you understand them and with so much isolated control when needed.
Jun 26, 2020 13:06:44 #

As I am just now getting deep enough into PS to understand the tools and terms you and Jim use, I will be placing this string into my photographic tutorial stack, Linda. Thank you for your continuing educational posts.
Jun 26, 2020 13:11:13 #
UTMike wrote:
Your support of the section is greatly appreciated, Mike.As I am just now getting deep enough into PS to understand the tools and terms you and Jim use, I will be placing this string into my photographic tutorial stack, Linda. Thank you for your continuing educational posts.
Jun 26, 2020 13:21:27 #

This is a great topic. Clipping masks are terrific tools that we can do lots of different things with. I haven't done much of what you're doing (which is very cool and graphic looking, I love it) and Jim Pops' font customization project, so I've already got some new ideas to pursue.
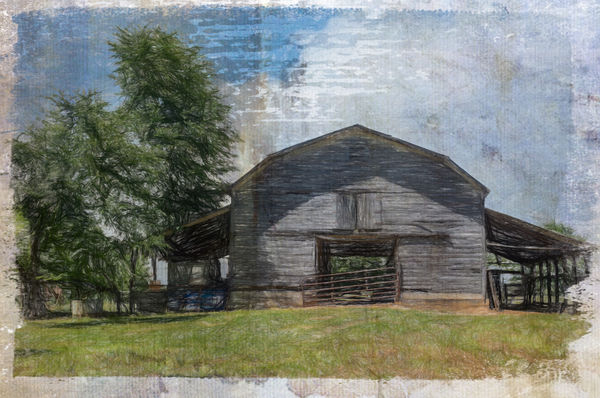
What I often find myself using them for is to get an image I've gone artistic with onto a background with grunged up edges. The first is an example. I've already flattened it so the steps are forever lost even to me, but essentially the picture itself is 3 layers (one a paint filter in Topaz Impression, one a sketch filter also in Topaz, and a photo layer, with various masking and opacities) collapsed into one image layer then clipped to a mask with those grungy edges and a background texture behind it all. Then of course a final texture layer on top.
I make the masks using grunge brushes that I get free from online sources like brusheezy and from Adobe, which offers lots of free brushes, or I use free png masks that I got from similar sources. I can make my own png masks to keep by creating a new document with a transparent background, painting on it with black and exporting it as a png with "keep transparency" checked.
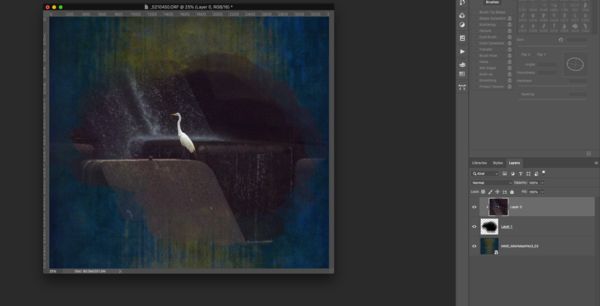
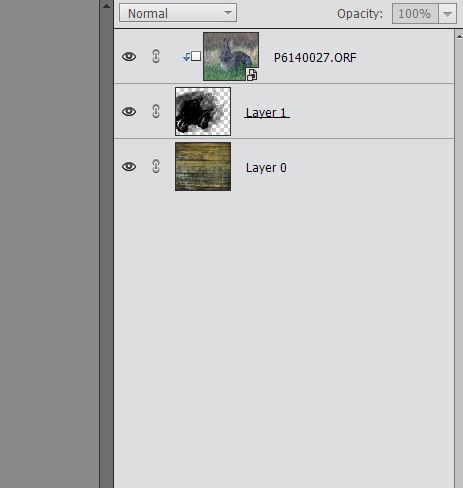
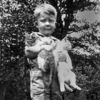
The second image is something I hustled up just now to illustrate the layer sequence. There is a background layer, a transparent "mask" layer where I painted with black using a couple of grungy brushes, and slapping a dam bird image on top and clipping it to the mask layer.
I'll be watching the thread to learn other ways to use these things. Thanks for an interesting topic.
What I often find myself using them for is to get an image I've gone artistic with onto a background with grunged up edges. The first is an example. I've already flattened it so the steps are forever lost even to me, but essentially the picture itself is 3 layers (one a paint filter in Topaz Impression, one a sketch filter also in Topaz, and a photo layer, with various masking and opacities) collapsed into one image layer then clipped to a mask with those grungy edges and a background texture behind it all. Then of course a final texture layer on top.
I make the masks using grunge brushes that I get free from online sources like brusheezy and from Adobe, which offers lots of free brushes, or I use free png masks that I got from similar sources. I can make my own png masks to keep by creating a new document with a transparent background, painting on it with black and exporting it as a png with "keep transparency" checked.
The second image is something I hustled up just now to illustrate the layer sequence. There is a background layer, a transparent "mask" layer where I painted with black using a couple of grungy brushes, and slapping a dam bird image on top and clipping it to the mask layer.
I'll be watching the thread to learn other ways to use these things. Thanks for an interesting topic.
Jun 26, 2020 13:37:46 #
minniev wrote:
Thank you so much for participating, Minnie! Your purpose may be similar to what Jim-Pops showed us about the "border" for water color effects. I'll need to check his topic here to compare, but your demo is intriguing. Many thanks!This is a great topic. Clipping masks are terrific... (show quote)
Jun 26, 2020 16:11:22 #
From Minnie's idea:
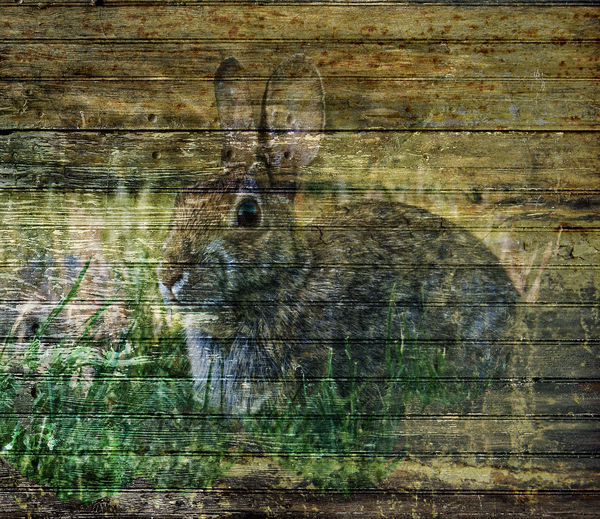
- Bottom layer is a free texture (Old Barn Board) from Shadowhouse.
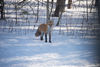
- Middle layer is just some masking I did quickly with one of my brushes. I used hard light blend mode after I placed the bunny. Changing blend modes can radically alter the look!
- Top layer is a bunny I photographed at the state park last week. That layer is clipped to the middle one so that only part of bunny pic shows up.
- Bottom layer is a free texture (Old Barn Board) from Shadowhouse.
- Middle layer is just some masking I did quickly with one of my brushes. I used hard light blend mode after I placed the bunny. Changing blend modes can radically alter the look!
- Top layer is a bunny I photographed at the state park last week. That layer is clipped to the middle one so that only part of bunny pic shows up.
Jun 27, 2020 07:37:14 #
Linda From Maine wrote:
I have thought about clipping masks off and on sin... (show quote)
Very interesting. Nice concept
Jun 27, 2020 09:18:15 #
foggypreacher
Loc: Dickinson, Texas
I mentioned a week or so ago that I was spending a week doing my classes on Photoshop. I have complete 7 out of 20. Clipping masks was just covered. What amazing tools are available. Later today I will post to this section my first foray into using layers and other tools. Thanks for all the encouragement and help.
Jun 27, 2020 09:31:30 #
foggypreacher wrote:
I mentioned a week or so ago that I was spending a week doing my classes on Photoshop. I have complete 7 out of 20. Clipping masks was just covered. What amazing tools are available. Later to day I will post to this section my first foray into using layers and other tools. Thanks for all the encouragement and help.
7 lessons. Congratulation on getting this far so fast.👏
Jun 27, 2020 11:16:39 #
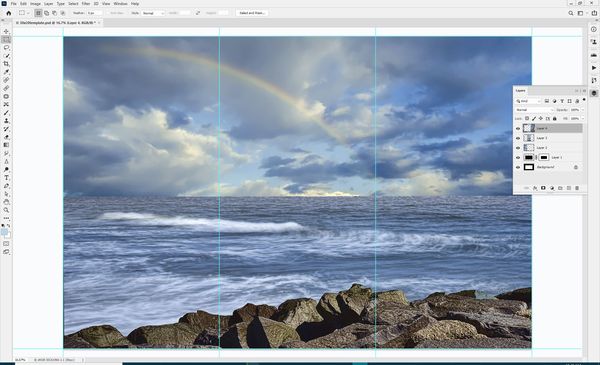
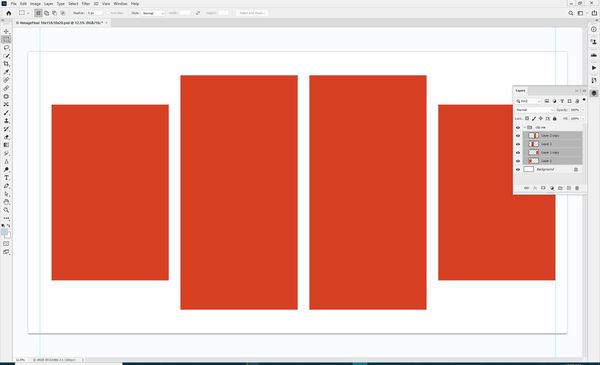
Great topic Linda! A while ago I made a bunch of multiple panel images for display in the elementary school where my daughter works. I'll attach one of the first ones I did (they got better as I went along) as well as a screenshot of a clipping mask template for 4 image panels.
If anyone here uses On1 Resize, there's also an easier way to build multiple panel images for print using the tiling feature.
If anyone here uses On1 Resize, there's also an easier way to build multiple panel images for print using the tiling feature.
Jun 27, 2020 11:27:07 #
Linda From Maine wrote:
From Minnie's idea:
- Bottom layer is a free texture (Old Barn Board) from Shadowhouse.
- Middle layer is just some masking I did quickly with one of my brushes. I used hard light blend mode after I placed the bunny. Changing blend modes can radically alter the look!
- Top layer is a bunny I photographed at the state park last week. That layer is clipped to the middle one so that only part of bunny pic shows up.
Very creative.
Jun 27, 2020 12:15:32 #
Guyserman
Loc: Benton, AR
Linda From Maine wrote:
From Minnie's idea:
- Bottom layer is a free texture (Old Barn Board) from Shadowhouse.
- Middle layer is just some masking I did quickly with one of my brushes. I used hard light blend mode after I placed the bunny. Changing blend modes can radically alter the look!
- Top layer is a bunny I photographed at the state park last week. That layer is clipped to the middle one so that only part of bunny pic shows up.
- Bottom layer is a free texture (Old Barn Board) from Shadowhouse.
- Middle layer is just some masking I did quickly with one of my brushes. I used hard light blend mode after I placed the bunny. Changing blend modes can radically alter the look!
- Top layer is a bunny I photographed at the state park last week. That layer is clipped to the middle one so that only part of bunny pic shows up.
Very nice work. I like your showing the layers panel.
If you want to reply, then register here. Registration is free and your account is created instantly, so you can post right away.