Clipping Masks - please share your tips and pics
Jun 28, 2020 10:01:40 #

foggypreacher wrote:
Thanks so much! I'm very impressed to hear how much progress you made through your lessons. You must be well organized and highly motivated Wow, how cool does that bunny look now. If he only knew how wonderful he now appears. Nice job, Linda.

Jun 28, 2020 12:34:06 #

Guyserman wrote:
Thanks for your explanation.In your picture, you've got the large center picture on the bottom and the four smaller pictures overlapping it. But in your diagram of the layers you've got the large picture (image 3) in the middle. The large picture would overlap the two lower pictures but by moving that image layer and layer mask below layers 4 and 5 it would come out the same as your pictures. Something you would have figured out when you actually use this psd file.
But if you look at the Layer thumbnails ... each layer (gray area) is separate, with no over lapping sections.
So i don't think it mattered, which order they were in.
Quote:
Some day I'm going to visit New Orleans.
If you have the tendency to sweat a little, skip June through September.

Quote:
You must be right on the ocean.
As the crow flies, I'm 45 miles from New Orleans and 60 miles from the Gulf of Mexico.
Small town called Thibodaux.
Jun 28, 2020 14:18:52 #
Guyserman
Loc: Benton, AR
dannac wrote:
But if you look at the Layer thumbnails ... each layer (gray area) is separate, with no over lapping sections.
So i don't think it mattered, which order they were in.
So i don't think it mattered, which order they were in.
You're right, the order doesn't matter if there are no overlapping sections. I had overlooked that you had cut out the four circles from the large circle. To me, that's a lot of extra work. Starting with the layer for the large center circle use the shape tool to drag out a circle. One click of the mouse button and you're through. You have your mask. There's no worry to make the cutouts because as you add the additional layers they will land on top.
dannac wrote:
As the crow flies, I'm 45 miles from New Orleans and 60 miles from the Gulf of Mexico.
Small town called Thibodaux.
Small town called Thibodaux.
I've heard of Thibodaux. In 1958 for 8 months between getting out of the army and starting to school I worked for Thibault Feed Mills, owned by a Mr. Thibault. (pronounced Tee-bo) Interesting. The road that went to his farm still bears the name Thibault Road.
Jun 28, 2020 19:55:12 #

Linda, I say your finished project on FB today and absolutely fell in love with it!
Jun 29, 2020 07:15:34 #
Cwilson341 wrote:
Thank you very much, Carol! It was fun to see that the first two entries were shots of, literally, brushes Linda, I say your finished project on FB today and absolutely fell in love with it!
 A great variety of interests in that group, as here in PP Forum.
If you get a chance to check Affinity for clipping masks, I'd love to have you report back to this topic.
Jun 29, 2020 14:15:58 #
Linda From Maine wrote:
From Minnie's idea:
- Bottom layer is a free texture (Old Barn Board) from Shadowhouse.
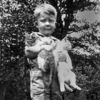
- Middle layer is just some masking I did quickly with one of my brushes. I used hard light blend mode after I placed the bunny. Changing blend modes can radically alter the look!
- Top layer is a bunny I photographed at the state park last week. That layer is clipped to the middle one so that only part of bunny pic shows up.
- Bottom layer is a free texture (Old Barn Board) from Shadowhouse.
- Middle layer is just some masking I did quickly with one of my brushes. I used hard light blend mode after I placed the bunny. Changing blend modes can radically alter the look!
- Top layer is a bunny I photographed at the state park last week. That layer is clipped to the middle one so that only part of bunny pic shows up.
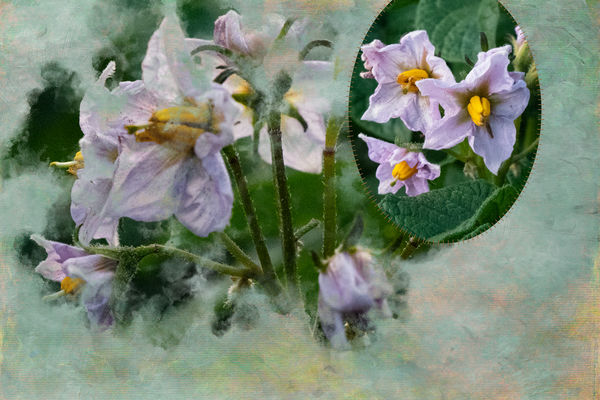
I was fascinated by this magic image so I spent two days trying to follow directions to get this done in the latest photoshop CC. I could not get the shape patterns to just clip. I don't get it? The instructions do not fit the options in the latest CC header thanks to techie improvements?. I finally figured out that I can put a pattern or brush image on a blank field and add a photograph above that, right click beside the photograph and select create clipping mask and some semblance of what everyone is doing appears. So simple! Thanks for nudging me into something I was unaware of. A copy of my first try with blooms from my potato bed. The artistry and fine tuning will be next.
Jun 29, 2020 15:03:46 #
Whitewater11 wrote:
That's pretty, Lynn! Sorry you had some frustrations. I use Elements, but you could ask one of our regulars, Jim-Pops or kenievans. Looks like you might have it worked out, though. Appreciate your interest and compliment!I was fascinated by this magic image so I spent tw... (show quote)
Jun 30, 2020 01:17:52 #
Linda From Maine wrote:
That's pretty, Lynn! Sorry you had some frustrations. I use Elements, but you could ask one of our regulars, Jim-Pops or kenievans. Looks like you might have it worked out, though. Appreciate your interest and compliment!
Thank you Linda. You are always there for us. I went through pages of how to, even sending a message to Adobe but nothing works as described and Adobe is too busy to update that procedure I guess. The procedure I used finally is so simple that it is all that I needed.
Jun 30, 2020 09:17:44 #

Whitewater11 wrote:
Thank you Linda. You are always there for us. I went through pages of how to, even sending a message to Adobe but nothing works as described and Adobe is too busy to update that procedure I guess. The procedure I used finally is so simple that it is all that I needed.
This is the simplest and least convoluted tutorial I have bookmarked on clipping masks. I returned to it many times while trying to figure this out. I'm a slow learner. https://helpx.adobe.com/photoshop-elements/using/clipping-masks.html.
It took me a long while to get my mind wrapped around layers, masking, and especially clipping masks. One of the problems that stumped me for a long while was that the mask layer has to have transparency to work. So if I dragged in a jpeg or tiff file of a mask, or had saved a mask I made as anything other than a transparent png, the thing would not work. Some masks that I've downloaded from free sites are listed as png's but their transparency was not saved to the file so those don't work either.
Jun 30, 2020 14:17:48 #
minniev wrote:
This is the simplest and least convoluted tutorial... (show quote)
Thanks for the input. I will check out the information.

Jul 1, 2020 04:15:16 #
foggypreacher
Loc: Dickinson, Texas
minniev wrote:
This is the simplest and least convoluted tutorial... (show quote)
minniev, that may be what I did wrong in using png's. I will research that as well. Thank you for your advice.
If you want to reply, then register here. Registration is free and your account is created instantly, so you can post right away.