Ugly Hedgehog - Photography Forum
Home Active Topics Newest Pictures Search Login Register
Posts for: bkwaters
Page: 1 2 3 4 5 6 ... 24 next>>
May 1, 2024 08:26:15   #
Linda From Maine wrote:
Or use this slightly larger jpg (it's the "full" size once all the cropping was done).


I like your original the best. It is a very pleasing example of fine art photography minimalism. I do find it interesting how some people like minimalism and others don’t.
Go to
Apr 20, 2024 07:52:47   #
drkeene wrote:
I am looking at the Canon R50 as my new "all purpose" camera and wish to acquire with it a "single" light zoom lens that that will shoot from 16" out to moderate telephoto range. As I recall, there is a Canon RF/STM lens that is rated 18 to 150 mm. Does anyone have experience with this lens and can comment on its virtues and limitations. I am concerned about low-light images (i.e. dusk) and image stabilization. Would it pair well with the R50? And for that matter, your experience with the R50 would be appreciated.
I am looking at the Canon R50 as my new "all ... (show quote)


I've owned very expensive FF cameras. I sold them. Now I use the R50 as my main camera. I love it. The RF 18-150 is the perfect wide to tele zoom for it (and my answer to your question), but as expressed above, the RF 18-45 is also an option if extreme compactness is your goal. My RF 100-400 basically lives on my R50, but this week I put on my RF 100 Macro for a trip to the local botanical gardens.

The tracking with the RF 18-150 and RF 100-400 is amazing. Tracking is the most important attribute of a camera when shooting kids, sports and wildlife. In my opinion you're making a fantastic choice.

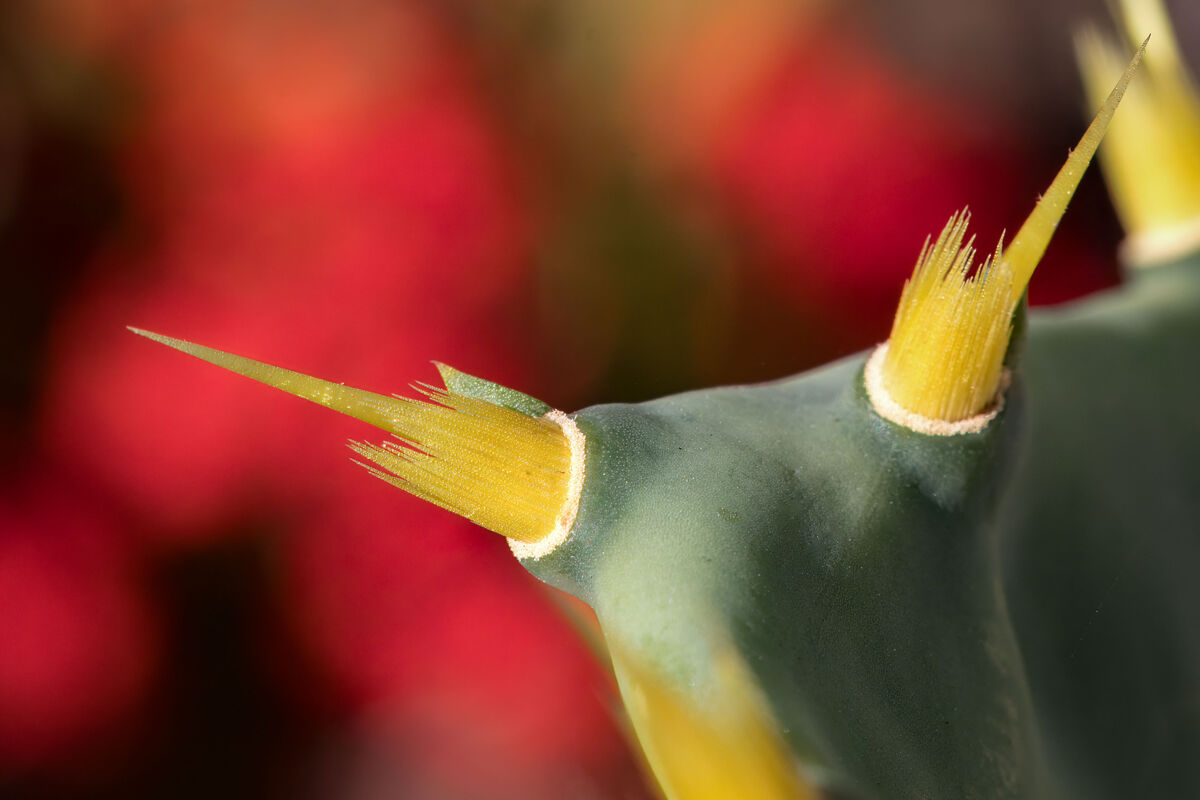
R50 with RF100 macro

(Download)


(Download)


(Download)


(Download)
Go to
Apr 19, 2024 07:25:09   #
billnikon wrote:
Pied-billed Grebe, Wakodahatchee Wetlands.
Sony a1, Sony 600 f4 @ f4, 1/8000 sec. iso 5000, manual exposure based on green grass, center spot focusing


Very creative composition. It's a fine art image that is perfect for a wall hanging.
Go to
Apr 19, 2024 07:21:19   #
imagemeister wrote:
I started out on Macs and a member of the Mac user's group - after my last I-Mac crashed I realized Macs are for well-to-do people - of which I am not ......so now I am a PC user ......


So true. Being able to easily upgrade and repair PCs as compared to Macs is a great money saver. Now if they would only make LRC and PS for Linux.
Go to
Mar 31, 2024 10:42:06   #
Angel Star Photography wrote:
For several days I had been experiencing slow performance with Lightroom Classic. I actually noticed it after their latest update. With all the incorporation of AI that Adobe is inserting this undoubtedly has a performance impact. The past few days I noticed that when attempting to apply a mask that has "Select people", Lightroom begins the process but then seems to hang. I let Lightroom sit overnight just to see if it would ever complete but it did not. Task manager was showing low to no CPU utilization by Lightroom. Also, the only way to exit Lightroom was to terminate it in the task manager. However, sometimes this was even a problem as Lightroom would not appear in the Windows task manager. I had to use another application, "Process Lasso", to find Lightroom and terminate it.

The system is healthy and powerful enough consisting of a 6-core Xeon processor (twelve threads), 128GB of RAM, NVMe SSDs, and an Nvidia RTX Quadro 5000 GPU. This is a Lenovo Thnikpad P-73 Laptop Workstation.

Lightroom is set to use the GPU for hardware acceleration. However, this was not helping either. A re-install of Lightroom did not solve the problem and I also confirmed that it has nothing to do with the catalog size by using one of Scott Kelby's catalogs with about seven photos in it---the issue persisted.

Final fix was to go into the Nvidia control panel and switch the GPU from "Dedicated to graphics tasks" to "Use for grahics and compute needs" under "Manage GPU Utilization". With this setting, Lightroom performs as expected and considerably faster. Even the less intensive tasks fly through impressively fast.

The GPU does run hotter (the fan is constantly running faster). Impacts to other applications have yet to be determined definitively but, thus far, it does not seem to cause any issues. Some performance improvements have been observed and even various graphics heavy applications appear to work well, if not better. Some games do seem to struggle at times but this experience is yet to be fully confirmed.

Aside from this change, I will be contacting Adobe and providing this experience to them for analysis and comment.


Sincerely,

C. R. Smith
Angel Star Photography
www.angelstarphotography.com
For several days I had been experiencing slow perf... (show quote)


Are you using the Game or Studio Nvidia driver?
Go to
Mar 27, 2024 09:34:23   #
don2b2 wrote:
Coming out of my neighborhood, I could always see the Bridge in the distance. A jolt this morning when it was no longer there. This was a photo from some 15 years ago.


Gorgeous photo that speaks to one of the most important reasons for photography. Thanks for posting.
Go to
Mar 19, 2024 10:21:31   #
selmslie wrote:
We [should] already know that visible noise (signal to noise ratio aka S/N or SNR) is the determined by exposure, not ISO.

I have studied this at length and determined that S/N is primarily the result of shot noise. Sensor read noise does not begin to influence the SNR until well below middle gray (around EC-5 or darker).

If we develop an image from raw, there are times when you find that the original exposure may have resulted in a dark JPEG from the camera.

Increasing the ISO in the camera or reducing it and using the Exposure slider to offset it might produce the same image, assuming the camera is ISO invariant, which nearly all modern cameras are (but that's a different topic).

What happens to noise when you move the Exposure slider to the right to brighten the image? With each stop added via the Exposure slider we increase the apparent brightness by one stop. But we also double the effect of shot noise and this lowers the visible SNR.

So what would happen if we took two images using the same exposure (aperture and shutter speed) and equalized the brightness with the Exposure slider?

It has been suggested that the image that used the higher ISO would have less noise. Of course, we already know it would be better because it will be closer to ETTR (exposing to the right) but that may actually be because the shadows are recorded better.

To determine if there is really a measurable difference, I tested three cameras, a Fuji X100t, a Sony A7 II and III and a Nikon Z7. As luck would have it, all three are ISO invariant.

Below are the results of the test.

The samples for each camera used the same exposure (aperture/shutter speed). The SD column is from a 150x100 pixel selection at the center of the image.

The A7 II has not Bayer array so the effective ISO settings are actually one stop higher than what was set. ISO 25600 does not work right but all of the other ISO settings in the analog range are proportional and ISO invariant. The log(SD) changed by almost exactly one stop with each doubling of the ISO. For the other cameras I just tested two ISO settings.

As we can see, there may be a very small difference in the noise level changes but they are within a reasonable range of the actual difference in ISO.

If you have been following this so far, it conclusively shows that raising the ISO does not actually alter the amount of visible noise. It's safe to say that there is no benefit to lowering the ISO and using the Exposure slider to correct the apparent underexposure.

The higher exposure does not suppress any noise. In fact, with an ISO invariant sensor, it has absolutely no effect.

ETTR remains the recommended approach because it collects more clean information in the shadows, if you decide to amplify it.
We should already know that visible noise (signa... (show quote)


To me it seems intuitive and logical. Why should increasing the exposure in camera (raising the iso) result in any more or less noise than increasing the exposure in post-processing? Just like cropping in camera by using APS-C (DX) mode does not make a difference in overall sharpness compared to cropping in PP.
Go to
Mar 19, 2024 10:10:09   #
Rongnongno wrote:
The progress is in the sensor, nowhere else.

The idea of using a display instead of through the lens is reverting to old time when folks were looking from above to focus...

Issues with the display...
- LIGHT!!! If too bright, good luck using the display.
- Eyes issue If one needs glasses all bets are off, there is no way to adjust for that but use the tiny in camera display in the 'view finder'. Go check for accuracy on that since the display is made of tiny pixels vs 'a normal light' (analog)
- Weight unbalance. (Light body, heavy lens)

That is one of the few reasons why I will not upgrade to mirrorless, even if I do appreciate the new sensors.
The progress is in the sensor, nowhere else. br b... (show quote)


I can't believe people replied! Amazing!
Go to
Mar 19, 2024 10:04:50   #
Ron Seher wrote:
I have a Canon EOS R5. I going use an extender on my RF 100-400mm lens for landscape closeups and occasional wildlife. I hear the 1.4 does a better job in focus than the 2.0 extender. Any experienced users of these extenders who would like to share their thoughts. Ron, Plano, TX


I prefer the 1.4.
Go to
Feb 19, 2024 07:43:39   #
gwilliams6 wrote:
Laowa 10mm f2.8 Autofocus lens coming Feb. 20 for Nikon Z-mount; L-mount, Sony E-mount and YES finally Canon RF mount. Are you interested if it has excellent image quality and low distortion in a rectilinear lens ?

It may the first third-party-allowed Canon RF lens that folks may actually want. Sigma is also set to announce new lenses on Feb.20/21 , that also may be for RF mount, as well as Nikon Z-mount, L-mount (Leica, Panasonic, Sigma), and Sony E-mount .

Great news for us all.

Cheers and best to you all.
Laowa 10mm f2.8 Autofocus lens coming Feb. 20 for ... (show quote)


Not unless someone knows of dark sites that are not isolated and creepy - no milky way photography for me.
Go to
Feb 13, 2024 11:55:30   #
burkphoto wrote:
This is a VAST oversimplification aimed at helping you use them:

RGB = The additive color model. It's not a specific profile, but a TYPE of profile. Red + Green + Blue add up to white, when mixed equally.

When mixed unequally, combinations of these three colors create all other colors. (The absence of light is black.)

CMYK = The subtractive color model. It's not a specific profile, but a TYPE of profile. Cyan subtracts red from white light reflected from white paper. Magenta subtracts green from white light reflected from white paper. Yellow subtracts blue from white light reflected from white paper. Because these three add up to a dark brownish gray, black is added as a "Key" color for "Kontrast" and detail.

RGB is a generic, undefined color space. But ADOBE RGB is a very specific set of color boundaries that includes highly saturated colors. It is most often used in high-end printing workflows to send files to ink jet printers using six or more colors. It is sometimes used as an intermediate, or "working" color space when editing images.

sRGB, or "standard RGB" is the lowest common denominator of color spaces. It's the one that all the major manufacturers agreed to use back in the 1990s. As such, you can put your JPEGs in sRGB at the camera, and your calibrated monitor will show you a decent approximation of what the camera saw, warts and all. Your printer, using OEM inks and papers, will reproduce that image approximately the same way. The photo lab you send files to for printing will make a decent reproduction of those files, too. HOW good it looks, depends on the accuracy of your white balance and exposure!

In reality, the "best" profile to use depends on your level of understanding, and the quality of equipment you are using. If you have not taken the time to research and learn about ICC color management, it's probably safest to stick to sRGB. It's not the most accurate color space, but it will give you a pleasing result — again, if you are careful about white balance and exposure. If you set those in reference to a target, your results can be excellent.

If you DO understand ICC color management, then you probably want to use raw data capture at the camera (with the in-camera profile set to sRGB). POST-PROCESSING is then REQUIRED to convert the raw data and to manipulate it for the precise effect you want. Here's my workflow:

> Capture original scene in raw, using an exposure and white balance reference target when accurate color is required/desired. Other camera parameters are set to make the JPEG preview image look as close to what I want as possible.

> I calibrate my monitor monthly, using a SpyderXElite from Datacolor. It's a colorimeter and software package that sets my view of the scene to an international standard. Because I print occasionally, I use these parameters left over from my days in the photo lab world:

Initial color temperature 6500K
Initial black point 0.5 candelas per square meter (cd/m^2)
Initial white point 105 cd/m^2 ± 15 cd/m^2
Initial gamma 2.2

> Import the raw files into Adobe Lightroom Classic. Normally, I use the Camera Natural Profile as my default. It's very accurate, but not at all punchy. Of course, since LrC is a non-destructive editor, I can choose another profile at any time to preview the effect of that.

> I use the sliders in the Develop module until I like what I see on screen.

> Any adjustments I do outside of LrC are done in ProPhoto RGB color space, from 16-bit .PSD or TIFF (.TIF) files. They go back into LrC in that format.

> For FINAL adjustment, I use the Soft Proofing feature of the software. This shows me an approximation of what the output will look like on a specific printer with a specific paper and OEM ink, OR it shows me what my lab of choice is likely to print. (Professional labs will generally share their proofing profiles if you ask them. Paper manufacturers generally make downloadable default profiles for each of their papers used in commonly available PHOTO inkjet printers.)

> When printing to my personal printer, I use the Print module in LrC, setting it precisely to the paper in use and the printer I'm using.

> When using a regular silver halide chromogenic process photo lab, I'll export a JPEG in sRGB.

> For very large prints made by high end boutique/giclee print shops, I'll consult with them to determine the best file type, profile, etc. Some can work in ProPhotoRGB, a super-wide gamut color space capable of containing colors human eyes don't see. I want their profiles, anyway, for soft proofing.

> For CMYK, 25 years ago, I would have opened my RGB file in Photoshop and converted my finally-adjusted file from ProPhoto RGB to CMYK using the closest set of parameters for the type of press and paper in use. However, in 2024, this is a crude and stupid approach. MOST savvy offset printers now prefer to receive files in an RGB color space and make the conversion to the flavor of CMYK that works with their paper, ink, and press conditions. Have a conversation with them to learn what they want! If they want YOU to do the conversions, RUN!!!

The major makers of monitor profiling kits are Calibrite (formerly X-RITE) and Datacolor. If you visit their sites and look around, you'll find a wealth of information on color management best practices.

If, like some here on UHH, you think it's all bull$#!t, just "set everything*" to sRGB and pray! (*Camera, working color space, and output color space for files going to labs) Set your monitor to Gamma 2.2, Color Temperature at Medium or 6500K, and turn the brightness way down*.

*For instance, my monitor can output 400 cd/m^2, but I typically turn it down to 120 cd/m^2. Mine's currently at 20, on the 100-scale brightness slider, with contrast at 70. Those settings work for me, but probably won't work for you! I calibrate and profile my monitor monthly. When it was new in 2021, the brightness was at 13! Monitors do get dimmer as they age. Color shifts... which is why recalibration and re-profiling are needed. Calibration linearizes the output of all three color channels. Profiling allows the color engine in the operating system or Adobe software to match the characteristics of one device as best it can to another device.

Monitor calibration is where it ALL comes together. If your monitor is off, files you share cannot look the same on another person's monitor, or print correctly at your photo lab! The number one reason lab prints look bad is monitor calibration! If your prints don't look like your screen, buy a kit and learn how to use it.

One note to avoid confusion: YES, inkjet printers use a subtractive color model. It's NOT necessary and definitely NOT recommended to convert files to CMYK for an inkjet printer, however! Doing so will severely limit the color gamut sent to the printer. All modern inkjet printers do their OWN conversion in the driver software from your RGB profile to the printer/paper/ink profile needed for that situation.

ICC color management can seem complicated. In reality, it is a fairly simple concept: Various devices reproduce color differently. The "color engine" in your operating system or software attempts to simulate the color space of one device as best it can using another device's more limited capability. It isn't perfect, but it is very, very good. It is, however, extremely easy to leave out a step, or "double profile," or apply the wrong profile. So read carefully and test, test, test.
This is a VAST oversimplification aimed at helping... (show quote)


Thanks. Great job explaining.
Go to
Feb 13, 2024 07:56:12   #
burkphoto wrote:
Think of a raw file as a CONTAINER file. You get the data from the sensor, yes, but you also get a JPEG preview image baked using the menu settings in the camera, plus the EXIF data that accompanies that preview image. The preview is what you see in an electronic viewfinder or LED/OLED display of a digital camera, or in your operating system.

When you open a raw file in post production software, several things can happen. If you're using software from the camera manufacturer (or written for them by a third party), its entirely likely that that software will display the low res preview briefly, while processing the raw data into a 16-bit bitmap, using the settings stored in the EXIF table of the raw file. Once that 16-bit image is processed, a proxy of it is displayed for editing and export. SOME such software will save a NEW preview JPEG into the raw file, made from this bitmap.

Third party post production software such as Adobe Lightroom Classic comes with lots of default "looks" or "profiles." You can choose any as your default, or make your own defaults. In this case, when you "import" a file into Lightroom Classic, it briefly displays the preview JPEG, then switches to a bitmap baked from the default "recipe," based on just some of the parameters in the EXIF. You can change everything about it, of course, in the Develop module. But with LrC, what you get is NOT stored into the original raw container... Instead, the changes are stored as a proxy in Lightroom Classic's catalog database, and they may be written to an external sidecar .xmp file as well. The original, "baked in camera" JPEG preview remains in the raw file. If you open the raw file in another application, that is what is displayed. To see your Lightroom Classic changes, you have to EXPORT from LrC to a new file. The best part about that, is that you can create virtual copies of the original file, and work on each of them separately, and retain the instructions to make each version!

In essence, the RAW DATA in a raw file is never, ever changed. They preview proxy MAY be changed in camera manufacturer's software. But the underlying raw data remains in all cases.
Think of a raw file as a CONTAINER file. You get t... (show quote)


Great explanations about RAW.

Now please explain RGB, sRGB, and CMYK color spaces. Thanks.
Go to
Jan 27, 2024 09:27:14   #
billnikon wrote:
Yes, it is not exactly good news for other birds who come there to nest. Especially Great Egrets and Great Blue Herons.


I literally walked hard into a Great Blue Heron around a month ago when it popped out from behind a golf cart. It looked at me like I was rude and kept on walking, totally unflustered.
Go to
Jan 26, 2024 10:36:18   #
billnikon wrote:
The Swallows return to Capistrano, the Buzzards return to Hinckley Ohio and the Wood Storks return to Wakodahatchee. Here a Wood Stork gathers nesting material.


As wood storks go up, parking spots go down. Shhh!
Go to
Jan 25, 2024 10:11:27   #
Mickey Jetpur wrote:
I bought my grandson an R10 with 18-150 lens. He needs a sports lens for taking videos indoors for his school. The RF lenses are way too expensive so I’m looking at EF lenses with an adapter. Can you please make some suggestions? Should I stick with Canon or any other make? I’m looking at used under $800. I’m familiar with Keh and MPB, thought I’d try here to get some info first.


I wouldn’t go that route. I suggest the RF 55-210 or RF 100-400 and run the images through Topaz Video AI afterwards. Since he’s shooting video, a very fast lens, nor great glass, is going to make a big difference.
Go to
Page: 1 2 3 4 5 6 ... 24 next>>
UglyHedgehog.com - Forum
Copyright 2011-2024 Ugly Hedgehog, Inc.