Posts for: big-guy
Sep 2, 2019 22:04:00 #
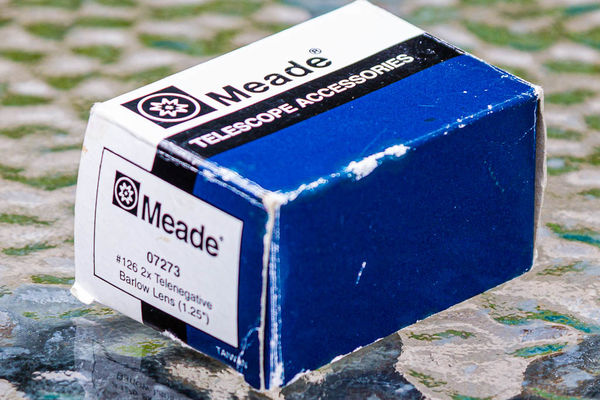
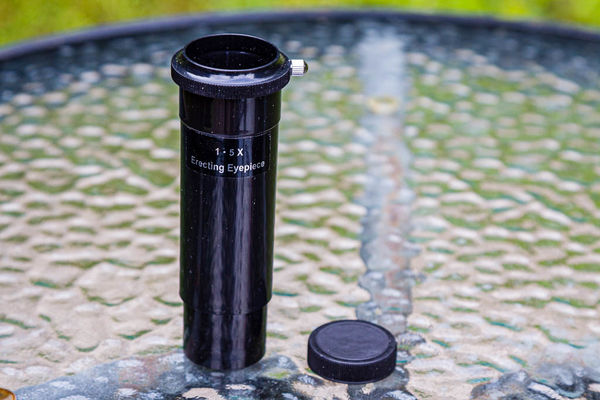
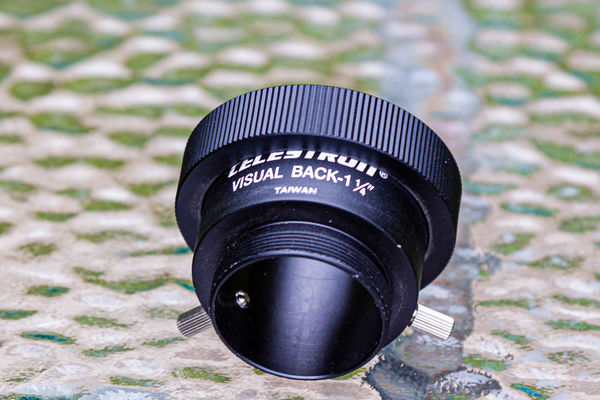
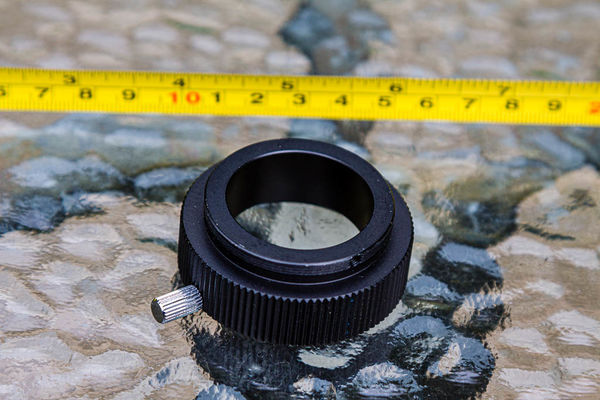
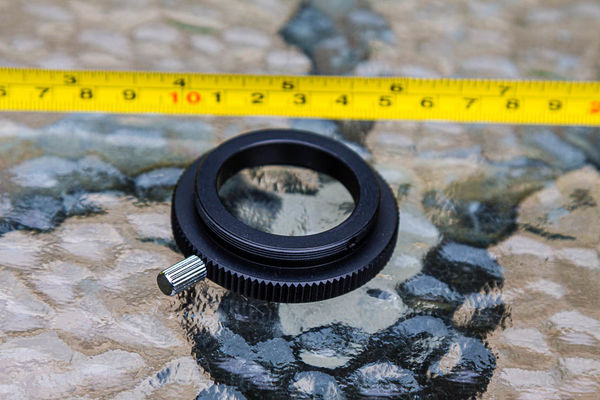
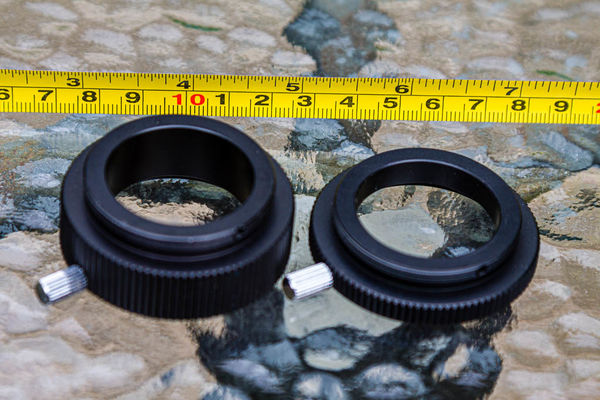
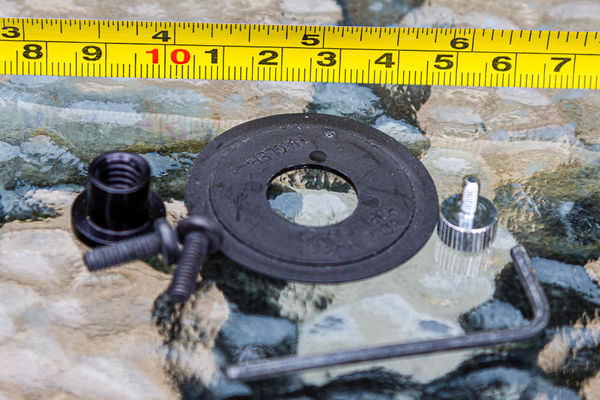
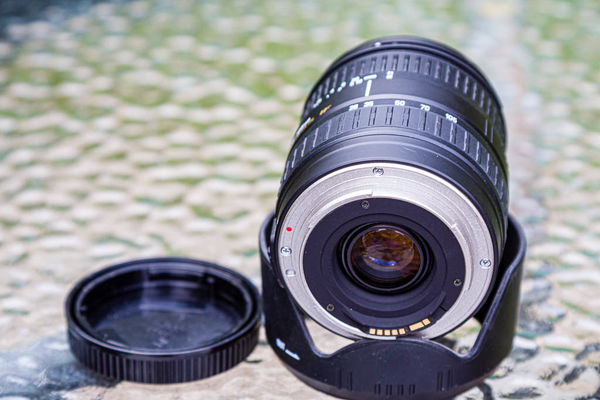
I attended NYAA Starfest last weekend and ended up purchasing a used telescope, my first, a Celestron NexStar GPS SC goto system with all sorts of attachments, gadgets and gizmos. I have a handle on many of the parts but the attached have me confoozed. Any help appreciated.
What are they, where do they fit and what are they used for?
I should mention that there is also a slough of caps that don't fit anything so it looks like I also collected some old parts from other systems.
What are they, where do they fit and what are they used for?
I should mention that there is also a slough of caps that don't fit anything so it looks like I also collected some old parts from other systems.
Sep 2, 2019 21:25:41 #
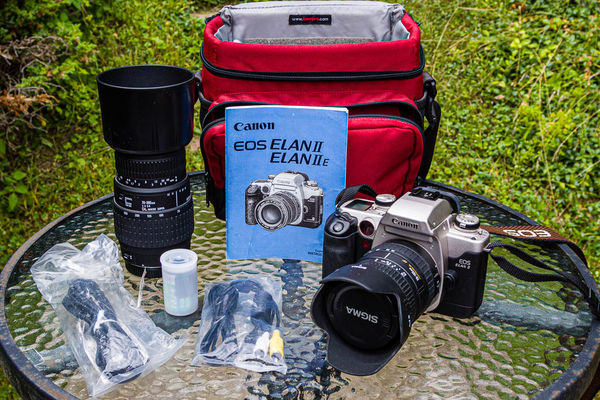
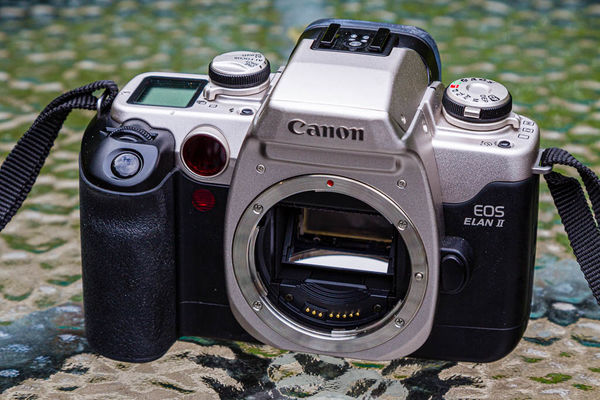
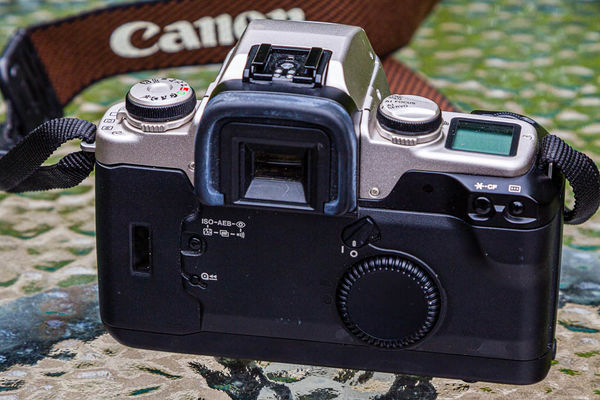
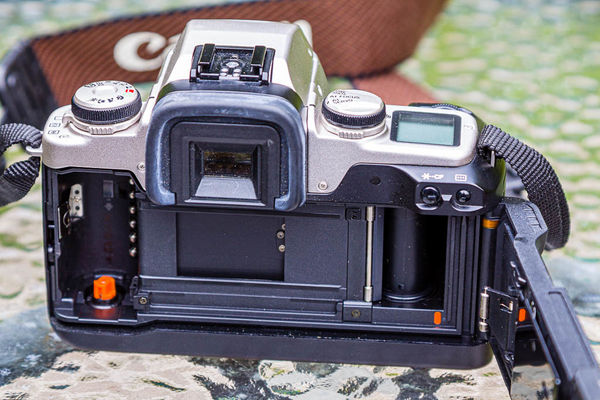
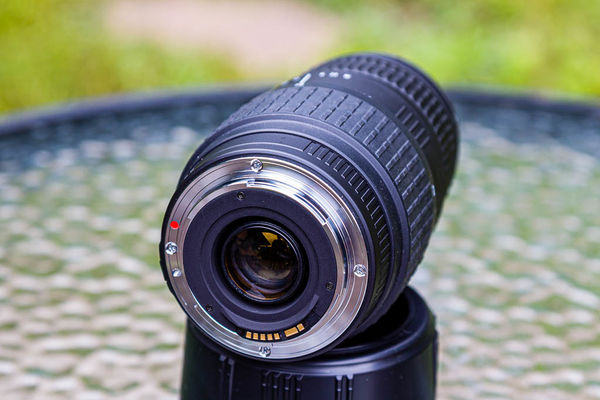
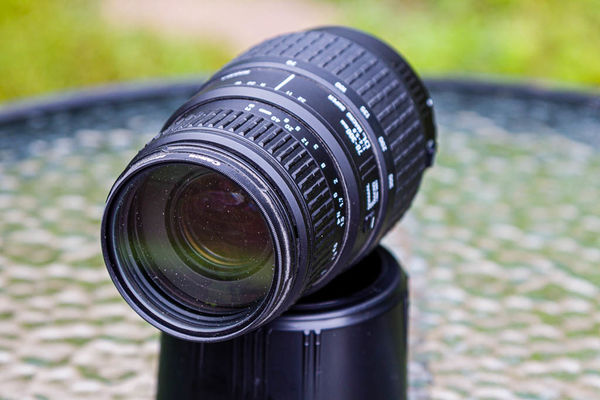
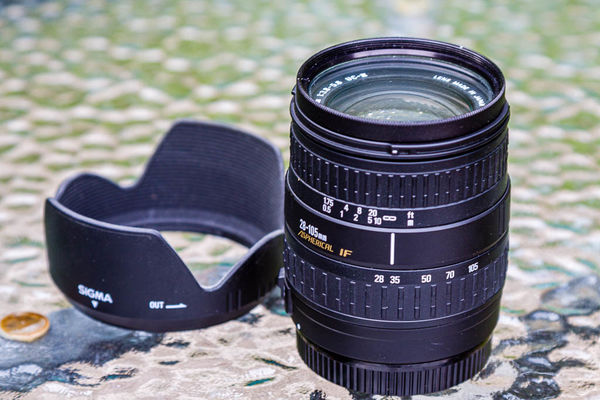
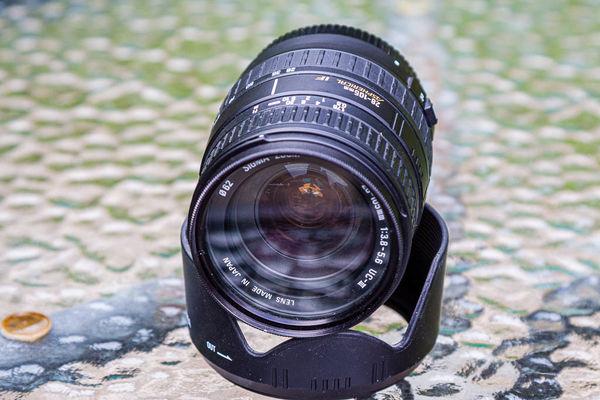
Included is one Elan ii e very clean and in great shape. (batteries dead)
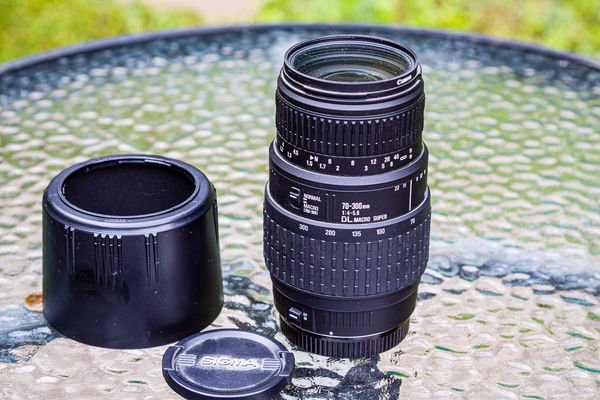
Sigma 28-105 3.8-5.6 with Tiffen 62mm haze
Sigma 70-300 4-5.6 with Canon 58mm UV haze
Both lenses have front and rear caps and shades
Elan ii e Manual
Cables
Red-orange carry case
1 roll of 24 exp 400 ASA Fijicolor Superia (age unknown)
This package is daughter in laws and hasn't been used for many years. I can't verify it works but she assures me it works fine. I notice very clean inside and out and can see no reason to doubt her.
PM me if interested. Ebay shows combo sold at +$200 but open to legit offers.
Aug 20, 2019 08:31:17 #
Thank you for the comment but the black/dark is not a matte but a backer board approx 1-2 inches behind the double matte and photo. Giving it a (sort of) 3d look and feel. Granted that in a single photo this does not show up very well. Instead of the black backer I could have simply placed it on a wall like they tend to do with acrylic and metal prints.
May 23, 2019 13:02:30 #
May 21, 2019 09:03:33 #
tuomi1947 wrote:
Does this help .?
You know what would really help? Clicking "Store Original" when posting your photos. Then we have all the information and don't need to rely on itty bitty screen shots (that also are not stored so we have to get out the magnifying glass to read)
May 15, 2019 08:56:28 #
Thank you all for your kind words, for better or worse. I did win the challenge BUT it was by default as no one else submitted a true night photo. there were a couple of low light photos, one ad copy from the 80's and a shot of ice taken in Iceland at 4 am but this is in the land of the midnight sun so it wasn't dark.
I was thoroughly impressed with the reactions to the digital matting. Almost all thought they were real mats until they, invited, came up and ran their fingers across the print and then the look on their faces was priceless. Then came the barrage of questions asking how it was done. As expected, some old dogs prefer to stay with old school techniques and claim this is not "real" photography. However, most wanted to learn more so they could master the technique. For myself I am looking forward to adding digital framing so my only cost is the print and backing board, no frames, glass or mats to inflate the cost. I have no illusions of making a fortune with this as so many now can't fathom buying a photo when they can take their own. (ROTFLMAO) But they will do fine for my home, cottage and travel trailer.
I was thoroughly impressed with the reactions to the digital matting. Almost all thought they were real mats until they, invited, came up and ran their fingers across the print and then the look on their faces was priceless. Then came the barrage of questions asking how it was done. As expected, some old dogs prefer to stay with old school techniques and claim this is not "real" photography. However, most wanted to learn more so they could master the technique. For myself I am looking forward to adding digital framing so my only cost is the print and backing board, no frames, glass or mats to inflate the cost. I have no illusions of making a fortune with this as so many now can't fathom buying a photo when they can take their own. (ROTFLMAO) But they will do fine for my home, cottage and travel trailer.
May 13, 2019 16:44:24 #
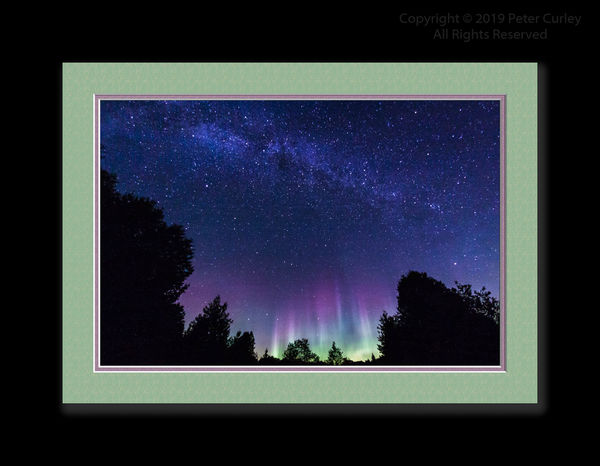
In our area we have a photo festival called Spark that is displayed all over the city and one display caught my eye. It was a simple photo with a physical mat attached to a spacer and placed on a flat black board giving it a 3D look and feel. The photo was laminated so no need for glass but the mat was still unprotected. So, putting 2 and 2 together I came up with this idea. A photo with digital matting flush mounted to a sturdy backing, cardboard, gator board, bead board what ever. Attached to some sort of spacer, small wood rectangle and that is mounted to a larger backing board covered with black felt or other black non shine material. Bottom line is no frame, no glass, no expensive cash outlay but a very attractive way to show off your work of art. See attached photo. Note that I added a digital drop shadow on the mat to simulate the spacer between photo/mat and backing board.
May 13, 2019 15:15:35 #
Here is one I shot as part of a timelapse and needed a night shot for our clubs challenge. Let me know what you think. Better or worse.

May 7, 2019 16:13:07 #
Right or left arm? If it's the left you could always hold the camera with the right and practice shooting from the hip. Just a thought.
May 1, 2019 09:51:12 #
You need to check your programming menu and you will find an entry that locks or unlocks sync speed when using flash. Sorry, I don't know where that might be on your rig but it's there somewhere. Turn it off and you can then choose any shutter speed you wish.
May 1, 2019 08:38:22 #
When shooting flash outdoors, is your shutter stuck on sync speed (200 or 250) or can you slow it down to capture the ambient light? It would require going to manual.
Apr 30, 2019 16:41:32 #
Excellent framing in the tree. Good job. Did you mean to do that or was serendipity making an appearance?
Apr 26, 2019 08:50:39 #
So glad you found and posted this. I have been doing all that manually and consequently not very often. But now??? I gave it a shot last night and was blown away. Well, me thinks it will become a staple part of my PP procedure. 

Apr 25, 2019 16:46:53 #
The only difference is that a macro lens can focus way closer than a regular lens. So instead of 5' 5" to ∞ you can now focus 5" to ∞. That is just an example, your lens will be similar. Of course at 5" little things will get quite large in the viewfinder.
Apr 24, 2019 12:56:32 #
Another 1st poster with all sorts of deals. No thanks.