Trouble with snow scene
Jan 4, 2020 05:08:41 #

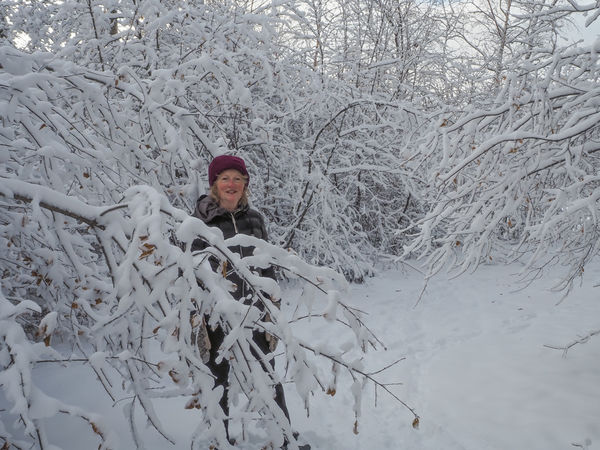
This is my edit doing just what I suggested and nothing else (except a very small amount of denoise along with the sharpening). It could easily go brighter if you wanted.
The snow on the ground is brighter and whiter than the snow in the branches so global adjustments can go only so far. You would get a more fully optimised shot if you used selections for localised adjustments. That also applies to sharpening. People's faces usually look better with only a little sharpening (if any) whereas the snow could use more. If I was doing this for myself I would apply edge-based sharpening globally (using the Masking function in Lr) and normal sharpening to everything except your wife's face.
Rather than obsess about getting the snow as pure a white as possible I'm quite happy to leave a trace of the original tints. Pure white snow probably never exists in reality. Reducing any tints to the point where they're not eye-catching should be enough for most shots. But to balance things out a bit I'd select the snow in the branches and give it more adjustments to bring it closer to the snow on the ground. Again I wouldn't obsess about making it perfect. And subduing that rosy glow in your wife's cheeks can be done easily with the HSL tool by targeting red. A slight tint shift towards orange, a very slight brightening and some desaturation should do it. Again, don't look to get rid of it altogether.
.
Jan 4, 2020 08:59:42 #
ORpilot wrote:
There is absolutely no shame in using the auto or ... (show quote)
Good points, all of which underscore the fact that I have a lot to learn. As I mentioned in an earlier post reply, new decade, new equipment, new attitude (under development). Thanks.
Jan 4, 2020 09:27:40 #

In addition to increasing EC by a stop or two, or spot meter off her face would be even better, as folks mentioned, you can also adjust the white balance curve out of the Olympus camera by selecting high key instead of normal. Just don't forget to set it back to normal or auto later on. :)
Jan 4, 2020 09:35:53 #
JJW wrote:
In addition to increasing EC by a stop or two, or spot meter off her face would be even better, as folks mentioned, you can also adjust the white balance curve out of the Olympus camera by selecting high key instead of normal. Just don't forget to set it back to normal or auto later on. :)
I’ll check that out, thanks!
Jan 5, 2020 17:26:27 #

Try one or two stop bump on your EV so that snow is white instead of gray. It may wash out some sky. Fill flash is fine but it may be good for your Subject but not necessarily the broad physical scope of the snow. Compromise and/or some PP.
Jan 5, 2020 19:43:18 #
R.G. wrote:
This is my edit doing just what I suggested and no... (show quote)
Thanks, R.G. I appreciate that you took the time to do this and add explanation/ rationale of the process.
Mark
Feb 6, 2020 02:32:08 #
flyboy61
Loc: The Great American Desert
If you'd like your snow to be somewhere near white, open up 1-1 1/2 stops, or use your exposure compensation, +.7-1.3. Alternatively, center weighted or spot metering on your lady's face, and let the surroundings go where they will.
Mar 28, 2020 09:23:28 #

Photographing scenes where snow predominates can be a little tricky. Your meter is going to try go get an average exposure across the frame equivalent to 18% gray. When white predominates, this is going to result in an underexposure. The best way to compensate is to add 1-2 stops of exposure, either in manual or in dialed in exposure compensation and see how the results work out.
If you want to reply, then register here. Registration is free and your account is created instantly, so you can post right away.