Learn-and-Share: Adding Textures To Photos
Aug 8, 2016 17:19:23 #
Dixiegirl wrote:
Here are examples of textures used on two differe... (show quote)
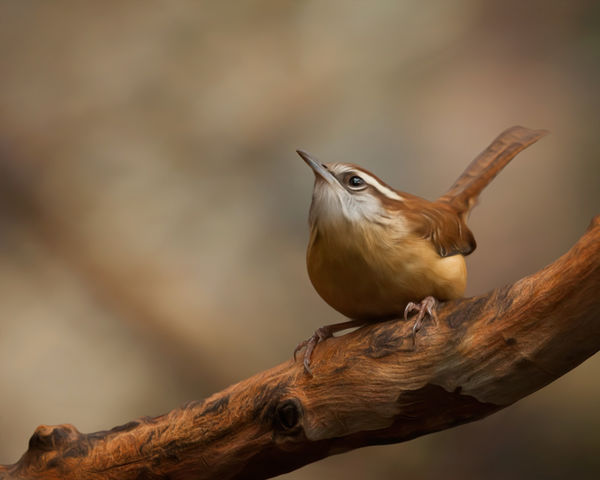
Ah, man, ummm I mean Dixie, that wren is stupendous - Inspiring. Can you speak more about how you use a the brush tool to remove texture yet keeping the color?
Aug 8, 2016 17:30:46 #

pfrancke wrote:
Ah, man, ummm I mean Dixie, that wren is stupendous - Inspiring. Can you speak more about how you use a the brush tool to remove texture yet keeping the color?
Thank you so much, Piet! I'm working on a tutorial and will post it shortly.
Aug 8, 2016 17:53:54 #

Dixiegirl,
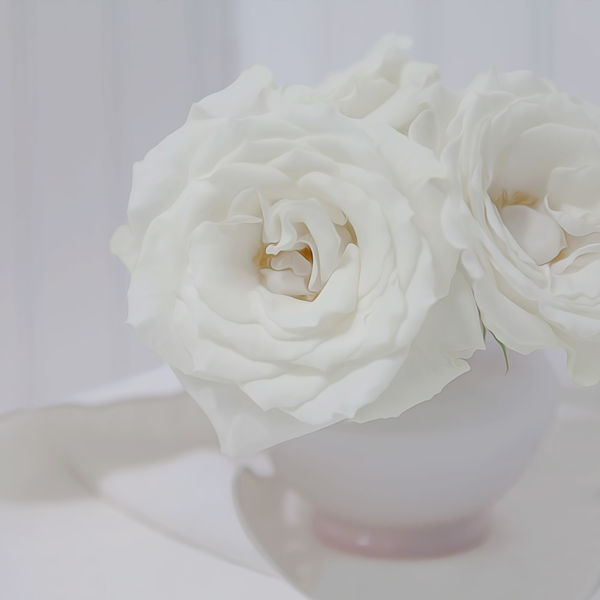
I'm inexperienced with, and, frankly, have had little interest in textures, but on those rare occasions when textures have been used subtly, sotto voce, almost un-noticeably ?..as in your two images of the high key rose and the exquisitely composed and rendered wren, they stop this gallery stroller in mid-stride. These are two images I'd love to see absent your subtle texture applications and be able to compare the before-and-afters!
Could be one helluva teaching moment...and I've squeezed into a seat on tjhe front bench!
Dave
Aug 8, 2016 18:11:44 #

Dixiegirl - exquisite artistry as always! And thank you in advance for the tutorial! Did I forget to warn you that once we snared you for this thread, your time would not be your own? 
pfrancke and Dave Chinn, thank you for your nice comments!
pfrancke and Dave Chinn, thank you for your nice comments!
MinnieV wrote:
This is a different idea from the examples I've seen. I found something to try, will post soon. Thank you again for all the info, Minnie!...it can help counteract busy backgrounds...
Aug 8, 2016 18:19:23 #
Linda From Maine wrote:
Dixiegirl - exquisite artistry as always! And thank you in advance for the tutorial! Did I forget to warn you that once we snared you for this thread, your time would not be your own?
pfrancke and Dave Chinn, thank you for your nice comments!
This is a different idea from the examples I've seen. I found something to try, will post soon. Thank you again for all the info, Minnie!
pfrancke and Dave Chinn, thank you for your nice comments!
This is a different idea from the examples I've seen. I found something to try, will post soon. Thank you again for all the info, Minnie!
LOL Thanks, Linda, and not to worry. I love it!

Aug 8, 2016 18:32:26 #
Dixiegirl wrote:
Thank you so much, Piet! I'm working on a tutorial and will post it shortly.
Piet, I hope this helps:
How to Remove Texture Without Removing Texture Color
After applying texture to image and while still in normal blend mode, use the color picker to select a color from the texture. Make sure the foreground color is checked. Using a soft brush, remove texture by painting over the object from which you want texture removed. To remove all, use the brush tool at 100%. To lighten marks but not remove completely, leave brush at 35%, 50% depending on how much texture you want to remove, and adjust brush size to fit the subject.
When finished, select desired blend mode leaving opacity at 100% (I usually use either soft light or overlay blend modes).
Credit goes to Sarah Gardner who developed this technique.
Aug 8, 2016 18:34:49 #
Uuglypher wrote:
Dixiegirl, br I'm inexperienced with, and, frankly... (show quote)
Dave, thank you so much. These are my "before" images.
Aug 8, 2016 19:23:58 #

Dixiegirl wrote:
Here are examples of textures used on two differe... (show quote)
These are both lovely, and you've introduced us to another tool to use in managing the adjustment of the textures to meet the needs of the individual image. These are very delicate and beautifully rendered. I'm so glad that you brought these to share, and are giving us the steps to try it ourselves.
One point that you make and illustrate is the use of texture in a nature-portrait image with plenty of blank space, where the texture helps make the blank space more interesting and also complements the subject.
Great contribution to the discussion!
Aug 8, 2016 19:53:31 #
minniev wrote:
These are both lovely, and you've introduced us to... (show quote)
Thank you so much, Minnie. This is a most enjoyable topic.
Aug 8, 2016 19:56:58 #
Dixiegirl wrote:
Piet, I hope this helps: br br How to Remove Text... (show quote)
thank you Dixiegirl - I am not 100 percent sure yet, but I am definitely going to google Sarah Gardner - Google and hard work is our friend!!!!
In the meantime, here is my submission... it was cheating, because it was also posted to the tall-ship thread - LOL - I liked using the background texture to apply drama and to help bring the composite together. Now off to figure out what Dixiegirl does (besides starting off with the most beautiful of wren images!!!).

Aug 8, 2016 19:59:51 #
This is stunning work, Piet!! A result to be very, very proud of - and for us to be inspired by.
Aug 8, 2016 20:01:20 #
pfrancke wrote:
thank you Dixiegirl - I am not 100 percent sure yet, but I am definitely going to google Sarah Gardner - Google and hard work is our friend!!!!
In the meantime, here is my submission... it was cheating, because it was also posted to the tall-ship thread - LOL - I liked using the background texture to apply drama and to help bring the composite together. Now off to figure out what Dixiegirl does (besides starting off with the most beautiful of wren images!!!).
In the meantime, here is my submission... it was cheating, because it was also posted to the tall-ship thread - LOL - I liked using the background texture to apply drama and to help bring the composite together. Now off to figure out what Dixiegirl does (besides starting off with the most beautiful of wren images!!!).
You couldn't have chosen a more beautiful subject for a texture, Piet. Gorgeous work!!
Aug 8, 2016 20:01:26 #
Being curious about possibilities to lessen details, I stumbled onto this result.
Only the foreground has the texture; the forest and Mt. Rainier are masked. Soft light blend mode at 100% opacity.
Only the foreground has the texture; the forest and Mt. Rainier are masked. Soft light blend mode at 100% opacity.
(Download)
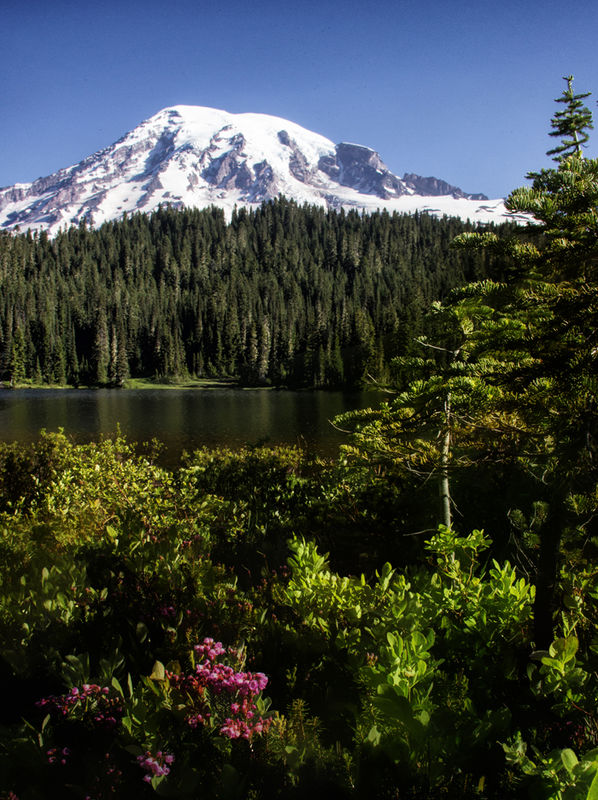
2. Original with busier foreground.
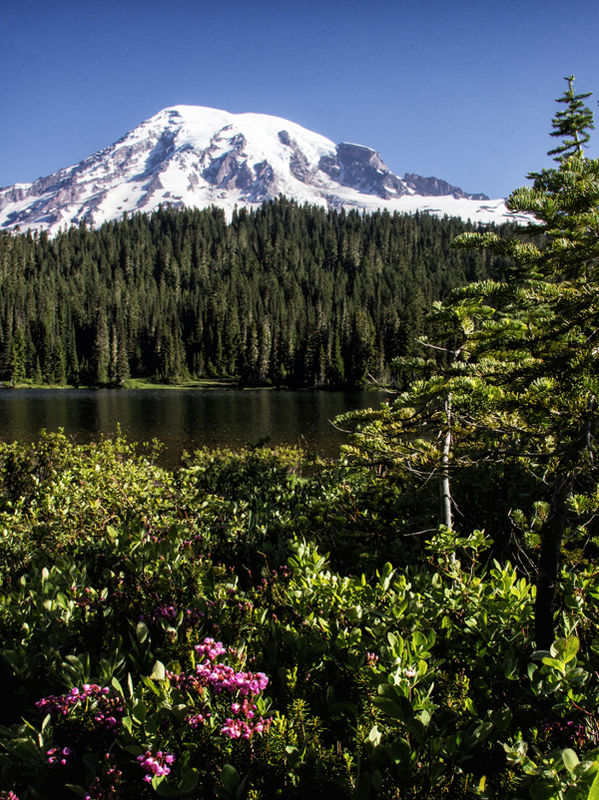
3. A bit of blurred background from another photo used as the texture layer.
Aug 8, 2016 20:14:58 #
Linda From Maine wrote:
Being curious about possibilities to lessen details, I stumbled onto this result.
Only the foreground has the texture; the forest and Miss Rainier are masked. Soft light blend mode at 100% opacity.
Only the foreground has the texture; the forest and Miss Rainier are masked. Soft light blend mode at 100% opacity.
it is amazing how much of an impact the blurred texture had. This had a wonderful effect on the foreground - this is a very odd thing about textures to me, even blurred ones, somehow they add depth, realism, makes the image more touchable. I can't describe it!
Most of our post processing actions seem to rob detail, adding textures seems to be the reverse - ends up somewhere between super-real and surreal
Aug 8, 2016 20:15:59 #
pfrancke wrote:
it is amazing how much of an impact the blurred texture had. This had a wonderful effect on the foreground - this is a very odd thing about textures to me, even blurred ones, somehow they add depth, realism, makes the image more touchable. I can't describe it!
I know exactly how you feel, Piet; it's like magic!
If you want to reply, then register here. Registration is free and your account is created instantly, so you can post right away.