Posts for: SalvageDiver
Sep 16, 2023 15:45:40 #
Longshadow wrote:
NICE!
Thanks Bill, glad you enjoyed.
Sep 16, 2023 15:44:07 #
StanMac wrote:
Gorgeous photos, Mike!
Stan
Stan
Thanks Stan, its way too easy to find interesting images in this park. BTW, this is my favorite park followed very closely by Yosemite.
Sep 16, 2023 15:42:06 #
Markag wrote:
All kind of wonderful ! ! !
Thank-you, so many beautiful views in the park. Glad you enjoyed.
Sep 16, 2023 15:40:42 #
NMGal wrote:
Awesome!
Thank-you and glad you enjoyed the images
Sep 16, 2023 15:39:49 #
bcheary wrote:
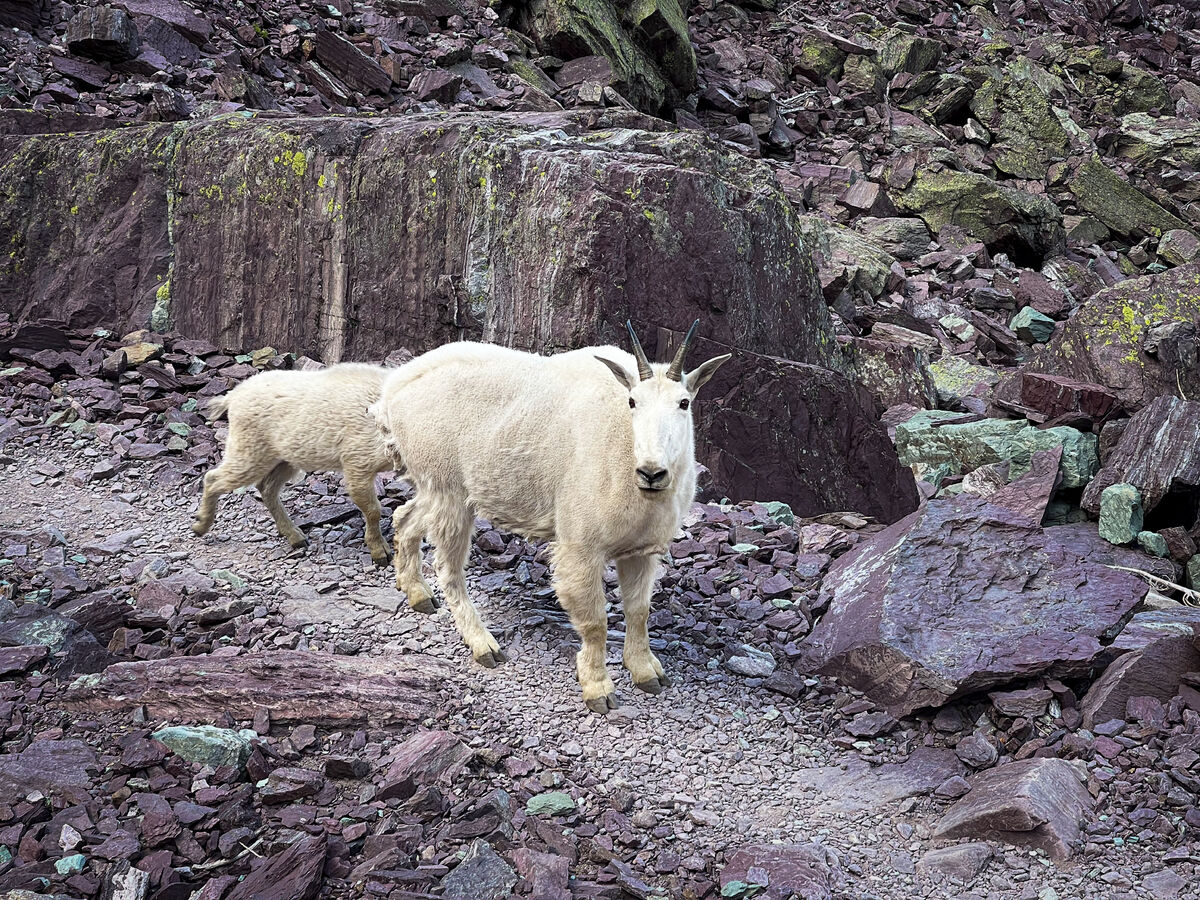
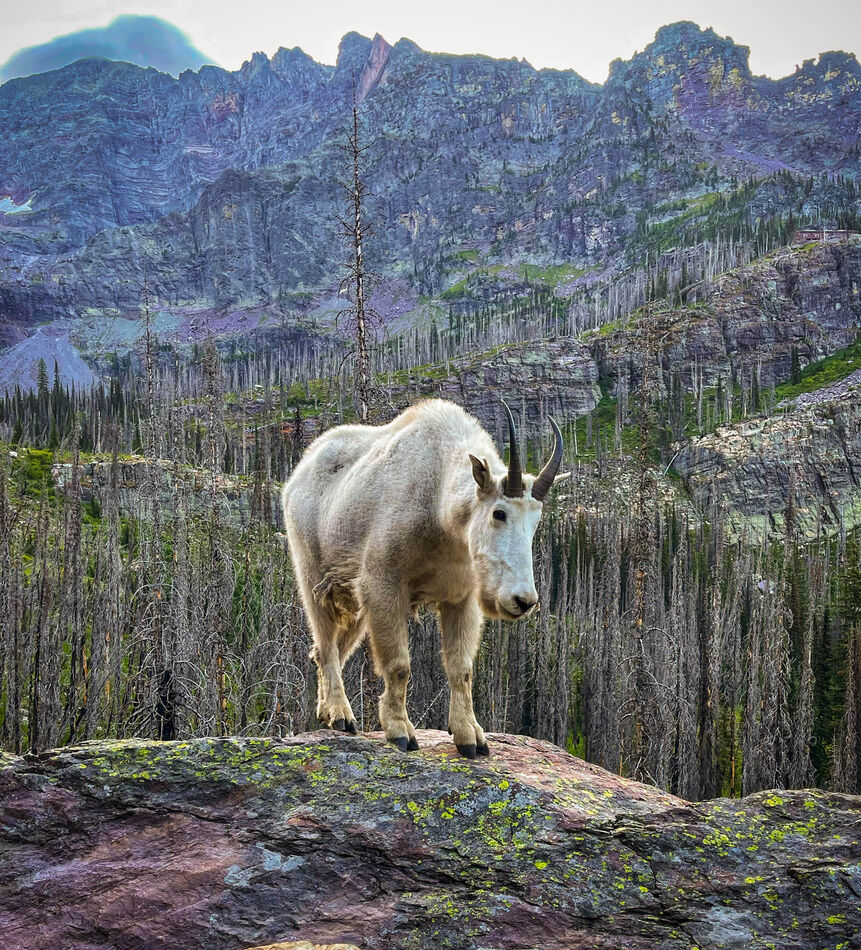
 All winners but that mountain goat takes the prize!
All winners but that mountain goat takes the prize!He was in front of us walking along the same trail and was walking faster than him. When we go to about 10' from him he veered off the trail up onto a large rock, looking down at us and watched us walk by. Then he just got back on the trail and continued on his way.
On another hike, we ran into another group of about 10 goats heading up to the glacier we were coming down from. There was only room for single file, so we yielded the right-of-way and watched them walk on by. They looked up at us but apparently didn't feel at all threatened. After they passed, we go back on the trail and continued on our way with another story to tell to friends and family later.
Sep 16, 2023 11:46:26 #
To call Adobe and/or Apple is a good recommendation.
I have the Macbook M2 and have no problems with running either Photoshop or Apple Photos. You would think it kind of silly for Apple to distribute their own app on their own hardware and have compatibility issues. I don't have a Canon printer, but I've had no problems with any of the printer or app setups. Some of the older plug-ins need to be run using Rosetta since they may not have been updated to the new ARM architecture.
The macbooks with the native apple silicon are blazingly FAST! If you get it configured correctly, you won't be disappointed.
Sep 16, 2023 11:35:52 #
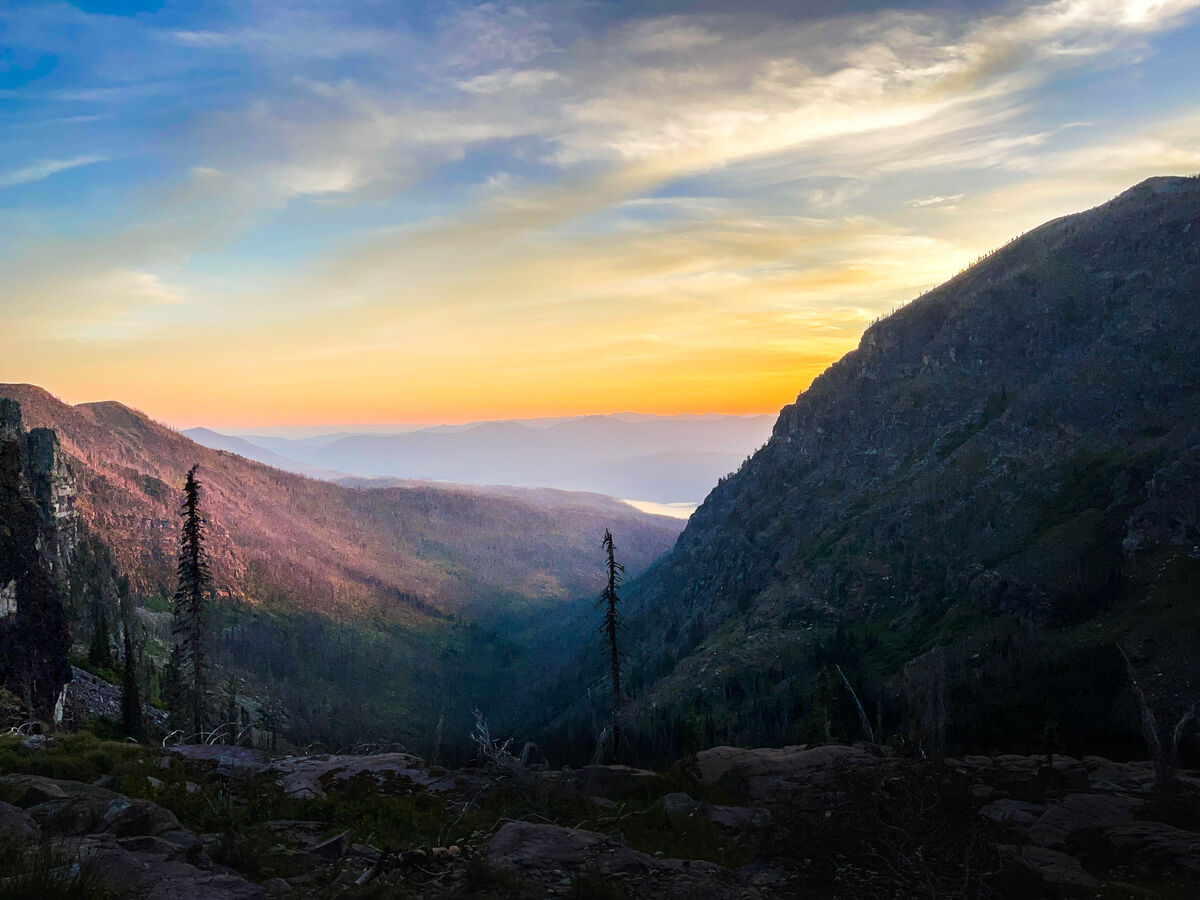
We recently returned from a week hiking around Glacier National Park. The first 3 days we stayed at the Sperry Chalet, which is a rudimentary hikers lodge only accessible via a hike up the mountain. The last half was hiking around an area called “Many Glaciers” which is on the eastern side of the park. Here are a few images from around those areas. Hope you enjoy.
Sunset viewed from the Sperry Chalet
(Download)
Local native yielding the right-of-way allowing us to pass him on the trail
(Download)
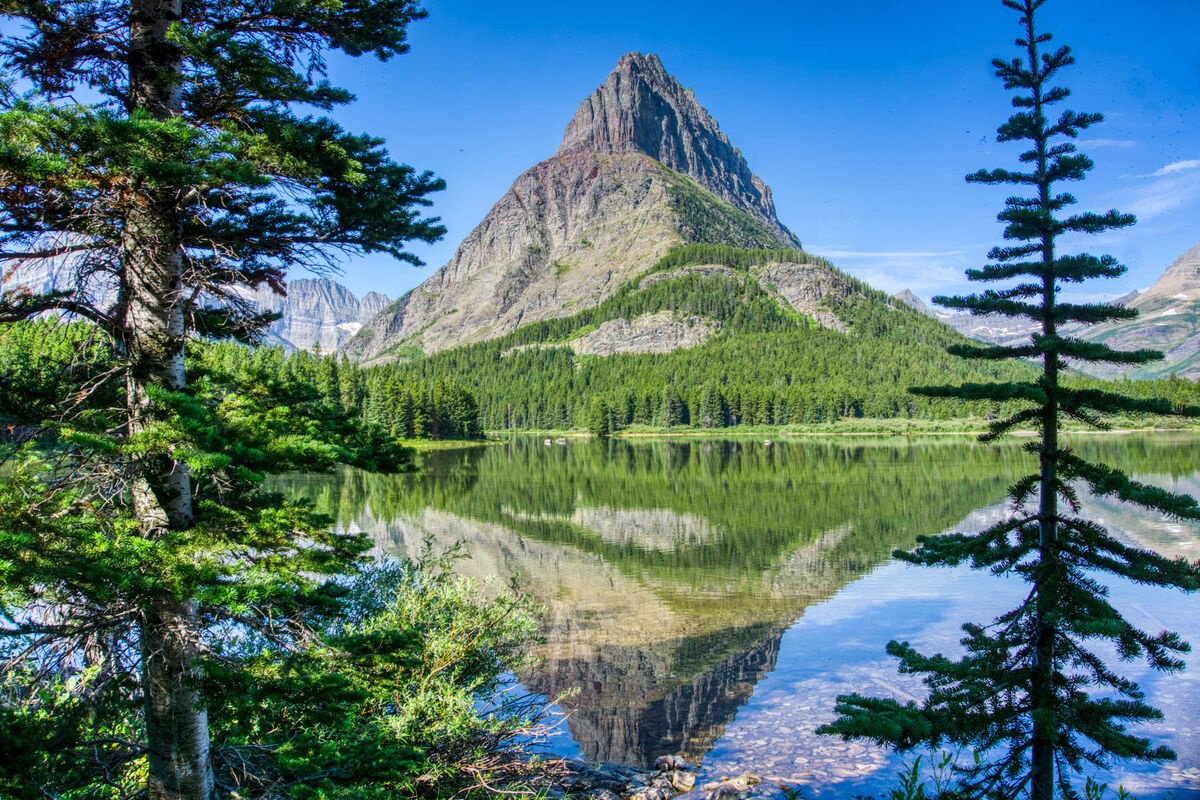
Mt Grinnell viewed from across Swiftcurrent Lake
(Download)
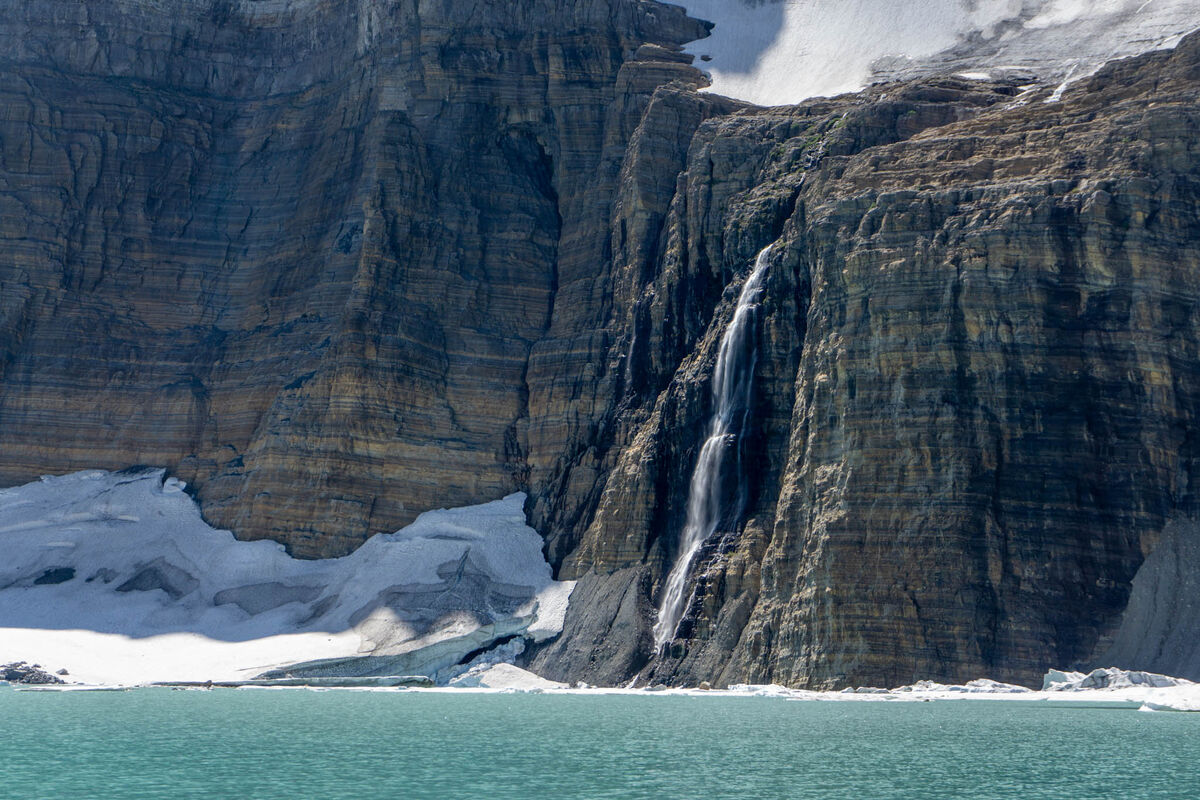
Grinnell Glacial melt into the upper Grinnel Glacial lake. The temp was about 90ºF.
(Download)
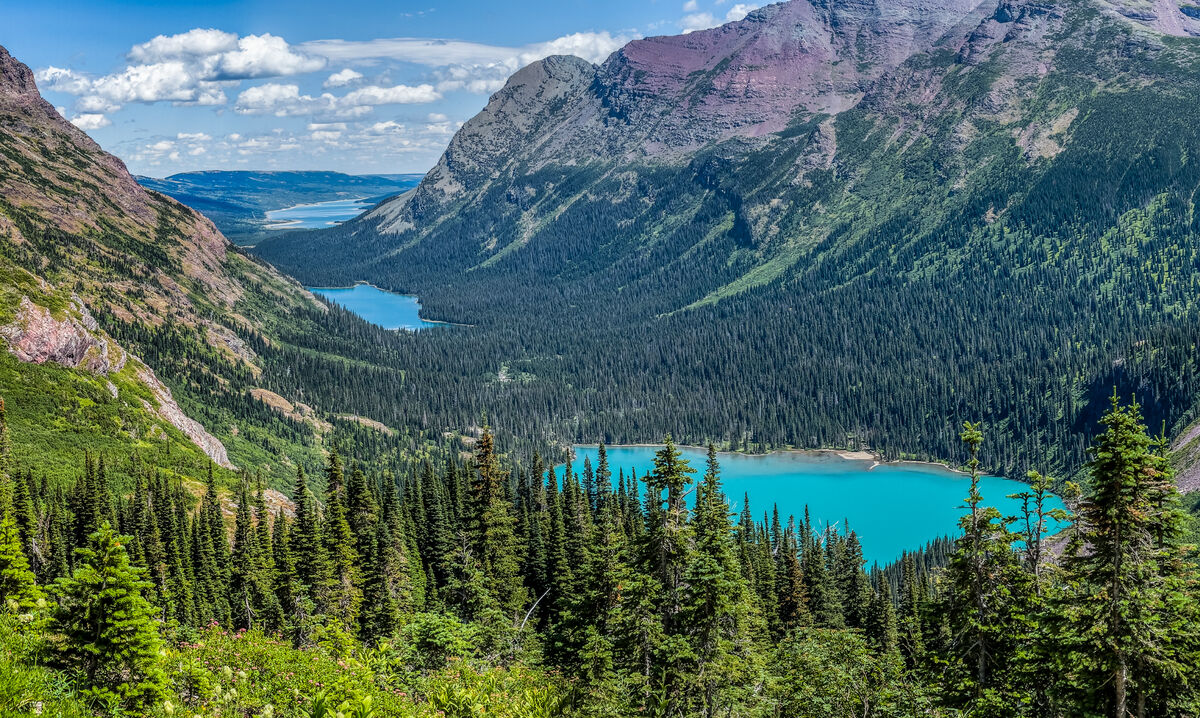
View looking back down the valley to the trailhead. Lower Grinnel Lake (near), Lake Joshephine (mid) and Swiftcurrent Lake (far)
(Download)
Sep 16, 2023 11:01:59 #
Beautiful... love the kayakers pausing a moment to take in the beauty of the moment.
Sep 13, 2023 12:48:25 #
Jim-Pops wrote:
Photo was taken from the deck of the Jewel of the ... (show quote)
Here's my view. The sky was replaced using the generative AI in the recent PS update.

Sep 12, 2023 19:42:03 #
yorkiebyte wrote:
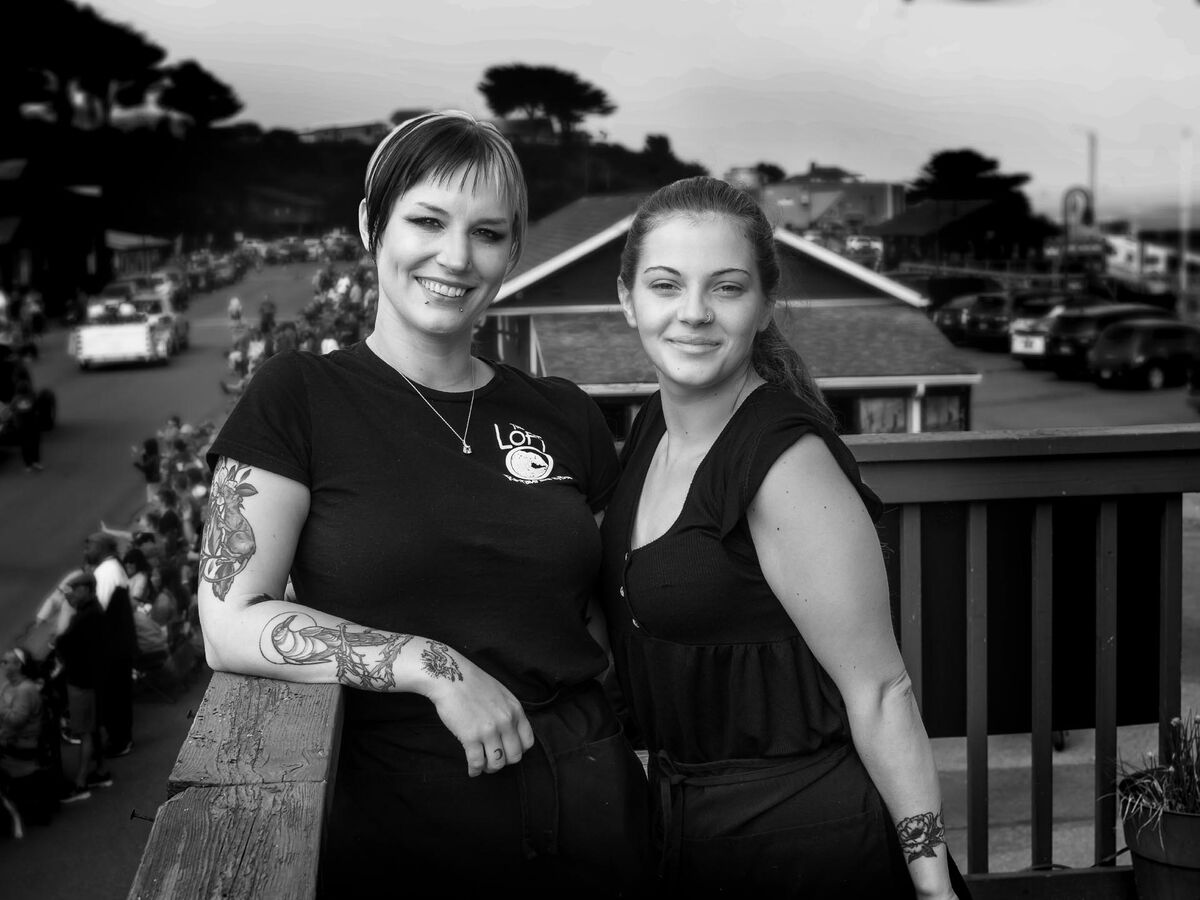
OK, this is my attempt to convert to B&W..... I feel uneasy about this after spending 'bout an hour on it! And yeah... sure coulda' used a bit'a fill flash in hindsight!
Please show me what you would do here - with an explanation of your procedure! Thank You so much, in advance!!
Please show me what you would do here - with an explanation of your procedure! Thank You so much, in advance!!
The initial critique is that there was too much bright clutter around the subjects. Additionally there was a totem pole behind the girls interfering with their image. Had I shot this image, I would have opened up the aperture to isolate the girls from the surrounding activity and clutter. I used PS to simulate en open aperture effect.
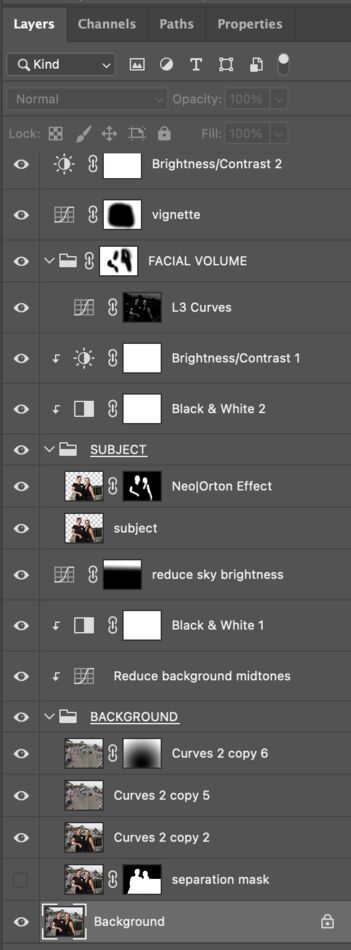
Here are the steps that I used to post-process this image. A screenshot of my layers panel is also attached.
1). Removed the totem pole from the image using the close stamp tool.
BACKGROUND
2). Separated the subjects from the background using the method in the link below.
https://www.youtube.com/watch?v=m_Qk8QsLbAs
3). After removing the subject and creating a subject free background, blurred the background using the lens blur tool. A radial gradient mask was used to vary the amount of blurring so that the distant features were blurred more than the near features.
4). Used a curve layer to reduce the background midtowns
5) Used a B&W layer to convert to BW and reducing the reds and yellows to reduce some of the bright colors in the background.
6). Using a curve layer and a liner gradient to reduce the sky brightness.
SUBJECT
7). Added a Norton effect to soften and create a slight glow to the two girls.
8). Used a B&W layer to convert to BW and increasing the reds and yellows to better highlight their faces.
9). Reduced the subjects brightness
FACIAL VOLUME
10). Used a luminosity mask to accentuate the facial highlights of both girls, placing emphasis on the left side of their faces. This added some volume back into their faces.
Finishing Touches
11). Used a curve layer with mask to create a slight vignette.
12). Slight increase in global image brightness.
Mike
Sep 12, 2023 11:46:05 #
bart11 wrote:
I thank you all guys very much for your effort to educate me and others too.
Over the past few years, this subject has been discussed ad nauseam, yet many still don't get it, so don't feel alone. I understand the concept so I can't really feel your frustration, but I can point you to a good reference explaining the effect different sensor sizes has on the field of view of a captured image. How (or if) you use this is up to you but the following link fully explains your question once you understand it. Beware, it does involve just a little math, but nothing more than 6th grade algebra.
https://en.wikipedia.org/wiki/Crop_factor
Sep 3, 2023 15:26:15 #
NJFrank wrote:
These were taken a couple of days ago early morning Morristown NJ. Didn't have to put up with any traffic or people photo bombing my shots. A very peaceful morning.
I like your first two images. The lack of people in those images conveys the early morning peacefulness very effectively. Nice captures.
The streetlights conotate a sense of darkenss that would accompany the early morning hours. You might try reducing the overall image brightness to recreate the early morning darkness while keeping the streetlights fairly bright. Using a curve layer, you could increase the image contrast, darkening the dark areas and lightening the light areas (street lights) to your preference.
Just another thought.
Sep 3, 2023 15:02:20 #
Sep 3, 2023 14:35:05 #
rv8striker wrote:
Any ideas why there are white lines on this image? It has happened with others too but not all. Stacked image using Affinity, processed in Lightroom.
The first place to look is the stacking process, not sensor problems like hot pixels.
The first thing to do would be to check each individual image for that white line. If it doesn't exist in any of the individual images, you can rule out the sensor. If it is, then you can rule in the sensor as the problem. However, hot pixels are individual pixels, not a line of pixels and generally will be present in all images.
The stacking process involves, algorithmically, finding the sharpest portions of each image, creating masks blocking the unsharp part of those images and finally blending the sharp portions of each together into a single image. All it takes is for a slight misalignment error in the stacking algorithm to create an anomoly.
To check the algorithm remove one image from the stack and redo it. If it disappears, then you know the problem lies with Infinity. Another way to check, would be stack with another editor, such as photoshop.
Aug 22, 2023 10:44:36 #
Verticalviking wrote:
Barn near the Olympic foothills. We have a pretty heavy haze from the fires in Spokane currently.
What a gorgeous image. I feel the haze adds to the image by layering and removing detail in the background mountains. I don't think that it would have been as impactful had the background been sharp with a lot of detail. It's very well composed image, the foreground framing and the haze gives it a storybook feel.