Wait Staff.....
Sep 10, 2023 11:28:20 #

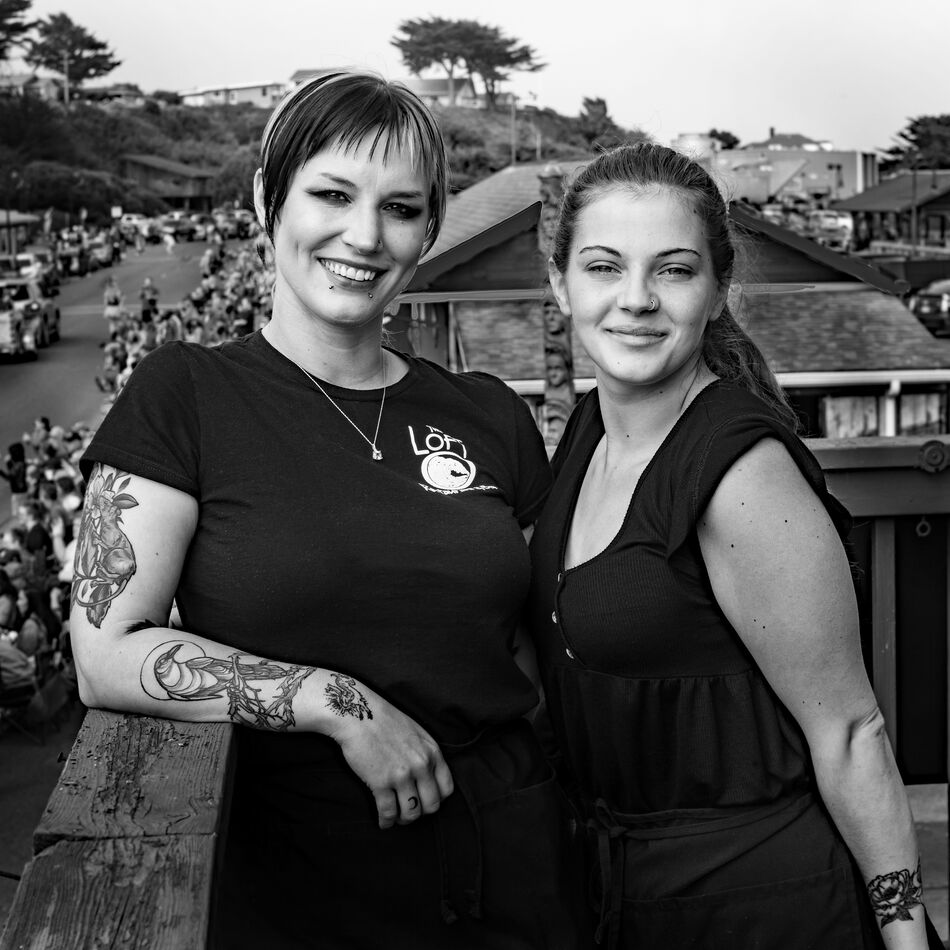
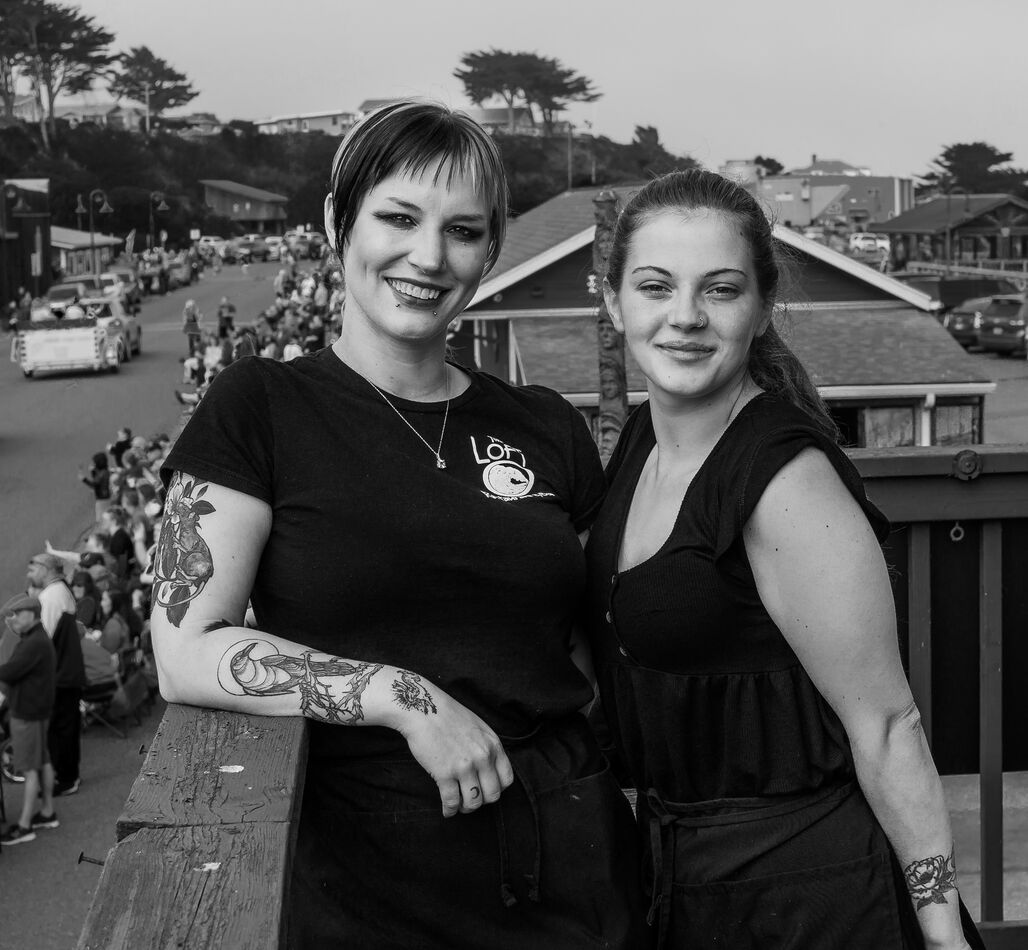
OK, this is my attempt to convert to B&W..... I feel uneasy about this after spending 'bout an hour on it! And yeah... sure coulda' used a bit'a fill flash in hindsight!
Please show me what you would do here - with an explanation of your procedure! Thank You so much, in advance!!
Please show me what you would do here - with an explanation of your procedure! Thank You so much, in advance!!
Sep 10, 2023 11:48:49 #

yorkiebyte wrote:
OK, this is my attempt to convert to B&W..... I feel uneasy about this after spending 'bout an hour on it! And yeah... sure coulda' used a bit'a fill flash in hindsight!
Please show me what you would do here - with an explanation of your procedure! Thank You so much, in advance!!
Please show me what you would do here - with an explanation of your procedure! Thank You so much, in advance!!
Looks fine ☀️☀️☀️☀️
Sep 10, 2023 11:53:46 #

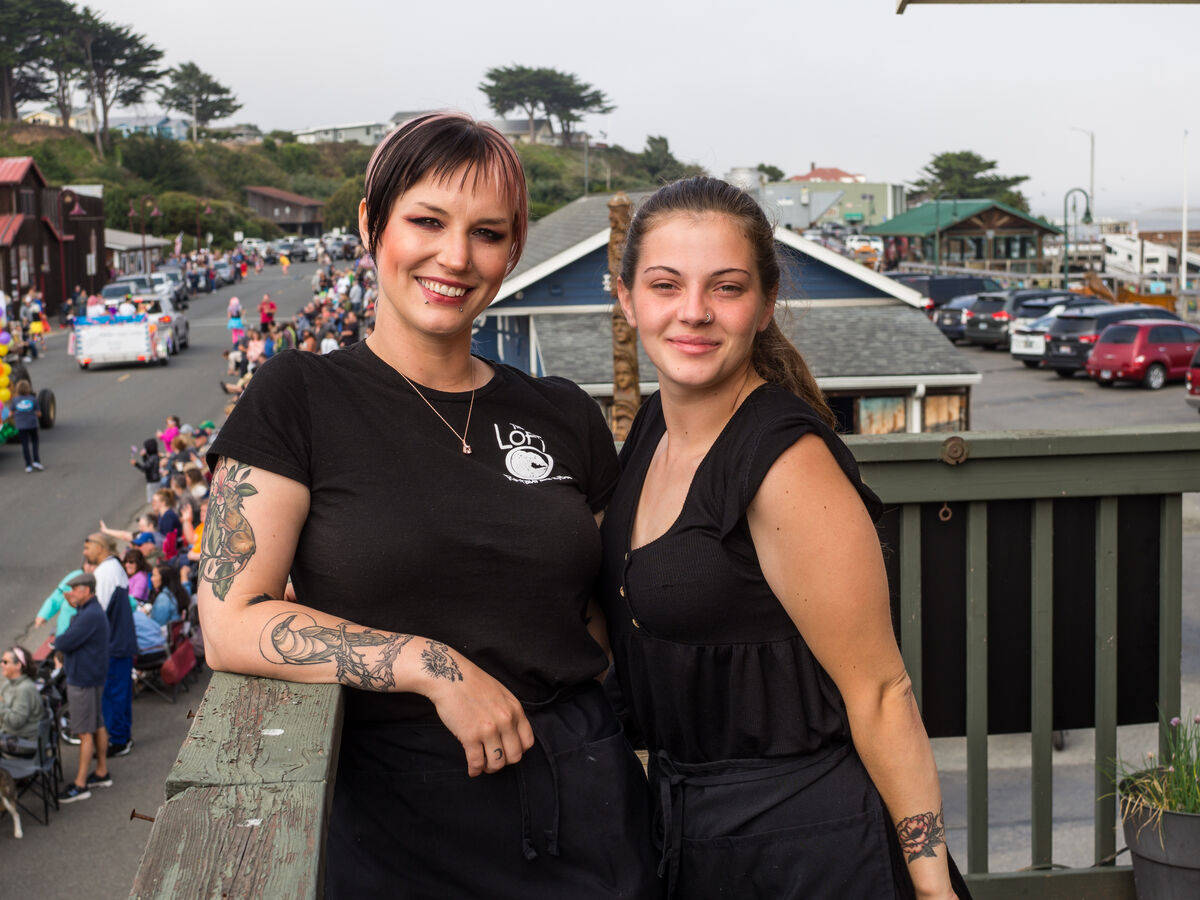
Nice work! I took your color original, imported it into Lightroom, picked "monchrome" and then applied the orange filter to get a little more detail out of the B&W. Hopefully some of the experts here can show you more detailed approaches using curves, etc.
Sep 10, 2023 12:40:24 #
UTMike wrote:
Nice work! I took your color original, imported it into Lightroom, picked "monchrome" and then applied the orange filter to get a little more detail out of the B&W. Hopefully some of the experts here can show you more detailed approaches using curves, etc.
I Like it! Thank you UTMike!!


Sep 10, 2023 17:33:11 #

To simulate fill flash, how about selecting the background mask in LR and dialing down the background exposure a tad? Copy and invert the mask so you can work on the women.
Sep 11, 2023 13:14:53 #
yorkiebyte wrote:
OK, this is my attempt to convert to B&W..... I feel uneasy about this after spending 'bout an hour on it! And yeah... sure coulda' used a bit'a fill flash in hindsight!
Please show me what you would do here - with an explanation of your procedure! Thank You so much, in advance!!
Please show me what you would do here - with an explanation of your procedure! Thank You so much, in advance!!
I'm not a people photographer...guess that's why I had to give this a go.
Took your original into ACR. Select sky...slight exposure drop...slight cool temperature...slight dehaze.
Duplicate & invert mask, subtract subject...slight exposure drop...slight warm temperature.
Select subject...slight increase exposure...moderately open shadows.
Nik Silver Efex Pro 3. Preset 005 High Structure (harsh).
P/S crop.
Topaz Adjust 5. Preset shadow recovery.
Topaz Vignette adjusted to taste, centered on girls.
P/S slight facial dodge both girls. Catch light dodge girl on left. Pupil dodge girl on right.
About 5 minutes in process and 10 minutes tracking and writing my workflow. Hope you will find some portions of my process of interest.

Sep 11, 2023 14:47:30 #
abc1234 wrote:
To simulate fill flash, how about selecting the background mask in LR and dialing down the background exposure a tad? Copy and invert the mask so you can work on the women.
Well, I don't have LR, so that eliminates that right off the bat! I might be able to figure something out with what I have - this journey is just beginning!
~ Thank you, abc1234!
Sep 11, 2023 14:49:52 #

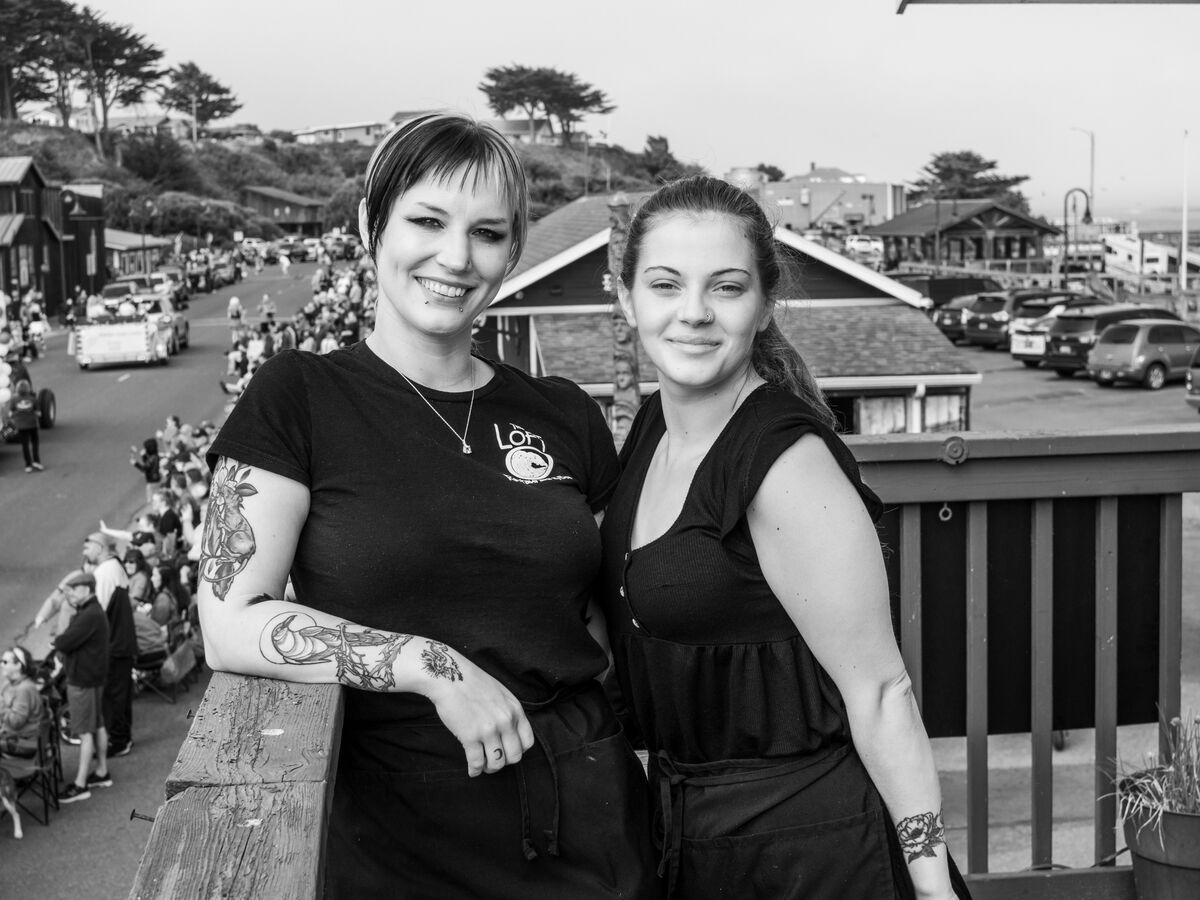
May or may not be the right level of contrast for you. With B&Ws I tend to err on the side of contrasty - the subjects, that is. The background got the opposite (by selection) - less contrast, lots of denoise to soften and negative sharpening to soften even more. The subjects got a touch of extra contrast round the eyes, mouths and tattoos. Orange proved useful for brightening the faces and arms.
.
.
Sep 11, 2023 14:54:37 #
SnappyHappy wrote:
I'm not a people photographer...guess that's why I... (show quote)
I find it ALL of INTEREST!! Yes! However, not having those programs may hinder me a bit.... When/if I continue learning RAW, I'm sure that I will have to make some investment in other programs.
~ Thank you, SnappyHappy!
Sep 11, 2023 15:05:48 #
R.G. wrote:
May or may not be the right level of contrast for you. With B&Ws I tend to err on the side of contrasty - the subjects, that is. The background got the opposite (by selection) - less contrast, lots of denoise to soften and negative sharpening to soften even more. The subjects got a touch of extra contrast round the eyes, mouths and tattoos. Orange proved useful for brightening the faces and arms.
.
.
~ For the most part, I like contrast depending on the subject.... Definitely with this portrait! And softening up the background further was also a priority for me.
I also find it interesting what others are doing with this for their interpretation - Amazing in fact!! The orange filter... I'll be investigating those B&W filters for sure!
It also seems that no one is bothered (as I was!) by the intersecting white roofline in the back of the girl on camera right. I tried my best to make that a non-factor when maybe I should be worried about other things.
Time will tell, as I hope a few others will jump in the fray!
Thank you, R.G. !!
Sep 11, 2023 15:19:10 #
R.G. wrote:
May or may not be the right level of contrast for you. With B&Ws I tend to err on the side of contrasty - the subjects, that is. The background got the opposite (by selection) - less contrast, lots of denoise to soften and negative sharpening to soften even more. The subjects got a touch of extra contrast round the eyes, mouths and tattoos. Orange proved useful for brightening the faces and arms.
.
.
Sep 11, 2023 15:19:36 #
yorkiebyte wrote:
...It also seems that no one is bothered (as I was!) by the intersecting white roofline in the back of the girl on camera right....
Yes, that is one of the worst distractions, but subduing the background in general will help to keep the viewers' attention on the subjects. It's also true that you have to draw the line somewhere and exercise a bit of tolerance. If the background is busy you could spend a lot of time and effort trying to get rid of one distraction after another. And if they can't be got rid of effectively, the results can end up looking a bit messy. If that white eave was bothering me I'd settle for turning it into a mid or light grey.
Sep 12, 2023 19:42:03 #
yorkiebyte wrote:
OK, this is my attempt to convert to B&W..... I feel uneasy about this after spending 'bout an hour on it! And yeah... sure coulda' used a bit'a fill flash in hindsight!
Please show me what you would do here - with an explanation of your procedure! Thank You so much, in advance!!
Please show me what you would do here - with an explanation of your procedure! Thank You so much, in advance!!
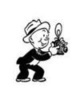
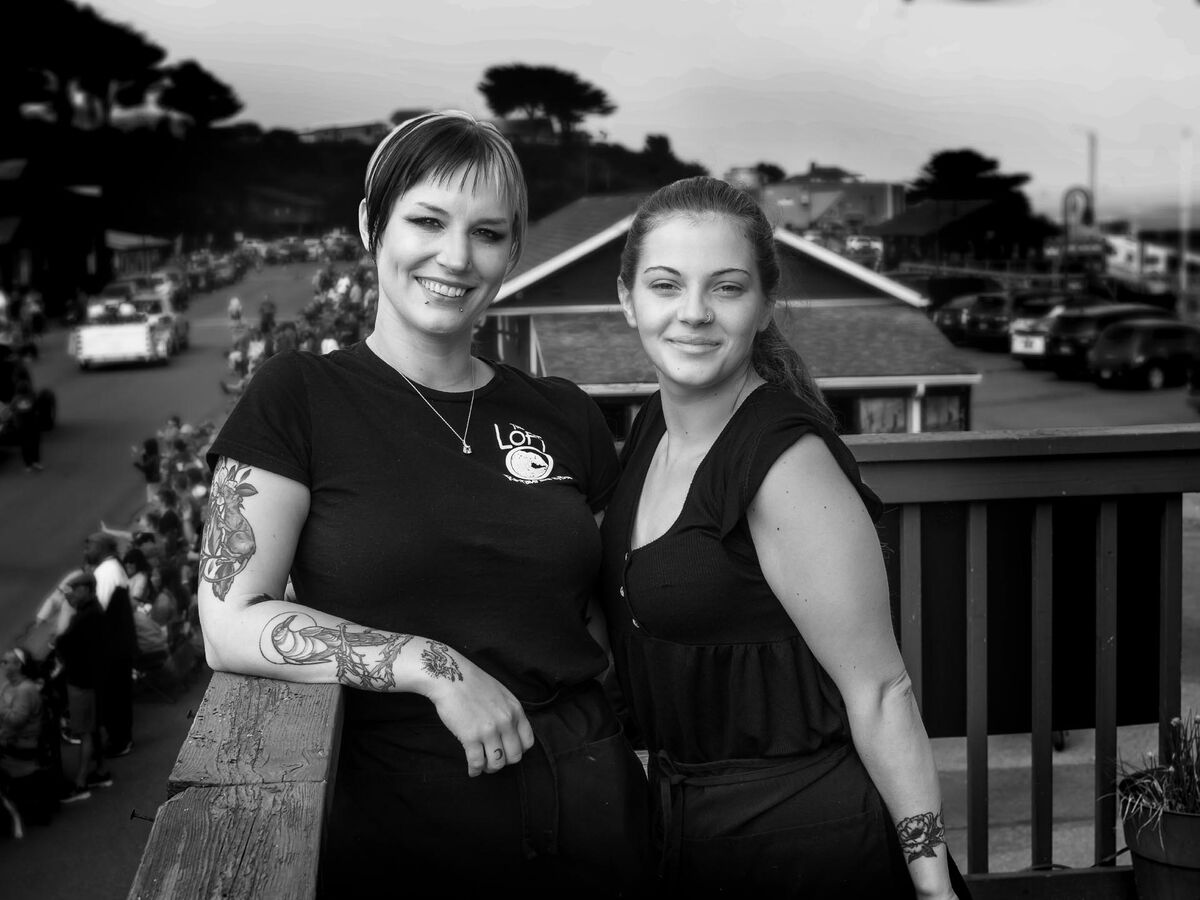
The initial critique is that there was too much bright clutter around the subjects. Additionally there was a totem pole behind the girls interfering with their image. Had I shot this image, I would have opened up the aperture to isolate the girls from the surrounding activity and clutter. I used PS to simulate en open aperture effect.
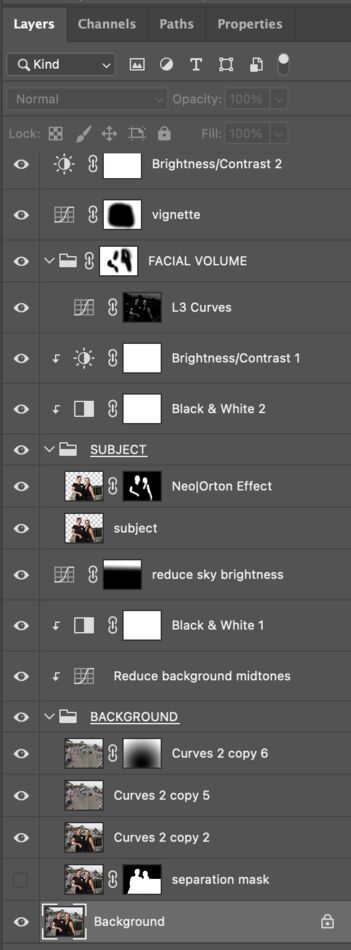
Here are the steps that I used to post-process this image. A screenshot of my layers panel is also attached.
1). Removed the totem pole from the image using the close stamp tool.
BACKGROUND
2). Separated the subjects from the background using the method in the link below.
https://www.youtube.com/watch?v=m_Qk8QsLbAs
3). After removing the subject and creating a subject free background, blurred the background using the lens blur tool. A radial gradient mask was used to vary the amount of blurring so that the distant features were blurred more than the near features.
4). Used a curve layer to reduce the background midtowns
5) Used a B&W layer to convert to BW and reducing the reds and yellows to reduce some of the bright colors in the background.
6). Using a curve layer and a liner gradient to reduce the sky brightness.
SUBJECT
7). Added a Norton effect to soften and create a slight glow to the two girls.
8). Used a B&W layer to convert to BW and increasing the reds and yellows to better highlight their faces.
9). Reduced the subjects brightness
FACIAL VOLUME
10). Used a luminosity mask to accentuate the facial highlights of both girls, placing emphasis on the left side of their faces. This added some volume back into their faces.
Finishing Touches
11). Used a curve layer with mask to create a slight vignette.
12). Slight increase in global image brightness.
Mike
Sep 13, 2023 09:47:29 #
yorkiebyte wrote:
OK, this is my attempt to convert to B&W..... I feel uneasy about this after spending 'bout an hour on it! And yeah... sure coulda' used a bit'a fill flash in hindsight!
Please show me what you would do here - with an explanation of your procedure! Thank You so much, in advance!!
Please show me what you would do here - with an explanation of your procedure! Thank You so much, in advance!!
Perhaps a little reduction in the black shadows but other than that it looks good to me.
Sep 13, 2023 10:54:20 #
FrumCA wrote:
Perhaps a little reduction in the black shadows but other than that it looks good to me.
The OP's edit ain't bad at all. I dealt with the shadows by selecting the darkest parts and lightening them till some detail was just starting to become visible. If the OP had used the orange slider to slightly brighten the skin tones it would have been close to optimum. I eased the shadows round the eyes of the woman on the left. Too much can lead to a Boris Karloff look, which isn't very flattering for a woman.
If you want to reply, then register here. Registration is free and your account is created instantly, so you can post right away.