Issues with IR RAW shooting
Mar 1, 2016 19:52:18 #

Bloke wrote:
I know there are quite a few people on here with I... (show quote)
I just googled this and got quite a few tutorials and articles.
--Bob
Mar 1, 2016 20:04:03 #
Bloke wrote:
I know there are quite a few people on here with I... (show quote)
Non modified Nikon D700 with a 90nm IF filter.
--Bob

Mar 1, 2016 22:19:57 #
bwana wrote:
Not sure what you're trying to accomplish? An IR or full spectrum modded camera captures more of the red end of the spectrum, i.e.: images will be "reddish".
What do you want them to look like?
I prefer B&W IR to color but have played with color a bit. I normally do channel swaps when processing color IR pix, i.e.: swap Blue for Red, etc. and play with saturation. A few examples at: https://goo.gl/photos/sDCbsFsM63rVL5E47
bwa
What do you want them to look like?
I prefer B&W IR to color but have played with color a bit. I normally do channel swaps when processing color IR pix, i.e.: swap Blue for Red, etc. and play with saturation. A few examples at: https://goo.gl/photos/sDCbsFsM63rVL5E47
bwa
Pretty simple... I want them to look like IR colour photos, not something which looks like it was taken through a deep red filter. Foliage is normally adjusted to be white-through-yellow, etc.
Doing a channel swap when the whole image is red, just gives you an image which is totally blue... Pretty sure I have typed this in about 4 times in this thread.
Anyone who has ever seen a false-colour IR image should understand exactly what I am talking about. The image is *never* all red... Who on Earth would want an image like that? If you do, then stick a red filter on the lens and save the cost of the conversion!
I am going to post an example of the raw and jpeg files, but this may not work because most software other than LR and PS display the embedded jpeg when you look at the raw, so here goes... Ok, not sure what happened there. With the raw file linked, it would not upload, saying "entity too large". I deselected the 'store original' box, and tried again, but this time it just didn't upload the images at all.
It is very difficult to explain exactly what I am seeing, when I can't show you the image...
Ok, I just exported a jpeg from the raw file in LR, and I will include the camera-jpeg for comparison

Mar 1, 2016 23:36:35 #
Bloke wrote:
Pretty simple... I want them to look like IR colo... (show quote)
The camera image you included can be accomplished by white balance and channel adjustment, per the attached slightly reprocessed version of your RAW image. I used Lightroom but Photoshop will do the same thing. It would be quite easy to yield a blue sky if so desired (or most any other color).
Something like: https://goo.gl/photos/i9svuWhZXxXRyj179 or https://goo.gl/photos/uuqST6FoT61mKnyo6 I'm guessing? Done by swapping color channels.
But I still prefer B&W IR: https://goo.gl/photos/4drsjaGSt6AEMZp37
bwa
Mar 2, 2016 09:34:25 #
bwana wrote:
The camera image you included can be accomplished ... (show quote)
I guess I didn't explain properly. That raw image which I exported was *already* at the full range of WB adjustment in LR... So, your additional processing is already beyond what the program can manage. I could export it, then reimport it, but if I wanted to end up with a jpeg, I could more easily just use the one out of the camera...
Mar 2, 2016 15:19:50 #

Bloke wrote:
Pretty simple... I want them to look like IR colo... (show quote)
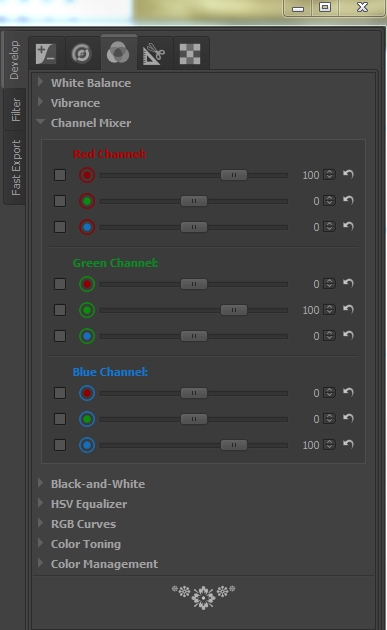
I use Photoshop, but if you don't have Photoshop try this. I am attaching the Channel mixer from RAWTherapee. This is a free application. Take your RAW image to this first and in this screen, do this: (And this will just not work good with JPEG)
1) Under the Red Channel, reduce the red setting from 100 to 0 and also increase the blue setting from 0 to 100.
2) Under the Blue Channel, reduce the blue setting from 100 to 0 and also increase the red setting from 0 to 100.
You can either do further adjustments in RAWTheraee or save the image into the format of your choice (I like TIFF and avoid JPEG since you will be handicapped on further adjustments. At this point, the image will have an entire different look with grass and leaves now close to white. Now you can import it into LR.
Results will vary based upon what filter you are using. The 590nm filter retains the most color. 630nm is good too. Many use 720nm (less color) and 850 (almost no color).
RAWTherapee Channel Mixer
Mar 2, 2016 18:00:51 #
Bloke wrote:
I guess I didn't explain properly. That raw image which I exported was *already* at the full range of WB adjustment in LR... So, your additional processing is already beyond what the program can manage. I could export it, then reimport it, but if I wanted to end up with a jpeg, I could more easily just use the one out of the camera...
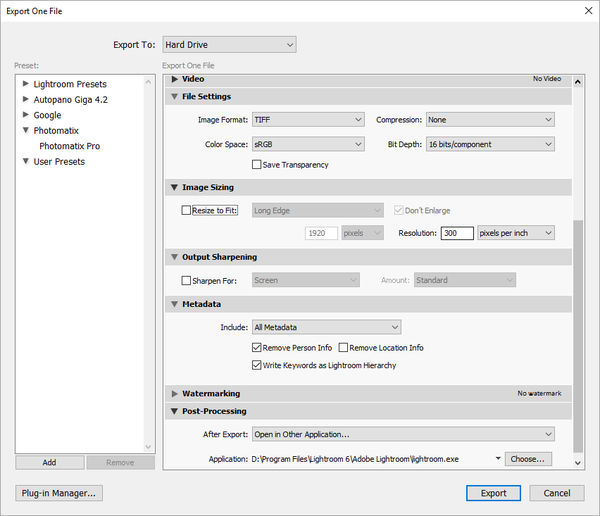
You could simply Export it as a TIFF format out of Lightroom to Lightroom for a 2nd pass of processing. You don't lose bit depth with this approach, per...
bwa
Mar 2, 2016 20:10:23 #
bwana wrote:
You could simply Export it as a TIFF format out of Lightroom to Lightroom for a 2nd pass of processing. You don't lose bit depth with this approach, per...
bwa
bwa
Certainly he can do this to get more range. But it doesn't solve the issue he is working. The image HAS TO HAVE the channel swap to get the pseudo color look. Changes WB causes all colors to move in the same direction. But they have to be swapped to get the look.
And then it can be adjusted in normal ways.
Mar 2, 2016 20:26:26 #
An example:
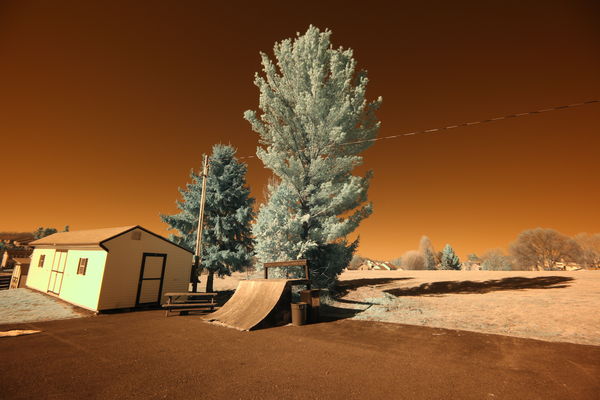
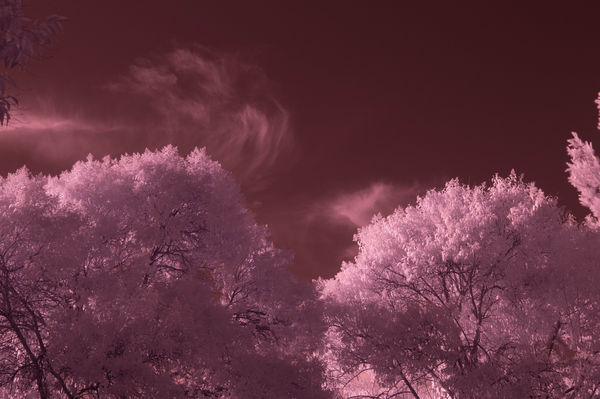
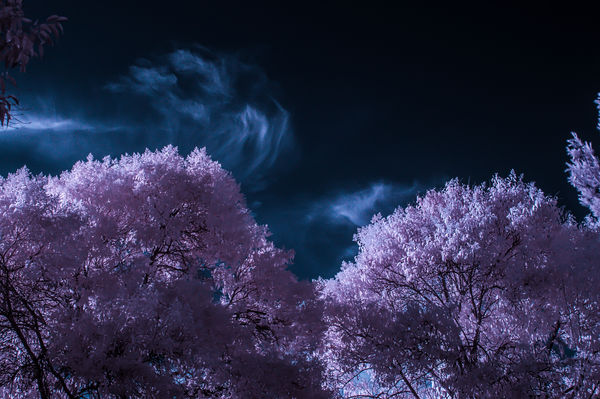
#1 This image is with a 590nm IR filter. Not quite as red as you would get with a 720nm filter, but red none-the-less. Before shooting, a custom WB was done using grass.
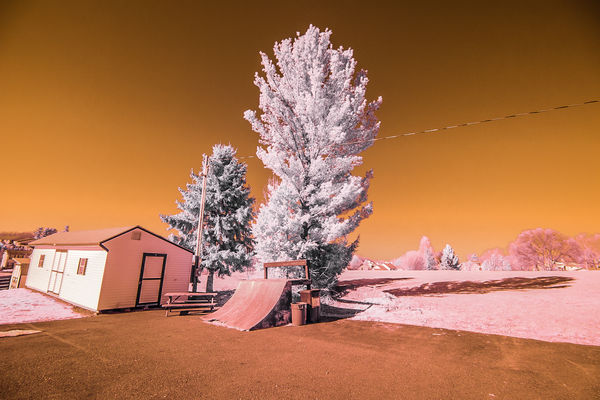
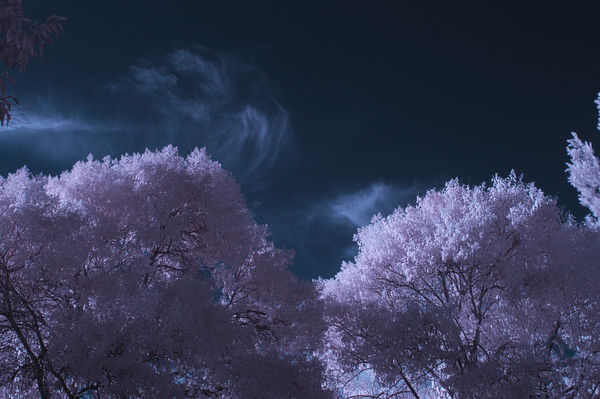
#2 This image is after a channel swap
#3 With a touch of tweaking to give it more contrast
Simple as that. But it does not work as good with JPEG. You need RAWs for this to really turn out.
Also, I manually focus my IR shots. I find that AF is usually off a bit. But manual focus makes it right on.
This was done using a Sony A55 that has been modded to be a full spectrum IR camera. The lens was a Minolta 28-85mm and was shot at 35mm (52mm after 1.5x crop adjustment) and at f6.3. ISO 400 and 1/1250 sec.
Please note also that some kit lens will show a hot spot in the center. I could post an example, but these Minolta lens have no such problems.
#1 This image is with a 590nm IR filter. Not quite as red as you would get with a 720nm filter, but red none-the-less. Before shooting, a custom WB was done using grass.
#2 This image is after a channel swap
#3 With a touch of tweaking to give it more contrast
Simple as that. But it does not work as good with JPEG. You need RAWs for this to really turn out.
Also, I manually focus my IR shots. I find that AF is usually off a bit. But manual focus makes it right on.
This was done using a Sony A55 that has been modded to be a full spectrum IR camera. The lens was a Minolta 28-85mm and was shot at 35mm (52mm after 1.5x crop adjustment) and at f6.3. ISO 400 and 1/1250 sec.
Please note also that some kit lens will show a hot spot in the center. I could post an example, but these Minolta lens have no such problems.
#1 As shot by the camera (this is JPEG, but it was shot in RAW)
(Download)
#2 After channel swap
(Download)
#3 With some tweaking
(Download)
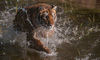
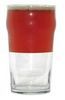
And just for fun, showing that common looking things look far different in pseudo color IR

(Download)
Mar 2, 2016 20:33:19 #
Did Lifepixel solve your problem?
Bloke wrote:
I know there are quite a few people on here with I... (show quote)
Mar 2, 2016 22:13:50 #
JimH123 wrote:
An example: br br #1 This image is with a 590nm ... (show quote)
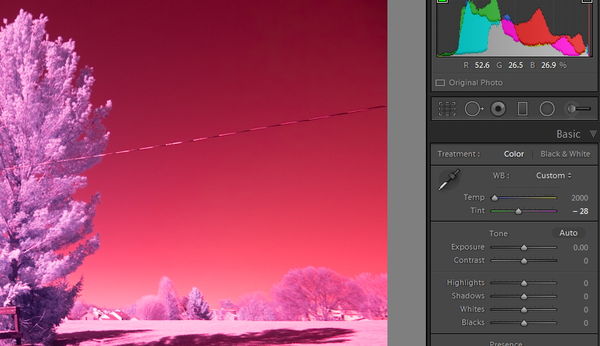
I do understand about doing the channel swap. I don't get far enough in the process to make that worth while is my issue. If I swap the channels where I am at, I just end up with a very heavy blue colour cast, rather than red. It's trying to get the white balance to a sensible level which is driving me crazy!
See below...
Mar 2, 2016 22:37:18 #
sueyeisert
Loc: New Jersey
You need to get a correct white balance lighter in camera or by converting a file to a DNG and then using the DNG editor. I sent you links that show you how to use the DNG editor and create a camera profile. When I first did the process I had 2 computers and step by step watched the process on one computer and did the process on the other computer. If you can't do that then I'd suggest you convert you infrared photo to black & white. I'd use Silver Effects Pro or the Topaz B&W program to do that. Good Luck.
Bloke wrote:
I do understand about doing the channel swap. I don't get far enough in the process to make that worth while is my issue. If I swap the channels where I am at, I just end up with a very heavy blue colour cast, rather than red. It's trying to get the white balance to a sensible level which is driving me crazy!
See below...
See below...
Mar 2, 2016 22:38:14 #
PixelStan77 wrote:
Did Lifepixel solve your problem?
I eventually got to spend my halfhour on the phone with the expert from LifePixel, but I am having trouble getting my head around what he told me.
Firstly, I expected a 'shared-screen' setup, like you get with decent tech support operations, so I could demonstrate what I am getting. They can't do that, so I was left trying to explain to him the stuff I have been trying so hard to explain in this thread... The stuff he was showing me was the same as my watching one of his videos, and not a whole lot of help.
His comments:
1. You have to work in manual; if you use AV or TV, you will end up with an unrecoverable red cast... Huh? For a given exposure value, how on Earth can it matter which camera mode selected the settings? I spend 90% of my time in AV, so what difference does it make if *I* set the shutter speed, or have the camera set that same speed? I cannot for the life of me see how that can cause a different colour cast...
2. Lightroom is a waste of time, and cannot process these images...
3. The reason that DPP is showing the embedded jpeg instead of the raw image, is because I shot raw+jpeg... Double-huh? So, I open a .CR2 file in a program, and this program somehow deduces that there is an equivalent .jpg of this image in a different folder on my PC, and opens that file instead... ????? He said that shooting raw only should solve all my problems... Again, once that raw file is on my PC, there is no way for any software to know whether I shot a jpeg with it!
None of these points has been raised in *any* of the videos I have watched on the subject, *even* those on the LifePixel site, which I believe are narrated by him!
To be honest, I am so confused right now, that I can hardly figure out which way is up... Having been on the go since 5 this morning isn't helping any either!
I guess I need to wait for another decent weather day to shoot some more images, using manual mode and doing a custom WB. He says that using a custom WB will not work with images shot in any other mode but manual. How the software on my PC knows that is beyond me. Anyway, I have to at least *try* his method.
Oh, and in all his years of training people, he has never seen a system where the programs (except LR & PS) will appear to open the embedded jpeg and not display the raw image. I swear that is what I have happening here, but it is impossible to prove since I can't send my raw file through email.
None of the software methods I have seen on any of the dozens of videos I have watched over the past couple of months is any help. They all explain either DPP or the DNGProfileEditor almost as a throw-away, like "you do this, and that is the result..." Except when I do *this* I don't get *that*... If you have followed the thread, you will know what I am talking about.
I had high hopes for this session tonight, and thought he would be able to help me see what is going on. Instead, he has just thrown so many new issues out there, that my head is spinning.
Time for bed said Zebedee...
Mar 2, 2016 22:42:13 #
Bloke wrote:
I know there are quite a few people on here with I... (show quote)
This is a wild stab into an invisible spectrum, but have you tried setting a custom white balance in the camera?
I have a standard camera but have played with an IR filter, and the custom white balance thing made a difference....
Mar 2, 2016 22:43:58 #
sueyeisert wrote:
You need to get a correct white balance lighter in... (show quote)
I have done this. I create a new profile, then export it. I have to guess where to put it, because counter to the instructions, the program does *not* open to the correct folder.
Having done that, I open LR, and go to look at the available profiles, and the new one is not there in the list. I included screen shots of this earlier in the thread.
The process is simple, there isn't much that you can do wrong, but whatever changes I make cannot be passed to LR. I have no idea why not, and because the profile editor is a freebie, they do not provide tech support on it.
I know that I should be able to work with a B&W version, but that is beside the point. I chose a colour conversion so that I would have both options available to me.
If you want to reply, then register here. Registration is free and your account is created instantly, so you can post right away.