Posts for: rhudston
Feb 5, 2022 16:15:38 #
DirtFarmer wrote:
You might have photos if you stick your foot under the lawn mower.
Haaahahahahah, I had to read all the way down to here before I finally got it!!!
Feb 5, 2022 16:13:03 #
DirtFarmer wrote:
You might have photos if you stick your foot under the lawn mower.
Haahahahah, I had to read all the way down to here before I finally got it.
Aug 28, 2021 18:54:49 #
DeanS wrote:
An early learning of six simple little words have steered me through 63+ yrs of marriage: “Yes dear, you’re right, I’m sorry!” Memorize that, and never forget?!
Don't know if you ever got to see Red Green show, but he and the members of Possum's Lodge had a man's prayer. It went like this" "I'm a man, but I can change, if I have to, I guess."
Aug 28, 2021 16:15:32 #
DeanS wrote:
Wife and I shate our home office, but have separate desks. She believes I should spend more time organizing than working (?). Any other masculine Hoggers here in this condition? 
Ck out the ddl for more detai
Ck out the ddl for more detai
Rule 1): the wife is always right (you did marry Miss Right, didn't you?)
Rule 2): do not argue with your wife (see rule 1)
when in doubt, say, "Yes, Dear", nod and do what she says until she takes on another improvement project, and then, like the rest of us, carry on with your original purpose
Jul 31, 2021 15:20:41 #
Longshadow wrote:
Me neither.
I just edit, send to Costco or print on my printer.
One of these days I'll look to see which monitor the local print matches the most.
I just edit, send to Costco or print on my printer.
One of these days I'll look to see which monitor the local print matches the most.
Not sure I'd recommend that. I used to be satisfied with my prints until I started comparing them to what they looked like as images on my computer screen. Now I'm on a quest, but it feels like I'm tilting at windmills.
Jul 31, 2021 15:17:20 #
joecichjr wrote:
One and Three are amazingly beautiful 🎯🏆🎯 Sorry, but I know nothing about color profiles ☀️🍀☀️
Thank you. That is my wife's eye for a photo and my editing. You can't edit what isn't already there, though, can you? I will pass along your compliment.
Jul 31, 2021 12:17:17 #
Longshadow wrote:
Did you have the box for color correcting checked for Costco?
I check "use as is" so they don't "color correct".
I check "use as is" so they don't "color correct".
Haahaaahaaaaa, yes, they do have that box and they did ask me whether or not I had opted for colour correcting when I complained about the quality of the prints (and I did make sure to avoid the colour correcting option after I had spent a whole bunch of time editing to have the photos exactly (or so I thought) as I wanted them). Later, when I had them printed elsewhere with the same results, I did feel bad for telling them how unsatisfied I was with their work. Blamed them for a mistake they never made.
Jul 31, 2021 11:56:21 #
TriX wrote:
The second part of a calibrated workflow is to sof... (show quote)
Thank you for your reply. I noted in my reply to CHG_CANON that the error may be coming from my rendering intent. I might be saving the file as suitable for a computer screen rather than as suitable for printing. I'll try that, but at the same time I'll ask my print lab about their ICC profile. It does make sense that if I adjust my image based on their profile, the next time it is printed it should come out right.
Jul 31, 2021 11:47:12 #
CHG_CANON wrote:
First, unless the lab says u in writing /u they ... (show quote)
Hello and thanks for the reply.
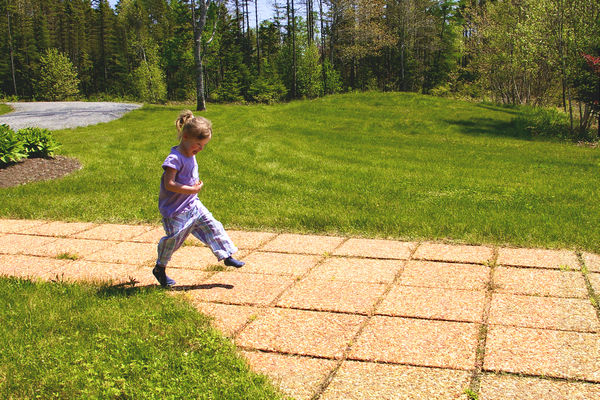
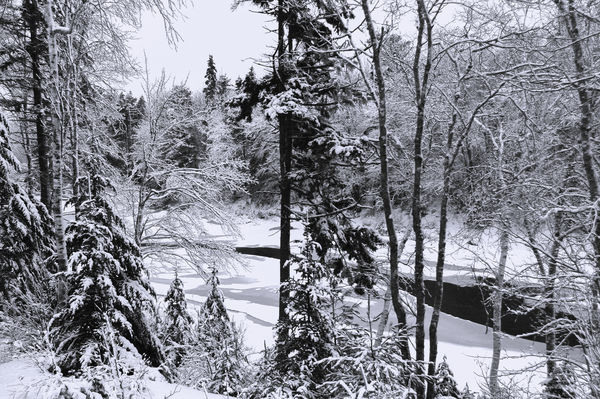
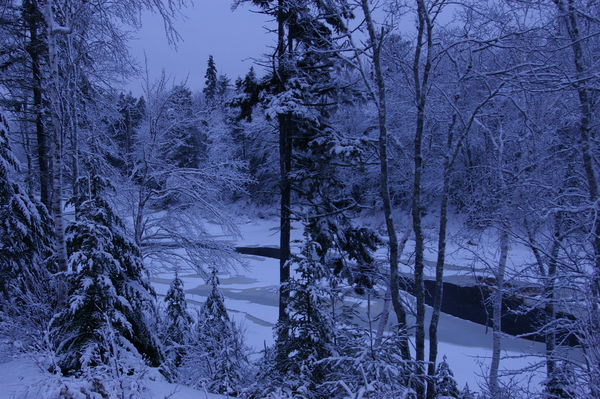
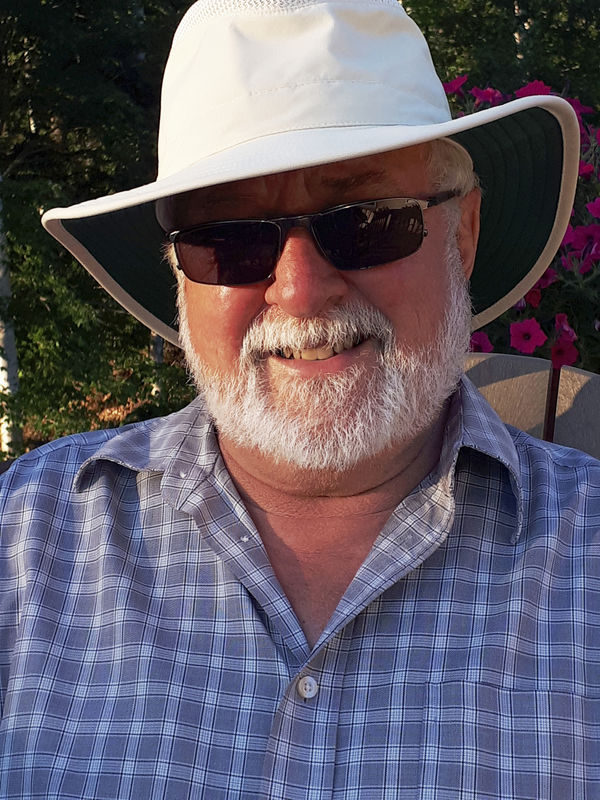
1), 1a), and 4) The files that I sent to the Costco lab were in sRGB and the first set that I took to the photo lab were in sRGB. The owner of the photo shop told me to save them in Adobe RGB, but a second set of prints made no noticeable difference. I'm going to try a different photo lab and I'll take a set in both colourspaces and ask their preference. I've attached four originals and four edited images. Images 1 and 2 were shot on a Pentax K110D as .jpg auto. Image 3 is from a cell phone (.jpg), Image 4 was shot on a Fuji as RAW, Provia Standard, colour chrome effect off, dynamic range auto. Unfortunately I can't give much accurate information about which digital editor was used for each image - I use both Capture One 21 and Photoshop Elements. Image 2 was changed to black & white with Photoshop, both masking and cloning were used in all images. Exposure, luminescence, and colour adjustments were done with Capture One. I haven't found ProPhotoRGB in either program, but in hunting for that I did notice that Photoshop is set to "computer screens" in colour settings and Capture One is set to "perceptual" in Rendering Intent. I usually do my final save from Capture One, but I'll set Photoshop to "no colour management" to discard embedded colour profiles, or to "optimize for printing"; I'll try "relative colorimetrics" or "absolute colorimetrics" in Capture One. I haven't found a way to set my preference for the editing colourspace in either program
2) No luck at all in that department. Neither the Spyder-calibrated Samsung monitor (good monitor but not really colour accurate), nor the factory-calibrated Acer monitor, nor the Spyder-calibrated Acer monitor could come anywhere near matching the prints. All the prints were much darker and "muddier" (yellowish cast) than I could produce with any monitor settings.
3) The editing room is not bright, but I do sit at the monitor with my back to an external window. The Spyder reports that the room is too bright and I should adjust my monitor brightness accordingly. I have yet to try calibrating with the blinds drawn, the door shut, and no other lights on.
4) In the following images the first is the edited image, the second is the original image. The final shot was taken on a Fuji as a raw image and it too large to upload so I changed it, unedited, to a .jpg image.

Jul 31, 2021 09:05:59 #
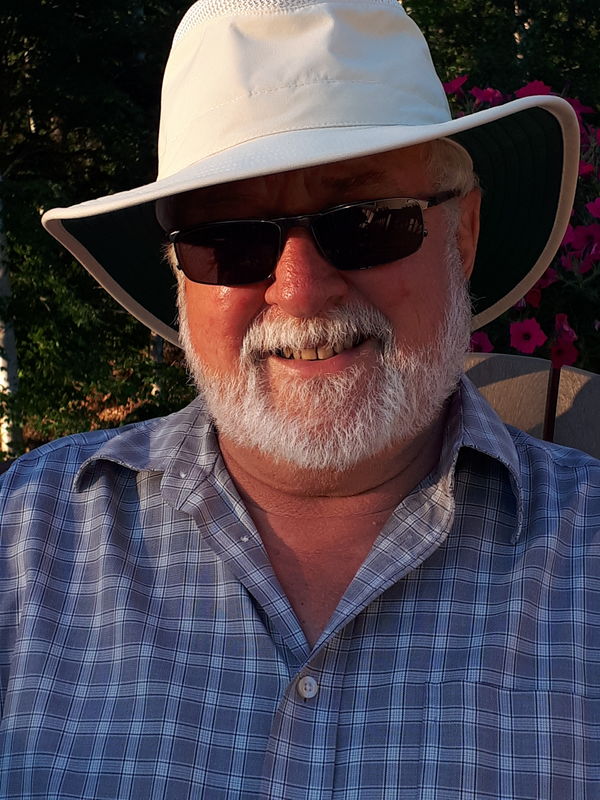
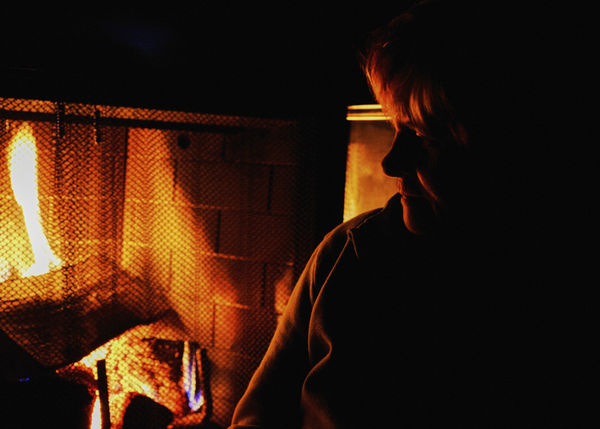
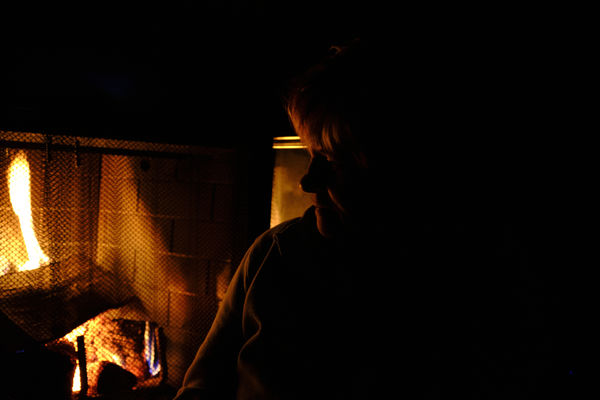
I am trying to have some images printed but they keep coming back with a yellowish cast. First I tried the Costco photo lab, and I thought it was their error, so I went to a local photo lab to have prints made. Same result. They told me I needed to calibrate my monitor so I could see the image as it would be printed. I bought a Spyder device to calibrate my monitor, but soon found it was not possible to get my monitor to agree with the actual prints. Next I bought an Acer monitor which is supposed to be 99% accurate in Adobe RGB. I brightened the digital images with Capture One, saved them as Adobe RGB .jpgs and took them back to the photo lab. One of the images is a black & white scene of trees and snow, and I raised the blue tones to make the snow even whiter and remove any vestige of yellow. I had test prints made this time - 5 x 7 - and they are still yellowish. So frustrated. What am I doing wrong? In one of the of the images the subject is wearing a blue checked shirt, but the print shows the shirt as almost grey. In another the subject's face is lit by firelight, but the print is far darker than the digital image. I can't even adjust my monitor's brightness down far enough to be as dark as the print. Am I making some error in saving the digital files?
Jul 29, 2021 20:41:12 #
I've watched eagles being chased by crows and crows being chased by blackbirds. Sometimes it's not size that matters, but how much damage can be done by the smaller aggressor. The crow that destroys a flight feather on an eagle's wing can cause serious harm. The coyote that bites through a tendon on a grizzly's hind leg might fatally cripple the grizzly. We want so much to understand nature on our own terms, but real shots of nature make us re-evaluate our thinking. It ain't all a Disney movie.
Jun 24, 2021 18:25:20 #
I'm looking at focus stacking. I've installed Affinity Photo (seems to be a great program for its price) and I'd like to edit my focus bracketed shots with Capture One and save them as .tif files before I stack and combine them. Here's the question: if I try to Select All files for editing in Capture One, and there are more than twelve files loaded into the browser on the right hand side, the program goes into an endless loop of trying to show the files on the main (edit) window. When that starts I lose all control over the program - it just goes on and on trying to show the images and telling me there are files that it can't show (for instance, if I have selected All of 20 files, the program shows 11 files, tells me there are 9 more, and cycles continuously to keep presenting images of the 11 files on the main window. The only thing that seems to work is to shrink the program and then stop it, and then delete the Capture One Catalog on my desktop and restart the program with an new catalog (btw, opening and then selecting 12 files works, but with macro focus bracketing, you usually do need more than 12 files. I suppose I could edit 12 variants at a time and save them, but that seems like a huge waste of time). Any ideas on this?
Jun 20, 2021 11:03:56 #
Mark Sturtevant wrote:
From what I understand that you are trying to do, ... (show quote)
I'm still pretty much of a newbie in the world of focus bracketing and stacking software, but the vast amount of help, suggestions, and encouragement on this site are great. Many thanks, and the image of the dragonfly is wonderful. We used to have those little white-bodied guys zipping around our pond when I lived on Nova Scotia's Eastern Shore. I loved watching them. Good memories.
Jun 20, 2021 10:49:56 #
fetzler wrote:
Let me say that I do not have a Fuji camera but I ... (show quote)
Very useful - thank you so much. Your method of measuring the steps in macro focus bracketing is brilliant and the following math is spot on. I'm going to follow your approach with my Fuji. I especially liked the focus bracketing in landscape photography article. I was beginning to doubt whether it could be done, but now I'll go back at it. There is something almost surreal in images where the near foreground and the far background are both in crisp focus. Again, my thanks.
Jun 18, 2021 11:21:34 #
jackm1943 wrote:
It's probably easier just to do it manually. You don't need more than three shots, one as close as possible, one mid distance (around a third of the way to the far end), and one at the far end for landscapes. You can probably do that manually far more quickly and easier than trying to program the camera to do it all.
In the long run this may prove to be the only way. My only problem here is that even with a tripod I seem to move the camera enough while making adjustments that the images don't stack very well. I had hoped with bracketing and with the time interval set to 0 seconds I would be able to get differently focused shots without moving the camera.