Posts for: Linary
Aug 23, 2019 16:54:32 #
maxlieberman wrote:
Thank you, but in this case, I have not processed the images yet. They are still on the SD card. Maybe it is when the camera converts from RAW to JPEG that it arises. When I finally download to the computer and open in Adobe Camera Raw (Elements version) maybe it won't be there.
I had assumed you were viewing your images on a monitor - not the camera screen. The image you see on the camera is not the raw file but a derivative jpg derived from the raw file. If you can see the white fringing on a 3" low res screen, then it may well be horrific on the actual image.
There are several different ways to remove white fringing so if you are stuck, I suggest you post a photo in the Post Processing section - https://www.uglyhedgehog.com/s-116-1.html (don't forget to subscribe) and some of the different methods will be explained and / or demonstrated.
Aug 23, 2019 12:42:19 #
You are describing the white edge line which can occur in camera as well as a Post Processing problem.
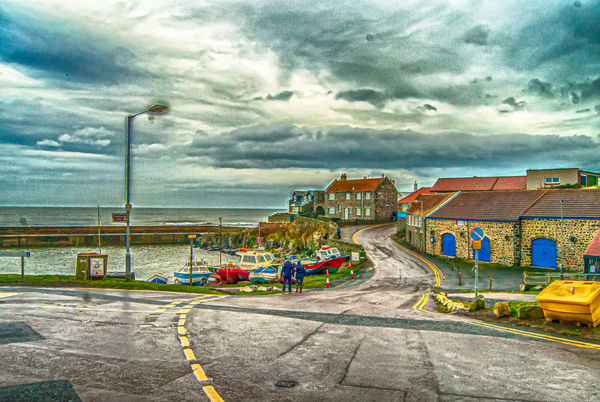
It usually shows up where two edges are touching each other and the contrast is high. It is very common when a picture is "over cooked" (see the example below - look along the horizon and for a really good example along the rooftop where it meets the sky.
This image I have deliberately overcooked to demonstrate the 'halo'.
Over sharpening, over saturation and winding up the contrast and exposure will almost guarantee the effect. To fix it - go back in your History panel one step at a time until the problem disappears, then reduce the amount of whatever the cause.
In this picture, the white band does not show on the original, (not posted), but makes its presence known in the Lightroom History panel at Vibrance and Saturation. The effect had been enhanced greatly by passing through Nik's Tone Mapping software. Check out the lamp-post in the foreground, Green, White, Blue and Purple fringing in one stroke!
Aug 23, 2019 12:12:18 #
tnturk wrote:
Looking for the command “vibrance” in Elements 15. Where oh where are you? Thanks in advance for your patience.
I no longer have Elements and when I did I had v.12.
So I looked up Vibrance in Adobe Elements 15 and it looks as though the command is not there. You could try the Basic panel of Camera Raw which is where it is in the full Photoshop.
You might find the Elements Manual interesting - the colour section in particular. https://helpx.adobe.com/uk/photoshop-elements/using/adjusting-color-saturation-hue-vibrance.html
Aug 21, 2019 14:14:20 #
Pysanka Artist wrote:
I took this shot through the window of a bus using a Canon 7D Mark II and Canon EF 100mm 2.8L macro lens. Here is my original and my shot after post processing. How did I do? What else could I have done to improve the image? I have also attached my cropped image. All comments welcome!
I have never looked at a lion at close quarters but is that pale nose end for real? Perhaps it was a highlight so could you not clone a little hair onto the bald patch rather than cropping? Excellent image, just a wee bit close for comfort

Aug 21, 2019 10:48:02 #
The Courthouse is a splendid photo. I have not commented on that post because I still have not recovered from the impact. The Parrot is good as well, but the Courthouse contains effects that make it an amazing photo.
Aug 21, 2019 10:41:36 #
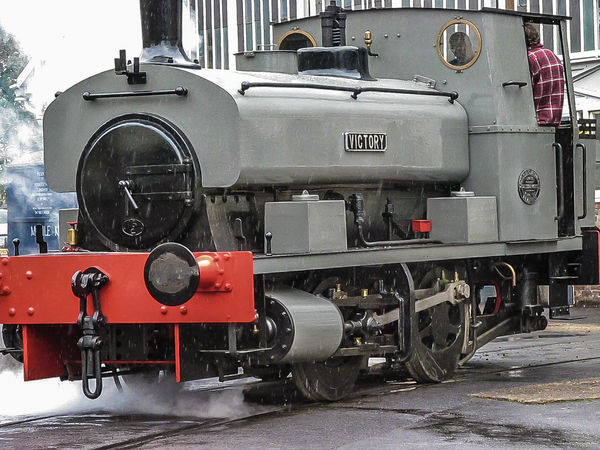
Shot a few years ago on a Canon SX150IS (not the more popular SX50)
I don't use this camera very much now due to lack of viewfinder. I fitted a Delkin shade device to the screen which works, but with no viewfinder I still have to hold the camera with arms outstretched (not a good idea for me).
I don't use this camera very much now due to lack of viewfinder. I fitted a Delkin shade device to the screen which works, but with no viewfinder I still have to hold the camera with arms outstretched (not a good idea for me).
Aug 21, 2019 06:56:39 #
LiamRowan wrote:
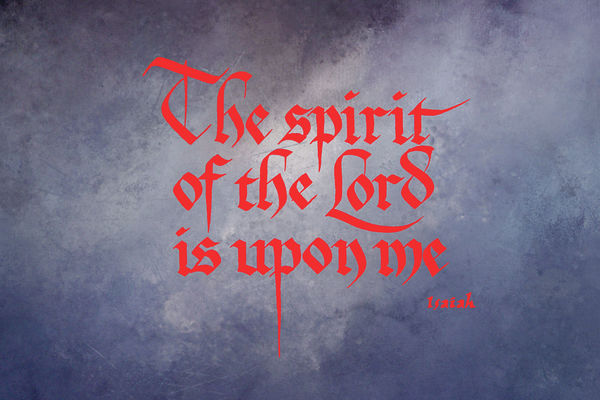
I took a piece of calligraphy I did years ago, and... (show quote)
In Photoshop use the magic wand, tolerance 10, Contiguous unchecked. Click on one of the letters. All the text will be selected, now paint over the new colour.
Aug 20, 2019 06:57:22 #
mas24 wrote:
France does not want to lose their language and culture. In years past, the local governments passed ordinances to prevent businesses from using signs in English. Montreal, Quebec Canada, has been known to do this too. To be an Air Traffic Controller, one must speak English. Worldwide. I didn't know the language of the EU was German?
It isn't, it was English but slowly transitioning to French.
The EEC does not like the British, but does not want us to leave their little Empire either.
Aug 20, 2019 06:40:02 #
Ed Walker wrote:
I have a number of photos taken from a bus which have window reflection. I use Affinity Photo to edit. Is there a way to eliminate the reflection? I have been successful with Inpainting Brush Tool is some instances where the background is consistent, but where the background is varied success has been limited. I will attach a sample.
Another way of using Inpainting is to select an area to be changed - the area should be adjacent to a good area, then press Alt+Backspace or from the menu Edit > Inpaint.
I think cloning is quicker but if you can get success with larger selections this this may be better. The other method is the patch tool, but like the clone tone beware of generating patterns.
Aug 19, 2019 12:06:14 #
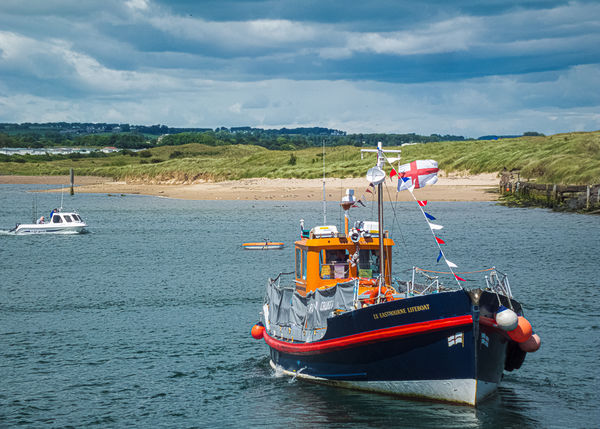
This boat is now a tourist boat taking visitors to view a bird sanctuary a mile or two off the mainland. (Puffins are the main attraction when arrive during May)
Camera is Fuji SX20HS20 EXR
Camera is Fuji SX20HS20 EXR
Aug 19, 2019 11:56:55 #
mwsilvers wrote:
If it was just due to the camera and lens the jpeg... (show quote)
For this image below, I removed the existing image from Lightroom, deleted the xmp file from Explorer, imported into LR, Exported from LR to a folder on my desktop. I switched on the Exif data (in the export dialogue - I usually have this turned off) and uploaded to UHH.
Prior to uploading I checked the Exif data, and in the newly generated XMP file there are several things I do not understand. "Tint +4", "Colour noise reduction 25", "Parametric Shadow Split 25", "Parametric Midtone split 75", "Parametric Highlight split 75", "Sharpen Radius +1", "Sharpen Detail 25" etc. There is a ton of entries suggesting I have attacked the image with a sledgehammer, but all my sliders are zero'd, I have no import presets (apart from adding the date to the file name), and my History Panel for this image reads Imported ~~~ Exported only.
This is why I started this post, Affinity shows the file as one would expect, LR enhances the image without being asked to do so.
I have some images from 2006/7/8, all of which were brought into different (older) versions of LR. None change as much as when imported into LR since CC versions.
The new UHH section for displaying Bridge camera photos got me looking at my old photos from my ancient Bridge camera. They were imported as Adobe Process 2 and 3", Change the Process to version 5 and they also brighten up and become crisper, but not as much as a high megapixel image.
Aug 19, 2019 07:38:35 #
mwsilvers wrote:
You need to check what you did in Lightroom because the horizon has been straightened, the image has been significantly sharpened, and it looks like contrast, clarity, and/or haze removal (or perhaps all three) have been applied. It is most definitely not an unprocessed image.
I did straighten the image (as I mentioned above) but nothing else. The history panel is empty (part from the straightening). When an image is opened in LR the Profiles appear to come into play. Also the process version - mine is current set to 5 (current version). These I do not think (but could be corrected) can be turned off.
Out of interest I have a couple of thousand images dating back over the years - all unprocessed by me. On opening, the profile opens as 'Adobe Standard' and the Process version is 1,2,3,4 or 5 depending on which version of LR was used when the image was uploaded to LR from the camera. I opened one image, an unprocessed raw file which opened in Process version 3, viewed at 100% and changed the Process version to 5. The change was not dramatic but there was a slight increase in contrast and overall sharpness. The image was shot on a Fuji HS20 - a camera not renowned for inbuilt sharpness.
The image posted above was shot on a D7100 - it is hard not to get a sharp photo when using a reasonable lens from this combo.
Aug 17, 2019 09:16:34 #
melueth wrote:
How is it that the LR version has been straightened if it's pretty much SOC? Sharpening is also a default setting in LR . . . not sure how your's is set up, but i didn't know there was any way to auto-straighten in LR. ??
ML
ML
Well spotted - colour - contrast - profiles etc. are untouched. My habit is to straighten before doing anything else and I did notice after posting that I had straightened the image. I rechecked History and nothing else was touched so I let it go. I am not used to Affinity so I have not yet formed the habit. In Affinity Develop Module, straightening is far more cumbersome, Lens > Rotate (leaves transparent borders which have to be fixed by Scaling or in the Photo Persona.)
Aug 17, 2019 06:46:05 #
frankraney wrote:
Photographers life has an article titled "beginners guide to Lightroom".
Seems several newbees have been asking for something like this.
https://photographylife.com/photoshop-beginner-guide
Seems several newbees have been asking for something like this.
https://photographylife.com/photoshop-beginner-guide
Not a bad intro but its really all about Photoshop, not Lightroom.
Aug 17, 2019 06:41:48 #
via the lens wrote:
I have to agree with blurrier, what you did really means nothing in the end. Who would want to convert a RAW file directly to a JPG without processing it? A RAW file is intended to be processed and then converted as needed. Doing this same thing with two cameras while shooting JPEG would make some sense but, for me, the test you did does not make sense. Process two files using the same parameters and that might mean something.
I do not disagree with you at all. The reason I tried this was because there was a post on the main section where it was apparent that several Hoggers use this method of conversion and production of images. Someone tried to explain that raw images need a little or a lot of working on, but the advice fell on deaf ears. I thought I would see what happens with the result of Affinity producing an image as expected but LR has produced an image much closer to a finished photograph.
I do think it is something do do with profiles which, according to Adobe have to be added when the raw date is converted to an image, it just so happens that their default (Adobe) profiles seem to engineer a brighter and more contrasty image than those of Affinity.