My color, Your black & white?
Jan 4, 2019 06:09:35 #
Jan 4, 2019 07:53:26 #
Linda From Maine wrote:
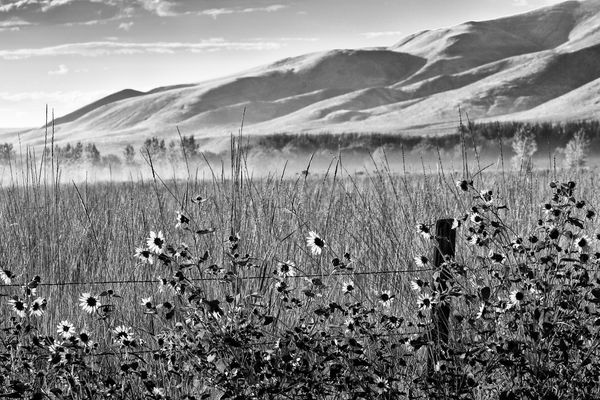
Credit goes to UHH member melueth for this challenge. Please use photo #2 and create a black and white version. Then we'll compare pros and cons to my color interpretation 
Many thanks!
Many thanks!
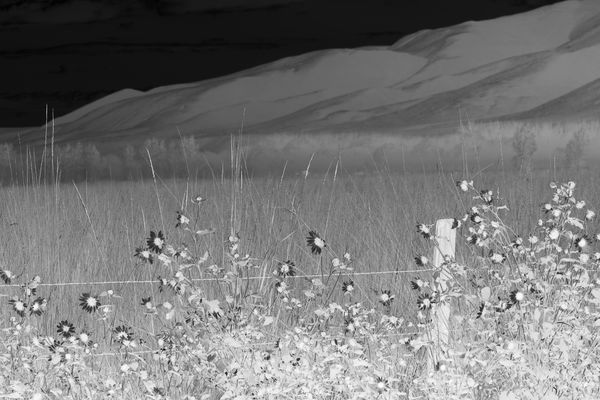
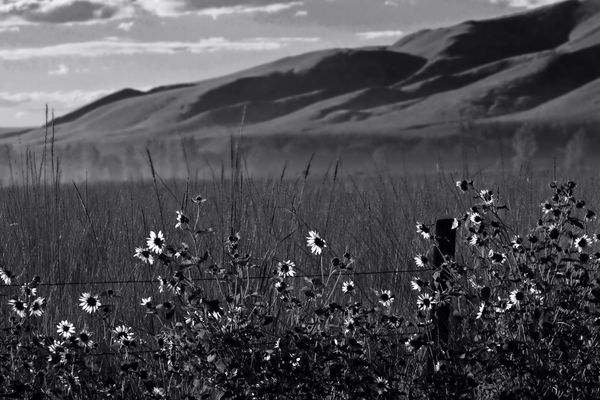
A quick flip to negative BW as a start.
Best seen in Download.
Jan 4, 2019 08:19:18 #

GrandmaG wrote:
Thanks so much for taking the time to share this!First, create a graduated radial filter, with the ... (show quote)
Jan 4, 2019 08:19:35 #
AndyH wrote:
Hi Andy, glad you're enjoying!What an interesting and fun exercise! I vote for Keni's as the best so far... it presents an entirely different aspect to the shot, and illustrates the differences in mood possible between b/w and color.
Great color image as the starting point, Linda.
Andy
Great color image as the starting point, Linda.
Andy
Jan 4, 2019 08:20:39 #
gwong1 wrote:
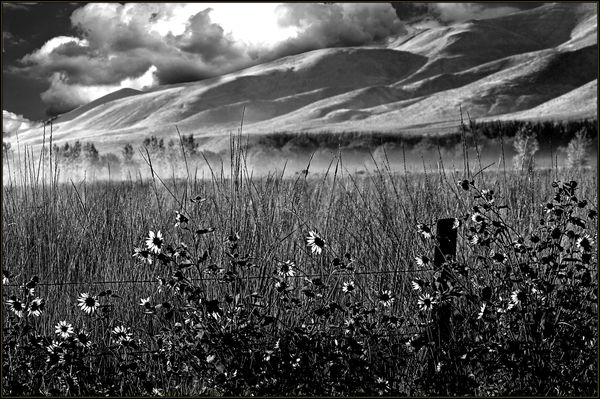
Lots of pleasing details. I love my Nik Collection!Here is my attempt, just used a little of the NIK software. Gary
Jan 4, 2019 08:21:07 #
Stephan G wrote:
Fun!A quick flip to negative BW as a start.
Best seen in Download.
Best seen in Download.
Jan 4, 2019 09:23:25 #

Linda, loved this "assignment". This is my entry. I used Silver Efex Pro and used the Fuji Acros preset. Thanks for all that you do for the forum.

Jan 4, 2019 11:11:31 #
rborud
Loc: Minnesota
Linda From Maine wrote:
Credit goes to UHH member melueth for this challenge. Please use photo #2 and create a black and white version. Then we'll compare pros and cons to my color interpretation
Many thanks!
Many thanks!
Linda Here is my try. RBorud
Jan 4, 2019 11:13:52 #
joehel2 wrote:
Very nice, Joe. Thank you for the compliment also!Linda, loved this "assignment". This is my entry. I used Silver Efex Pro and used the Fuji Acros preset. Thanks for all that you do for the forum.
Jan 4, 2019 11:14:24 #
rborud wrote:
Ohhh, storm clouds rolling in! Very cool Linda Here is my try. RBorud
Jan 4, 2019 11:26:43 #

Played with a lot of settings attempting to make the flowers stand-out.
Jan 4, 2019 11:28:23 #
SoHillGuy wrote:
And very successful you were, Gaylord!Played with a lot of settings attempting to make the flowers stand-out.
Jan 4, 2019 11:54:57 #
Linda From Maine wrote:
Credit goes to UHH member melueth for this challenge. Please use photo #2 and create a black and white version. Then we'll compare pros and cons to my color interpretation
Many thanks!
Many thanks!
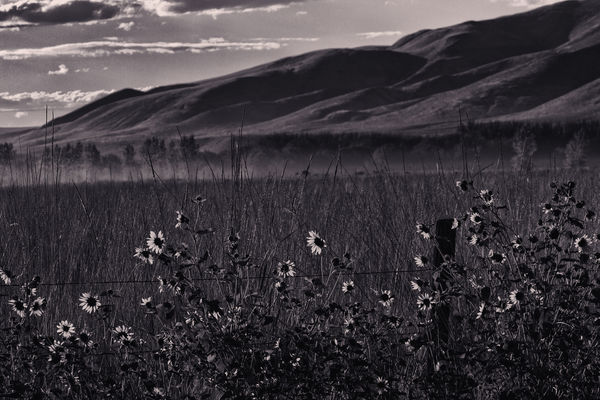
I like my B&Ws dark and moody. The sunflowers add just a touch of brightness to the image.
Jan 4, 2019 12:07:16 #
Stephan G wrote:
A quick flip to negative BW as a start.
Best seen in Download.
Best seen in Download.
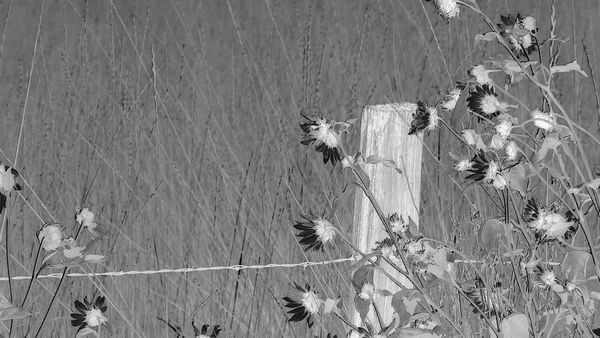
A detail from the neg BW.
I like the way it presents itself. I just increased the contrast a little and picked up a little more sharpness overall.
Again best seen in Download.
Jan 4, 2019 12:19:24 #
Curmudgeon wrote:
Mood is good! (moo is goo or mud is gud? Ain't English weird I like my B&Ws dark and moody. The sunflowers add just a touch of brightness to the image.
 )
)
If you want to reply, then register here. Registration is free and your account is created instantly, so you can post right away.