HDR with subject in rapid motion.
Mar 28, 2017 17:17:26 #
mikegreenwald
Loc: Illinois
speters wrote:
Take the shot, wait 'til the subject left the frame, then take your HDR and in PP, superimpose subject back into frame!
With waves or moving water, that would be quite a wait. For all situations one would have to hope that the light intensity and angles don't change too much. It might work pretty well for a single runner for example, or a running animal or flying bird.
Mar 29, 2017 07:32:10 #
TriX wrote:
Uh oh - you've done it now Bob - you used the ETTR word 😁. You know what's coming now...
ETTL Or, EC (Expose Correctly)

Mar 29, 2017 07:48:36 #
If the motion part of the picture is not too big you can consider taking several bracketed exposures (i.e. normal HDR practice) and combining them in your favoured HDR processor. Then take the HDR output and layer it in Photoshop with a mid-exposure original image. Then brush through the motion part from the original image so you get a single combined output. Personally I've not tried this with fast-moving objects so it could get tricky - a lot will depend on the nature of the rest of the image and if the immediate background to the moving object gets substantial HDR treatment.
Mar 29, 2017 07:58:20 #
The better way is Photomatix's "selective deghosting". This allows you to select multiple portions of an image and to set a base frame for each one. The caveat here is that if the base frame that you choose for an area contains blown highlights, those will be blown in the final HDR, and if the base frame you choose is too dark, you will increase noise in the selected area. So you need to take some care to make sure that the subject in the position you want is exposed within a couple of EV from the normal exposure for the subject.
The good news is that the selection blends seamlessly into the rest of the image in terms of the tonality. It's actually pretty amazing how well it works. Other programs allow deghosting of the entire frame from a chosen base frame, but the stronger the deghosting, the worse the dynamic range of the final image. Only Photomatix has selective deghosting, and it has saved my ass many a time. Check these out:
The good news is that the selection blends seamlessly into the rest of the image in terms of the tonality. It's actually pretty amazing how well it works. Other programs allow deghosting of the entire frame from a chosen base frame, but the stronger the deghosting, the worse the dynamic range of the final image. Only Photomatix has selective deghosting, and it has saved my ass many a time. Check these out:
Mar 29, 2017 07:58:22 #
The better way is Photomatix's "selective deghosting". This allows you to select multiple portions of an image and to set a base frame for each one. The caveat here is that if the base frame that you choose for an area contains blown highlights, those will be blown in the final HDR, and if the base frame you choose is too dark, you will increase noise in the selected area. So you need to take some care to make sure that the subject in the position you want is exposed within a couple of EV from the normal exposure for the subject.
The good news is that the selection blends seamlessly into the rest of the image in terms of the tonality. It's actually pretty amazing how well it works. Other programs allow deghosting of the entire frame from a chosen base frame, but the stronger the deghosting, the worse the dynamic range of the final image. Only Photomatix has selective deghosting, and it has saved my ass many a time. Check these out:
The good news is that the selection blends seamlessly into the rest of the image in terms of the tonality. It's actually pretty amazing how well it works. Other programs allow deghosting of the entire frame from a chosen base frame, but the stronger the deghosting, the worse the dynamic range of the final image. Only Photomatix has selective deghosting, and it has saved my ass many a time. Check these out:
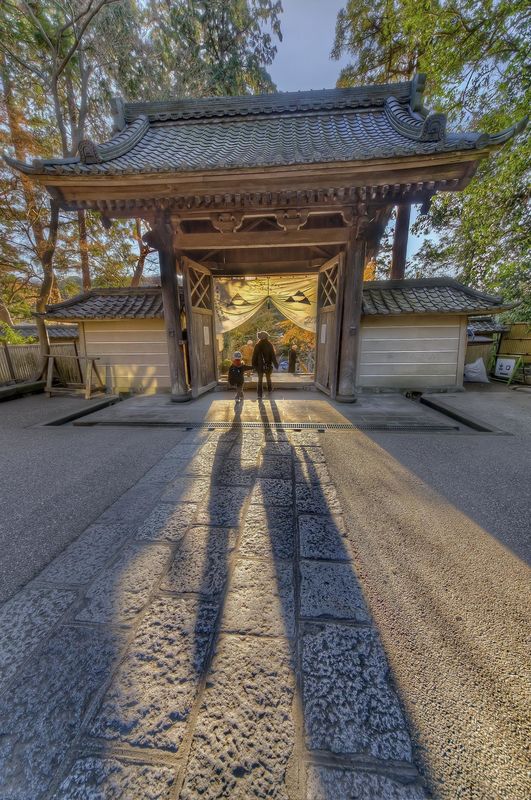
Engakuji Temple, Kamakura, Japan
(Download)
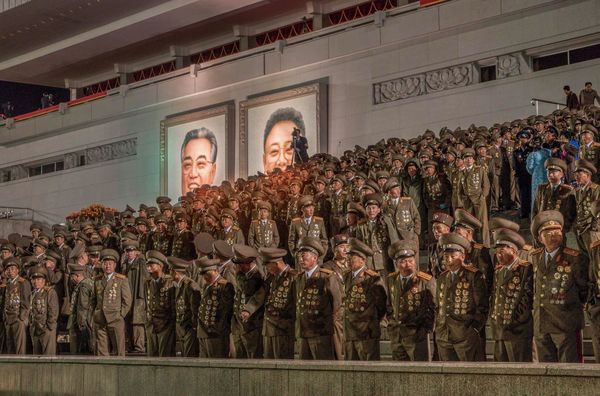
Kim Il Sung Square, Pyongyang, NK
(Download)
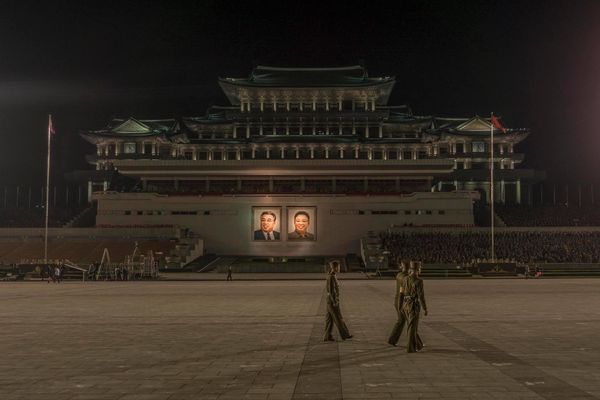
Kim Il Sung Square, Pyongyang, NK
(Download)
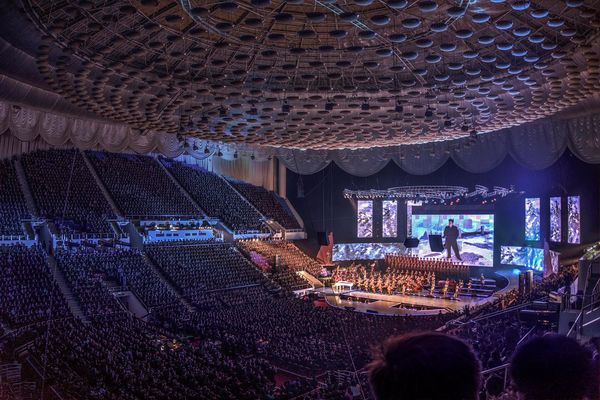
Moranbong performing in Pyongyang
(Download)
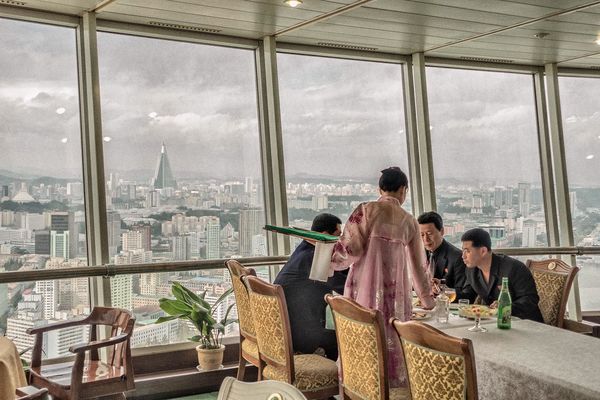
Lunch in the Yanggokdo Hotel, Pyongyang, NK
(Download)
Mar 29, 2017 08:11:44 #
StanRP
Loc: Ontario Canada
mikegreenwald wrote:
Facing a subject such as flowing water, wildlife i... (show quote)
My practice is to underexpose by 1 EV to minimize washout of the bright. Then, in PP I create additional images at plus & minus 2 EV from the original. Then use the three images in what's called pseudo HDR, to create a final image. Usually it works, but sometimes the range of light is just too great to get both shadow and highlight detail.
Is there a better way?
Hi Mike,
This does not increase the light range in the original photograph so playing around with created images from the original will not help.
The RAW image file has far more information than JPG so if your camera has the option for RAW files, - expose the photo so as to NOT blow out the highlights (The dreaded ETTR) and use software to adjust shadows etc. (even use the CURVES ).
The ETTR works because a blown highlight is so obvious while loss at the dark end - well it is hidden in the shadows :-)
Mar 29, 2017 09:00:37 #
Mar 29, 2017 09:19:11 #
I have changed my ISO to compensate for the lighting. This keeps my aperture, depth of field,
the same.
the same.
Mar 29, 2017 10:01:39 #
mwsilvers
Loc: Central New Jersey
kymarto wrote:
The better way is Photomatix's "selective deg... (show quote)
Seperate from this HDR discussion, the photos of North Korea are incredible. I find the one with the large mass of North Korean officers most interesting, primarily because a significant number of them are standing there with their hands in their pockets, something I've never seen a soldier from any army anywhere do while in uniform.
Mar 29, 2017 10:15:40 #
mikegreenwald wrote:
Facing a subject such as flowing water, wildlife i... (show quote)
Unfortunately there is no ONE better way to deal with these situations. If you can analyze and decide what is needed, you can shoot accordingly [bracketing, correct exposure, fast shutter speed, etc.]. OR you can do what I often settle on: all of the above... I take various exposures in case I need to use HDR, I try to get the best exposure settings and shutter speeds I can, sometimes I use the same settings more than once for more choices, then go home and play with it!
If you have one image that will work well with normal editing, that is great. If you have too great a dynamic range, the HDR probably will work best. When things are in motion, and you have ghosting, you can use the Photomatix selective de-ghosting [which I just learned about here, and have to try it!]. You can also use layers instead of HDR. Used with different images taken with the same settings, you can put each image into a layer and hide and reveal the areas that have the best of each. I took a photo in which there was an American flag blowing around. It ghosted in HDR. I used a combination of layers for hiding and revealing where I could, then used cloning for the rest.
It is not always easy [at least for me] to decide in advance which way to deal with the various situations encountered. I have actually learned a lot about the capabilities in PS by experimenting to see what works the best! Time-consuming, but I enjoy the process - especially when it works...
Mar 29, 2017 10:45:40 #
photoman022
Loc: Manchester CT USA
I regularly take the faux HDR approach. I expose for the high lights and then, in Camera Raw, draw out the details in the shadows. I often make 5 or 6 exposures in Camera Raw then photo merge them in Elements.
Mar 29, 2017 11:06:17 #

mikegreenwald wrote:
Facing a subject such as flowing water, wildlife i... (show quote)
mike,
How about considering this option?
1. Use an external flash attached to the hotshoe on the camera to fill in the shadows.
2. For bright backgrounds, set the camera Exposure Compensation to -2Ev, and allow the flash to expose the foreground.
(When the exposure is captured the camera shutter controls the exposure on the background, the flash exposes the foreground. This works best with camera and flash using ETTL technology.).
The above works very well with RAW captures and will provide a much wider control over the final product.
Some PP RAW software will allow the user to split the RAW capture into three editable images and then merge the three exposures into one image ready for final editing in the normal editor program.
Michael G
Mar 29, 2017 13:09:31 #
amfoto1
Loc: San Jose, Calif. USA
mikegreenwald wrote:
Facing a subject such as flowing water, wildlife i... (show quote)
I frequently do something similar...
I'd suggest you not deliberately underexpose the image. That will tend to increase digital noise and is usually unnecessary. Take the image "properly" exposed and use that as your "middle" or main image file... then create one at +1/2 stop... +1 stop at most... and another at - 2 or -3. You might only need one or the other.... depending upon what you're trying to accomplish (i.e., whether you are trying to darken or brighten the background). You can "pull" exposures back down in post-processing a whole lot better than you can "push" it up from underexposure. In other words, in digital images slightly blown-out highlights are generally more "recoverable" than too-dark shadows.
For a more "normal", less HDR-looking image, use narrower range of difference between only two or three shots. For a more exaggerated HDR effect, use wider range of difference and possibly more shots (4, 5 or more).
Here are a couple examples, both of which I was trying to avoid "HDR exaggeration". (Both finished images are slightly over-saturated due to the printing process that was going to be used.)
This first example is done with single shot that was shot using best possible normal exposure for the primary subject, then double-processed: one for the shaded indoor subject, the second about - 2 or -3 stops to recover some of the very overexposed, sunlit, outdoor background. Exposure, color temperature and tint were all adjusted differently, then portions of each image were manually combined:
 +
+  =
= 
Above, left image is the normal exposure for the subject.... center version is -2 or -3 stops to recover background... and the far right image is the result manually combining the two.
Here's another example that's more subtle... an outdoor and brightly backlit subject, normally exposed (but exceeding the dynamic range of the camera). Here I wanted to both recover some highlights and to open up the shadows a bit. For this I started out the same way with a single image, then made three versions... one about +1 stop, one without any adjustment to exposure and the third -1 stop. Not a wide range of difference, because my goal was a "normal, unexaggerated" look. There also was no need to tweak the color temp and tint in this case, since the entire scene is sunlit. And here I automatically combined using Adobe Photoshop Photomerge HDR (stripping the three images together manually would be near impossible!):
 +
+  +
+  =
= 
Far left image is +1 stop in post-processing, next version of image is 0 adjustment, third shot is -1 stop in PP... and far right image is the final "HDR" composite of the three.
I know with this second example it's difficult to see the difference at Internet sizes and resolutions, plus even the best graphic quality backlit LCD computer screen "clips" both highlight and shadow detail... The end result is intended to be rather subtle improvement over the original image and it's more noticeable when prints are compared.
Note: While I refer to "stops" above, I'm making my adjustments in Lightroom using its "virtual copy" feature, very convenient for this sort of thing. Lightroom adjustments aren't indicated in actual stops, so I'm estimating.
So, basically I'm doing same as you. Yes, it might be possible in some cases to take two shots, as previously suggested... one with the moving subject and a second of just the background.
But I think the main mistake people make is "fear of blowing out highlights" that causes them to underexpose, which makes for a lot more noise in their images.
There is probably some variation from camera to camera, but I've found highlights in digital images are a lot more recoverable than most people think. The top example above, the outdoor light was probably 4 or 5 stops brighter than the indoor that I was exposing for... so the outdoor sunlit background ended up extremely overexposed.... yet quite a bit of it was recoverable. Also, often you can't fully see the highlight and shadow details on a computer screen, but will see them both in any prints made from the image. In other words the dynamic range of a backlit LCD computer monitor screen is less than that of the print.
EDIT: a later post reminded me of another important thing.... Yes, I also shoot RAW almost exclusively. RAW files have much more latitude for adjustments such as shown above, and both those were originally shot RAW and processed in 16 bit mode, then reduced to 8-bit JPEGs as a final step. (Usually I shoot only RAW, sometimes RAW + JPEG if images are needed immediately, there's no time for post-processing... Virtually never shoot JPEG only.)
Mar 29, 2017 13:12:16 #
mikegreenwald
Loc: Illinois
StanRP wrote:
My practice is to underexpose by 1 EV to minimize ... (show quote)
I always shoot RAW. Camera is now a 5D4, though until it was available 5D3, where the situation arose previously. Until 8 or 9 yrs ago, I had no idea how to approach it.
I've tried something close to this suggestion in LR, but when I dealing with something like windblown leaves or a mountain stream moving in and out of deeply shaded areas and bright sunlight, it either didn't work well, or because so tedious and time consuming that I reverted to the method used in the OP.
Mar 29, 2017 13:39:36 #
mikegreenwald wrote:
I always shoot RAW. Camera is now a 5D4, though until it was available 5D3, where the situation arose previously. Until 8 or 9 yrs ago, I had no idea how to approach it.
I've tried something close to this suggestion in LR, but when I dealing with something like windblown leaves or a mountain stream moving in and out of deeply shaded areas and bright sunlight, it either didn't work well, or because so tedious and time consuming that I reverted to the method used in the OP.
I've tried something close to this suggestion in LR, but when I dealing with something like windblown leaves or a mountain stream moving in and out of deeply shaded areas and bright sunlight, it either didn't work well, or because so tedious and time consuming that I reverted to the method used in the OP.
This is where PS comes in. Using layers you can underexpose on one and overexpose on another layer and then hide or reveal to equalize bright and dark in one image. Sometimes blending is a bit tricky, but using a very soft brush that is fairly large on the junction of light and dark will help with blending.
The main thing is not to have any completely blown out highlights or completely dark shadows in the final image. Nothing can be retrieved once that happens, and even when some of the image can be brought out, the noise level is unacceptable. This is one of the reasons, I believe, for why HDR [with multiple images] was developed, and why working with layers [with one image - or more] in PS is a must-know application.
If you want to reply, then register here. Registration is free and your account is created instantly, so you can post right away.