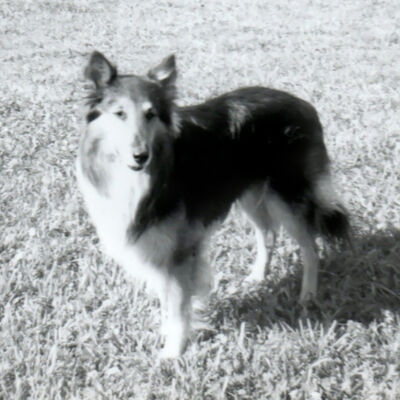
2201 - Challenge - Horribly Underexposed
Jan 24, 2014 01:05:19 #

MtnMan wrote:
I really struggled with the distortion correction. Couldn't make it happen in Lightroom so had to go to free transform in CS6.
Did a little sharpening and noise reduction while there.
I used the radial filter in Lightroom to put the light on your husband. And some noise reduction.
Did a little sharpening and noise reduction while there.
I used the radial filter in Lightroom to put the light on your husband. And some noise reduction.
Looks overly sharpened to me. Is it?
Jan 24, 2014 01:34:55 #
BigDaddy, when I brushed to lighten the underexposed parts, the colors were decidedly desaturated. What am I doing wrong?
Jan 24, 2014 11:42:07 #
abc1234 wrote:
BigDaddy, when I brushed to lighten the underexposed parts, the colors were decidedly desaturated. What am I doing wrong?
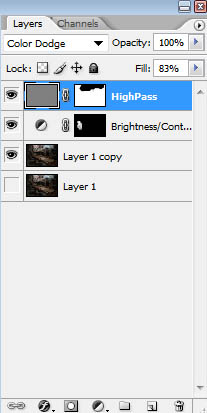
Not sure what you are brushing on, so it's hard to say. If you used the action I posted, make sure all the steps are in there, desaturation is one of them, and color mode another. Make sure you are working with a copy of the original picture under the HighPass layer and both layers are active. The HighPass layer looks like a silver mess, nothing to see, don't brush on that, brush on the layer mask you have to make for that layer. Also, I use a low opacity brush when doing this sort of stuff, not a hard brush. I also made a brightness/contrast adjustment layer which automatically creates a mask and I filled the mask with black, then painted on just on the man with white so only the man was brightened, also painted with a low opacity brush.
Jan 24, 2014 12:06:07 #
abc1234 wrote:
BigDaddy, why the high pass filter rather than another way of sharpening?
I made this action many years ago to lighten dark pictures. I got the steps off the internet somewhere. I just posted the steps for the action. It works amazingly well for me. I suggest those with PS do the same and see how it works for you. I think it would also work fine in elements also, but you would have to create the action with PS, as elements does not allow you to create actions, but you can _use_ actions already created. (assuming elements has a high pass filter)
So, the reason I use the high pass filter in this action is because it works amazingly well in combination with the steps I listed. It is my most used action, I use it all the time on any picture that is too dark, or needs some spots lightened. Generally all I need do is run the action then adjust that layers opacity until the brightness is how I want it. If some spots are too dark or light, I add a mask and fine tune things with a mask.
In this one, I also made a brightness/contrast adjustment layer to brighten just the man, using a mask filled with black, then painted in white over just the man, as he needed a bit more brightening. In the highpass layer mask, I painted the light workshop walls in black because they were bright enough.
Those not familiar with masks, black erases, white un-erases and you can adjust the opacity of the black/white brushes to partially erase/un-erase
Here is my layer pallet for this picture. Note that the HighPass mask has it's opacity reduced to 83%
If you want to reply, then register here. Registration is free and your account is created instantly, so you can post right away.