How do I photograph people with dark skin color?
Jun 30, 2013 09:56:18 #

Recently I photographed 100 Forner classmates at a reunion. I am not happy with the results of some of the pictures of my black friends If there are some black photographers on this forum, I would really like to hear from them.
How do I take a good picture of a black person? I unfortunately did not have the luxury of changing the backdrop, and I did use a flash on everyone. I did some post processing, but that didn't help much.
We are doing this again in a few years and I want to be ready.
How do I take a good picture of a black person? I unfortunately did not have the luxury of changing the backdrop, and I did use a flash on everyone. I did some post processing, but that didn't help much.
We are doing this again in a few years and I want to be ready.
Jun 30, 2013 10:22:15 #

I have photographed people of various skins shades. I have found opening the lens a stop to be fairly affective. Harsh or hard light makes it more difficult to photograph people with darker complexions. I am a pale person but I hope this helps.
Jun 30, 2013 10:31:27 #
Jun 30, 2013 10:33:55 #

Well I'm black, though I'm not very dark. I've never really had issues with dark skin(I mostly photograph Indonesians and some are quite dark)
The issue has always been photographing dark people with lighter people.
How about showing some of the pictures?
The issue has always been photographing dark people with lighter people.
How about showing some of the pictures?
Jun 30, 2013 11:06:15 #
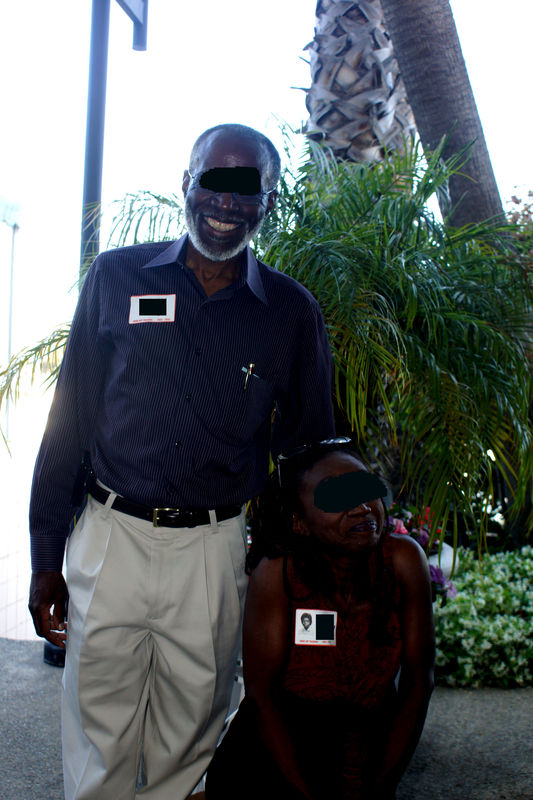
Here is one... I realize that the bright backdrop doesn't help, but I am even having trouble pulling out the detail in post.
Jun 30, 2013 11:18:14 #
They are slightly under exposed for the subject. The bright background may have confused your settings and it provides too much flare and glare. A fill flash would have evened out the exposure but not added too much shine on the faces.
BillA77V wrote:
Here is one... I realize that the bright backdrop doesn't help, but I am even having trouble pulling out the detail in post.
Jul 1, 2013 05:52:30 #

Jul 1, 2013 06:51:16 #
CurreyPhoto
Loc: Reddick, Florida
BillA77V wrote:
Here is one... I realize that the bright backdrop doesn't help, but I am even having trouble pulling out the detail in post.
One quick way to solve this problem is to set your camera for spot metering, then use exposure compensation to darken the picture a bit, probably from .3 to 1.0. In your picture I would measure on the skin or dark shirt. Your meter will give you an exposure that makes the skin tone medium gray. That is the reason to use some negative exposure compensation.
Jul 1, 2013 07:02:05 #

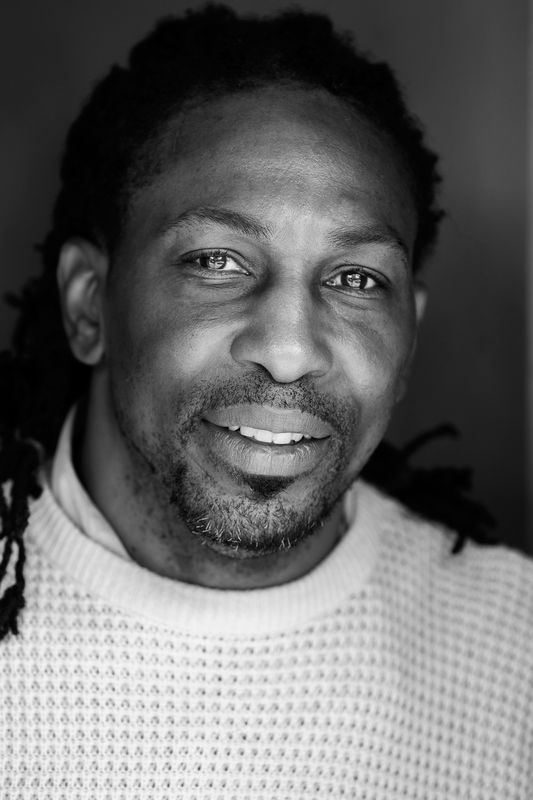
Choose your background very carefully. This applies no matter what the skin color is. Your camera can only handle a certain dynamic range. I like to choose a background only a little lighter than the subject.(Usually pretty dark)
Here is an example. (White shirts are rarely good but will work with Dark skin)
Here is an example. (White shirts are rarely good but will work with Dark skin)
Jul 1, 2013 07:06:05 #

Your background is confusing your camera.Try using your flash with a diffuser.if possible bounce your flash off a wall or ceiling,this will also eliminate reflection from the skin tones. Take your meter reading from close up on your subject.I hope this will help.
Jul 1, 2013 09:00:56 #

You don't say what camera you're using. Anyway have you tried setting your camera to Centre-weighted or Spot metering??? Also try setting your Exposure Compensation anywhere between +.3 to +1.0.
Hope the above helps.
Hope the above helps.
Jul 1, 2013 09:20:59 #

When possible, move in close for your settings, then back off for composing. I've never had much trouble with differing skin colors.
Jul 1, 2013 09:27:50 #
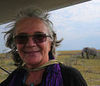
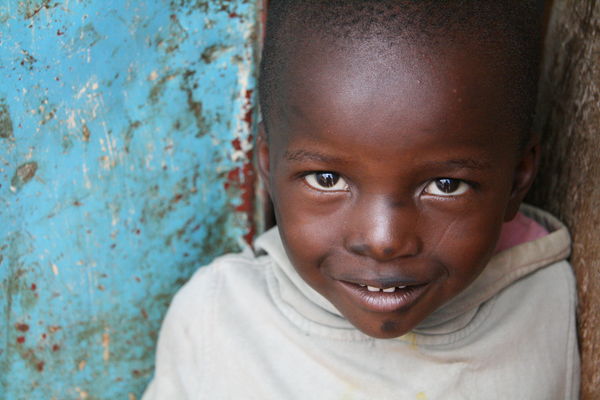
I looked at your picture and I think it would have been difficult to have any success with all this light in the background. Here is one taken in Nairobi last year, with my camera being on automatic...
BillA77V wrote:
Recently I photographed 100 Forner classmates at a... (show quote)
Jul 1, 2013 11:01:00 #
DannyJS wrote:
You don't say what camera you're using. Anyway have you tried setting your camera to Centre-weighted or Spot metering??? Also try setting your Exposure Compensation anywhere between +.3 to +1.0.
Hope the above helps.
Hope the above helps.
You need minus compensation for dark tones-not plus!
Remember the zone system?
Fed Archer/Ansel Adams developed the Zone System
To control exposure and contrast for black and white film photography
And To pre-visualize finished image after post processing in the darkroom,
There are11 zones black to white-each zone represent 1 EV (exposure value) stop:
0 Total black
I Almost black-no detail
II Dark grey-black -very dark detail in shadows
III Very dark grey-shadow detail-dark animal fur
IV Medium dark grey-dark green foliage, shadow side of Caucasian face
Dark stone-landscape shadow-dark skin-details plainly visible
V Medium grey-green grass-grey stone-dry tarmac-excellent detail
VI Rich mid-tone grey-Caucasian skin in sunlight-light stone and sand
VII Bright light grey-white with texture-silver hair
VIII Almost white-Delicate texture-no detail-reflected highlights on Caucasian skin
IX Nearly pure white
X Absolute white
Each zone is a tone between black and white
Each zone is either half or twice the exposure of its neighbour, depending on whether you are going up or down, For example Zone III is 2 stops darker than zone V, and zone VII is 2 stops lighter than zone V-As you move your exposure one stop (ev) say, from f 8 to f 11,or from 1/60sec to 1/125sec, you will have moved the exposure one zone
Although developed for black and white film, it can still be useful for digital imaging, and once you get used to using it, your resulting images will be superior to anything you have done before..
It can be difficult to understand that when working in color, that black and white and tones of grey can apply. Your cameras meter sees in black, white and tones of grey in between.
So to help you understand:
Your cameras built-in meter will average everything it sees as mid-grey (18% or 13%-whichever you believe to be correct) > ZONE V!
To prove that this is so, try this experiment:
Get a piece of white paper and a piece of black paper ( A4 sheets) take separate photo of each sheet, filling the frame, in the same lighting conditions, using the cameras meter - Surprise, Surprise! They both came out mid-grey. This is because the cameras meter averages out the scene, giving an average exposure for the scene at ZONE V.
The cameras light meter will measure and average everything its pointed at
So it becomes necessary to switch to spot metering-a spot meter will measure only a very small angle (1-2 Degrees)-spot metering will let the camera know the most important part of the scene in front of it.
Ok. Lets assume you have a Caucasian model against a relatively dark background-So you assess the scene before you, and decide that the models face is the most important part of the scene.
Usually Caucasian skin registers at Zone VI or Zone VII, (Even though we are looking at a color scene, the camera only sees light and dark.) When we spot meter for models face, this will register on camera as Zone V
We have decided to rate the models skin at Zone VII, and this means we must open up 2 EV stops to achieve this:
If we are in manual shooting mode, this will require us to either a) Decrease the shutter speed from, say 1/250th sec to 1/60th sec, or b) 0pen up aperture from, say F8 to F4.
If you are in auto mode/scene exposure mode, set exposure compensation to +2
Always do a final check using your histogram: In some situations, by placing the subject at a certain zone, could result in other areas of the image being under or over exposed.
Jul 1, 2013 12:03:34 #
You really needed to shoot this at a much faster shutter speed and then using some fill to get the right exposure on the people.
If you want to reply, then register here. Registration is free and your account is created instantly, so you can post right away.