stupid question time
Jan 1, 2013 15:58:48 #

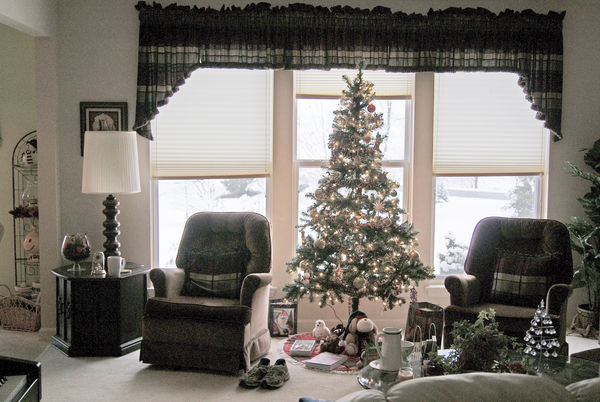
All kinds of advice here - my best choice would be learning more about indoor use of flash -
tilll then here is a quick PP in CS4 - some of each in the description
Harvey
tilll then here is a quick PP in CS4 - some of each in the description
Harvey
Shadow/highlights>levels>brightness contrast> unsharpmask
Jan 1, 2013 16:00:07 #
Jan 1, 2013 16:12:57 #
Thanks - I love challenges like this - that shadow/highlight tool does wonders. I used a photo like this to sell a friend on the Canon SX40 as he was worried about the flash strength.
Pepper wrote:
Nice job Harvey
Jan 1, 2013 17:58:51 #
Harvey, a great "save". Looking at the original I would have never guessed there was that much detail left.
Jan 1, 2013 18:20:52 #

Harvey wrote:
All kinds of advice here - my best choice would be learning more about indoor use of flash -
tilll then here is a quick PP in CS4 - some of each in the description
Harvey
tilll then here is a quick PP in CS4 - some of each in the description
Harvey
Harvey,
I am shocked at the detail you were able to bring out of the original.
If this was April instead of January I would have thought you and planepics were playing a joke on us!
Jan 1, 2013 19:03:39 #

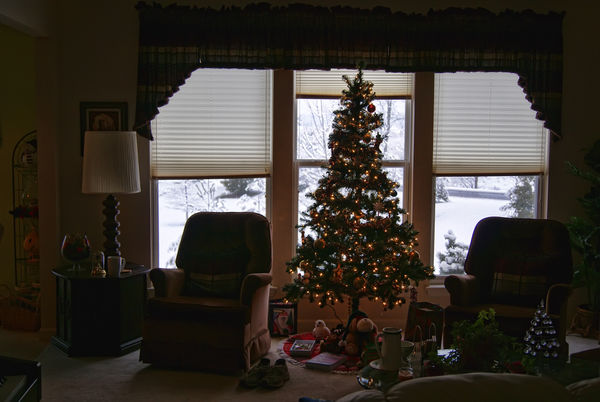
Harvey and Bret's PP got me to wondering what Topaz Adjust (inside CS5) could do. It can do adjustments on a zone basis which means that details can be brought out of the shadows AND the highlights.
It's hard to tell, but to me it looks like it is overcast outside so the darkness in the room is somewhat natural looking. However, all the details get pulled out of the darkness - corner shelves far left; Santa and items under tree; coffee table objects; potted plant (and driftwood?) far right. If you try to bring the gamma up for more brightness the horizontal seams/creases in the chair backs goes to that ugly green over-processed shadow color. (Edit - upon looking closely after posting this, I see that what I thought was a shadowed seam/crease is actually the top edge of a pillow that is actually dark green. A little brightening would be warranted.)
I was pretty surprised at what a few clicks and a couple of slider adjustments inside Topaz Adjust are able to do.
(Like Bret's D-Lighting adjustment - my adjustment pic may appear pretty dark inside the UHH webpage - download to see it better. This applies to Bret's adjustment too.)
planepics photo - Topaz Adjusted - denoised
Jan 2, 2013 00:05:14 #
Due to my impatient and random places I shoot photos of opportunity I find myself doing lots of PP _ and I enjoy doing it. Long ago in PS 5.5 I found I could bring out detail from shadowed/darker areas of a photo by selecting the area and using image>image adjustment> brightness/contrast ( pushing the brightness slider brought out faces from under hat brims and such) then a while back I was introduced to the "Highlights/Shadows" tool on CS4 which works wonders on whole photos. Along with other tools PP can be really enjoyable - helping save a photo or showing some one a new PP technique.
Thanks for the pat on the back.
Harvey
quote=Curtis_Lowe]
Harvey,
I am shocked at the detail you were able to bring out of the original.
If this was April instead of January I would have thought you and planepics were playing a joke on us![/quote]
Thanks for the pat on the back.
Harvey
quote=Curtis_Lowe]
Harvey wrote:
All kinds of advice here - my best choice would be learning more about indoor use of flash -
tilll then here is a quick PP in CS4 - some of each in the description
Harvey
tilll then here is a quick PP in CS4 - some of each in the description
Harvey
Harvey,
I am shocked at the detail you were able to bring out of the original.
If this was April instead of January I would have thought you and planepics were playing a joke on us![/quote]
Jan 2, 2013 00:23:28 #
I have found that in most dark digital photos there is detail that can be brought out - unlike over exposing which washes out detail.
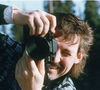
This is a shot I used to show a friend of mine that sometimes it did not matter if you popped up you flash for that quick snap shot. He was a very experienced SLR shooter - but shying away from digital because of flash strength and asa/iso choices.
He bought the SX40 the next week took it on an Alaskan cruise and never missed a shot. Well not many he is 85 and loves the IS as well as the super Zoom.
Harvey
Saved no flash shot
Jan 2, 2013 05:34:38 #
It is not a STUPID question. It is a lack of understanding just how digital or film works.
Camera sensors read light, but their dynamic range is limited to a max brightness and darkness at the same time. The eye, designed by the Good Lord does a far more efficient job and can see both dark and bright at the same time fairly well. What you see is NOT what the camera can pick up. The eye can see about 13.5 stops of range - the dark detailed shadows barely discernable to the details in the brightest areas.
But what makes the eye even more remarkable is our noggin. That grey matter uber computer inside that lid of your can instantly adjust the perception to instantly see the darker inside as normal and then instantly see the outside as normal almost at the same time. Amazing piece of engineering, eh?
Film can just about duplicate that range of pickup. Sensors - well, not as good. Somewhere around 9-12 depending on the camera. In other words, when the camera can see the bright outside, it can't very well see the inside. Or if exposed right for the inside, the outside is all too bright.
So, ya gotta live with that and understand it to appreciate your situation.
Now that this is figured out, you have to work within it's limits. In other words, unless your lighting is better, you will not be able to get the outside and inside to be the same - just don't work. So to get the outside and inside to be the same intensity - your options are:
1: Decrease the outside light intensity. Like, put a huge pair of sunglasses over the window to reduce the intensity. A monster ND filter. (Big chunk of expensive film. Since I doubt you have that in your camera bag, you are gonna have to wait until a cloud comes over, wait until it gets darker, or live with an over exposed window brightness.
2: Increase the light inside by any means possible. Turn on a ton of lights. Get everything you can. Use flash (yuck) use mutliple flashes wisely (yuck again). Take the window out of the picture. Close the blinds and forget about the outside.
3: Take 2 pictures one for a proper exposure for the inside and outside. Then blend the 2 proper ones together in post production -need skills to do that. PP can darken to a degree that window brightness, but you will not have any detail left in the darkened shot. It won't look natural. Some cameras have High Dynamic Range capabilities for a situation like this, but I have never seen much good come out of the picture. It is usually way too flat and lacks fire.
4: You may not like it, but you could reframe your shot without the window, cover the window, pull the drapes to reduce light, either get rid of the window, or reduce the light coming in by an outside manipulation. They do this in the movies all the time.
5: Get a beer and watch a movie instead and say to heck with it.
Cheers,
Take 5
Jan 2, 2013 05:58:10 #

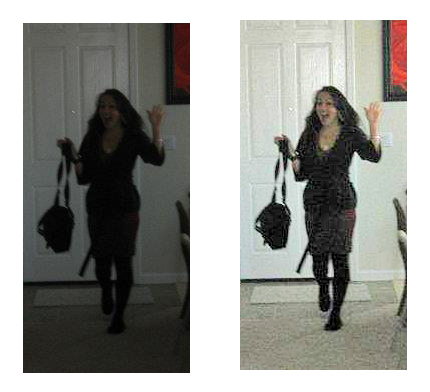
Without spending money on a flash you will miss a lot of photos, fo $70.00 on amazon you can get a youngnoo flash it's a total knockoff of a canon flash. It works grat with my D7000 using my $30.00 cowboy studio radio wireless controllers.
I have a Nikon SB 600 flash too but everyone gets hung up on the big names. Do some research and that wy when you need flash you will have it. Good luck
I have a Nikon SB 600 flash too but everyone gets hung up on the big names. Do some research and that wy when you need flash you will have it. Good luck
Jan 2, 2013 06:13:08 #
Back in the old days when we used film, we used film with a nice low ISO (<64) with long exposure times on a tripod (gave longer exposure curve).
Not sure if that works now with digital. I think all the info is recorded anyway. Hence I would save as a raw file with the bright bits deliberately over exposed then adjust in image processing to "flatten the curve" ie less contrast
Not sure if that works now with digital. I think all the info is recorded anyway. Hence I would save as a raw file with the bright bits deliberately over exposed then adjust in image processing to "flatten the curve" ie less contrast
Jan 2, 2013 06:21:01 #

planepics wrote:
How does one go about setting up the exposure of a shot when there is such a huge difference in light values? See example.
Look on the Photoshop Elements site - I remember seeing a demonstration there of combining two differently exposed pictures in order to give correct overall exposure.
Jan 2, 2013 06:21:19 #

Jan 2, 2013 06:25:39 #
jimbo70
Loc: Orange Park, FL.
With a Christmas tree don't overpower your light source or the tree lights will not stand out. Best solution---wait until it's dark outside.
Jan 2, 2013 06:32:03 #
hflare
Loc: Florida
planepics wrote:
How does one go about setting up the exposure of a shot when there is such a huge difference in light values? See example.
The first basic photographic knowledge you need to be aware of, is that the meter in your camera, which is what sets your settings in order to give to your camera what "it' thinks is the proper setting for all of the light in the shot....
The problem with the "inner" mind of the camera is that the camera does not know which in the scene is your "subject" so it averages all of the light values into
a setting that will attempt to give to your photograph a decent image of each light value..
The back ground light in your example was so ten times brighter than the inner room light.. and thus the setting it gave your camera at that extreme light difference did not give to the scene any proper setting.... the range was just too great...
You needed to decide on which light brightness in the scene was your subject.. for example: the tree.
What you should have done was to zoom up your lens to the allow only the tree light to be in your viewer than press your shutter button"half" way down and read the settings it would have given you .. The go back to your original position .. put the same scene in your viewer than manually set the settings it gave for the tree and shot the shot... and your tree would have been lite up... of course the light outside would have been pure white. and no detail would have been rendered correctly... but you would have had your subject in the correct exposure settings...
If you want to reply, then register here. Registration is free and your account is created instantly, so you can post right away.