Raw files looks dark
Sep 19, 2023 11:35:23 #

Dynamics5 wrote:
I focus on the dark area, keep the shutter halfway down, then reposition the viewfinder and shoot.
Dynamics5 wrote:
Yes, must learn more about processIng! But the first disturbing fact is that when even when I expose for the dark area, the picture does not turn out lighter. I can see in the playback that there are very dark areas.
Could it be a bad camera setting?
Could it be a bad camera setting?
You need to understand how your camera's meter works when you use pattern metering. It's not spot metering or even center weighted metering.
Your exposure was NOT based on the brightness of the shadows. It was based on the entire image surrounding the area where you focused.
It's actually exposed correctly to prevent the highlights from blowing out.
Now you need to learn about recovering the shadow information while developing the raw file on your computer.
Sep 19, 2023 11:39:54 #
larryepage wrote:
Yes. The second example you posted has nothing to ... (show quote)
I remember seeing a non-working Challenger Engine at the Train Museum at the fair grounds in Pomona, CA. It was near the now restored and running Big Boy UP 4014. Back in 2019 I took photos of the 4014 running thru the Banning Pass in CA. It was a fantastic experience. Difficult to photograph since I was shooting the dark side of the train. But my wife and I both got some nice images. Here are a couple of the better ones. The first straight one is mine, (c) 2019 Michael D. Williams . The second with the filter effect was taken by my wife. Even though she is usually a reluctant photographer she often gets better images than I do.


Sep 19, 2023 11:47:24 #

Dynamics5 wrote:
Exported JPEG first imported into LR. Took forever to upload!
Thanks for the file! Here's a few things:
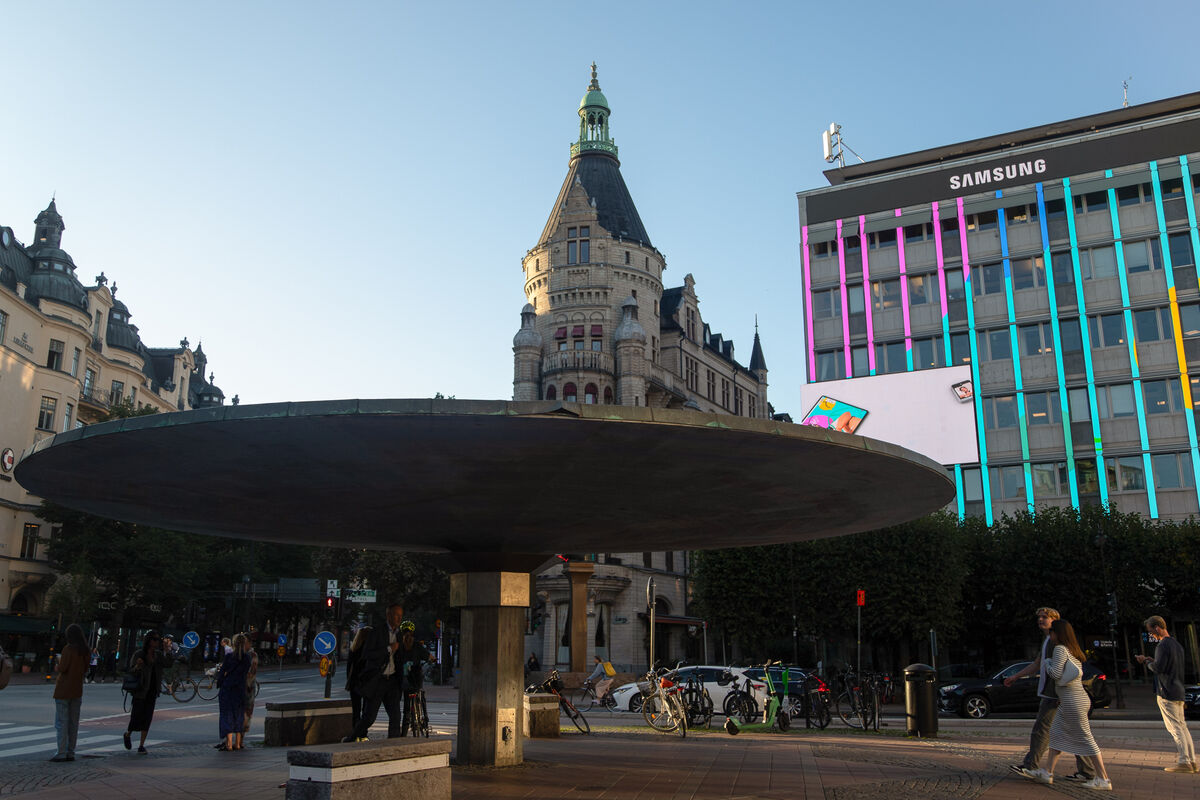
1. A screen capture of the LR import, with the shadow clipping highlighted in blue. The only 'too dark' areas are in the background bushes, not the undersides of the street shelter in the foreground. There's nothing "too dark" in the relevant sections of the image to be recovered via digital editing.
2. Next is a processed JPEG. Even from the JPEG conversions, there are plenty of details in the shadows to lighten these areas, if desired. I started with LR6's <Auto> tone, then adjusted to my preferred edit, including some straightening and cropping for the wide-angle. My old software doesn't have a lens profile to address the vignette and distortion. You might want to lift the shadows even more. That's for you to decide, best, on the original RAW.
3. Finally, I exported the same edits as a DNG. You can download and import this file back into your LR catalog and sync the edits from the DNG to a VC of the original RAW to get a sense of what and where I made changes. You can selectively sync, such as just the "basic" settings.
4. You asked if there was something generic to do to your RAW images. As a RAW shooter and LR editor, consider the following:
a, Use the LR auto-tone and LR auto-WB against your images and "see" what LR thinks need to be done. Edit from there to our own preferred result.
b, Apply LR lens profiles to your images.
c, Develop your own noise and sharpening presets, rather than accepting LR's default settings. Use the ideas linked below.
Basics of noise processing
Basics of Lightroom Sharpening

Sep 19, 2023 11:47:28 #

Dynamics5 wrote:
I focus on the dark area, keep the shutter halfway down, then reposition the viewfinder and shoot.
With some cameras the shutter button half-press will lock focus but not exposure. And as Scotty says, pattern metering will evaluate the whole of the scene at the time of exposure lock. In your case that would have included an undetermined amount of bright sky.
Sep 19, 2023 11:51:59 #

Dynamics5 wrote:
Exported JPEG first imported into LR. Took forever to upload!
Deleted - Paul beat me to it

Sep 19, 2023 12:05:45 #
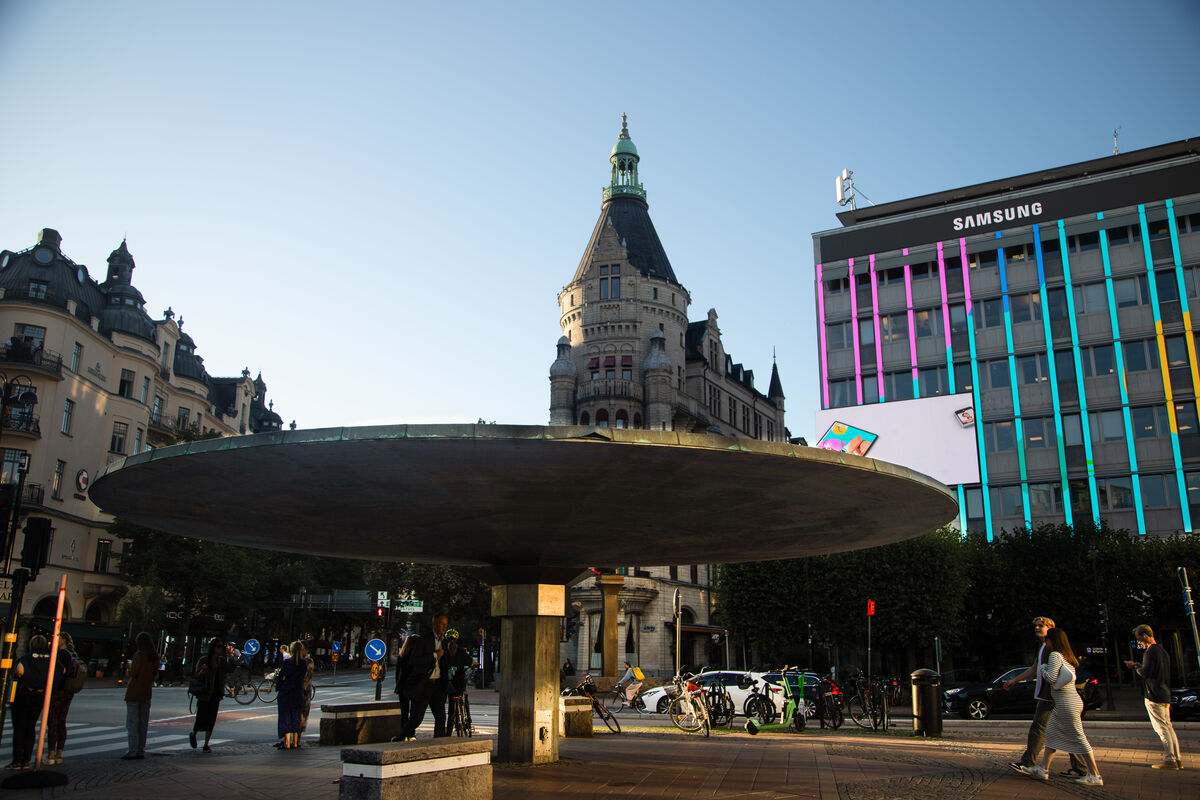
Regarding HDR and bracketing. This is September 2023 with the magic of an EOS full-frame DSLR, captured in RAW. And, a composition with moving subjects. The modern approach is to simply just process the shadows of the image and / or send a single processed image into an HDR plug-in. Here's a result from Topaz Adjust, with the Topaz result massaged further back in LR. I prefer a subtle HDR result, where working from the RAW, rather than a JPEG, would give even more control. If you open this version in one tab and the earlier processed version in another, you can see a bit more shadow recovery, but really just more of a "vivid" result in the saturation of the image.

Sep 19, 2023 12:07:59 #
Dynamics5 wrote:
The dark part of my raw files look exceptionally dark. Is there a way to correct for that?
------------
If the histogram shows a lot of dark area, increase your exposure some when you take the shots. Especially if it happens in a lot or most of your shots.
Sep 19, 2023 12:32:37 #
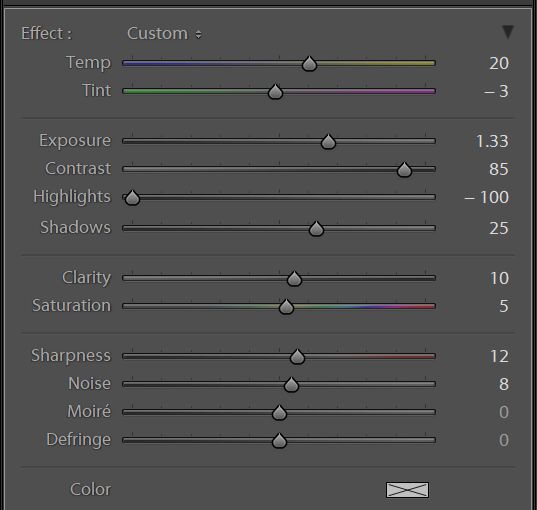
This is a basic edit that you could use as a starting point for further adjustment as you see fit. I used Lr's Adjustment brush set to Auto Mask and zero feathering to select just the shadows. I refined that selection using Erase with Auto mask plus some feathering where the shadowing had a gradation. More could have been eliminated within that selection if I wanted and further selections could be made within that same area for further tweaking. Below is a screen shot of the settings for the brush.
Ambient outdoor light typically consists of blue from any clear bits of the sky and yellow from any direct sunlight. Outdoor shadows obviously don't have direct sunlight so they tend to have a pronounced blue cast. I used the WB blue/yellow slider to add some yellow to the entire selected area to counter the blue cast. The selected area also had a slight purple/magenta tint (probably because of the camera's rendering of colours in low light) so I used the Tint slider to give the selection a slight nudge away from purple/magenta towards green.
Apart from the skewed colours, brightened shadows also tend to lack contrast, saturation and sharpness when compared to the well lit areas, so I applied extra of all of those to the selection, plus a touch of denoise because shadows tend to hide noise which can become visible when you brighten the shadows.
The purpose of all of those adjustments is to have the brightened shadows look more similar to the well lit areas.
.
Sep 19, 2023 12:49:35 #
Thanks to all. Lots to absorb!
The 6D Mark II has limited dynamic range. Reading up on how to deal with that.
By the way, decreasing the shadows helps a lot. For general Lightroom treatment I usually have the highlights at -85 and shadows at +85.
Given the large dynamic range of the scene, what is the best way to meter for best exposure?
Sep 19, 2023 12:59:57 #
Dynamics5 wrote:
Thanks to all. Lots to absorb!
The 6D Mark II has limited dynamic range. Reading up on how to deal with that.
By the way, decreasing the shadows helps a lot. For general Lightroom treatment I usually have the highlights at -85 and shadows at +85.
Given the large dynamic range of the scene, what is the best way to meter for best exposure?
The 6D Mark II has limited dynamic range. Reading up on how to deal with that.
By the way, decreasing the shadows helps a lot. For general Lightroom treatment I usually have the highlights at -85 and shadows at +85.
Given the large dynamic range of the scene, what is the best way to meter for best exposure?
In digital photography, you avoid blowing the highlights, while pushing the RAW exposure to the right as far as possible, without blowing the highlights. The easiest way is Canon's Evaluative metering, paying attention to where the highlight warnings fall, not the histogram shape / position. Then, you process the RAW file.
Consider <quote reply> to assure your questions / comments are provided in context of who / where you intend to reply. Otherwise, the unrelated train litter might think they're being helpful.
Sep 19, 2023 13:13:21 #
Artcameraman wrote:
Actually the opposite is true. Jpeg correct almost everything in camera including sharpening but post processing by you will be limited. RAW on the other hand is like an uncooked meat, salt, pepper and heat has to be applied to make it delish!
Who are you talking to???
Sep 19, 2023 13:17:15 #
Sep 19, 2023 14:14:44 #
Dynamics5 wrote:
No problem with exposure compensation. The light areas look fine, the dark areas are too dark. Is there a way to color calibrate the camera / lenses?
If you thought you exposed for the shadows, and the HIGHLIGHTS look perfectly exposed, I would suspect Exposure compensation even more.
Your result LOOKS like a minus 2 or 3 EV. This would happen if you turned the ec dial the wrong way.
I certainly cannot be sure of that. We don't know how you metered.
But just looking at the results you got for what is a high dynamic range subject (deep shadows in the buildings, bright sky above) If you had use a normal automatic exposure , the highlights would have been much brighter.
Your data will show except settings.
Sep 19, 2023 14:22:15 #
Dynamics5 wrote:
No, the problem is that I exposed for the darker area yet the shaded area is very dark. Other cameras did not have this problem.
Is there a color calibration of some kind that?
Is there a color calibration of some kind that?
When you say you exposed for the shadows, How did you do that? It is normally done with EC
There are Moire patterns all over the image, if you shot through a bus window (as someone suggested) they are sometimes plexiglas and some tour busses have a polarizing film on them to prevent glare, that can really screw up your metering.
Now this is all conjecture because we do not know exactly what you did
Sep 19, 2023 14:23:44 #

MJPerini wrote:
he says above the moire is from shooting a pic of his computer screen.When you say you exposed for the shadows, How did you do that? It is normally done with EC
There are Moire patterns all over the image, if you shot through a bus window (as someone suggested) they are sometimes plexiglas and some tour busses have a polarizing film on them to prevent glare, that can really screw up your metering.
Now this is all conjecture because we do not know exactly what you did
If you want to reply, then register here. Registration is free and your account is created instantly, so you can post right away.