Processing old B&W Photos
Sep 17, 2022 12:11:46 #
Sep 17, 2022 16:28:25 #
Your blacks and whites are gray. Most reasonably good software will allow you to adjust the black point and/or the white point. That will increase the contrast. Another thing to look for is a curve control. That will allow you to adjust the gamma curve so that you can improve the highlights or the shadows.
Sep 17, 2022 17:24:00 #

DirtFarmer wrote:
Your blacks and whites are gray. Most reasonably good software will allow you to adjust the black point and/or the white point. That will increase the contrast. Another thing to look for is a curve control. That will allow you to adjust the gamma curve so that you can improve the highlights or the shadows.
See DirtFarmer's comment about grey vs B&W. Here's a few tools to help.
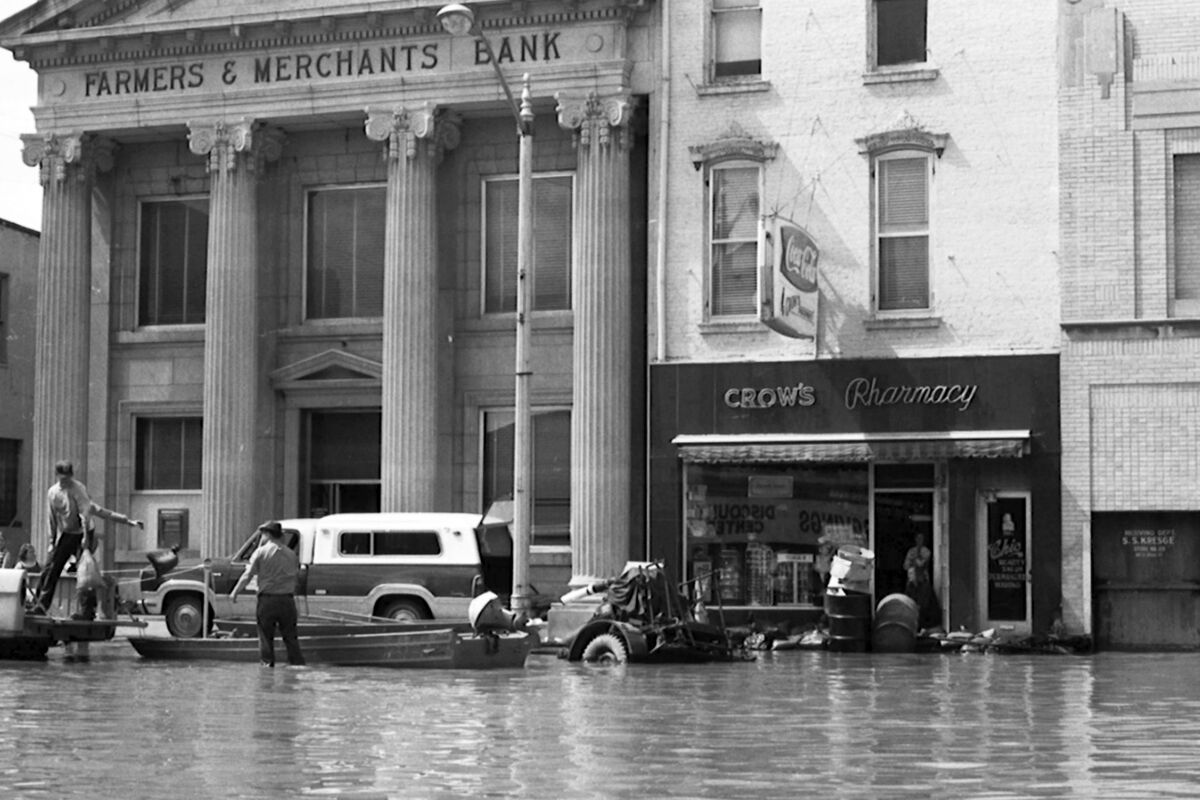
1, A processed image as an export using the B&W film Develop preset and some further customizations.
2, A DNG of the same image so you can see the edit settings for the JPEG export. Just save the DNG local, same as the film image, and import the DNG to your catalog.
3, The text file of the B&W film develop preset. Just figure out where your user Develop Presets are located and detach and store the file there. Just restart LR to pick up the preset. Ask for help, if you need more specifics on how to install this preset.
(Download)
Flooding DNG
Attached file:
(Download)
LR6 B&W Film Develop User Preset
Attached file:
(Download)
Sep 17, 2022 17:51:53 #
Henlopen
Loc: Lewes, Delaware
Good results can also be had rather quickly using Paint Shop Pro which I've been using ever since it came out in the 80's for Old prints and retouching. The one picture that stood out to me to work on was this one which took less than 10 minutes including removing some blemishes. Comments welcome.
Sep 17, 2022 18:19:17 #
Tote1940
Loc: Dallas
Most look pretty good, one that looks washed out needs setting black point
I use Lightroom 4, it allows setting black point and to look snappier there is an slider, actually two ( clarity and vibrance in my version )or you can play with curve directly
I use Lightroom 4, it allows setting black point and to look snappier there is an slider, actually two ( clarity and vibrance in my version )or you can play with curve directly
Sep 17, 2022 18:43:24 #
Henlopen
Loc: Lewes, Delaware
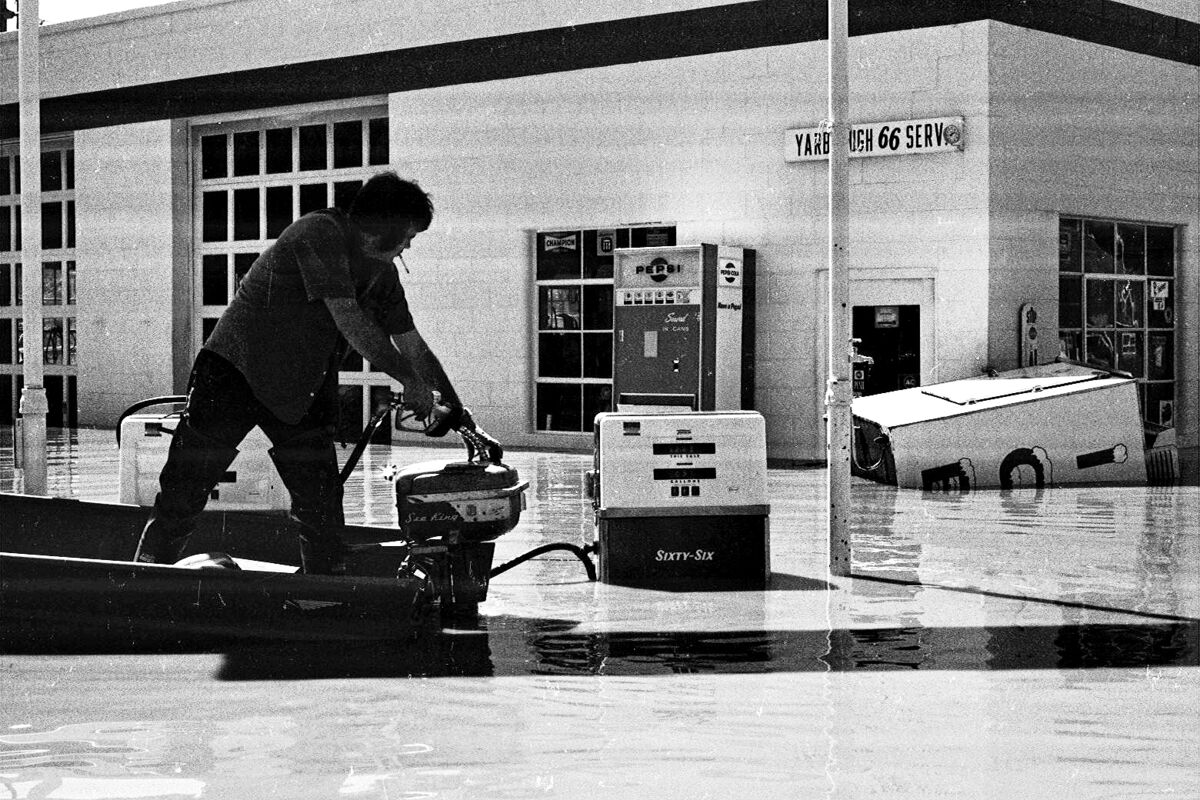
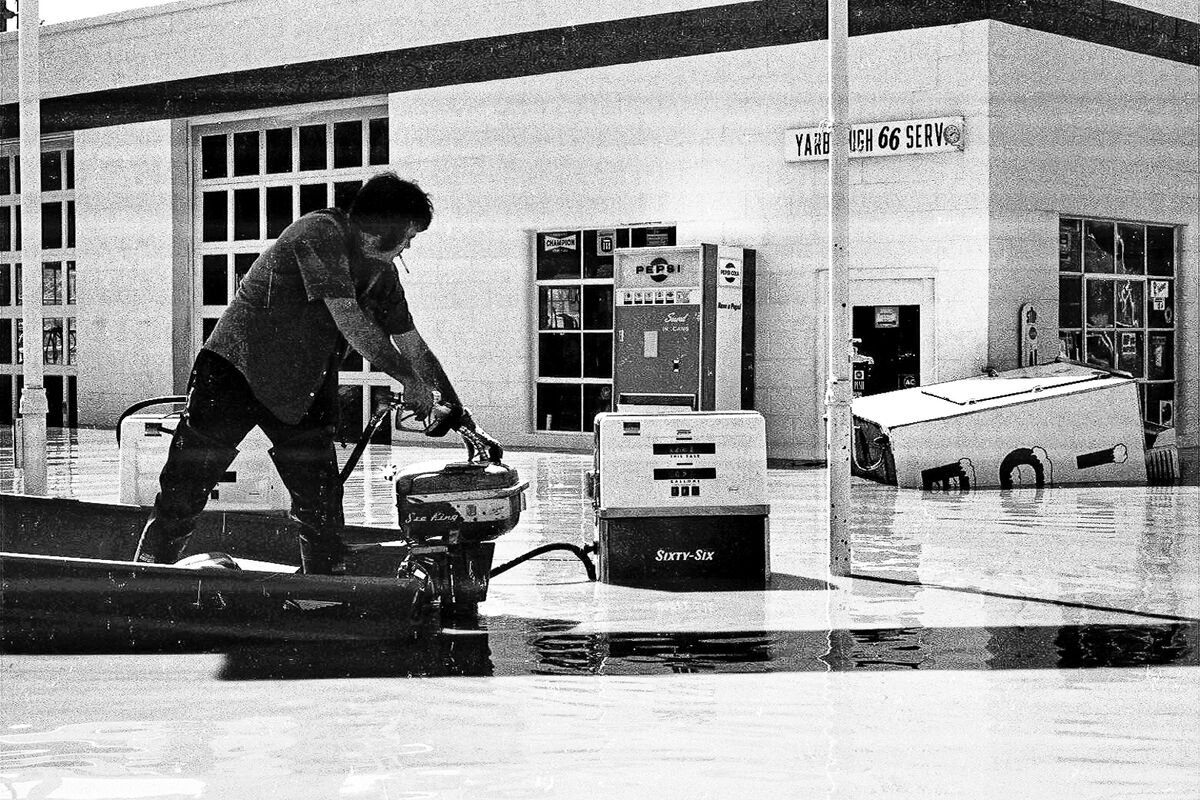
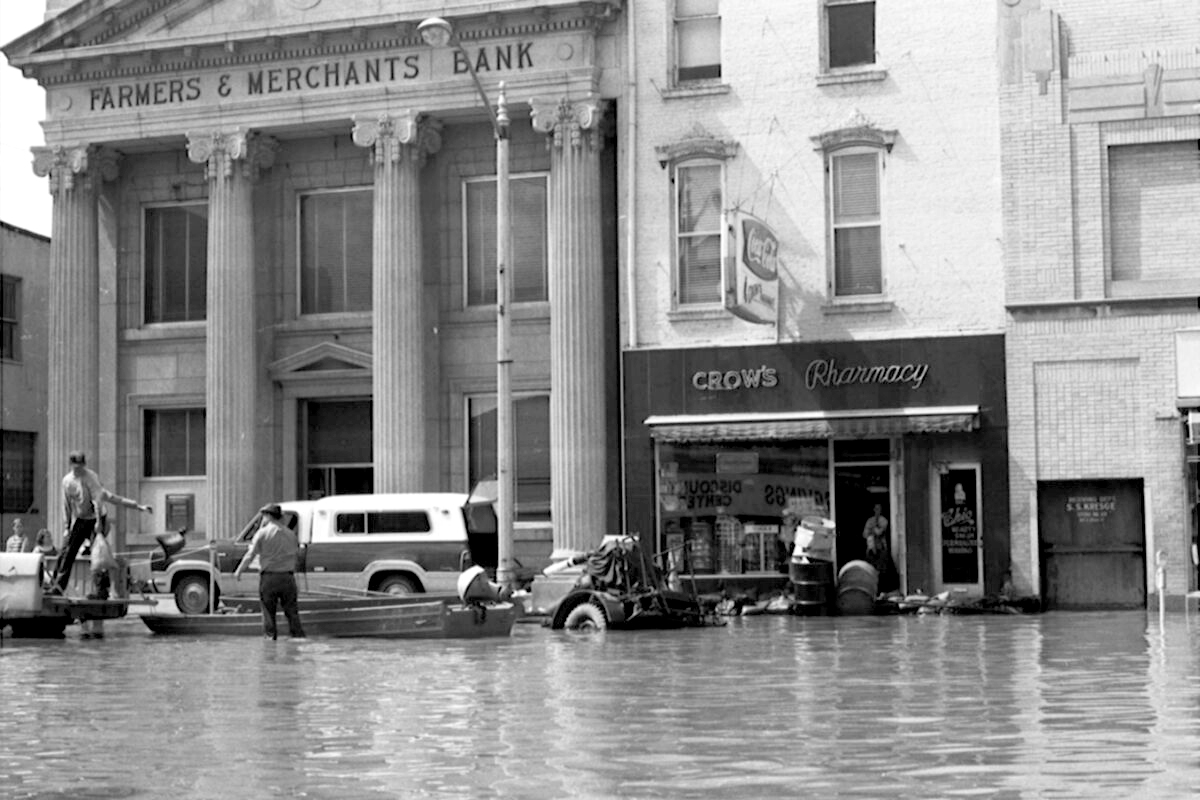
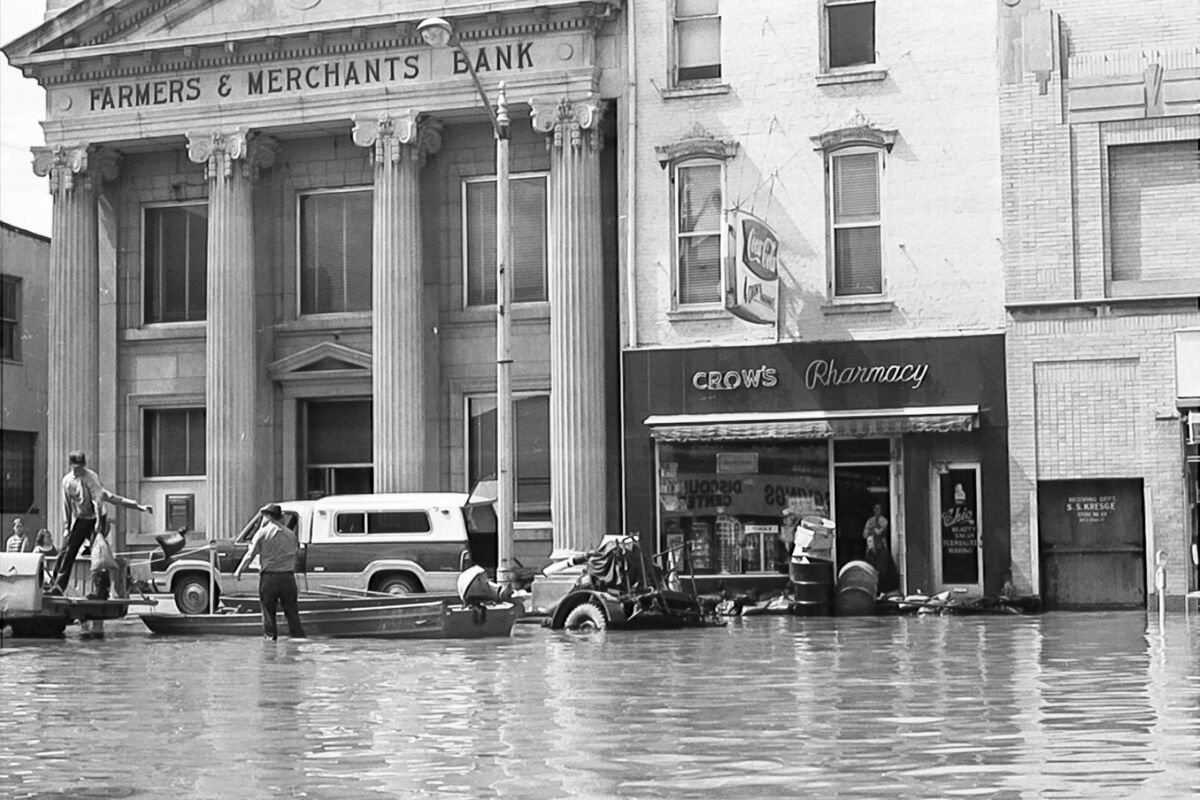
As I sometimes do with photos that I want to see if I can bring out more, I follow up with a run through LR and when I did this, I noticed that the gas price on the pump looks to read 34.9 cents a gallon. Sound about right? Here's the resulting shot.
Sep 17, 2022 18:52:10 #
charlienow wrote:
These are examples of files I'm trying to edit. M... (show quote)
You already have the software! I currently have Photoshop Elements 2021 on this laptop to demonstrate the procedure to improve your images.
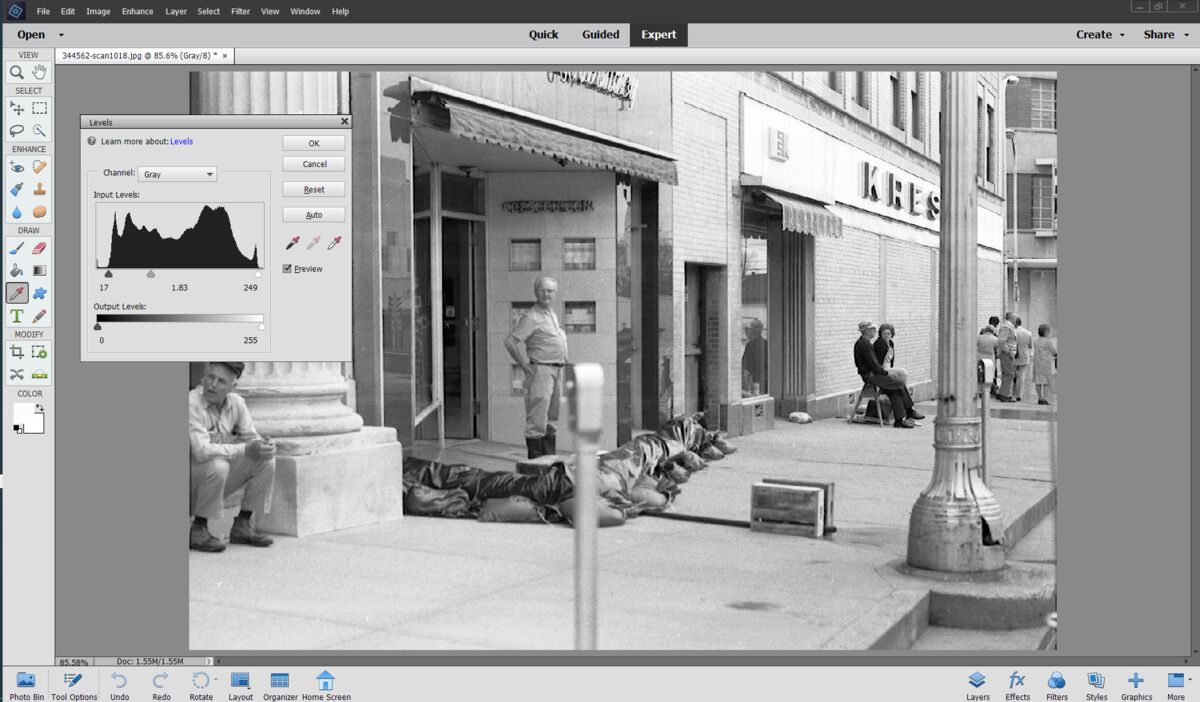
1. Along the menu bar of your Elements in the "Expert" mode, open your image and click on "Enhance" (4th item from the left). Window will open.
2. Then click on "Adjust Lighting." Side window will open.
3. Then click on "Levels" and you will see the first "Before" screen capture with the open Histogram. Notice how the left black pointer and the right white pointer are touching the frame of the Histogram.
4. Move the two points slightly inwards towards the body of the histogram to increase contrast while also moving the grey pointer to the left to lighten the middle tones. Adjust these points to your preference and to the individual lighting of each image. As you do so, you will see the effects on the screen.
If you do this to all of your images, they will look normal as your original scans were "flat" and lacked contrast; the lighter tones needed to be lighter while the darker greys were too dark.
You can also use "Curves" but I feel this is easier!
Be well! Ed

Sep 17, 2022 19:00:17 #
The other two!
You also need the "Bandage" tool to remove white spots and lines.
Be well! Ed
You also need the "Bandage" tool to remove white spots and lines.
Be well! Ed

Sep 17, 2022 19:11:22 #
With you awesome guidance I used Lightroom 6 with a little more confidence. They still arent what I was hoping for, but are better than the originals...I still have more to learn from what has been posted on this thread..
Thanks for your help...What could I improve on these?
Chuck
Thanks for your help...What could I improve on these?
Chuck

Sep 17, 2022 19:26:12 #
charlienow wrote:
With you awesome guidance I used Lightroom 6 with a little more confidence. They still arent what I was hoping for, but are better than the originals...I still have more to learn from what has been posted on this thread..
Thanks for your help...What could I improve on these?
Chuck
Thanks for your help...What could I improve on these?
Chuck
Alas, no one knows who you've responded to ... That's why the use of <quote reply> is rather important in UHH during back n forth discussions.
For 'clean up' of the scratches and lint in your images, use the LR spot removal tool in the heal mode. Given the pixel resolution of the image I provided as a DNG, try a 'size' between 21 and 30, a feather of 11, and the Opacity at 100.
Sep 17, 2022 19:52:27 #
charlienow wrote:
I have scanned al of my old B&W film from many years ago...there needs to be some processing on them to get them where I want them...
I'm wondering what the best Post Processing Software might be for these scans...or are they all about the same...
Thanks for your advice
Chuck
I'm wondering what the best Post Processing Software might be for these scans...or are they all about the same...
Thanks for your advice
Chuck
Look at Nik Collection Silver Efex.
Sep 17, 2022 19:57:23 #
CHG_CANON wrote:
Alas, no one knows who you've responded to ... That's why the use of <quote reply> is rather important in UHH during back n forth discussions.
For 'clean up' of the scratches and lint in your images, use the LR spot removal tool in the heal mode. Given the pixel resolution of the image I provided as a DNG, try a 'size' between 21 and 30, a feather of 11, and the Opacity at 100.
For 'clean up' of the scratches and lint in your images, use the LR spot removal tool in the heal mode. Given the pixel resolution of the image I provided as a DNG, try a 'size' between 21 and 30, a feather of 11, and the Opacity at 100.
I was pretty much thanking everyone. No specific person. However you have been a big help on this and past problems..I used LR6 to do these two photos and from what everyone has said it is about as good as it gets..
I'm not concerned about clean up I am okay with that both in LR and Elements
Chuck
Sep 17, 2022 19:58:08 #
Sep 17, 2022 22:42:42 #

charlienow wrote:
I have scanned all of my old B&W film from many years ago...there needs to be some processing on them to get them where I want them...
I'm wondering what the best Post Processing Software might be for these scans...or are they all about the same...
Thanks for your advice
Chuck
I'm wondering what the best Post Processing Software might be for these scans...or are they all about the same...
Thanks for your advice
Chuck
The ultimate *for me* has been a combination of Adobe Lightroom Classic (LrC) with Adobe Photoshop (Ps). It's $10/month.
LrC is a parametric editor. You move sliders for lots of control over exposure, black level, shadows, highlights, white level, saturation, hue and tint (white balance), sharpness, noise reduction, etc. But you can also crop, size, spot, remove red eye, and do some rudimentary masking. It's also a catalog tool, completely non-destructive, has a full-fledged printing module and a great export tool, and does everything a pro needs for cull editing, making proofs, and cataloging all images.
Ps is a bitmap (pixel level) editor, with layers, masks, text, filters, and lots of tools for local area modifications and adjustments. It is decades old, so it is full of tools for all kinds of needs. It can be a "black hole time sucker" that consumes you! That's why I use it very sparingly. Most of what I need to do with my images, I do in LrC.
My setup is using a digital camera with macro lens to make raw files of my slides and B&W and color negatives, then edit them in the Adobe suite. A key element is the Negative Lab Pro (NLP) plug-in for Lightroom Classic. It is one of the most important tools for working with B&W and color negatives that I've ever encountered. I ran a scanning department in a major professional lab back before digital cameras got popular, so I know quality when I see it! NLP rivals Kodak's legendary Bremson HR-500 lab scanner output from DP2 lab software.
I've attached a white paper on my "camera scanning" workflow that you might find interesting. Open it in your favorite PDF reader. It contains many samples and a pretty full explanation of what I do.
Sep 17, 2022 22:49:46 #
charlienow wrote:
These are examples of files I'm trying to edit. M... (show quote)
I see a need for contrast and sharpening adjustments, perhaps some levels adjustments, highlights, shadows, etc.
Too bad you lost the negatives!
I love the frame of the guy filling a boat gas tank while smoking a cigarette over the tank opening. Classic invitation to receive the Darwin Award...
If you want to reply, then register here. Registration is free and your account is created instantly, so you can post right away.