Simple flash diffuser?
Sep 19, 2021 22:21:00 #
Chrishants wrote:
I need to take a few macro shots, and wonder whats the best way to make a simple diffuser? Have a Nikon 105 2.8 Micro lens, and a D7100 with onboard flash, but also an SB600 add on flash.
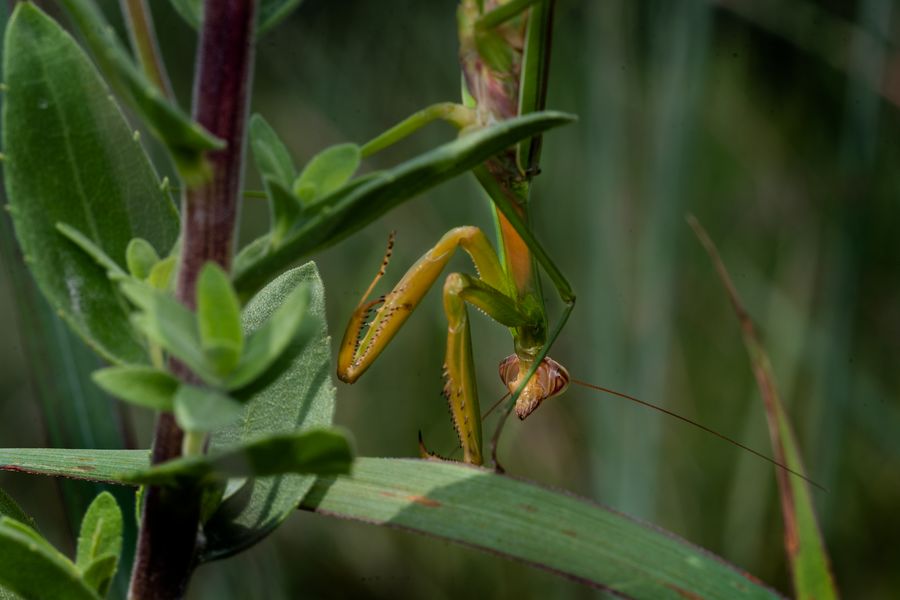
The Nikkor 105mm f/2.8 has a minimum focus distance of about 12-inches which is measured from the camera sensor to the subject so when shooting as close as possible it means that the end of the lens will be quite close to the subject which of course is desirable in capturing those amazingly sharp details. This also means that the illumination of the subject will also be close which is one of several reasons that the diffusion of light is so important.
Secondly, we must remind ourselves that the physical Law of Light tells us that the intensity of the light varies with the square of the distance so when shooting a subject that is further away, more light will be required to obtain the same intensity of light as when the subject is closer.
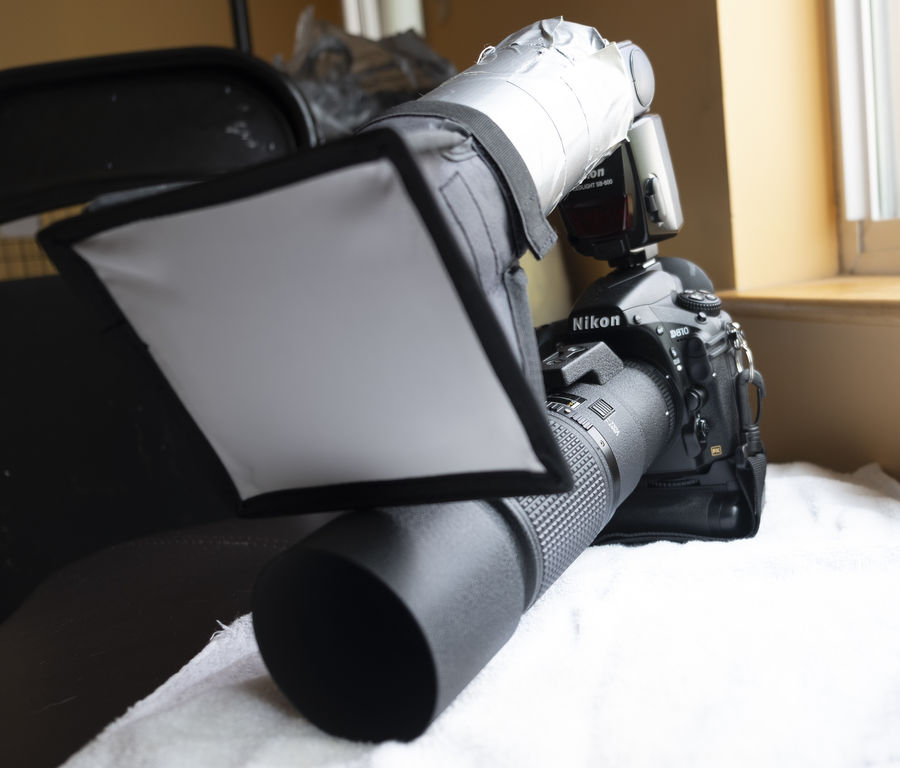
This is what my rig looked like using Pringles can and the little softbox to provide the off-camera lighting. And hey, who can resist an excuse to buy a can of Pringles?
Getting the diffusion "off-camera" is ideal. Simply meaning that the diffusion mounted on the end of the lens with the Speedlight mounted on the camera shoe works quite well and there are a near endless of ways to accomplish this in both DIY and manufactured diffusion products.
One that works quite well is to use an extension device such as a Pringles Chips can by cutting the end out and smashing it to fit over the flash head. The other end will be at the end of the lens and a simple inexpensive 6X5 softbox works very, very well (I wrapped the Pringles can with duct tape so it would not look as cheesy for I get enough strange looks the way it is).
Sep 20, 2021 00:08:04 #
Sep 20, 2021 00:11:26 #
Crazytooth wrote:
I cut a Pringles tin at 45 degrees and put a bit of kitchen paper over it as an experiment.
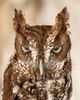
Did a quick garden safari...a bush cricket in a rose, the image has been compressed the original is sharper.
I was pleasantly surprised by the results.
Did a quick garden safari...a bush cricket in a rose, the image has been compressed the original is sharper.
I was pleasantly surprised by the results.
Sep 20, 2021 01:56:30 #
sippyjug104 wrote:
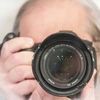
The Nikkor 105mm f/2.8 has a minimum focus distance of about 12-inches which is measured from the camera sensor to the subject so when shooting as close as possible it means that the end of the lens will be quite close to the subject which of course is desirable.....
Sippyjug104 is that a 105 or a 200mm in that photo? I have a 105 VR macro and a 105 f/1.4 as well as the "tank like" all metal built 200mm which looks like the lens in your photo.
Regardless... all of these lenses are good performers. I have found the 60mm f/2.8 to also be a very sharp lens. Love that light little beastie.
Sep 20, 2021 06:47:37 #
tcthome
Loc: NJ
Charles 46277 wrote:
Today people want diffuse light for macro work, wh... (show quote)
https://www.youtube.com/watch?v=glkej8_NkIs&list=PLOD1rrjm5sQDne9AacaP0weB4mwrclaE8&index=11
Sep 20, 2021 10:32:58 #
Real Nikon Lover wrote:
Sippyjug104 is that a 105 or a 200mm in that photo? I have a 105 VR macro and a 105 f/1.4 as well as the "tank like" all metal built 200mm which looks like the lens in your photo.
Regardless... all of these lenses are good performers. I have found the 60mm f/2.8 to also be a very sharp lens. Love that light little beastie.
Regardless... all of these lenses are good performers. I have found the 60mm f/2.8 to also be a very sharp lens. Love that light little beastie.
Real Nikon, this is my Nikkor 200mm f/4 AF ID which is a beast of a lens...physically at 2.5-lbs. I rarely use it now and my 105mm and the 60mm are my most often go-to field lenses.
The 200mm needs more light out at the point of the subject and the law of light tells us that the intensity of light varies with the square of the distance. So...the 200mm provides a very generous reach however the diffused light needs to be increased to send it out to that distance and battery consumption is a factor. It's a great lens for a bright sunny day.
Your 60mm is a great walkabout macro lens, razor-sharp, and comfortable to carry all day.
Sep 20, 2021 18:15:39 #
Sep 20, 2021 23:08:17 #
If anyone is interested in some "diffuser" material (much like Nikon diffusers) PM me and we can chat. Glad to help out a hogger.
Sep 21, 2021 12:18:27 #
Gene51 wrote:
Ask in the "True Macro Section:lots of info.
Sep 21, 2021 16:00:36 #
pshane wrote:
I've had success with the sides of a plastic Milk Jug, cut to fit.
I've cut out the corner of the bottle leaving one side longer, and taped it onto the pop=up flash units of my cameras. helps a little, when using that harsh little bugger of a light. For a bigger home made job, is a frame, picture to PVC pipe friction joined so you can collapse. Stretch translucent Plastic window covering over the pipes with tape. Shower curtain material hung ahead of a flash on a stand works wonders, and sometimes projects an interesting pattern onto the subject of a background. Also usable as a backlight diffuser. Hang with a friction shower curtain in small spaces.
And if the plastic shheting colored, they open many possibilities.
Sep 21, 2021 16:03:09 #
chfrus wrote:
As I learned in the US Army photo school back in the day Fort Mammoth N.J use tissue paper single or double it up.
Ansel Adams shows that in his book The Camera.
Sep 21, 2021 18:44:41 #
quixdraw wrote:
Back in the day, even as far back as bulb, you could drape a linen handkerchief over the flash. Obviously, something more permanent is desirable. Frosted plastic bottles are a good thing to try, find one just the size to slip over and you're most of the way there.
I used to grab a Kleenex from my wife and use it like you used the linen handkerchief.
Sep 21, 2021 19:24:09 #
Chrishants wrote:
I need to take a few macro shots, and wonder whats the best way to make a simple diffuser? Have a Nikon 105 2.8 Micro lens, and a D7100 with onboard flash, but also an SB600 add on flash.
This is the "off-camera" flash diffuser that I currently use. It's really quite simple to make. I used a piece of stiff bendable electrical wire to hold the shape and then used two layers of vellum tracing paper (later replaced with Rosco Tuff Lux white diffusing paper which is far more durable). I laid the wire that I bent over the paper and folded the edges over and taped them in place. I cut a half-circle notch out to fit over the end of the lens. I can bend the diffuser to close in around the subject or shoot with it flat. Raise or lower the angle as the situation in the field requires.
I'm now using a dual-head macro flash however I have used this with my Nikon SB800 Speedlight and it worked just as well.
The journey is endless so enjoy the ride..!


Sep 21, 2021 21:51:59 #
sippyjug104 wrote:
This is the "off-camera" flash diffuser ... (show quote)
Sippy, you're a gold mine for those who want to get better. You're like the Britannica Encyclopedia in the old days. Like Wikipedia in our day.
You're photos are great and your advice is also!
Sep 21, 2021 22:19:28 #
canonclicker wrote:
Sippy, you're a gold mine for those who want to get better. You're like the Britannica Encyclopedia in the old days. Like Wikipedia in our day.
You're photos are great and your advice is also!
You're photos are great and your advice is also!
Canonclicker, thanks ever so much for the kind reply. One of the great features of the UHH Community is the willingness to share. Regardless of the subject, there is always someone here that has experience in that field.
I've tried so many things to diffuse the illumination of my sessions indoors on my tabletop setup and out in the field that at times a few of them actually work. If sharing my experiences helps others in the slightest way then it gives them something to build on from there.
Most will agree that the best time to be outdoors with a camera is when the lighting is softened by passing through the clouds. The lighting is even and there are no harsh shadows. What would be ideal would be for us to emulate that condition where we are in control of that soft light and need not depend on the sun and clouds.
On that perfect natural lighting day, the CLOUDS actually become the source of light with their glow. The sun is quite far away from our subject, the flower, compared to the clouds above (our off-camera flash). Separating the primary source of light (our Speedlight) from the diffuser on the end of the lens mimics that relationship of the sun, clouds, and the subject. Even more ideal is to have a much larger diffusion (cloud in the sky) compared to the size of the subject. A larger off-camera diffuser provides a larger spread of soft glow which helps subdue specular highlights and loss of detail.
How one accomplishes this and what they may use is endless. Why one wants to do it is with a specific goal in mind.
If you want to reply, then register here. Registration is free and your account is created instantly, so you can post right away.