Tight Crop Repair Help Needed
Mar 26, 2021 01:28:14 #
tiphareth51
Loc: Somewhere near North Pole, Alaska
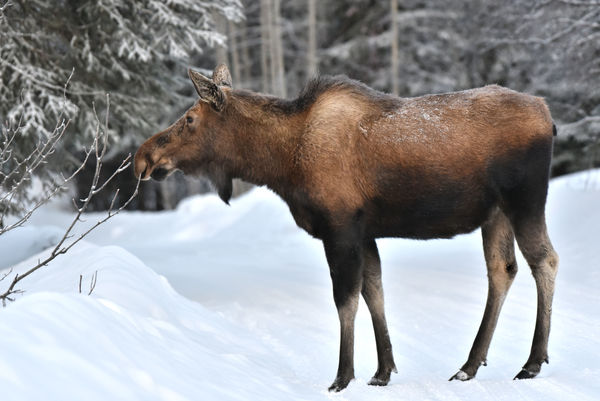
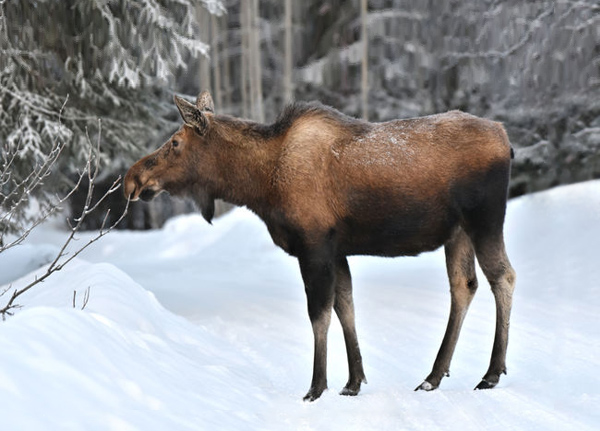
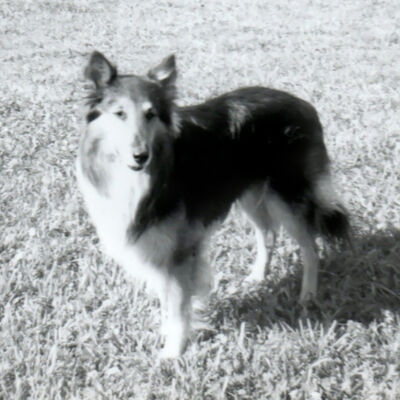
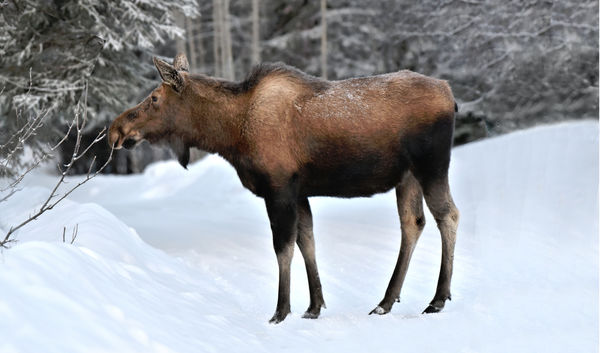
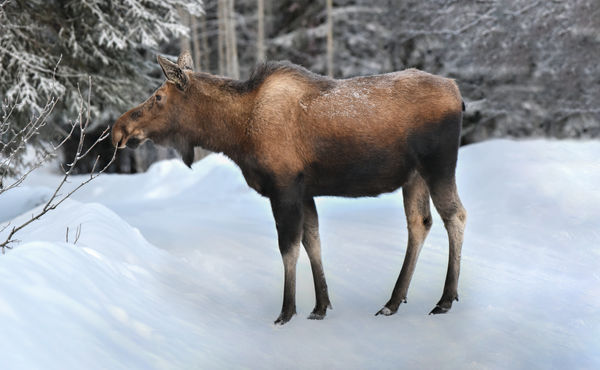
In my haste to get a shot in before the moose moved, my crop was too tight on the right side and bottom. This shot is one that likely will not be repeatable as moose are so unpredictable. I did look at tutorials posted on you tube but between my poor post-processing skills and old eyes vision, it was not coming out as desired.
Is anyone out there familiar with this process that is willing to make the adjustment on both the right side and bottom? I would be willing to pay for your time and effort. Please send me a private message and hopefully, something can be worked out. Thank you immensely!
Sue
Is anyone out there familiar with this process that is willing to make the adjustment on both the right side and bottom? I would be willing to pay for your time and effort. Please send me a private message and hopefully, something can be worked out. Thank you immensely!
Sue
Mar 26, 2021 02:34:48 #
tiphareth51 wrote:
In my haste to get a shot in before the moose move... (show quote)
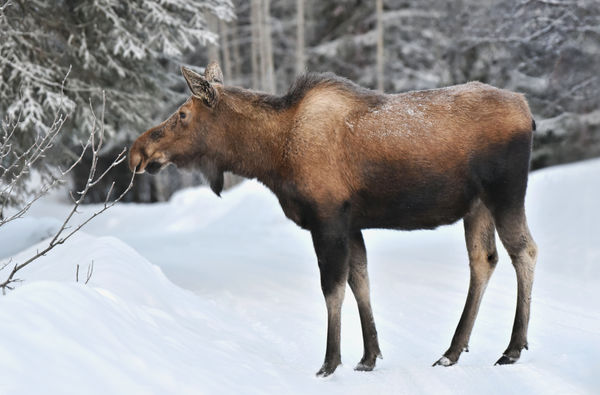
Basically, any expansion that you want there would be adding something that was not photographed. It would have to be drawn either from scratch, rebuilt from elements within your photo or introduce elements form another photo.
Here is a rough edit on how it can be done with PS
.
Add space by increasing the canvass size using the crop tool
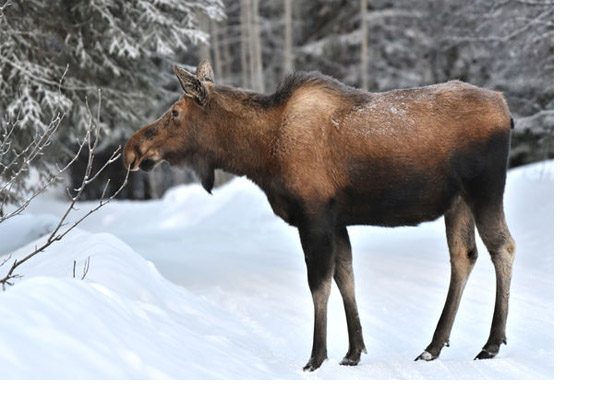
copy the image, put it below & resize to fit the canvas
Distort the bottom image using free transform to align it as much as possible with top photo. Merge both layers then clean-up with clonst amp & brush. Repeat process to adjusts other parts
Mar 26, 2021 05:13:37 #
Mar 26, 2021 09:35:34 #

Wallen wrote:
Basically, any expansion that you want there would be adding something that was not photographed. It would have to be drawn either from scratch, rebuilt from elements within your photo or introduce elements form another photo.
Here is a rough edit on how it can be done with PS
.
Here is a rough edit on how it can be done with PS
.
Can you post the downloadable version (larger) so that it is usable?
Thank you.
Mar 26, 2021 10:04:55 #

Mar 26, 2021 10:12:07 #
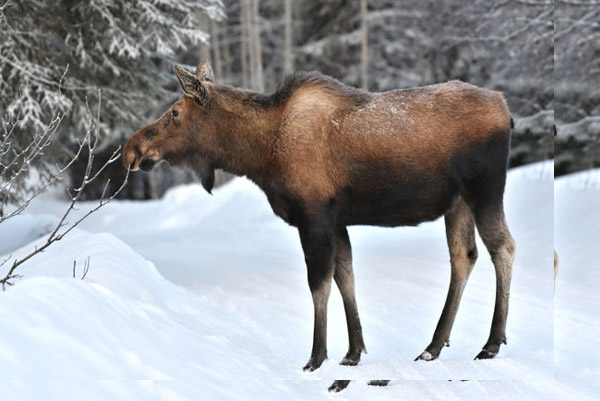
Here is my edit for you. You m might want to make a final crop of your choosing for framing.
Steps to make this edit;
1) Open In Photoshop. Selected Image>Canvas Size>Changed Width to 24 and Height to 13.5, Changed Anchor spot to upper left corner> click OK
2) Duplicate layer Command J
3) Used lasso tool and selected the moose's legs. Used content aware to fill area. Didn't come out just the right color so selected the same general area and used Edit>Fill>Content Aware again. Now it made a perfect match.
4) Made a selection of bottom area to fill with snow and used Edit>Fill>Content Aware. Perfect for bottom.
5) Made a selection of right area to fill with snow and brush used Edit>Fill>Content Aware. Didn't work too good but a starting point.
6) Made a selection with the lasso tool for the brush area on the right that didn't come out to good on first try. Next Edit>ContentAware fill. Using This setting for ContentAware you can choose the area to clone from with a brush.
7) Once the ContentAware did its thing I used a soft brush and the cloning stamp and fixed the edges of the new fill area
8) Moved the base layer to the top. Made a mask and brushed out the areas to let my new extended photo areas visible.
9) Flattened image.
10) Did some final touch up using the cloning brush to softening merged edges.
Mar 26, 2021 10:44:36 #
tiphareth51 wrote:
In my haste to get a shot in before the moose move... (show quote)
Added to the right and bottom.
Mar 26, 2021 11:09:27 #
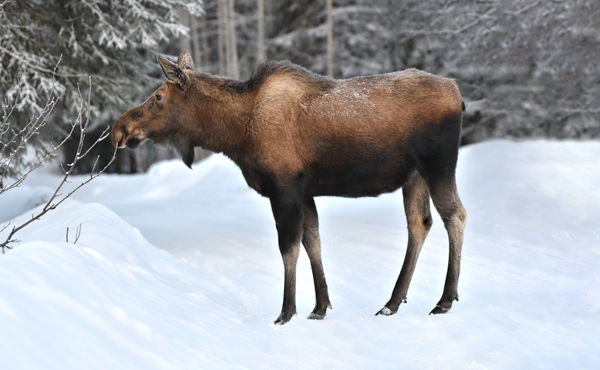
Part of what makes this image difficult to re edit is that the lights are a bit blown, and no matter what you do, it seems the moose is floating in the air. Its hard to get a sense that he is standing on the ground, and the more that is added to the bottom, the more he seems to float.
Mar 26, 2021 11:39:46 #
fergmark wrote:
Part of what makes this image difficult to re edit is that the lights are a bit blown, and no matter what you do, it seems the moose is floating in the air. Its hard to get a sense that he is standing on the ground, and the more that is added to the bottom, the more he seems to float.
I think the problem is the sun is directly overhead and bright. I thought the same thing, but it is a real shot.🤔
Mar 26, 2021 12:04:33 #
Jim-Pops wrote:
I think the problem is the sun is directly overhead and bright. I thought the same thing, but it is a real shot.🤔
My take was a little different. I assumed it wasn't so bright because there is no shadow from the moose. And that the exposure was for the moose causing the lights to blow out.
Mar 26, 2021 12:26:41 #
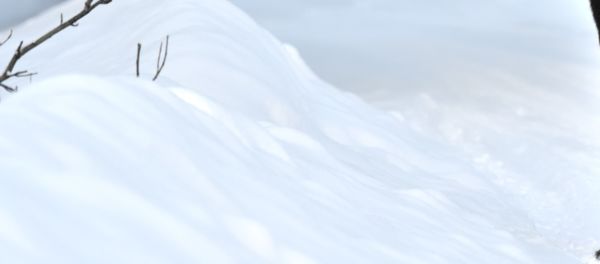
Actually there are plenty of details in the snow....
The halo around some of the moose shows that there has been some editing made to lighten the animal's robe.
The halo around some of the moose shows that there has been some editing made to lighten the animal's robe.
Mar 26, 2021 12:57:49 #


Mar 26, 2021 14:57:40 #
With the comments I went back to it added some shadowing, sharpened the background around the moose toning down the sharpness between the moose and background.
Mar 26, 2021 15:30:29 #
Jim-Pops wrote:
With the comments I went back to it added some shadowing, sharpened the background around the moose toning down the sharpness between the moose and background.
I think this is very good.
I'm not seeing any fringing on the moose, and it's hard to say if he should have any shadows or not.
Adding shadows is not too hard of a technique, but without shadows to begin with, it's leans more towards art than technique, and likely would look like shadows were added rather than natural. I could be wrong though, so if someone wants to add shadows, there are a million tutorials out there on just that. They would definitely be very light that's for sure.
Mar 26, 2021 20:01:08 #
Rongnongno wrote:
Can you post the downloadable version (larger) so that it is usable?
Thank you.
Thank you.
Because i only did it as a support/guide, I only copied the posted image so it is not high quality.
The PS file is here:
https://u.pcloud.link/publink/show?code=XZkG62XZJMorLtMfSykQcxBSRiGnMXqYIMg7
If you want to reply, then register here. Registration is free and your account is created instantly, so you can post right away.