Making a composite image
Jul 29, 2020 03:20:24 #
Not to be confused with composition, a Composite Photo is a manipulated image with elements from another image or media. Creating one requires a capable software and the knowledge to use it. Add to that some basic principles that need to be addressed and the composite image will look natural and believable.
Although the term composite refers to photos with elements from another photo or media, technically it is just copy, paste & moving/removing elements.
For this post, Adobe Photoshop is used. The editing is quick and unpolished as it is just meant to show the process and principles and not to actually produce a required document so please forgive me if you see some roughness and errors in the photos.
The most important skill in compositing is how to isolate, select, copy paste & layer the elements. The better one can be on it, the better the final merging can look. Photoshop has many ways to isolate & then select a part of the image. Some use dedicated tools with each tool having further adjustments. Some selection process is actually that, a process where several tools or adjustments are used in a sequence. Other ways include a reversed approach where transparency adjustments are used, decreasing the visibility instead of making it stand out. Since this is a subject too deep to delve into in this sample, i'll leave it to you readers to expand that part of your skill outside this post.
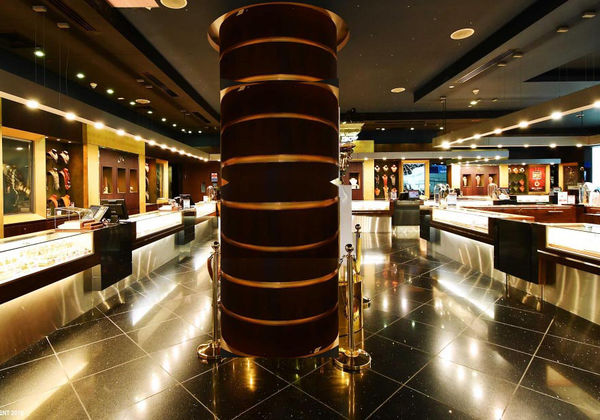
The idea is to make a mock-up image where a display material is digitally inserted to show how it would look in a certain location. The problem is that the area already has a display in it when the photo was taken. So the image is manipulated to return it to its bare presentation for further editing.
.
Although the term composite refers to photos with elements from another photo or media, technically it is just copy, paste & moving/removing elements.
For this post, Adobe Photoshop is used. The editing is quick and unpolished as it is just meant to show the process and principles and not to actually produce a required document so please forgive me if you see some roughness and errors in the photos.
The most important skill in compositing is how to isolate, select, copy paste & layer the elements. The better one can be on it, the better the final merging can look. Photoshop has many ways to isolate & then select a part of the image. Some use dedicated tools with each tool having further adjustments. Some selection process is actually that, a process where several tools or adjustments are used in a sequence. Other ways include a reversed approach where transparency adjustments are used, decreasing the visibility instead of making it stand out. Since this is a subject too deep to delve into in this sample, i'll leave it to you readers to expand that part of your skill outside this post.
The idea is to make a mock-up image where a display material is digitally inserted to show how it would look in a certain location. The problem is that the area already has a display in it when the photo was taken. So the image is manipulated to return it to its bare presentation for further editing.
.
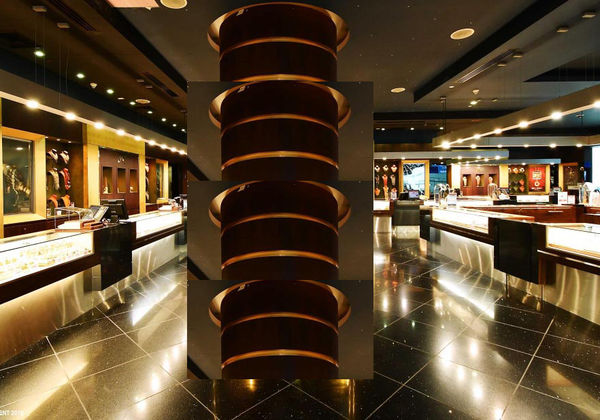
The problem photo. The top of this pillar is copied and used to re-created the bottom part
The copied element is pasted on separate layers and positioned where it is needed
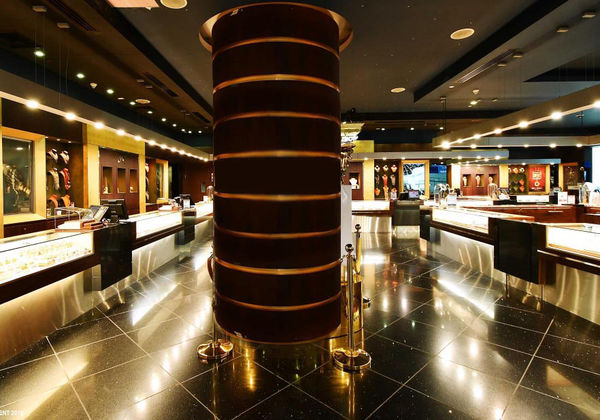
Not needed parts are trimmed. Here we can see one of the Principles needed to be addressed which is "PERSPECTIVE". The curvatures direction is not natural.
We flip some of the elements and using the "Warp" tool, we adjust the curves of the center to match the perspectives plane.
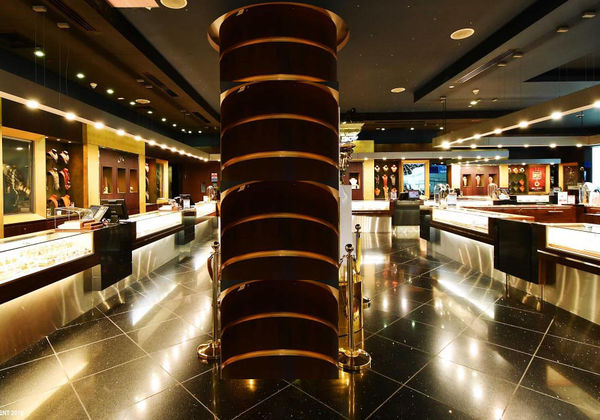
Small details are fixed- painted or copy pasted as needed and we now have a better looking complete pillar.
With a layer below the pillars but above the base image, we now repair the floor & background. We use layers so that we keep a copy the original image in our project. Something we can return to if needed
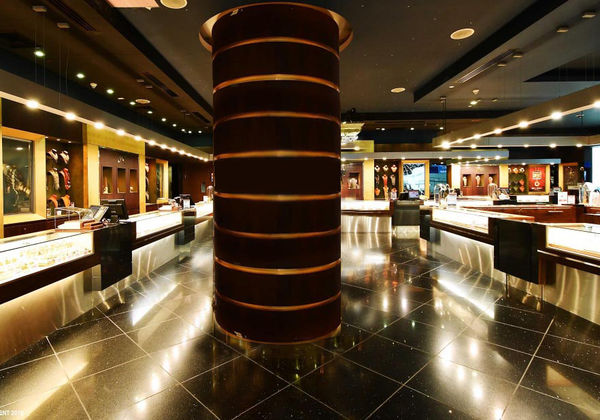
We now address another Principle -"Reflection".The floor is shiny so it would be natural that the pillar would also be reflected on it. Our bare image is now complete and we have successfully removed the old display

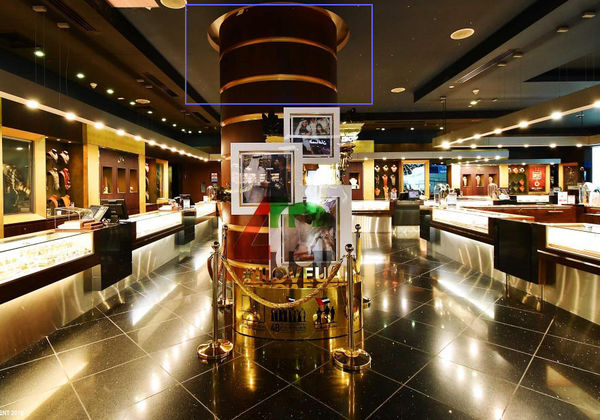
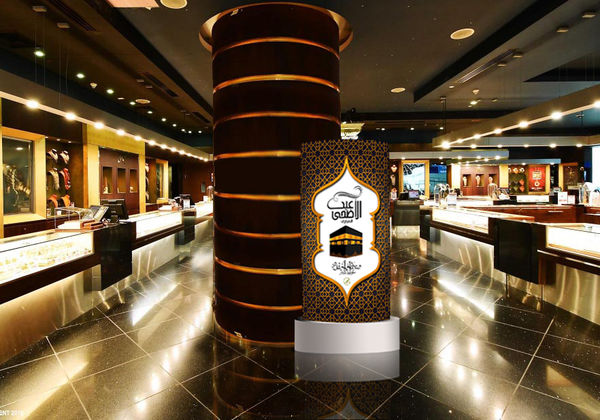
With the principles of "Lighting & Shadow" in consideration, we now insert the external image and create a composite photo. This is a mock-up of how a display would look when applied. External image is not a photo but an Adobe Illustrator Drawing
(Download)
Since light is all over, there is also no harsh shadow on the insert element. Other principles like Color, Pixel Density etc. were not discussed because the insert was a drawing and the size is minimal. For other projects they would matter a lot.

Jul 29, 2020 03:54:55 #
The main principles that need to be addressed when making a natural looking composite image are:
1. Perspective - the viewing plane should be consistent, sharing the same vanishing point.
2. Proportion - the logical size of the element with regards to its surrounding.
3. Depth of field - it should have the same sharpness as the part of the image plane it is located.
4. Color balance - all elements needs to be at least near the same color gamut.
5. Image quality - mixing different quality images should be avoided
6. Pixel density - after resizing/adjustments, the final pixel density of each element should be similar.
7. Light source - the effect of the light on each element should be the same. Add fx if needed
8. Shadow - As with the light source, the shadows should all agree.
9. Reflection - Should be there if it should be there & missing if there is another element in front of it.
10. Composition - is the overall relation of each element and is entirely dependent on the users skill & taste.
Jul 29, 2020 06:46:13 #

You did some pretty good work and the explanations were quite clear as to what was done & why. Because you're showing the viewer an example of what can be achieved, the final Image should be your best work. I wish you had not added that last element. Since you did, I think you should have given to it the same attention to detail as the rest of the image. The viewer then is shown "THIS is what can be achieved" if you work at it.
Other than that, very impressive.
Other than that, very impressive.
Jul 29, 2020 09:29:39 #
Thank you! You went into a lot of effort to illustrate the details of how to 'alter reality' using PS! I am excited to try these techniques and hope to manage it as well as you! Thanks again!!!
Jul 29, 2020 09:34:33 #
IDguy
Loc: Idaho
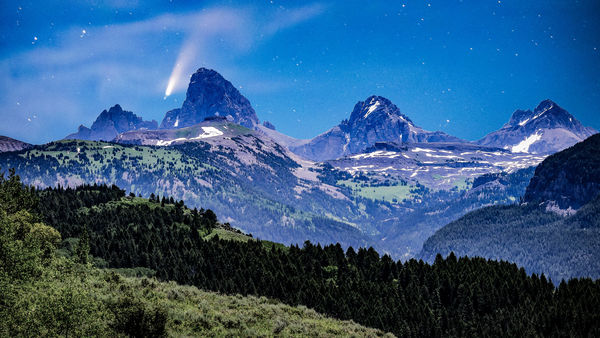
Thanks for some great insights. I’ve been struggling with trying this. I want to combine different backgrounds and my comet images. My problem was getting the second image as a layer.
Here is one resource I found with a couple of ways to do it: https://helpx.adobe.com/photoshop/how-to/compositing.html
Here is one resource I found with a couple of ways to do it: https://helpx.adobe.com/photoshop/how-to/compositing.html
Jul 29, 2020 11:34:08 #
Jul 29, 2020 17:31:06 #
Howard5252 wrote:
You did some pretty good work and the explanations were quite clear as to what was done & why. Because you're showing the viewer an example of what can be achieved, the final Image should be your best work. I wish you had not added that last element. Since you did, I think you should have given to it the same attention to detail as the rest of the image. The viewer then is shown "THIS is what can be achieved" if you work at it.
Other than that, very impressive.
Other than that, very impressive.
Thanks.
It really was a very fast & rough sample i created just for the post. That is why i wrote a disclaimer in the introduction:
"For this post, Adobe Photoshop is used. The editing is quick and unpolished as it is just meant to show the process and principles and not to actually produce a required document so please forgive me if you see some roughness and errors in the photos."
The last element, the display material was the reason why the first image was adjusted. It was cleared so that a replacement display can shown.
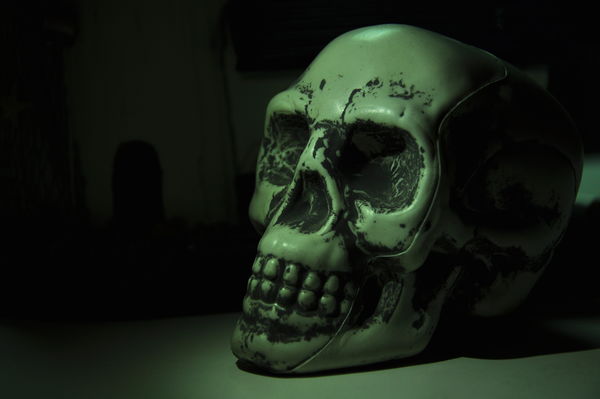
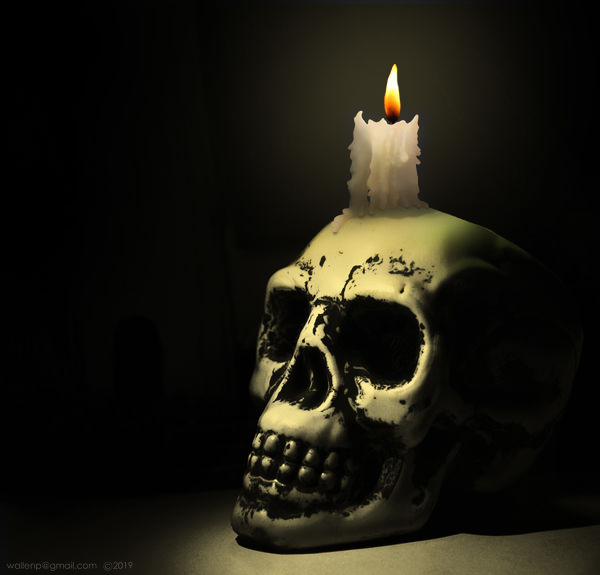
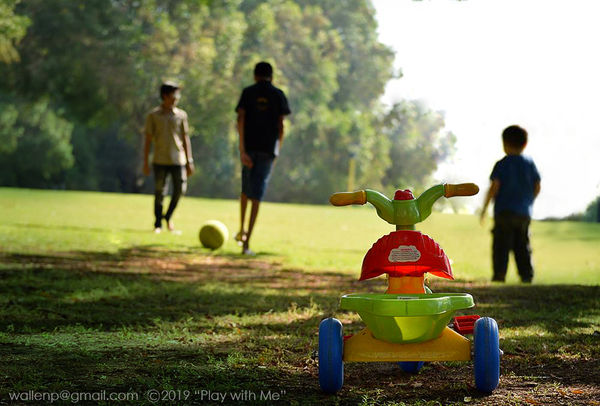
I hope you find these other samples of what can be achieved with compositing/manipulation more pleasing.
All have been previously posted on the following UHH links:
https://www.uglyhedgehog.com/t-619848-1.html (The skull)
https://www.uglyhedgehog.com/t-619677-1.html (Play with me)
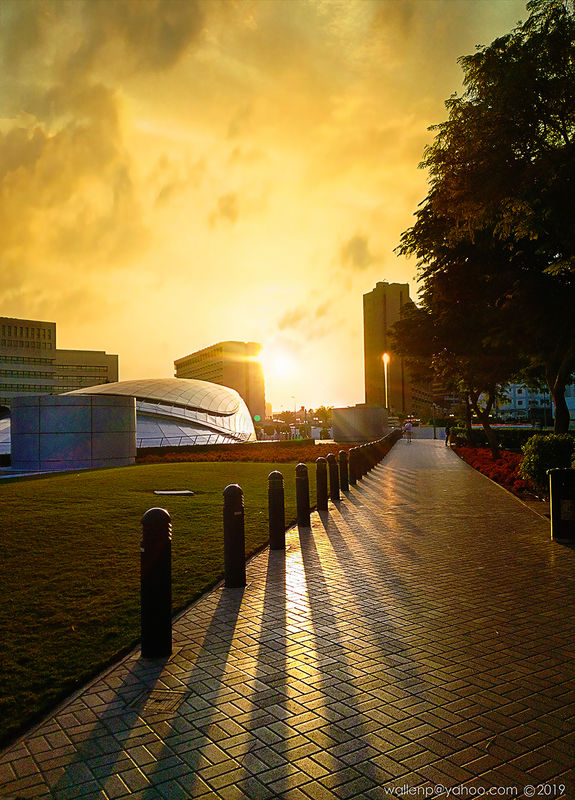
https://www.uglyhedgehog.com/t-621002-1.html (Metro Sunset)
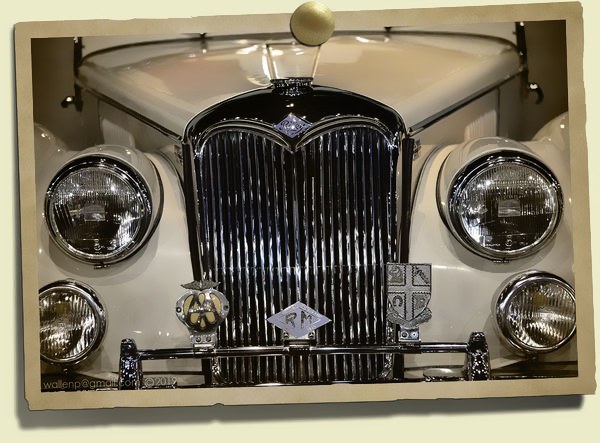
https://www.uglyhedgehog.com/t-614602-1.html (Tacked wall picture)
.
Starting image
The composite image
Starting image

Re-composed image
The clouds were added to make this image more dramatic
Experiment of creating a tacked image
Jul 29, 2020 17:34:42 #
WCS wrote:
Thank you! You went into a lot of effort to illustrate the details of how to 'alter reality' using PS! I am excited to try these techniques and hope to manage it as well as you! Thanks again!!!
 Good luck. There are many tutorials online. I suggest focusing on how to isolate/select an element out of an image, Masking & blending modes. Skills on these will be very helpful in merging images.
-Wallen
Jul 29, 2020 17:42:45 #
IDguy wrote:
Here is what I've been working on. At least now I can get the two together.
Thank you too.
If i may give some insight, #4 Color Balance may be needed to adjust the mountains so it would appear more natural part of the photo.
Good effort
Interest, Practice and Understanding why are the map to success and your well on the way.
Jul 29, 2020 17:51:10 #
IDguy
Loc: Idaho
Wallen wrote:
Thank you too.
If i may give some insight, #4 Color Balance may be needed to adjust the mountains so it would appear more natural part of the photo.
Good effort
Interest, Practice and Understanding why are the map to success and your well on the way.
If i may give some insight, #4 Color Balance may be needed to adjust the mountains so it would appear more natural part of the photo.
Good effort
Interest, Practice and Understanding why are the map to success and your well on the way.
Thanks. Yes, it needs work for sure. It was my first attempt at compositing and I was stuck on getting the two images together as layers. I now have a couple of ways to get that part done. I’m also a beginner on masking so that will take some time.
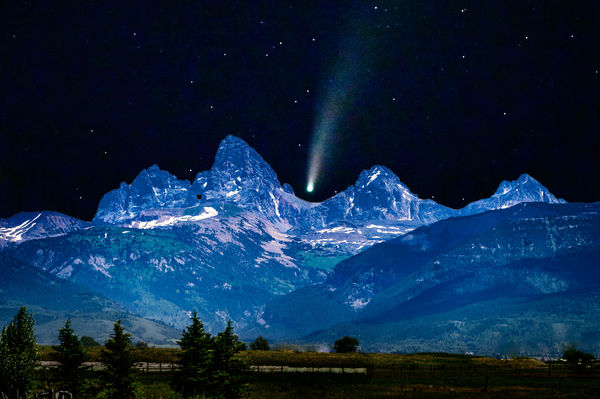
The image of the Tetons (from ID side) was taken in bright sunlight. I got some images of the comet with a blue background. I’ll try a daylight combination too.
Jul 30, 2020 07:58:32 #

Wallen wrote:
Not to be confused with composition, a Composite P... (show quote)
Thank you. That was quite interesting for me. I have NO skill in this stuff at all and am fascinated by it and how people manage to pull it off. Thanks again....nice job.

Aug 2, 2020 11:14:53 #
Blair Shaw Jr wrote:
Thank you. That was quite interesting for me. I have NO skill in this stuff at all and am fascinated by it and how people manage to pull it off. Thanks again....nice job.
Thank you.
Although i have been into digital image manipulation for more than 30 years, i still started from no skill on it just like you. I am lucky to be into drawing, arts, architecture & miniatures before i delved into it so i was able to comprehend it a little faster than usual as it meant merely changing tools.
It is far easier now than way back then as not only have the tools and interoperability are so much improved, you tube and the net provides a powerful resource of information.
Everything is out there for the taking if you want to follow the interest.
Good luck should you decide to and thanks again.
Aug 2, 2020 11:19:55 #
IDguy wrote:
Thanks. Yes, it needs work for sure. It was my first attempt at compositing and I was stuck on getting the two images together as layers. I now have a couple of ways to get that part done. I’m also a beginner on masking so that will take some time.
The image of the Tetons (from ID side) was taken in bright sunlight. I got some images of the comet with a blue background. I’ll try a daylight combination too.
The image of the Tetons (from ID side) was taken in bright sunlight. I got some images of the comet with a blue background. I’ll try a daylight combination too.
Aug 3, 2020 11:25:50 #
Aug 3, 2020 23:07:48 #
IDguy wrote:
Here is another attempt.
That is Much better than your first try.
Check elements: #3(depth of field), #5 (mixing photos of different image quality) and #6 (pixel density) for improvement.
Other than that, Its a very pleasing image.
Your well on your way to making your ideas concrete & tangible.
Congratulations on finding a new path to explore.
If you want to reply, then register here. Registration is free and your account is created instantly, so you can post right away.