How do I resize an image...
Apr 11, 2020 09:09:09 #
Linda From Maine wrote:
This was the result I got after reducing your file to just 100 pixels on a side, then putting on top of a blank 3000x3000 file, then dragging the edges to cover the bottom file. Doing a simple blur is quicker and easier 
Hi Linda
Blurring is not what I am looking for. I tried that already. Imagine you have a "zoom" slider that starts at zero and you can slide it to the right to zoom in. Well, what if you could bring the slider back past zero and into "negative zoom"- moving the slider to the left instead of to the right. That is what I think I am trying to do.
Apr 11, 2020 09:19:11 #

You could try stretching the canvas and using Content Aware to fill in the new area. You might have to do it in stages. (Not sure if PSE can do that).
Apr 11, 2020 09:54:24 #

Apr 11, 2020 09:57:34 #
Linda From Maine wrote:
.....if you can clarify that or if someone else has hit on the right solution, we're good
I think he wants the pattern to be smaller but the overall image to be the same size.
Apr 11, 2020 10:16:05 #
If this is what you're looking for, I will happily provide a tutorial. Basically it's a simple copy/paste + moving, using layers, and was far quicker than I envisioned when I read "stitching." Sorry, Bebu 
Apr 11, 2020 10:37:27 #
Fstop12 wrote:
Here is a video by one of the industries Photoshop Gurus explaining this.
https://vimeo.com/399889177/629167a84a
https://vimeo.com/399889177/629167a84a
Thanks to everyone above for wonderful learnings about editing. The Ugly Hedgehog at its best. and Linda I loved your two photos earlier this week of the cows in the morning mist. Beautiful. But I wonder: how long will you be "....from Maine" Its"s been almost 20 years--isn't it time to be "...from Yakima"?
Apr 11, 2020 12:39:07 #

I suspect what the OP is saying is that when he or she places the texture into a photo as a layer, it is too big, and the OP wants to size it to fit the photo. The answer in that case would be to use the Move tool.
Apr 11, 2020 14:55:25 #
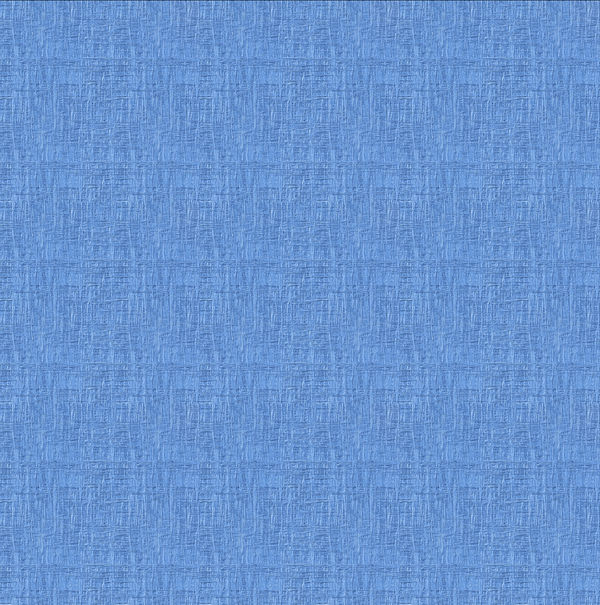
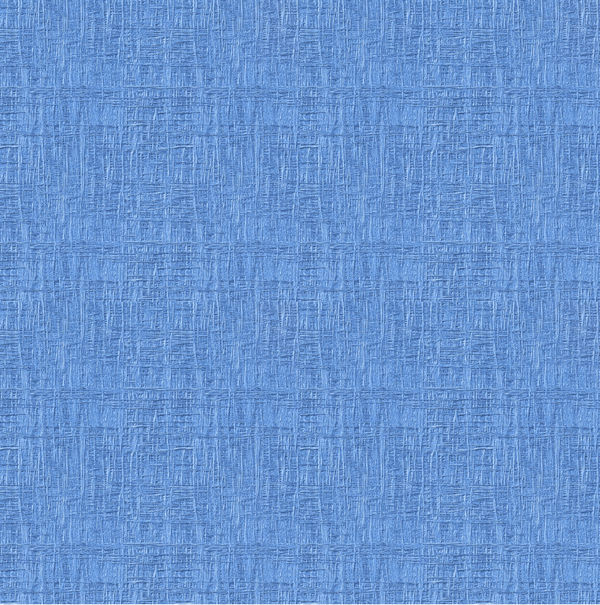
If I understand, the texture in your photo is too magnified. You'd like it to have smaller structure. Is that right? As many have said, you can't zoom OUT to make a finer texture. What I did in the attached is to make the canvas twice the size in both directions (4 times the area). Then I copied the pattern 3 times to make a total of 4 texture swatches that I butted together to fill the canvas. That's all I could think of to do what I think you want.
Apr 11, 2020 14:57:42 #
Oops, just say what Linda did. Almost the same thing. Results look similar.
Apr 11, 2020 15:50:03 #
PlymouthWoodworker wrote:
Ayuh Oops, just say what Linda did. Almost the same thing. Results look similar.
But BebuLamar was the one who first suggested.Apr 11, 2020 16:18:25 #
cahale
Loc: San Angelo, TX
Linda From Maine wrote:
Zooming is simply a view, not an editing action. b... (show quote)
Or you can reduce the contrast to significantly change the impact.
Apr 11, 2020 19:49:32 #
Linda From Maine wrote:
If this is what you're looking for, I will happily provide a tutorial. Basically it's a simple copy/paste + moving, using layers, and was far quicker than I envisioned when I read "stitching." Sorry, Bebu
Linda, this is exactly what I want it to look like! Thank you to you and to everyone who chimed in.
P.S. So now I need to know how you did it. Also, Bebu, your results look good as well.
Apr 11, 2020 22:39:37 #

Perhaps this will help by understanding the concept of texture screens.
Ansel Adams nemesis was a guy named William Mortensen- I won't go into all the history of there opposing factions and ongoing opposition to each other's style and philosophy. Mortenson was the father of special effects and manipulative photographic techniques and was a major force, innovator and proponent of the TEXTURE SCREEN. Many of his famous images resembled etchings, paintings woodcuts, and tapestries. The basic procedure and method of imparting textures in photographs were to photograph a textured surface and print it on a lithographic film and overlay the resulting transparency on the paper on the enlarger's easel during the exposure. This was known as a CONTACT screen. The intensity of the effect depends on what percentage of the printing exposure time that the screen remains on the paper during the exposure. 100% of the exposure time would yield a very definite texture to the degree where the photograph could be mistaken for a painting on a burlap-like canvas. When the screen is carefully removed after 75, 50, or 25% of the exposure had lapsed, the effect would become less prevalent and at the lowest percentage, there would be just a hint of texture where the resulting print would be somewhat reminiscent of other artforms- just enough to show and foster the theme of the image. Perhaps a kinda rough etching look on a portrait of a man with weathered features and skin texture, slight tapestry-like texture on a portrait of a lady in Victorian garb, or a fine linen texture in the still life of an old document, or a cracked surface in an image of religious artifacts.
For those who did not want o create their own screens, for many years, a company called Textureffects manufactured a wide variety of texture screens and a range of sizes to accommodate prints of many dimensions and many styles- some based on the original Mortensen kinds and many other more contemporary offerings.
Yet another technique was to add the scene only to the background or selected elements of a composition by placing the screen over the paper and precise dodging and burning.
In this thread, we are discussing re-sizing a texture image to accommodate a certain size of original image or print but that is problematic because the texture itself may become too coarse or too fine for the original image. It can become unnoticeable, may be mistaken for a flaw, or overpowering. The trick is to find the texture material and photographs it specifically for the image or image types you are producing. If you have a large piece of line, if you photograph it close up the weave and slubs will be very prominent whereas if you shoot it from further away you will end up with a finer effect.that's why in the analog darkroom, the screen dimensions were the same as the print size to be made. There were inexpensive screens that were sandwiched with negative but the results were usually too strong and the texture would obscure too much fine detail and distract for the motif of the image.
I reals that we are no longer using enlargers but will be creating layers in our editing programs but the size and intensity of the texture still matter. The degree of the effect is controlled by varying the opacity of the texture layer. This is the digital equivalent of the percentage of exposure techniques. Areas can be masked or erased to create localized textures.
Weh shooting textured surfaces, cloth, natural subjects like stone, rocks, water, sand, wood grain tree bark- consider side lighting, feather-lighting to enhance the texture.
In the attached image the texture was derived from a wall with crackled paint to which I applied a coat of varnish
Weh applying different layers, you may have to increase the contrast or saturation of the original image because of some muting or diffusion may occur in combining the images or inversely, you may prefer the more grayed down or muted tones.
If you have the time, rather than randomly discovering an interesting texture, which is fun too, design and make one for one of your existing images or planned images. Once you have the basic materials, an original subject and a texture of the rig size and proportions, all you need to do is combine the images and work the sliders and you will have many choices and interpretations to select from. You might find a texture and become inspired to create an image for it or go on the hunt for an interest, compatible, or appropriate texture source for an existing image or something you are planning to shoot.
Apr 11, 2020 23:37:13 #
roadsideron
Loc: Apache Junction, AZ
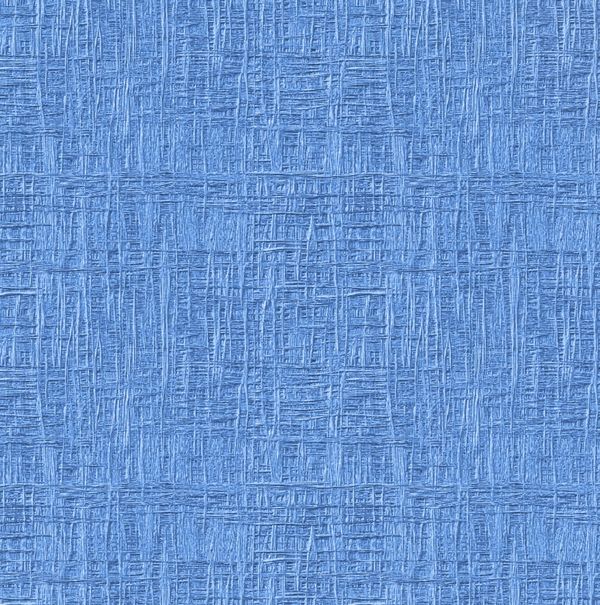
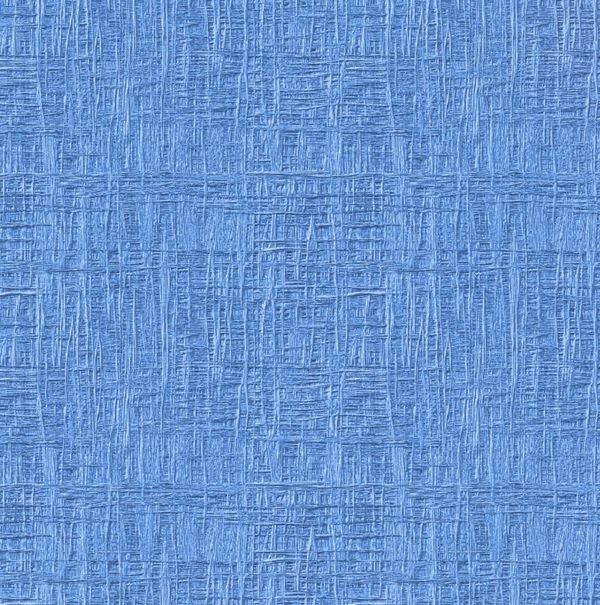
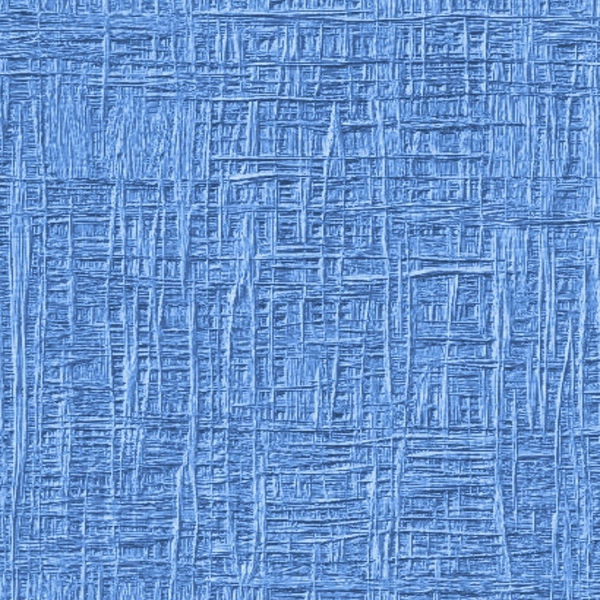
The first is the original 1600 by 1600 pixel. The second one is resized to 800 by 800 and the third is resized by pixels 400 by 400. The last one is cropped to 750 by 750. I also save all of my jpeg outputs to 100 percent quality which helps with better resolution.

Apr 12, 2020 01:17:56 #
roadsideron
Loc: Apache Junction, AZ
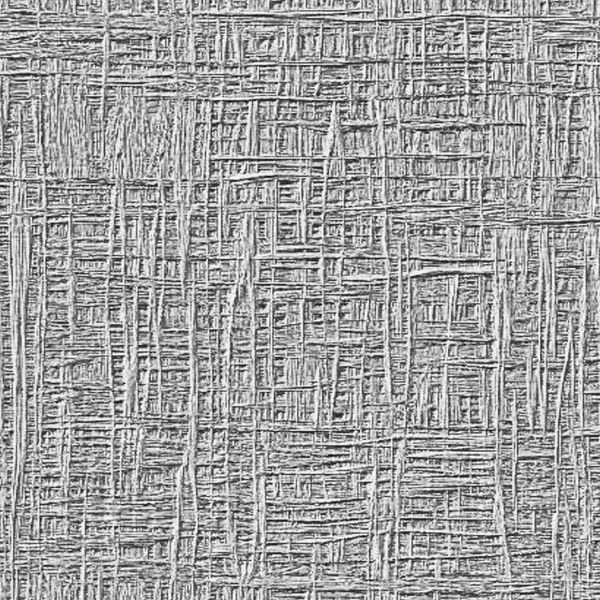
Keeping the crop, de-saturating and resizing back to 1600 by 1600.
If you want to reply, then register here. Registration is free and your account is created instantly, so you can post right away.