A PP technique I use for cropping shots
Feb 3, 2024 10:38:30 #

I know there are people on here much more experienced in PP than I am, and also know there are other ways to accomplish what is needed to preserve a photo the way the maker wants it to look. This is something I do to get to the end result. It is quick and easy and can be done in about a minute.
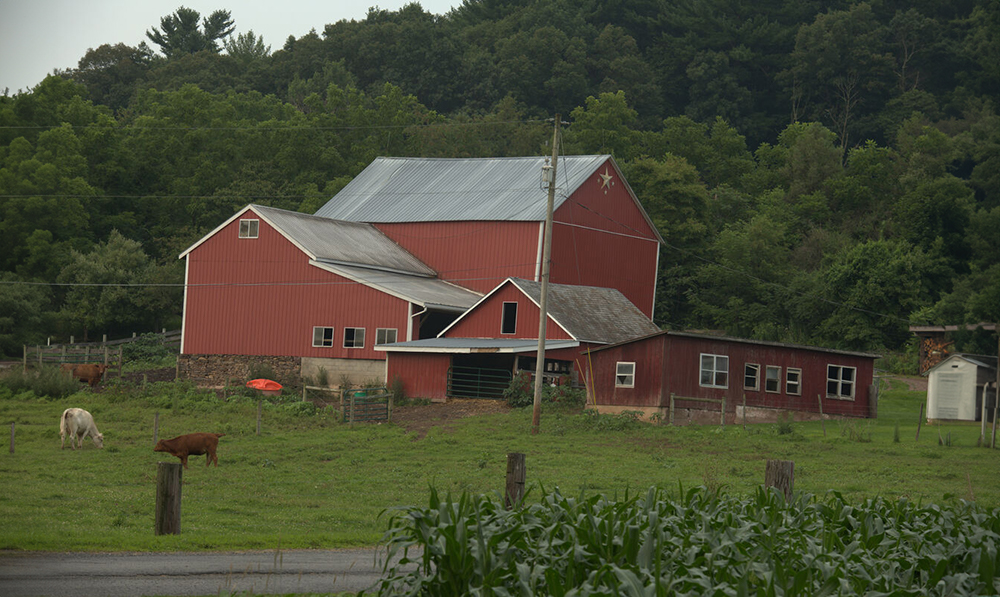
Problem 1: The photo is not straight
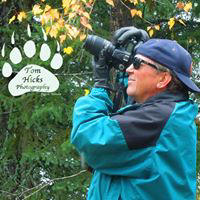
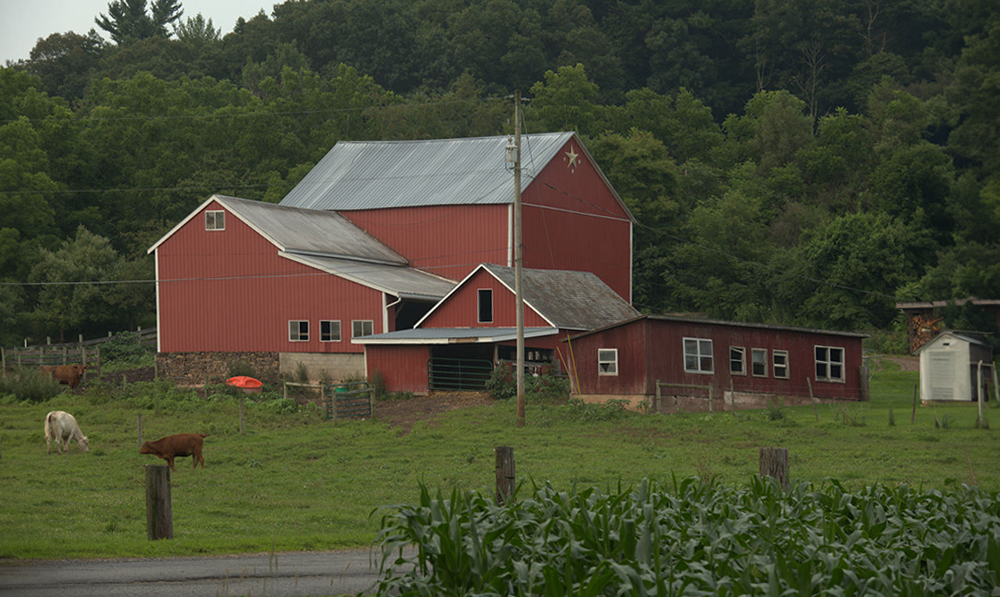
Problem 2: Cropping the shot in a traditional manner will result in cutting off part of the white cow on the left side of the shot.
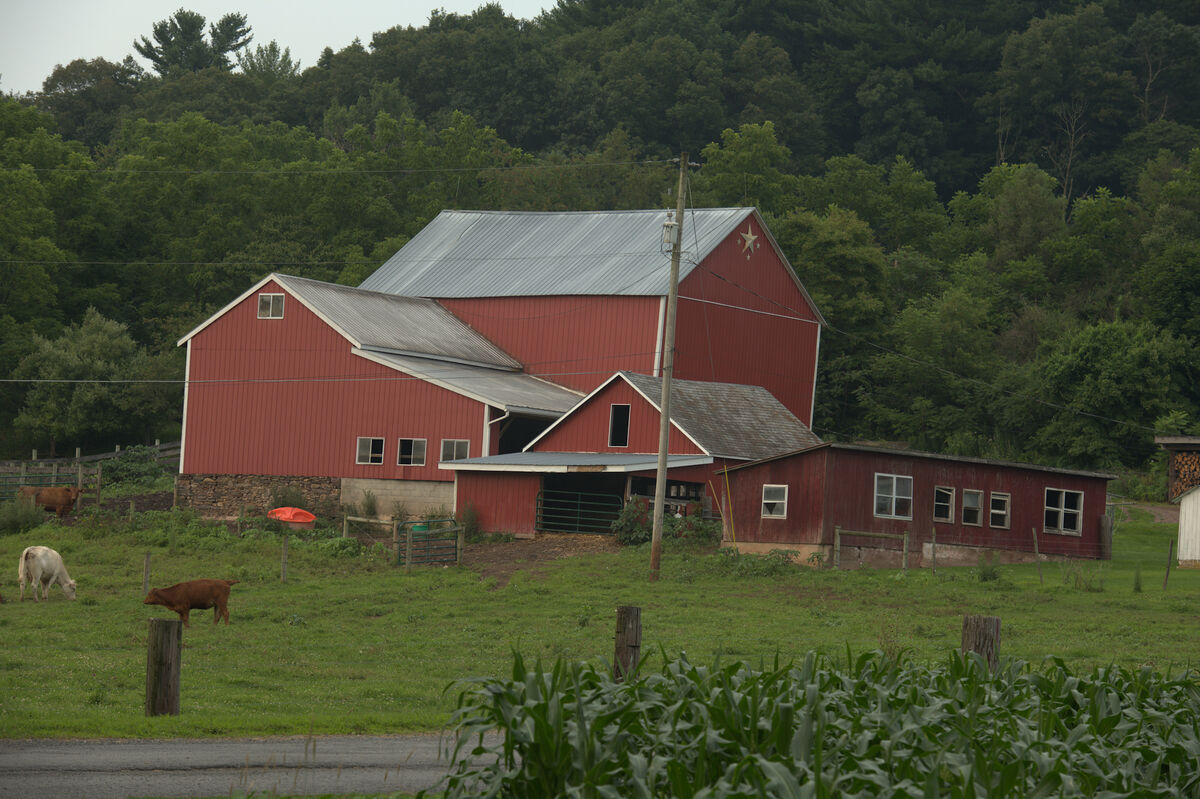
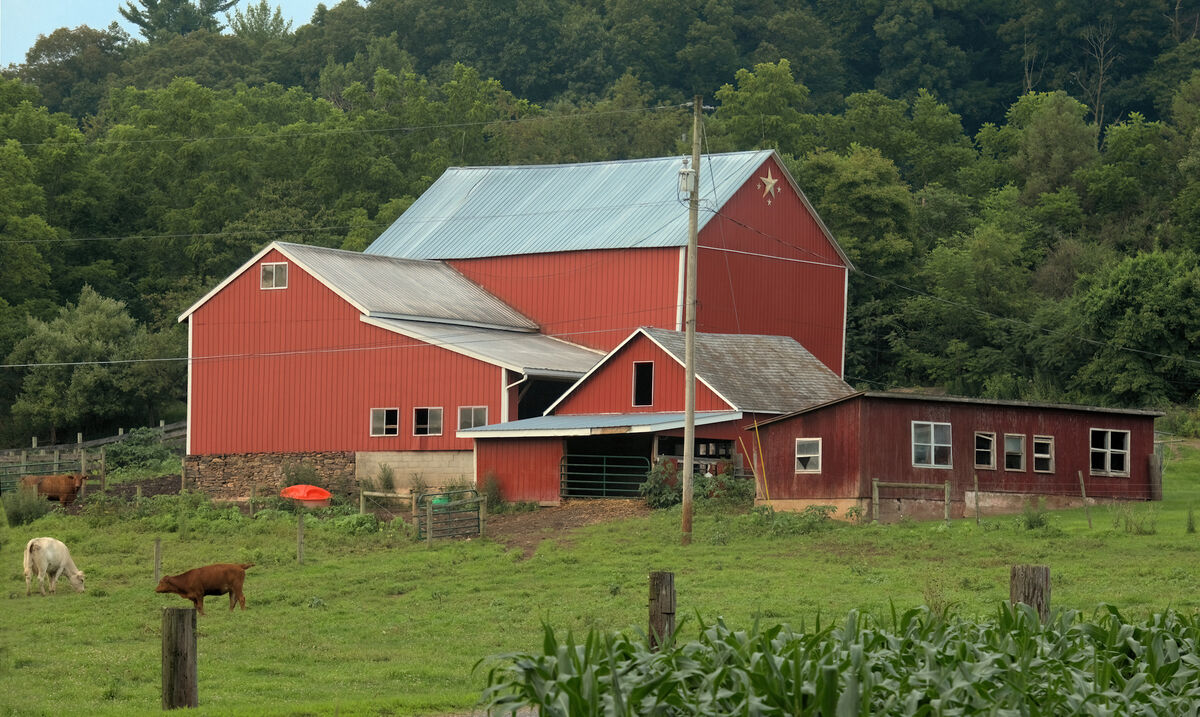
Photo 1 -- original shot
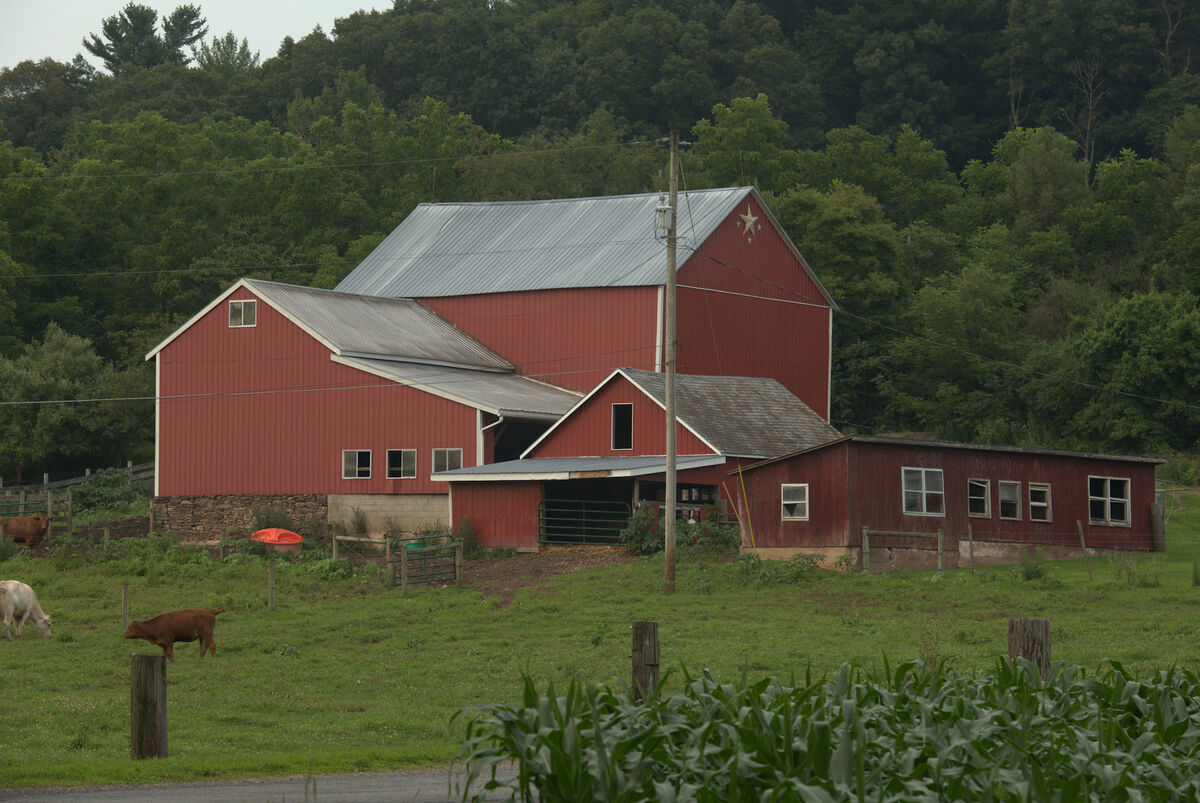
Photo 2 -- original shot with standard cropping
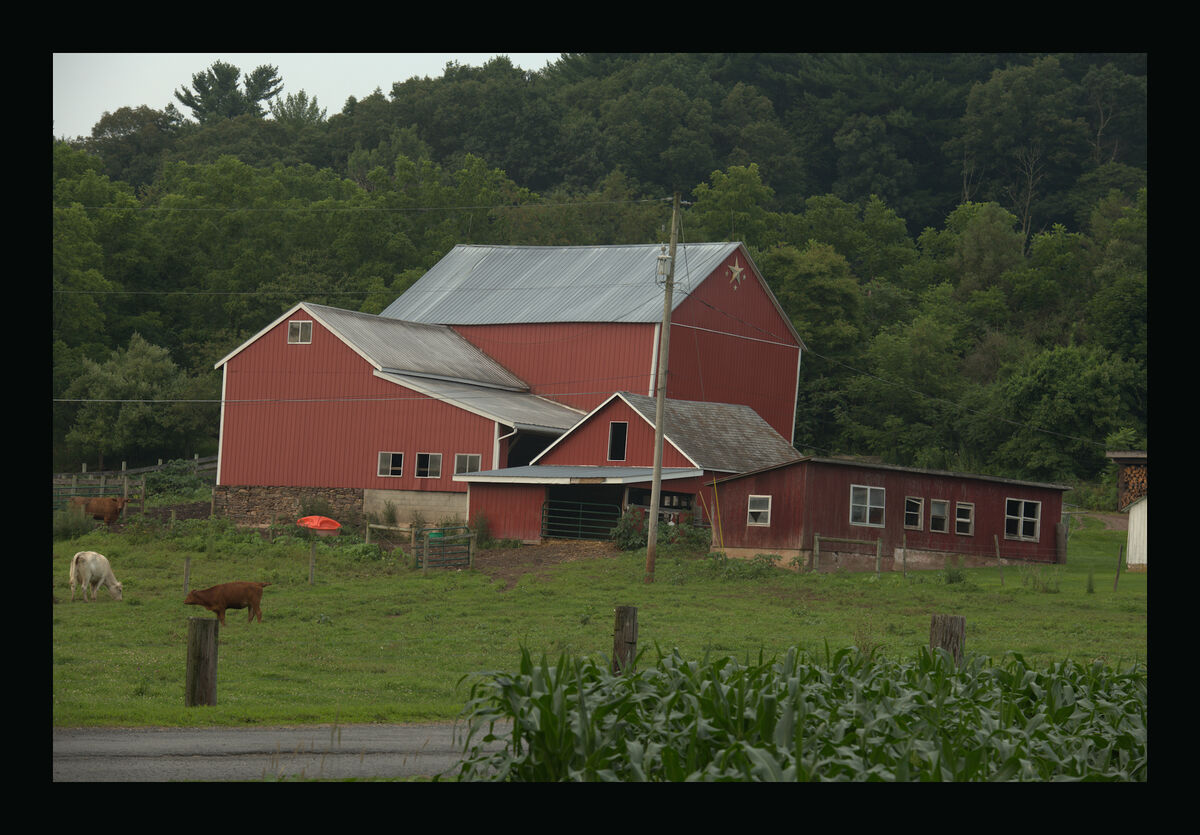
Photo 3 -- original shot with added border
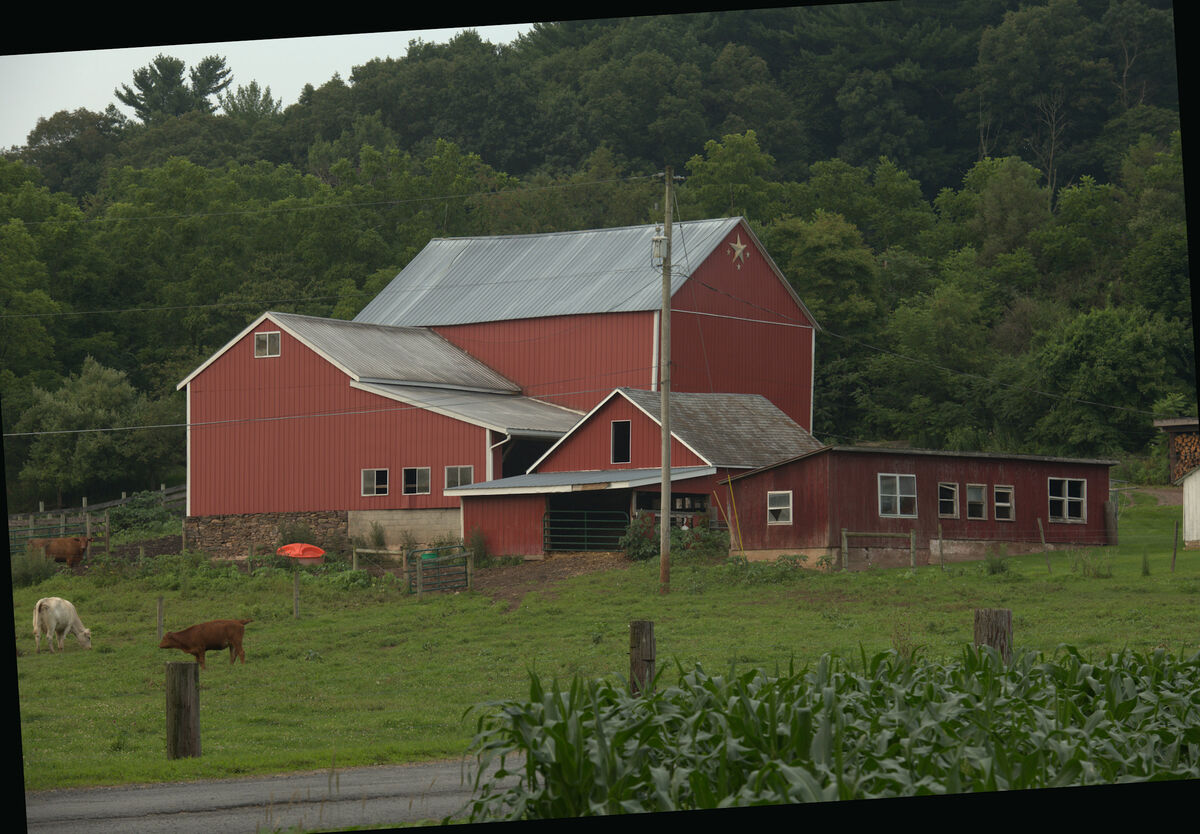
Photo 4 -- crop after border is applied
Photo 5 -- additional crop to get the final look
Photo 6 -- finished photo after cloning in some grass in the lower left corner to eliminate the black triangle left
from the final crop. Additional PP to boost color and eliminate noise.
I hope this will help a few people to save a shot or two. I have used it to keep a face from being cut in half and for other shots like the one posted. While this isn't a wonderful photo or a wall-hanger, it served as a good example of this technique I use for cropping.
Problem 1: The photo is not straight
Problem 2: Cropping the shot in a traditional manner will result in cutting off part of the white cow on the left side of the shot.
Photo 1 -- original shot
Photo 2 -- original shot with standard cropping
Photo 3 -- original shot with added border
Photo 4 -- crop after border is applied
Photo 5 -- additional crop to get the final look
Photo 6 -- finished photo after cloning in some grass in the lower left corner to eliminate the black triangle left
from the final crop. Additional PP to boost color and eliminate noise.
I hope this will help a few people to save a shot or two. I have used it to keep a face from being cut in half and for other shots like the one posted. While this isn't a wonderful photo or a wall-hanger, it served as a good example of this technique I use for cropping.

Feb 3, 2024 10:54:33 #

Curious - What's the purpose of adding the border then cropping it out?
Feb 3, 2024 11:01:33 #
Feb 3, 2024 11:05:06 #
Longshadow wrote:
Curious - What's the purpose of adding the border then cropping it out?
Because it extends the crop outside of the original shot allowing the content you want in the shot to remain. This will produce a shot where a little of the black border is left as it is in the lower left-hand corner of this shot. That can be eliminated by cloning in (a little grass) to cover the black area.
If you look at the original crop, you will see it cuts off part of the white cow.
Feb 3, 2024 11:05:47 #
Orphoto wrote:
Hmmm, thanks for share cropping
I have corn and peas also!
Feb 3, 2024 11:09:36 #
Bridges wrote:
Because it extends the crop outside of the original shot allowing the content you want in the shot to remain. This will produce a shot where a little of the black border is left as it is in the lower left-hand corner of this shot. That can be eliminated by cloning in (a little grass) to cover the black area.
If you look at the original crop, you will see it cuts off part of the white cow.
If you look at the original crop, you will see it cuts off part of the white cow.
I would have adjusted the original crop to not cut the cow.
Feb 3, 2024 11:12:29 #
Longshadow wrote:
I would have adjusted the original crop to not cut the cow.
Like I said, there are other ways to accomplish what is shown here but this is something I find useful at times and I hope others might as well.
It isn't just the crop but the straightening that is also a factor. Download the original shot and try straightening and cropping it without cutting into the cow.
Feb 3, 2024 11:33:08 #
Shooter41
Loc: Wichita, KS
Bridges wrote:
I know there are people on here much more experien... (show quote)
Dear Bridges... Would you explain how one adds a black border OUTSIDE THE ORIGINAL IMAGE? (I know how to add a black border inside the original image using Photoshop CS4, but not outside the origianal image.) Thank you. Shooter41
Feb 3, 2024 11:53:27 #
Thanks for taking the time to share your techniques. There are many ways to skin a cat, and apparently also to crop a cow!
Feb 3, 2024 12:21:01 #

Are you a Photoshop CC user? You can now extend the sides of the photo using the AI feature, then crop.
Feb 3, 2024 12:29:50 #
Bridges wrote:
Like I said, there are other ways to accomplish what is shown here but this is something I find useful at times and I hope others might as well.
It isn't just the crop but the straightening that is also a factor. Download the original shot and try straightening and cropping it without cutting into the cow.
It isn't just the crop but the straightening that is also a factor. Download the original shot and try straightening and cropping it without cutting into the cow.
I think I grasp the concept. Adding the border shrinks the original image to fit within the border thus allowing more room for play?
Nice idea!
Feb 3, 2024 12:57:02 #
Cany143
Loc: SE Utah
As mentioned above, there are many ways to skin a cat.... if kitteh skinnin' happens to be your thing.
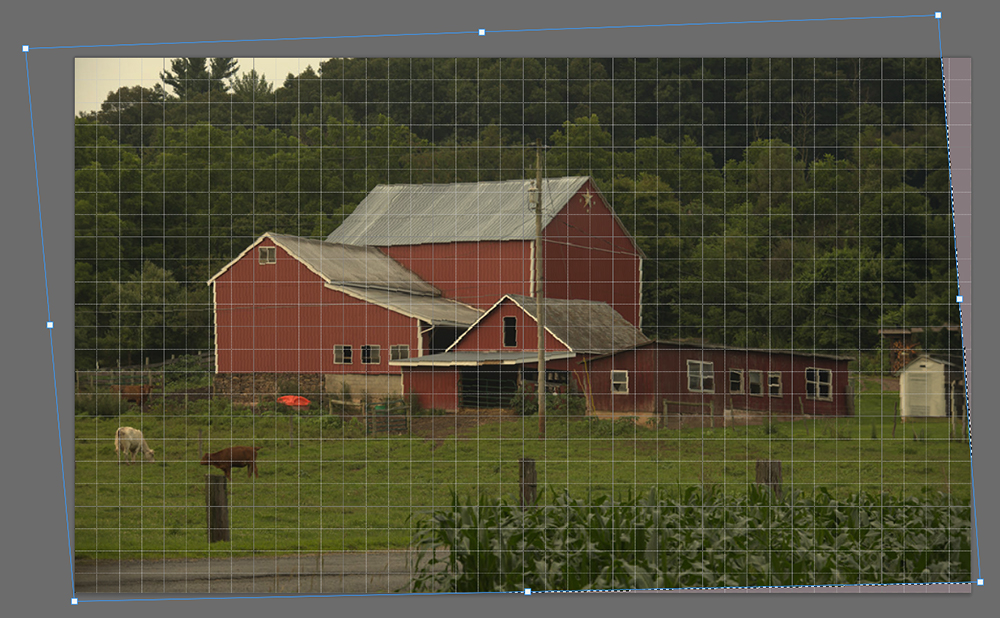
We --or at least some of us-- have lots of tools at our disposal. Some of those have been around for a very long time, others are relatively new. Below is a demonstration of using both sets of tools in combination.
#1: the right- and left-hand margins of your image have both been extended, been given more 'real estate' with which to work. Though there are several ways this could've been done (increase canvas size then clone those areas in, though doing so tends to produce unwanted repetition in large areas), I used generative fill --which can be done by either of several ways-- to 'expand' the image.
#2: after turning on a grid overlay (which makes setting verticals and horizontals more precise), the image was selected and 'transformed' --skewed in this instance-- as shown.
#3: blank areas (on the rh side and bottom) were 'filled' using AI content aware fill, and now you have one possible 'final' image, at least crop-wise. I'd suggest not cropping it though, since the light-colored AI generated shed on the right now tonally 'mirrors' the light-colored cow on the left, and this (in my view) provides a better "point ~ counterpoint" 'balance' tonally, with the added benefit of the cow being no longer awkwardly close to the left margin.
Feb 3, 2024 13:17:01 #

Bridges wrote:
I know there are people on here much more experien... (show quote)
You may have taken the long way around the block, but you got to where you set out to be.
That's what counts. Good job

---
Feb 3, 2024 13:28:57 #
Bridges wrote:
Because it extends the crop outside of the original shot allowing the content you want in the shot to remain. This will produce a shot where a little of the black border is left as it is in the lower left-hand corner of this shot. That can be eliminated by cloning in (a little grass) to cover the black area.
If you look at the original crop, you will see it cuts off part of the white cow.
If you look at the original crop, you will see it cuts off part of the white cow.
I do that when needed. Works well.
Feb 3, 2024 14:04:21 #
lnl
Loc: SWFL
Thank you, Bridges and Cany, for your descriptions and “showing your work” to help us learn.
If you want to reply, then register here. Registration is free and your account is created instantly, so you can post right away.