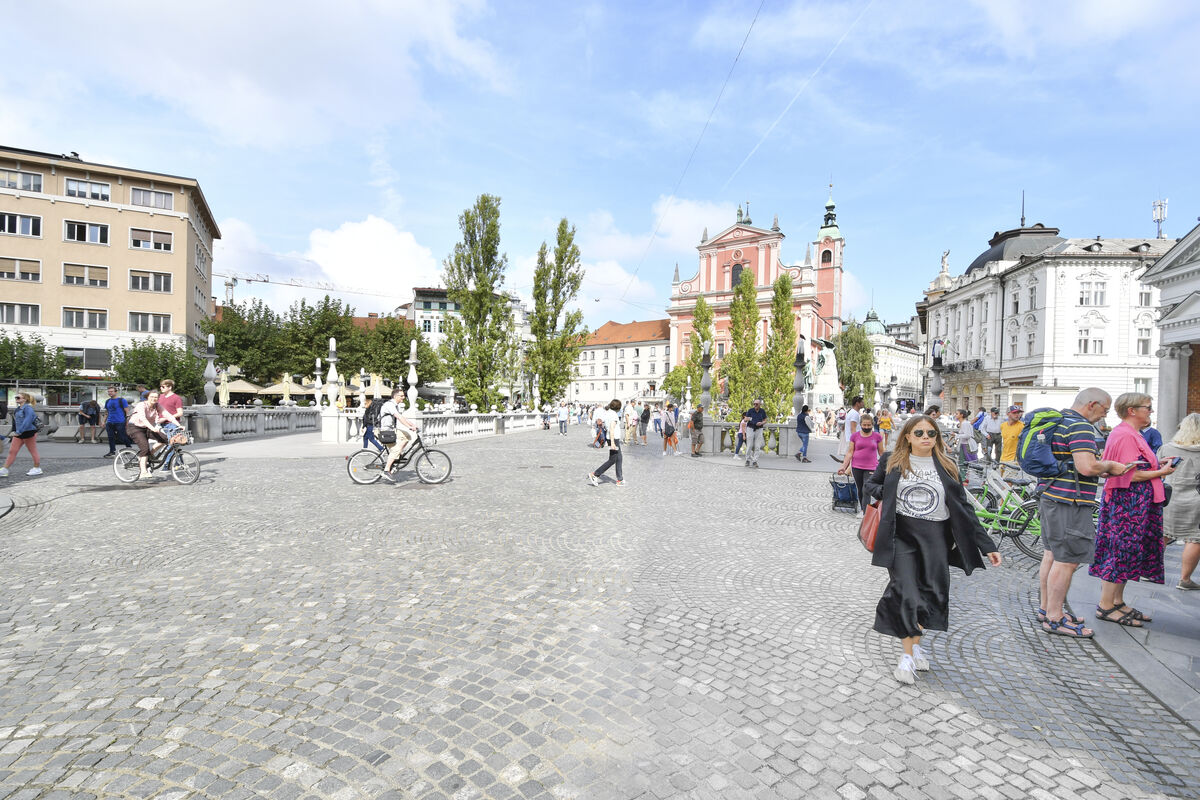
how to remove the shadow in this shot
Nov 2, 2023 20:49:48 #
The time to fix this was when you were framing it, the shadow was as obvious then as it is now.
You either wait for different light or take a different picture
The bright half is way over exposed, clouds appear blown which, if true, cannot be fixed.
You Could try darkening the bright half with a gradient tool, that would reduce the effect somewhat but if Highlights are clipped, you can't really 'save' the picture.
But fundamentally, things in full sunlight are always going to look different than things in shadow .And it is not only the difference in brightness.
This is a great picture to learn from , here are a lot of "What not to do" things here. I am not trying to be rude or harsh. When you think you see a picture you always have to remember that Cameras see differently than we do, and this is one where you have to say, Nice Place Wrong Light, and come back when the light or other elements are better.
Nov 2, 2023 22:31:51 #
terryMc wrote:
You can't fix the multitude of problems with his image in Lightroom. You can easily make it worse, but you can't fix this in Lightroom.
Would you please be more specific about what you consider “the multitude of problems with his image”?
I ask because I’m interested in what UHH members use as criteria for judging a photo to be “good” (or at least “problem-free”).
Nov 2, 2023 22:40:43 #
home brewer wrote:
I just want the steps either in Lightroom or photoshop or a video that will guide me. I have other city scapes or landscapes with shadows that need corrected.The time is later by 6 hours than shown in the data and the photo taken at 11:54 am not 5:54 am. This is the out of camera Jpeg and I will develop the NEF. The only youtube videos I have found have not been helpful.
I would leave the shadow but darken the bright and lighten the dark a bit. Thus making the difference between the sides less dramatic.
But as others have said the people in the shade would look stupid with no shadows and those in the sun next to them have shadows.
Live and learn to see the whole composition including light and shadow in your compositions.

Nov 2, 2023 23:06:50 #

home brewer wrote:
I just want the steps either in Lightroom or photoshop or a video that will guide me. I have other city scapes or landscapes with shadows that need corrected.The time is later by 6 hours than shown in the data and the photo taken at 11:54 am not 5:54 am. This is the out of camera Jpeg and I will develop the NEF. The only youtube videos I have found have not been helpful.
For what it is worth I took a few minutes in Lightroom, using Luminance Masks and Photoshop, using the remove tool, to correct the thin line between the dark and light areas. I DID NOT take the time to rid the image of all the dark areas so you could see the results of the LR Luminance work (the far right foreground). There is still much that could be done to improve the image, but the task here was only the shadows.
Clearly working on composition at the time the image was taken (moving to the left and making the building in the far background (pink face) the image's subject would help the image. For me, there is no subject the way it is now.
I can't take the time to detail the steps taken to correct the image to this point, that is something you will have to gain by watching the videos I suggested.
Nov 2, 2023 23:21:53 #
fredpnm wrote:
For what it is worth I took a few minutes in Light... (show quote)
Technically, its close to mission accomplished. Kudos on the tech. But aesthetically its worse than the crummy original. Now theres a vast central emptiness, a "portrait of nothingness". The shadow boundary at least carved that up somewhat. The whole project is a real classic lose-lose proposition.
Nov 2, 2023 23:32:58 #

fredpnm wrote:
For what it is worth I took a few minutes in Light... (show quote)
You might be knocking yourself out for nothing. If you want to work endlessly to clone, the demarcation between light and shade on the ground, you are in for a tedious job. It's an OK shot- a nice semi-pano effect and a bit of digging and burning will clean up blown-out highlights, and a contrast adjustment will even things out. There is a lot going on in that image- who is going to look at the sidewalk or the roadway?
That is not a small shadow from a tree or an object- it is not easy to clone out or erase- just blend and soften the edges.
Attached- a quick and dirty 5-minute job- take a bit of time and you will do better with a simple approach.

Nov 2, 2023 23:47:37 #
E.L.. Shapiro wrote:
You might be knocking yourself out for nothing. I... (show quote)
My point was not to have a perfect result in the end...but rather to show that some improvements, and likely a great more improvements, could be made by taking the time and using the resources to correct the image. Clearly, it would have been better to deal with the issues of this image at the time the image was created, but that isn't always possible. There are many ways to address image imperfections, I was showing only one, and you are showing another. Having several different examples can help folks expand their thinking...as they say, to something outside the box.
Having said that...I see these as examples showing others what is possible...
Nov 3, 2023 00:20:31 #
srt101fan wrote:
Would you please be more specific about what you consider “the multitude of problems with his image”?
I ask because I’m interested in what UHH members use as criteria for judging a photo to be “good” (or at least “problem-free”).
I ask because I’m interested in what UHH members use as criteria for judging a photo to be “good” (or at least “problem-free”).
When I refer to the "multitude of problems," I mean specifically those facing anyone who wants to make this image over without that shadow.
Obviously, the first problem is the large shadow itself that the photographer doesn't want there. Taking that out and making it look like it was never there entails more than just using a crude mask and increasing the luminosity and contrast.
The whole thing is overexposed. The raw file is likely salvageable.
Highlights are blown.
Image lacks contrast.
There is lens distortion. The people on the right don't likely have feet that long, and the ground doesn't likely slope away like that.
The line where the shadow ends has to be blended. It covers the cobblestones, so their details will blur.
None of the people who are in the shadow are casting shadows. None of them have sun in their faces. All of the people on the other side are casting distinct shadows and have bright sunlit faces and clothing. To make this look natural, all that has to be fixed. Not impossible, but incredibly time consuming and requiring more than Lightroom's developing and light retouching tools.
The foregoing is not what "UHH members" consider "good" or "problem free," this is just me, just my opinion.
Nov 3, 2023 05:15:56 #

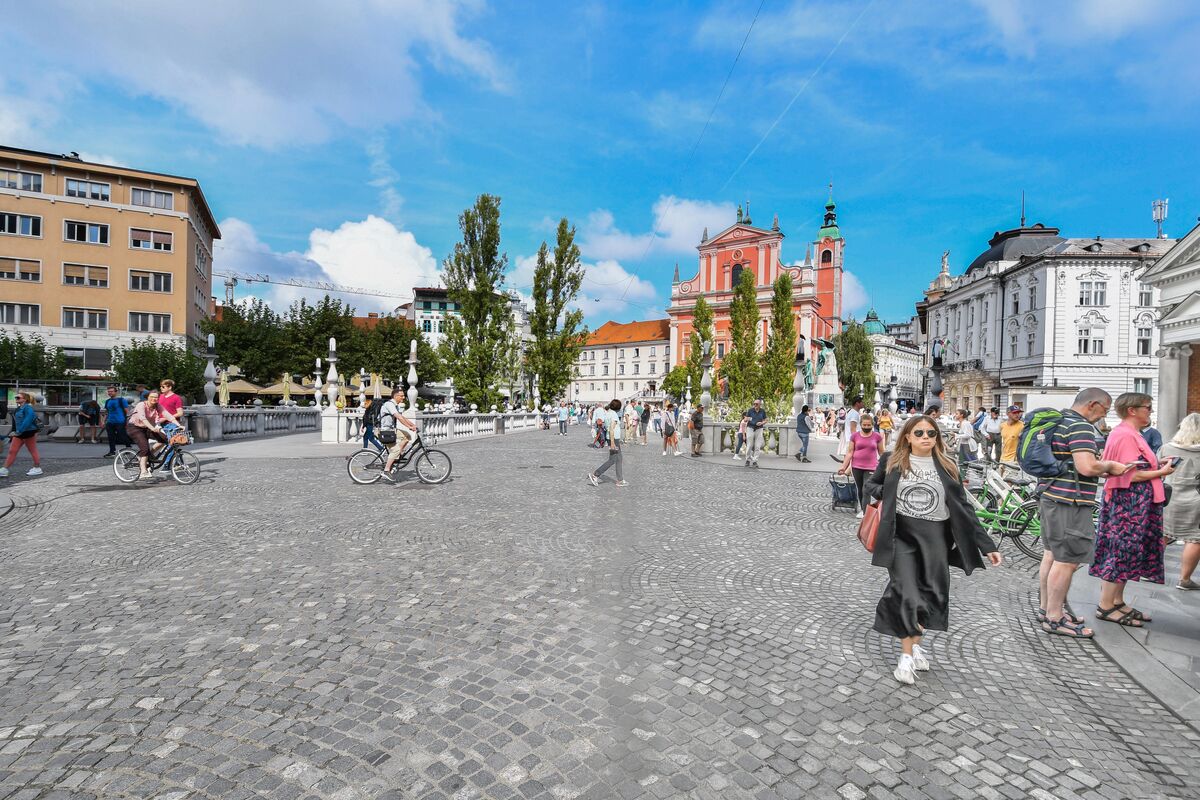
I think the first thing you need to do is be realistic. No fix is going to be perfect, and a decent fix is going to be time-consuming. Plus as has been pointed out, it's a busy shot so the cobbled ground isn't going to command much attention.
The border line of the shadow presents obvious difficulties and the quality of the outcome depends on how skilfully you adjust things like the feathering and size of the brush, and how many refinements you are willing to make to the selections (it'll definitely need several different selections).
Another point that has barely been mentioned is the colour differences between the shadows and the directly lit parts. The universal difference between them (for outdoor scenes) is that the shadows will have a noticeable blue tint and the directly lit parts will have a yellow tint. In both cases in this instance the Temp slider provided both of the required adjustments, but Tint adjustments are sometimes needed.
Typically there are also contrast, saturation and occasionally sharpness and noise differences between shadows and bright areas. Rather than working on just the shadow area it's better to work on both separately. The objective is to find a common neutrality that suits both areas.
I finished off by selecting the whole of the cobbled area and desaturating it and reducing contrast. If problem areas can't be fixed to perfection it usually helps to make those areas less eye-catching.
Final edit below, along with a suggested crop. All editing done in Lr6.
.

Nov 3, 2023 06:08:15 #
Relatively easy. A few ways to do this. First, select color. Use your shit key while clicking the area to select. Then use your quick mask to see what you have selected. Feather or grow your selection. Then use adjust, levels to lighten the area. Alternatively, you can use your selection tool instead and draw a line down the darker area and around it to complete the selection, then adjust your levels for that selection. If you send me the file, I can give it a try for you.
Update: I just saw the additional images. Looks like others have helped you well.
Update: I just saw the additional images. Looks like others have helped you well.
Nov 3, 2023 06:24:47 #
Nov 3, 2023 07:22:05 #
fredpnm wrote:
For what it is worth I took a few minutes in Light... (show quote)
Miserable looking,looks like the right cobbles got smeared and the lady has no shadow like the people to the left.
Nice try but lack of shadows on people makes them look cut and pasted.
Better to remove them completely but then still have the smeary cobbles.
Nov 3, 2023 08:11:35 #
I would not , it is part of the picture , actually the shaded part of the picture is more pleasant to the eye .
Nov 3, 2023 08:35:21 #
billnikon
Loc: Pennsylvania/Ohio/Florida/Maui/Oregon/Vermont
home brewer wrote:
I just want the steps either in Lightroom or photoshop or a video that will guide me. I have other city scapes or landscapes with shadows that need corrected.The time is later by 6 hours than shown in the data and the photo taken at 11:54 am not 5:54 am. This is the out of camera Jpeg and I will develop the NEF. The only youtube videos I have found have not been helpful.
pick Quick SELECTION TOOL, let it capture all of the shadow, go to IMAGE, ADJUSTMENTS, BRIGHTNESS/CONTRAST, OR EXPOSURE SLIDER, slide until it matches the bright side. easy in photoshop
Nov 3, 2023 08:53:16 #

R.G. wrote:
All editing done in Lr6.
All editing done in Lr6.
Wow ... would have never thought you could do that in LR6.

If you want to reply, then register here. Registration is free and your account is created instantly, so you can post right away.