USS Missouri in Heavy Seas
Nov 23, 2022 10:14:36 #
UncleBuck wrote:
Thank You kindly, for me 5 and 7, with 5 slightly ahead. My favorite of the ones I did is a different version of #5 which I didn't include in this post, a little darker, more moody. Delighted you enjoyed them and Thank You for the question !!!

I can see why you like that, attractive colours and even more drama. Very nice.
Nov 23, 2022 10:16:06 #

magnetoman wrote:
I can see why you like that, attractive colours and even more drama. Very nice.
😊 Thank You
Nov 23, 2022 10:28:25 #
Nov 24, 2022 21:58:05 #
I recall a couple days of riding through seas like that on a much smaller ship and having difficulty walking along a passageway. Some great photos.
Nov 24, 2022 22:50:14 #
PhotogHobbyist wrote:
I recall a couple days of riding through seas like that on a much smaller ship and having difficulty walking along a passageway. Some great photos.
Thank You and Thank You for your service !!!
Nov 25, 2022 11:29:42 #
Fstop12 wrote:
Would love for you to show a "How to tutorial" on this effect!
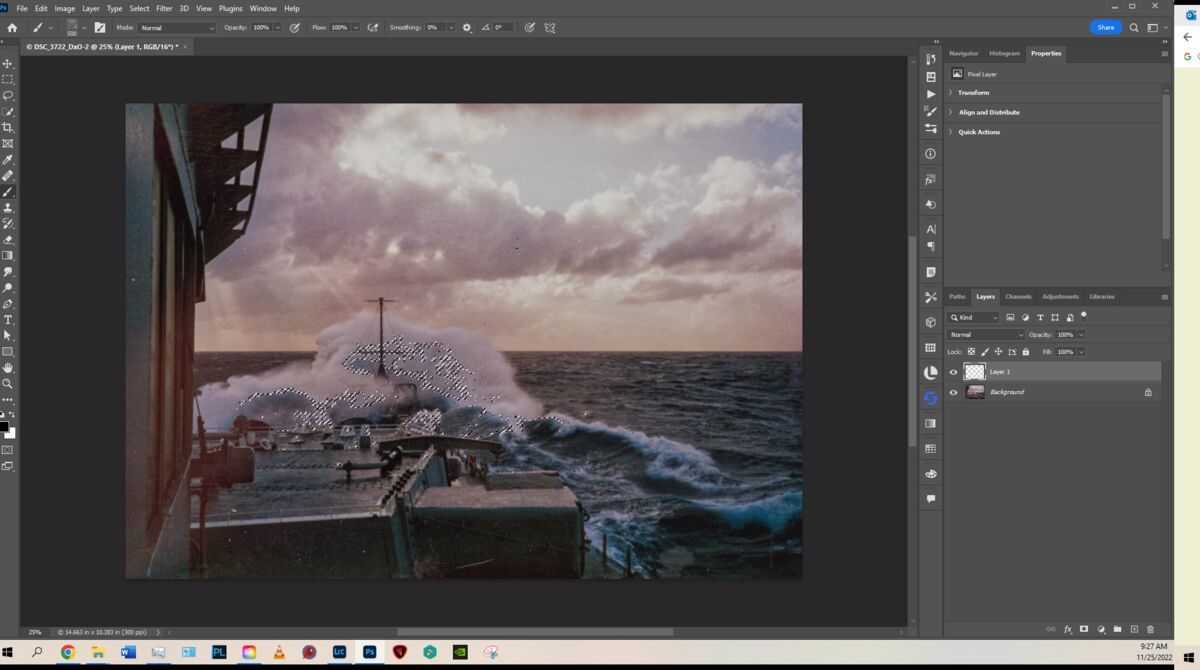
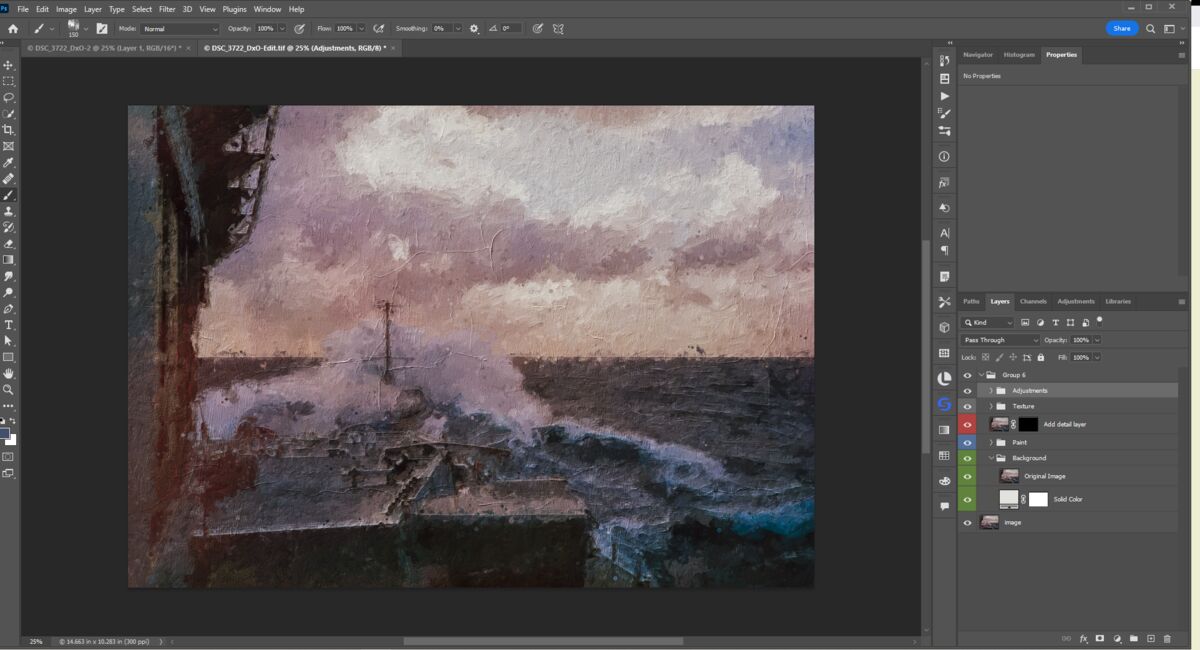
The painting effect is built up in multiple layers using a variety of brushes, varying the colors and sizes, each with it's own layer and using various blend modes and opacities. Rather than do it all by hand, I'm not an artist, I'll use stroke paths to do the heavy lifting. After I've done the painting I'll put a copy of the original image with a black layer mask so I can paint in detail if I choose. For reducing or removing some of the effect, I'll normally put a white mask on the layer or group that created the effect and paint it out where I don't want it. I'll also add a color fill adjustment layer just above the background layer. Afterward, above these layers I'll apply the texture or patterns, and different filters and adjustments.
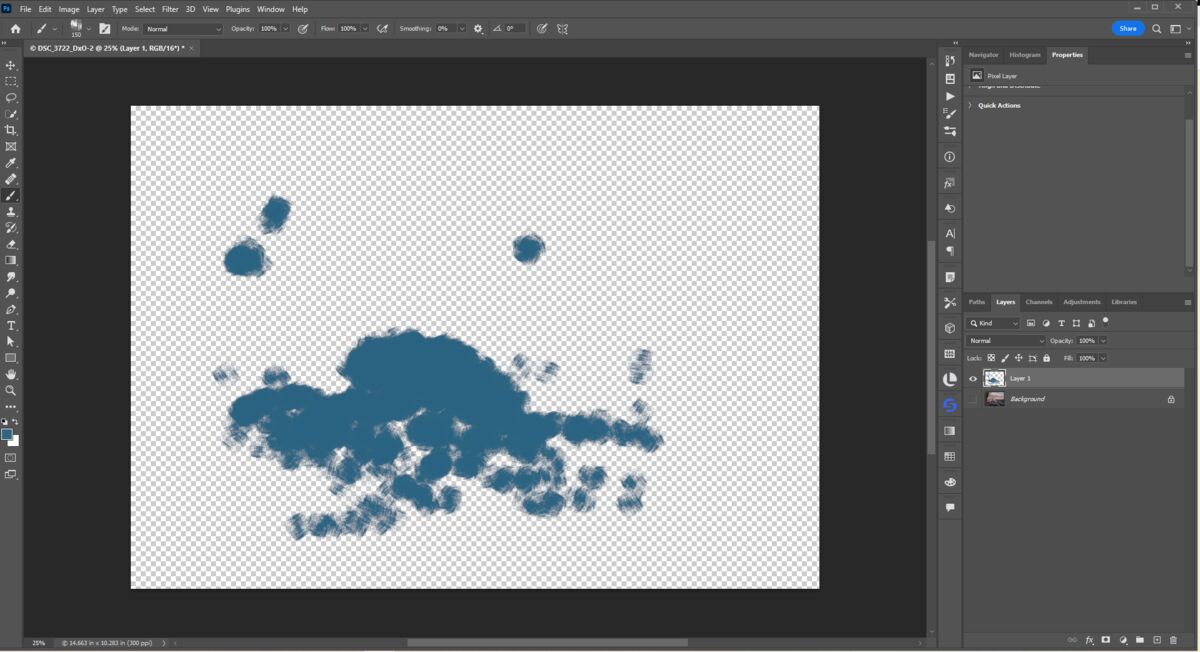
In creating the mask for the stroke path, as there are several different ways, I normally use either the channels or color range, probably color range most often as I find adjusting the fuzziness and range can give me a good variety of masks.
It will take lots of trial and error with the different settings to achieve the effect you want but, but doing so will help you become more proficient with the effect results, and of course there are many different applications for using a stroke path. In this image I used 7 different paint layers. The link below is to some PS Essentials tutorials on brushes
https://www.photoshopessentials.com/?s=brushes
Go to Select, Color Range, and adjust for the range you want, when you click OK you'll see a mask of that range

Holding the Ctrl/Cmd key click on the new layer icon in your layer panel thus giving you a transparent layer with that mask on it
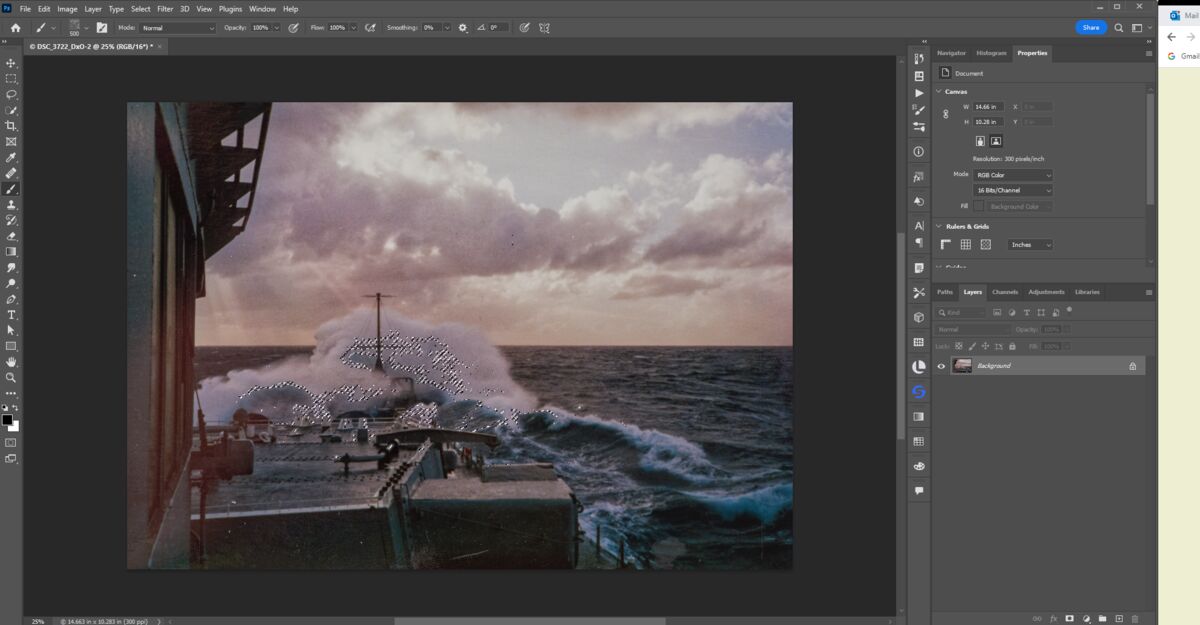
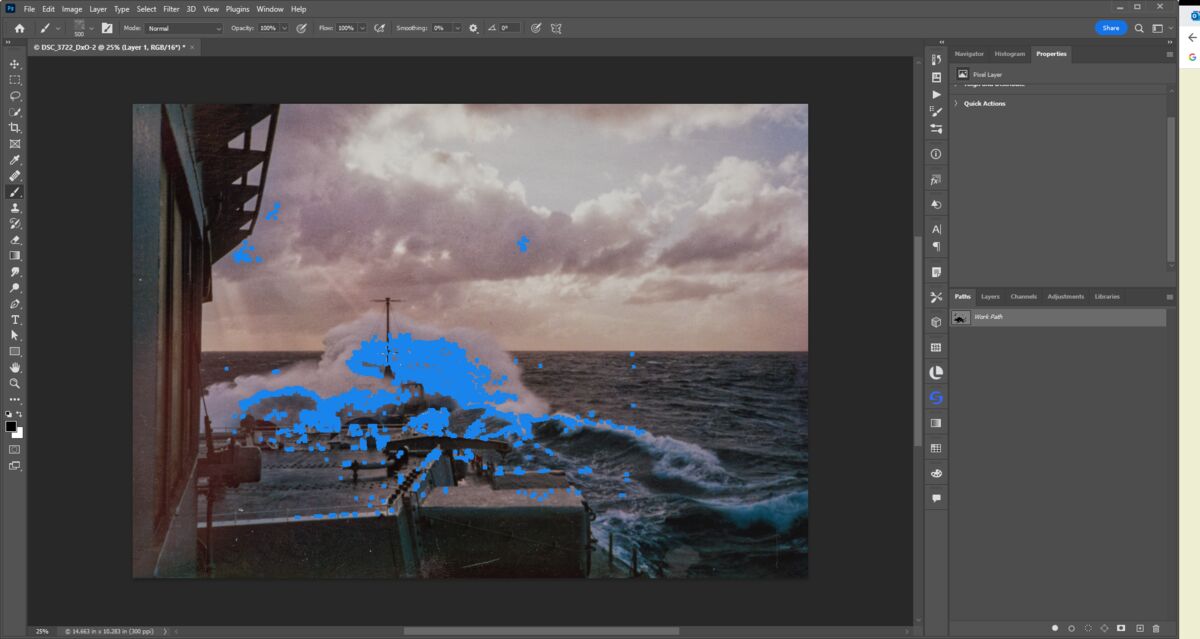
With the mask layer selected go to paths, bottom of that panel click make new work path from selection, 4th button from the right and you'll see the work path in blue
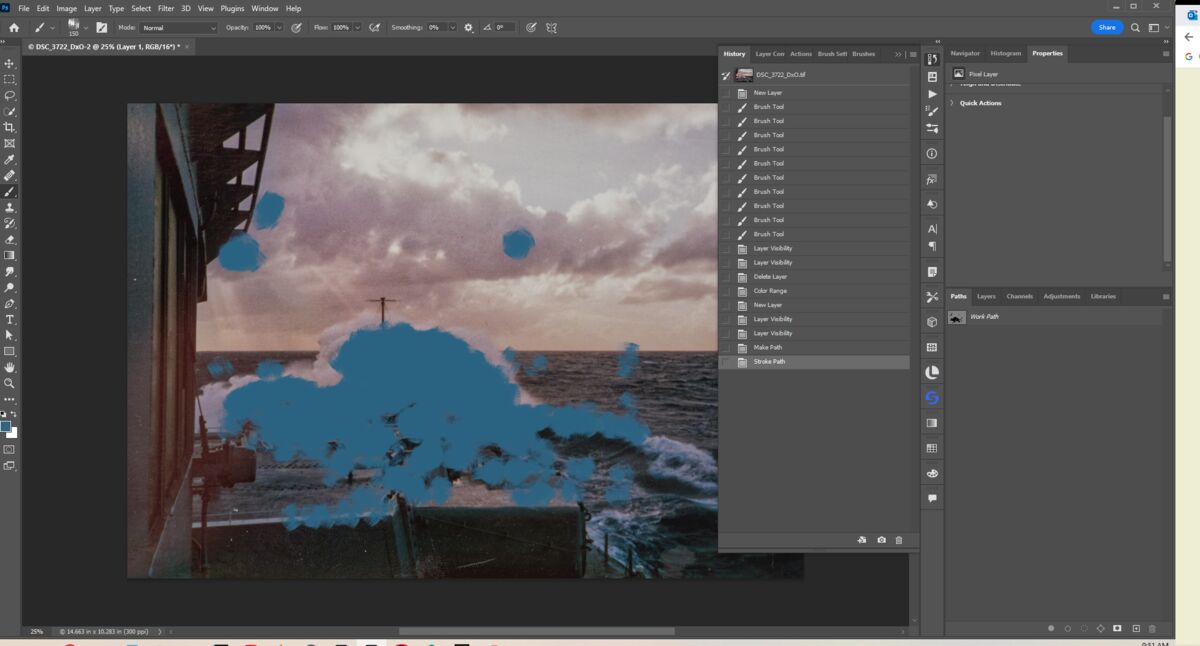
Right click on the work path layer well to right of the words to pull up the drop down box and select stroke path, making sure you have your brush size color and brush settings already selected
Before you leave the Paths panel in the empty space belown the path layer click to remove the blue stroke path outline leaving the painted brush strokes
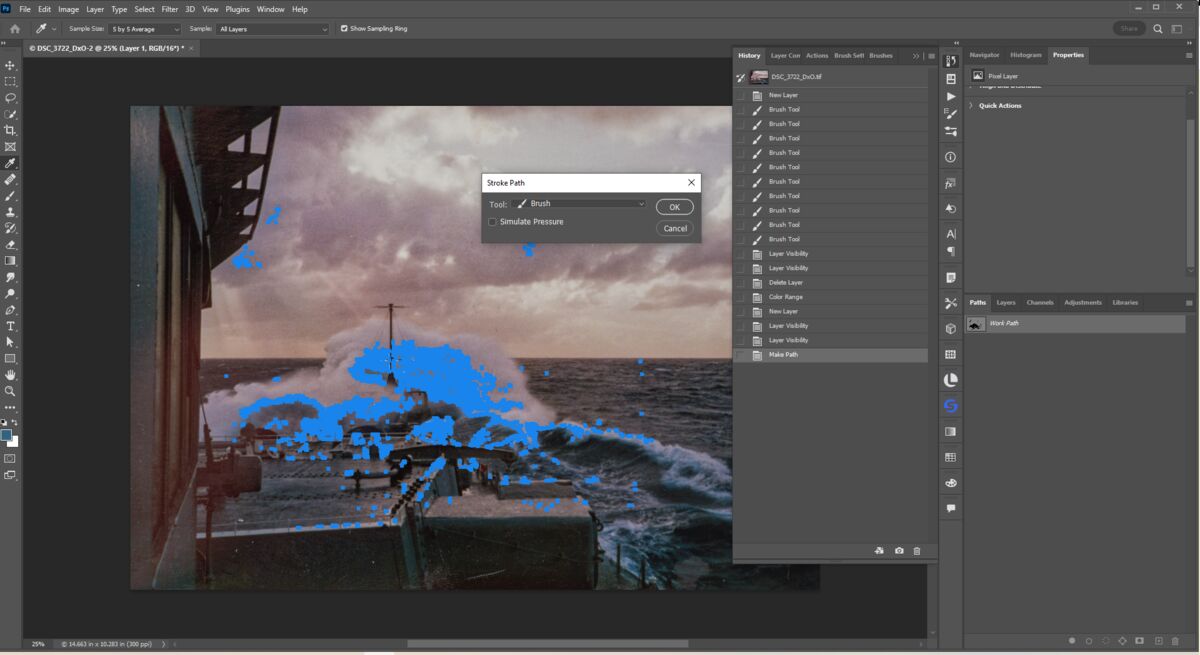
Go back to the layer panel and by turning off the eyeball on the background layer you can see where the brush was applied along the stroke path
If you want to reply, then register here. Registration is free and your account is created instantly, so you can post right away.