Much better way to mask in Photoshop
Nov 17, 2022 09:26:22 #
Ok , I just tried another way encase I did it wrong the first time . This is without changing to the cloud in Pref. I selected Select Subject , then I clicked on the Mask tool on the bottom right of PS and got the results you got using the cloud . Before I clicked Select Subject , then I clicked the Select and Mask and got the results I posted before . That's when I thought I did it wrong . And tried the 2nd way . Here is the sample after doing it the 2nd way vs the 1st way . Looks the same as yours to my eyes . What do you think ?
Nov 17, 2022 09:36:01 #
As far as I can tell It looks the same.
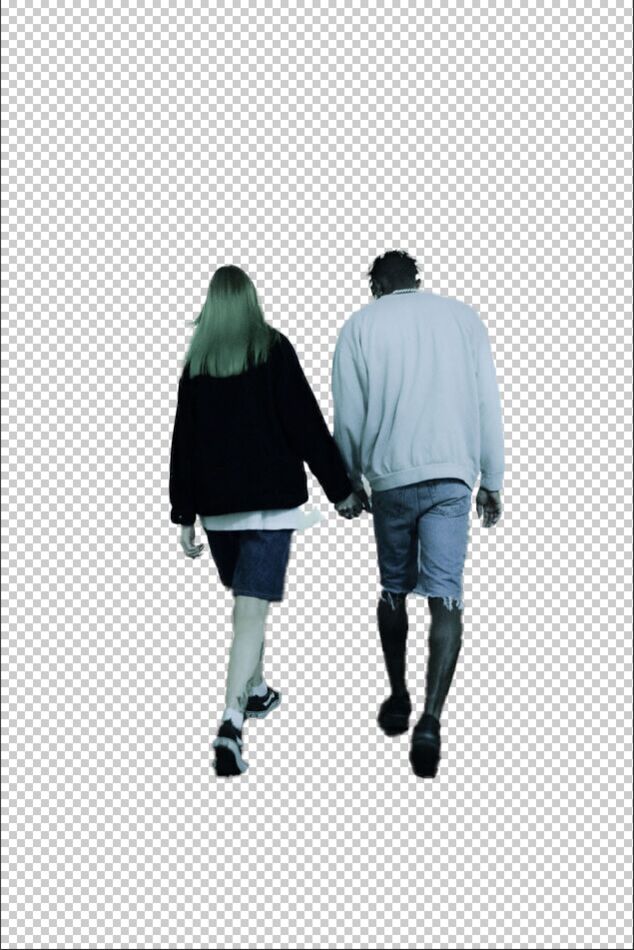
Now that you have it set for the cloud. Just try this one out. They are friends of mine. The picture is untouched just as I got it. After processing it I used in a directory. Tell me what you think about the one click mask in this.
Now that you have it set for the cloud. Just try this one out. They are friends of mine. The picture is untouched just as I got it. After processing it I used in a directory. Tell me what you think about the one click mask in this.
Nov 17, 2022 09:43:19 #
I don't have it set for the cloud . I changed it back to Device and got the results I posted the 2nd time . I just downloaded your new photo and done it the same way as the last one . I'm not using the cloud .
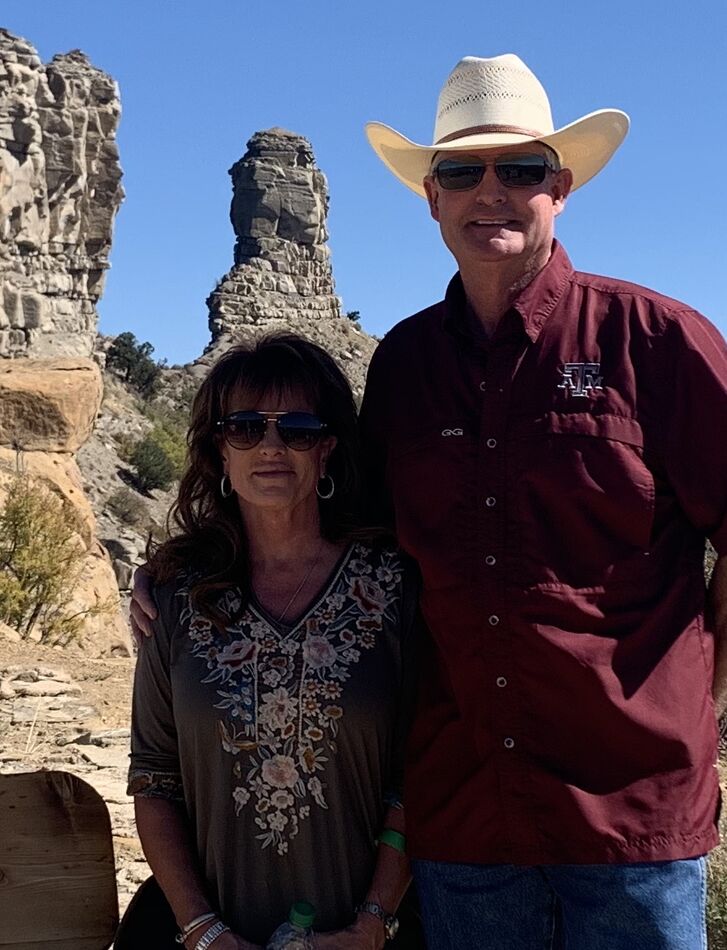
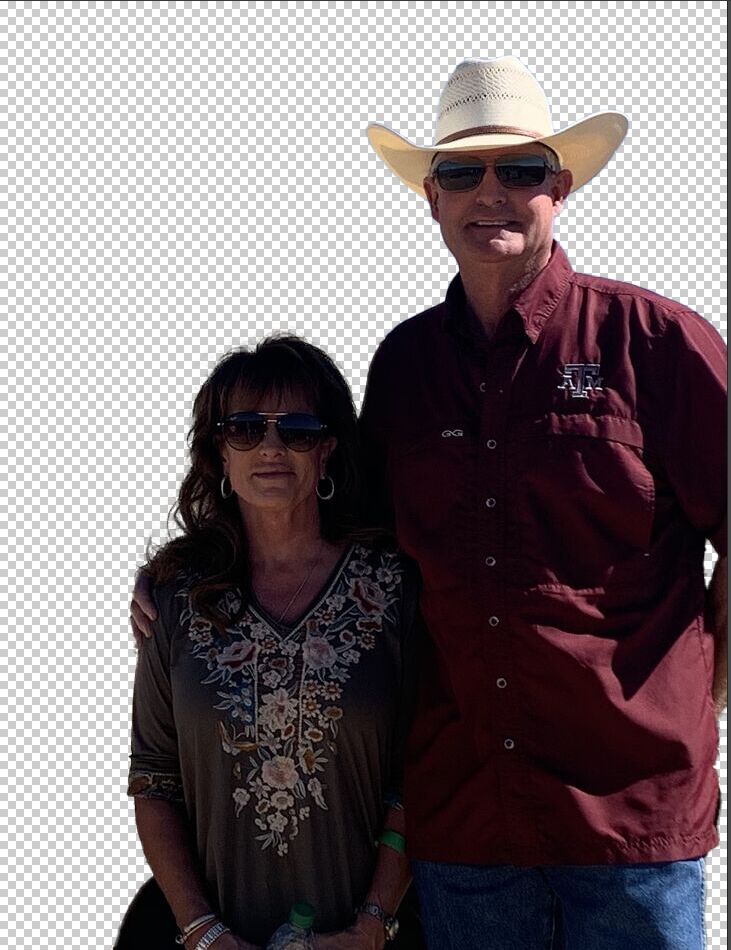
Here is the results for this new photo
Here is the results for this new photo
Nov 17, 2022 10:46:09 #

abc1234 wrote:
Rongnongno, how did you merge the masks? Did you have to switch clouding masking off to get the local masking?
I used the two methods, one after the other, by doing what you described:
► Switching the mask creation method.
► Merging the masks.
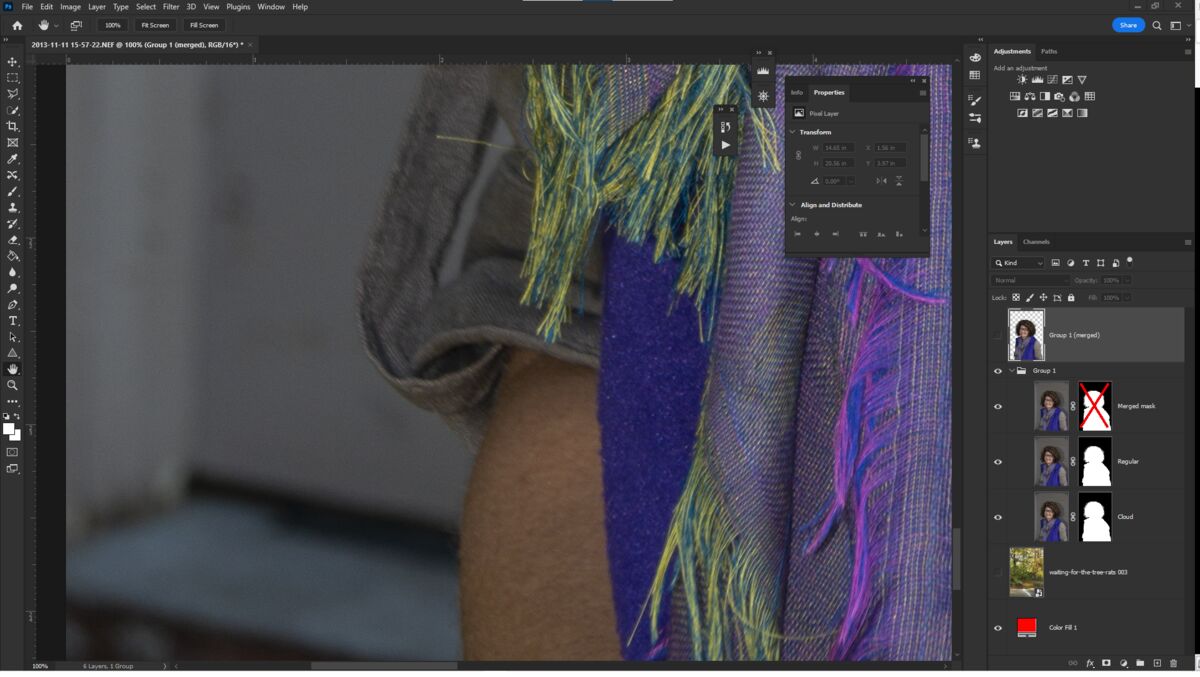
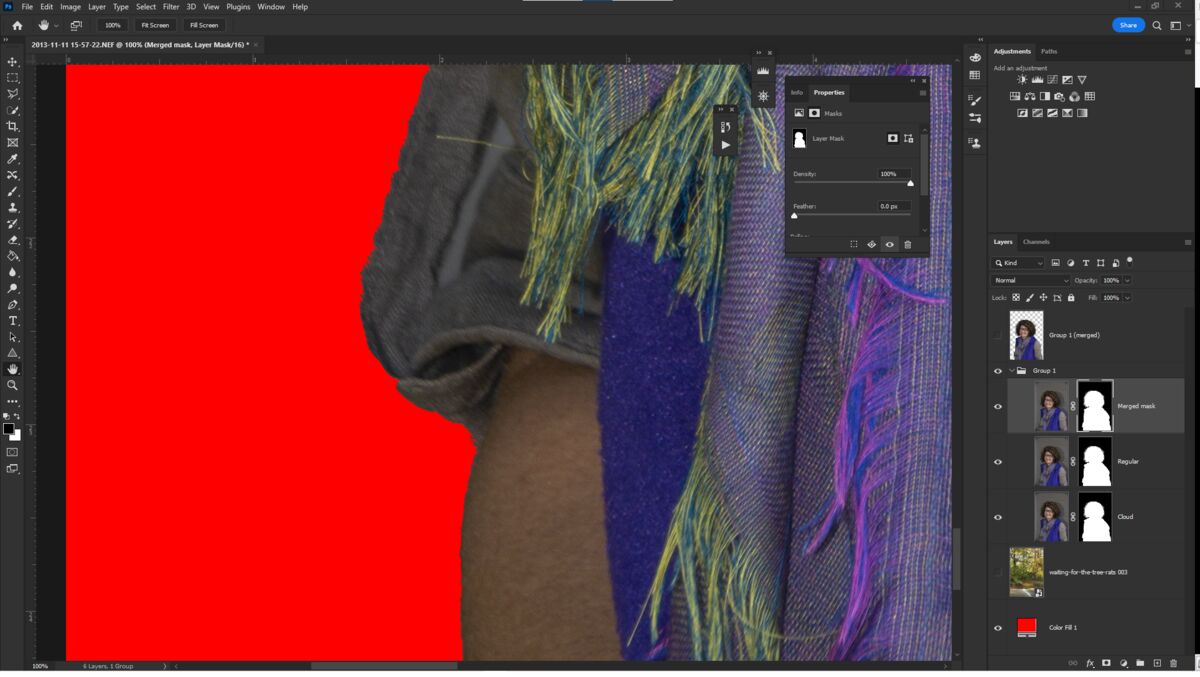
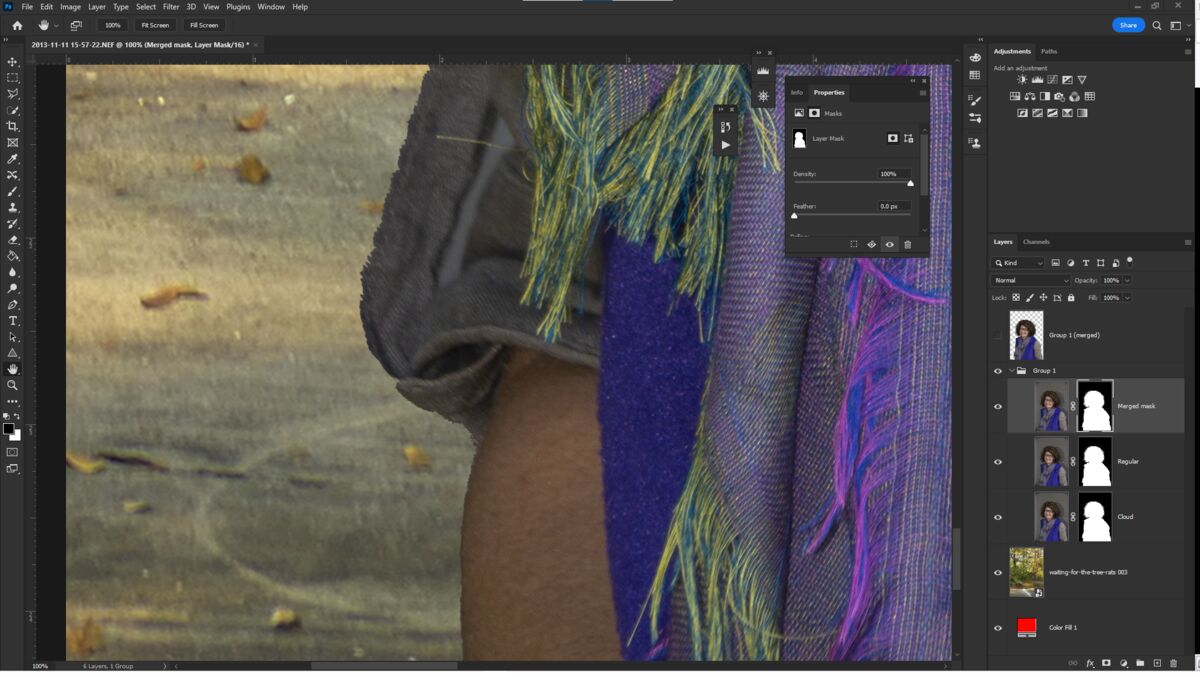
I did that because it was evident the masking method was different and I such should have different results. I did not expect that the difference was so flagrant, both 'shaving' the subject in different places. Merging the mask removed the 'shaving' BUT there is still color contamination in both methods.
Please note that I did that in order to select fine hair. When I looked at the rest, there is a real need to edit the mask. (illustrations)
Nov 17, 2022 12:35:15 #
Jim-Pops wrote:
I just saw found this today and was blown away. br... (show quote)
Using Select Subject, I got very similar results as your 'Cloud to Mask' image using Device vs Cloud to create the mask. The cloud version was slightly better, but both required some minor touch up for an excellent mask.
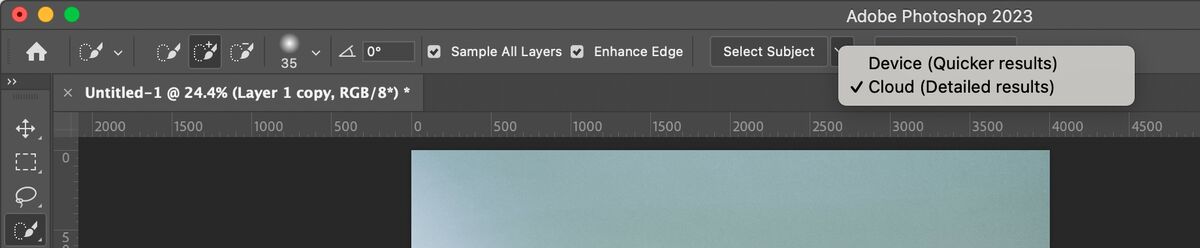
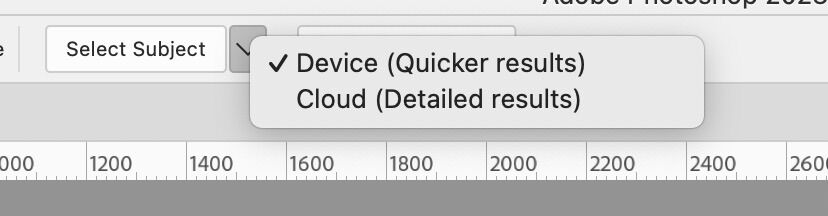
A short cut to the cloud without going to preference, under Select Subject there is a drop-down menu for selecting either Device or Cloud.
Nov 17, 2022 15:54:53 #

It all looks pretty good with human subjects that the AI has presumably been given practice with, but try it with, e.g., a red and yellow leaf on a black reflector. My results, using the cloud, required adjusting around about 75% of the subject.
Nov 17, 2022 17:02:01 #

Jim-Pops wrote:
As far as I can tell It looks the same.
Now that you have it set for the cloud. Just try this one out. They are friends of mine. The picture is untouched just as I got it. After processing it I used in a directory. Tell me what you think about the one click mask in this.
Now that you have it set for the cloud. Just try this one out. They are friends of mine. The picture is untouched just as I got it. After processing it I used in a directory. Tell me what you think about the one click mask in this.
If I had taken this shot, I would feel pretty good

Nov 17, 2022 17:02:42 #
kubota king wrote:
I don't have it set for the cloud . I changed it back to Device and got the results I posted the 2nd time . I just downloaded your new photo and done it the same way as the last one . I'm not using the cloud .
Here is the results for this new photo
Here is the results for this new photo
I sure wish I could remove a background as effectively as this

Nov 18, 2022 12:12:16 #
joecichjr wrote:
I sure wish I could remove a background as effectively as this
Are you talking about this photo , or any photo you want to remove background ? Are you using PS ?
Just want to have an idea why your disappointed when you try to remove backgrds
Mar 17, 2023 14:01:25 #
Jim-Pops wrote:
I just saw found this today and was blown away.
There are two ways to to use auto masking in Photoshop...
There are two ways to to use auto masking in Photoshop...
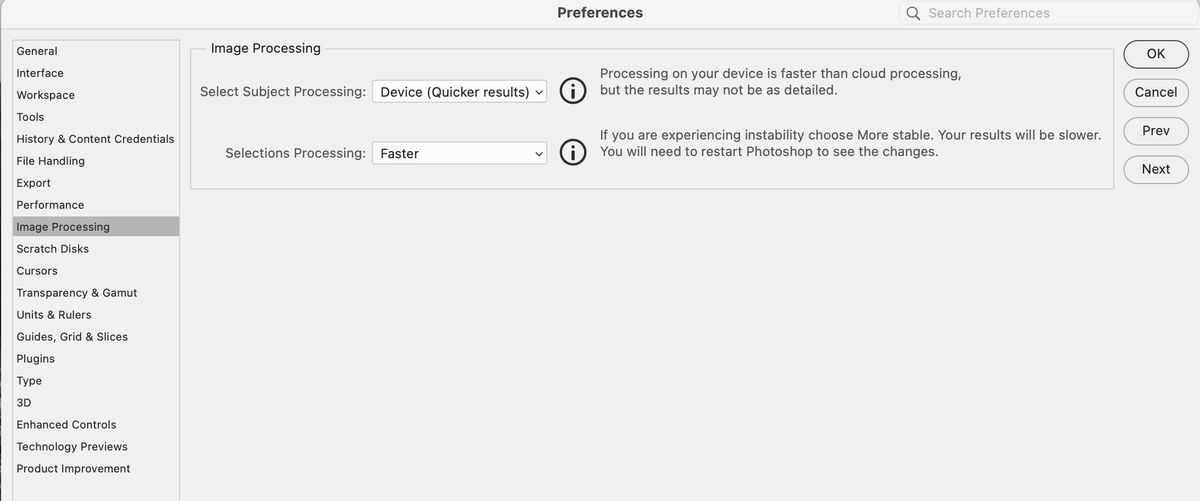
My preferences are set to the default, local selection:
To select a subject I choose the quick select on the left. That gives me a select subject button at the top.
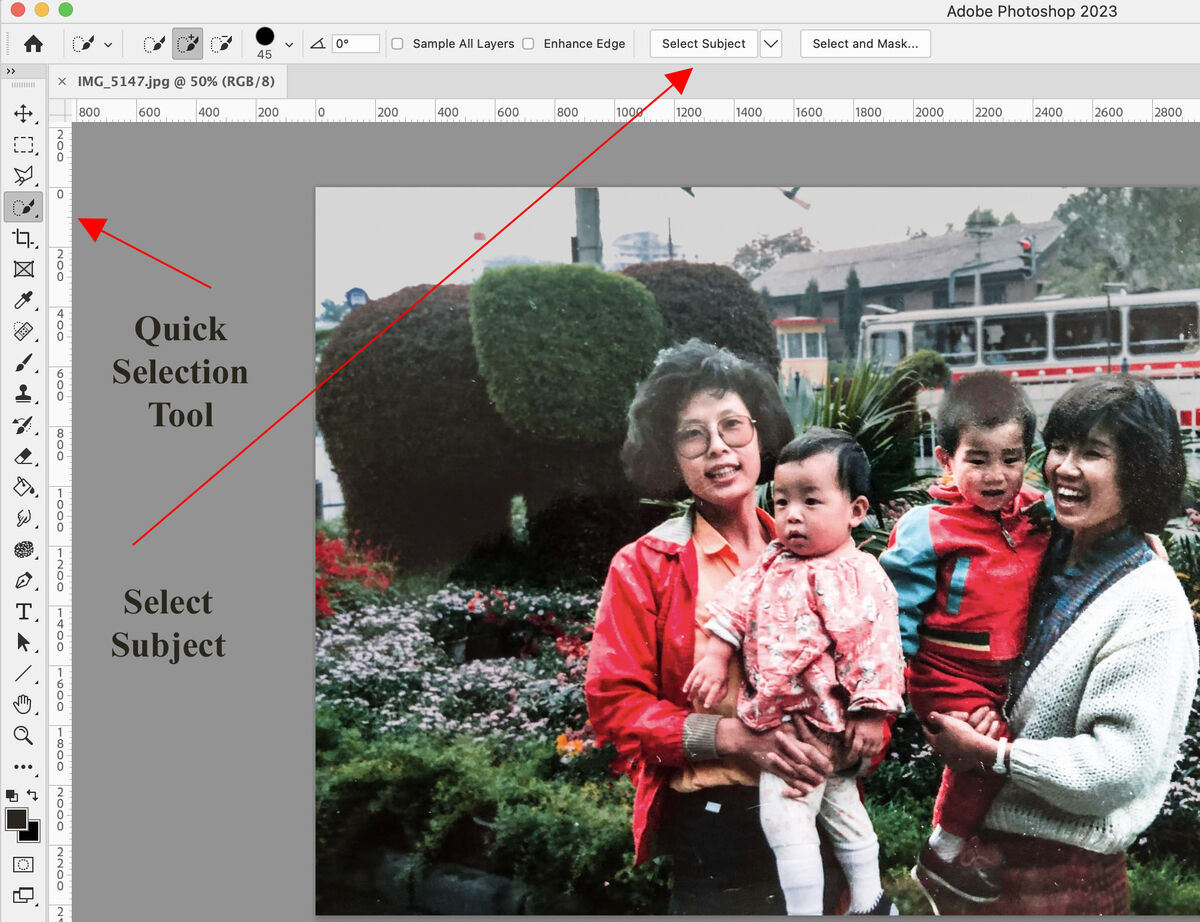
Clicking on the arrow on the right of the select subject button gives me the choice of local or cloud. I don't have to change anything in preferences.
If you want to reply, then register here. Registration is free and your account is created instantly, so you can post right away.