edges of selections
Jun 3, 2021 07:13:18 #

REJ wrote:
first off, I am not a computer person. I have been... (show quote)
Hair needs time and patience.
(To select the area, you can use many tools but the the most accurate to control is below)
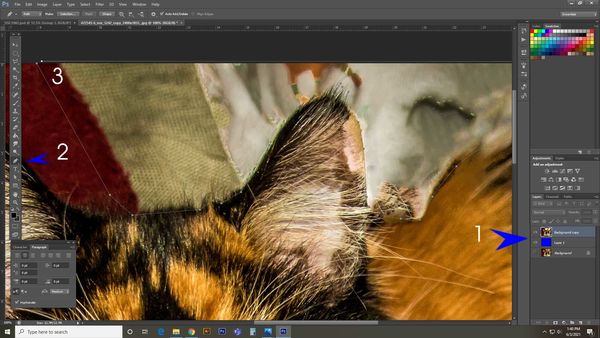
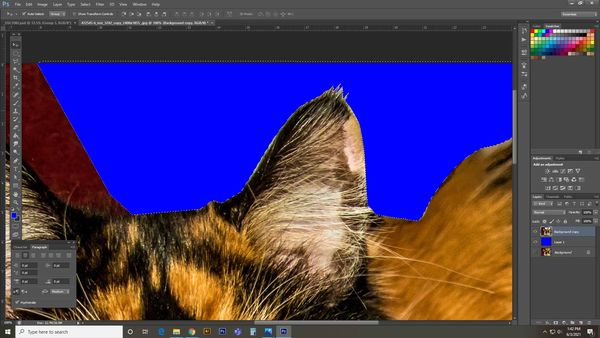
1.Open the file in PS. Make a copy layer and a blank layer fill of the opposite color
2.With top layer active (1) Select Pen Tool
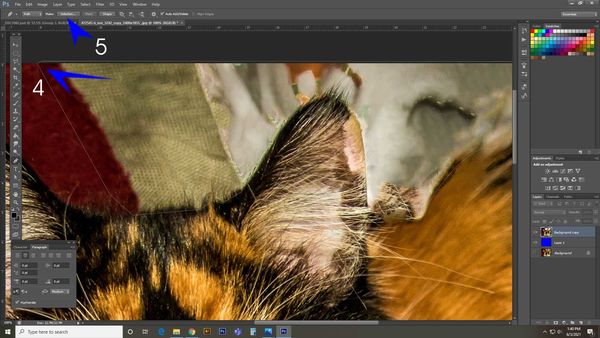
3. Select the area you want to remove
4. Complete the selected area by clicking the first point. A circle will show when you are on it.
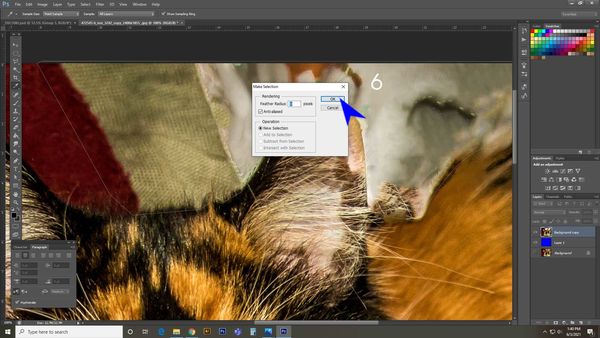
5. Click Select
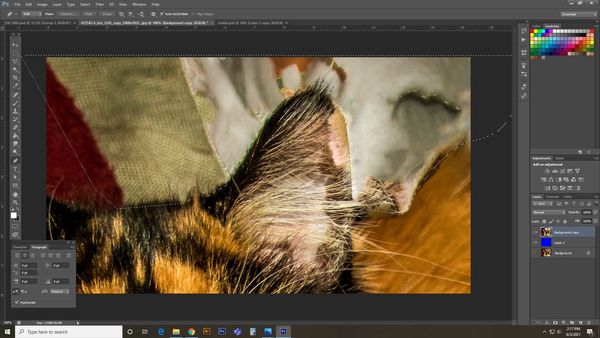
6. A box would pop out. Keep feather radius to 0. click OK
* Your area will now be selected as shown by the Marching Ants
** Press delete and the opposite color fill layer will now be visible.
The reason why we made this is so you can see clearly the changes.
(Making the hairs)
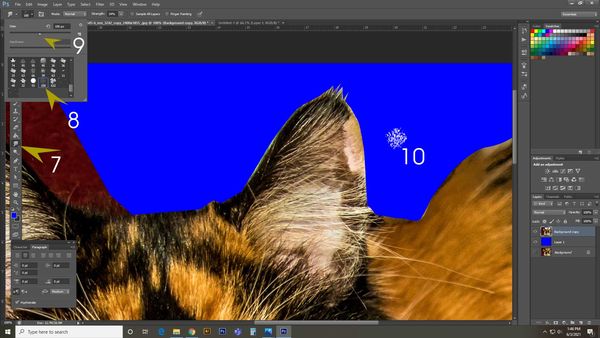
7. Select Smudge Tool
8. Select many small dots brush
9. Adjust brush size as needed. Adjust hardness to around 40
10 This is how the brush should look like
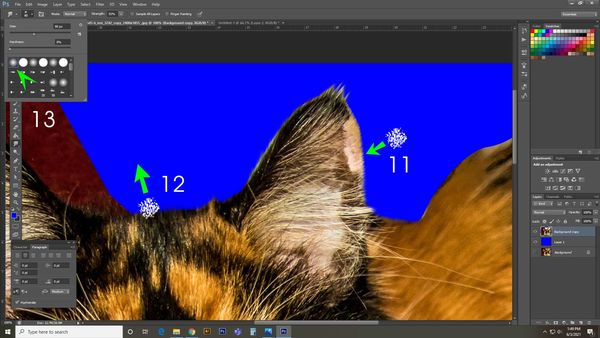
11. If you push the brush from the outside, it will create hairs by reduction of the image
12. If you click the edge and brush out, it will create hair by smudging away from the surface.
This is good for the general group of hairs. Always move the brush in the same direction as the hair would go.
13. For single strands, you need to draw them individually. Change to a pointed brush, make it very small and increase harness to 85-90 depending on your need how long to stretch the hair.
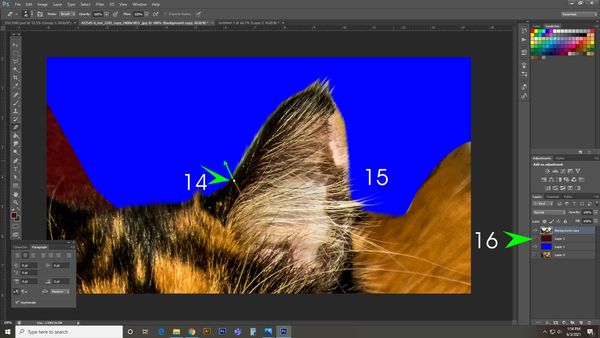
14 Start by putting the brush on a hair strand you want to extend. Click and drag
15 you will be able to make hair like this
16. Once finished, you can put this element into any background by adding the new background as a lower layer.
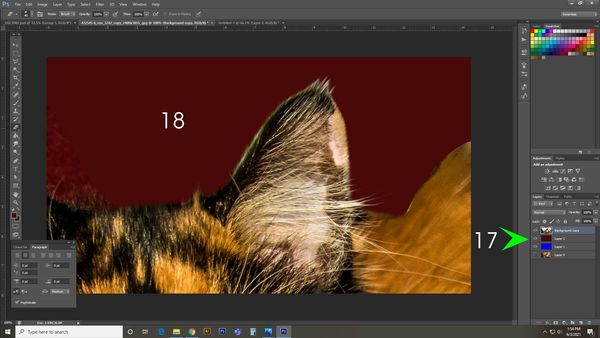
the "Eye" icon is off so this layer does not show
17 Click on the Eye symbol and the layer will be visible 18
There are other ways to select hair but for your purpose, this will suffice.
Jun 3, 2021 09:21:06 #

Wallen wrote:
Hair needs time and patience. br (To select the ar... (show quote)
Thank you Wallen, It seems you are the only one that read my thread, It stated that I was not a computer person. Your answer in a text outline was just what I needed. Once again Thank You. REJ.
Jun 3, 2021 15:21:48 #
REJ wrote:
Thank you Wallen, It seems you are the only one that read my thread, It stated that I was not a computer person. Your answer in a text outline was just what I needed. Once again Thank You. REJ.

To get the full photo, Left click the download link and Save as on your preferred folder location.
The Text is matched with the numbers in the pictures.
If you want to reply, then register here. Registration is free and your account is created instantly, so you can post right away.