How to use Photoshop or ??? to brighten this shot
Oct 7, 2012 01:10:50 #

Neilp wrote:
The raw is there as well, the download link below ... (show quote)
Select Brightness on the panel on the right, then choose screen, then hit Command I on a Mac, (I think it is control on a PC), then make sure your paint chips are black and white on the left panel and white is selected, then paint. If you goof, hit X and it will then become a black chip, then paint over the mistake. You can fade your painting or use opacity on the right panel. These are instructions for Photoshop CS.
Oct 7, 2012 08:17:16 #

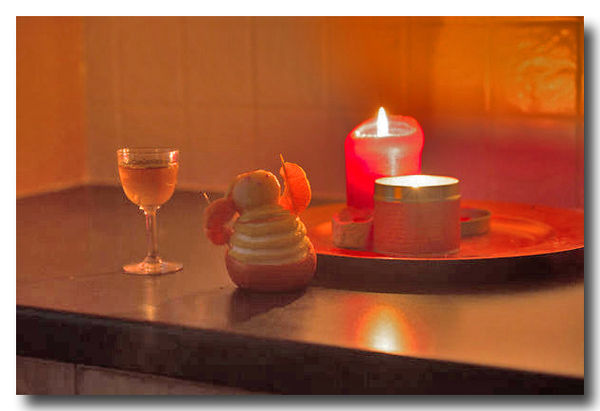
Yes it was the glass that was the main target for the brightening issue. That last shot being pretty much what I was asked to try and achieve..almost a surreal look to the glass.
Not dust on the surface..it is a mottled granite stone work top, it may just give that appearance.
When I (eventually) get home I will try the techniques suggested
Many thanks
Not dust on the surface..it is a mottled granite stone work top, it may just give that appearance.
When I (eventually) get home I will try the techniques suggested
Many thanks
Oct 7, 2012 10:16:33 #
nolte1964 wrote:
Use a luminance mask to fix it.
Where and in what is that? just looking in PS CS6 now and can't see how to do that.
have created a new Layer from background..is that a start in the correct direction?
Oct 7, 2012 17:45:49 #
Neilp wrote:
Where and in what is that? just looking in PS CS6 now and can't see how to do that.
have created a new Layer from background..is that a start in the correct direction?
nolte1964 wrote:
Use a luminance mask to fix it.
Where and in what is that? just looking in PS CS6 now and can't see how to do that.
have created a new Layer from background..is that a start in the correct direction?
I wasn't sure what luminance was either. I know luminosity, but that does not do the trick. Screen works well and if you want to go darker, use multiply. The beauty of using the technique I mentioned above is that it is not the same as cloning. You are able to retain all the characteristics of the image, such as texture, because you are darkening or lightening exactly what is there. And you can do it multiple times if the first time around does not produce the effect you want.
Oct 7, 2012 18:28:36 #
This evening, I found the 'tool' or technique I was trying to find
I could not explain amy better than I had previously, ad I did not know what it was called. If I had known the term I could probably have found it.
What I was looking for was the little symbol that appears in CS6 at the bottom of the pane showing the layers. Symbol is a white square with black circle in it. From my bed and iPhone now cam't be sure but think it is called a mask.
How I had seen it used was this:
Create new layer as a copy of the background ,
Do what ever you will to that layer.. Filters/ blur whatever
Add a mask in white to that layer
Selectively use the brush tool on the layer in black to allow parts of your new layer to appear.
I believe this was touched upon earlier in this thread, but it did not click that it was what I was thinking of, till I saw the layer and mask icon in the layers list earlier
Thanks everyone for helping me jog my own memory
Oct 7, 2012 19:21:32 #

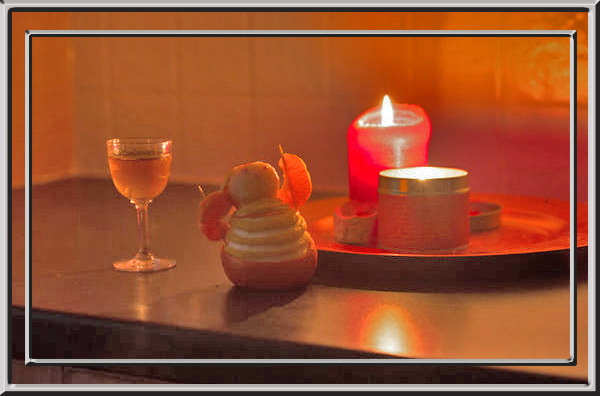
This was done with CS4 - image>adjustment>shadow/highlights - both pushed +100%
drop shadow PS one click action frame.
Just a quick fix. I hope you like it.
Harvey
drop shadow PS one click action frame.
Just a quick fix. I hope you like it.
Harvey
Candel Light
Oct 7, 2012 19:25:13 #
All looking way better thany efforts
What do you mean by the phrade ' action frame'
What do you mean by the phrade ' action frame'
Oct 7, 2012 19:52:01 #
In Photoshop programs - I speak of PS 5. PS7 & CS4 as well as other I do not know of personalty - they have a set of one click or more click "Actions" which are a series of steps one would have to do that are all saved in a file with a name for their use - and put into motion by clicking on the file name in the "Actions" pallet of PS programs. - many of these are included in the program when you buy it - others can be downloaded later free or you can even create your own for specific things you would do on a regular basis.
I use this frame on all photos I post - it automatically fits any size or shape of photo.
Here is another of my favorite frames this one is called "double transparent" frame where it allows you to choose the color, size/thickness, space between & even whether to keep the color in it or make the space in the frame B&W all with simple drop box aids.
quote=Neilp]All looking way better thany efforts
What do you mean by the phrade ' action frame'[/quote]
Framed candel photo
Oct 7, 2012 19:52:15 #
Neilp wrote:
This evening, I found the 'tool' or technique I wa... (show quote)
Yes, that is one way, but try the half black half white circle and use the method I suggested. It works beautifully.
The way you are considering may be more difficult and even possibly destructive because you are working on the original. Not sure if I am right about that though. By creating another, separate layer, it will much easier.
Oct 7, 2012 23:49:13 #
The way I was thinking, is non destructive too, as this action is on a new frame.
I will tvy your method, though probably not till Wednesday night now, as I am going to England for two nights from Monday.
Thanks
Neil
I will tvy your method, though probably not till Wednesday night now, as I am going to England for two nights from Monday.
Thanks
Neil
Oct 7, 2012 23:54:28 #
Neilp wrote:
The way I was thinking, is non destructive too, as this action is on a new frame.
I will tvy your method, though probably not till Wednesday night now, as I am going to England for two nights from Monday.
Thanks
Neil
I will tvy your method, though probably not till Wednesday night now, as I am going to England for two nights from Monday.
Thanks
Neil
I looked at how you were trying it and I could not figure out how to do it.
Oct 8, 2012 02:51:11 #
Will get back on it in a few days. Waiting at airport for fog to clear at moment
Oct 8, 2012 21:33:55 #
Oct 11, 2012 14:53:42 #
Oct 11, 2012 15:05:58 #
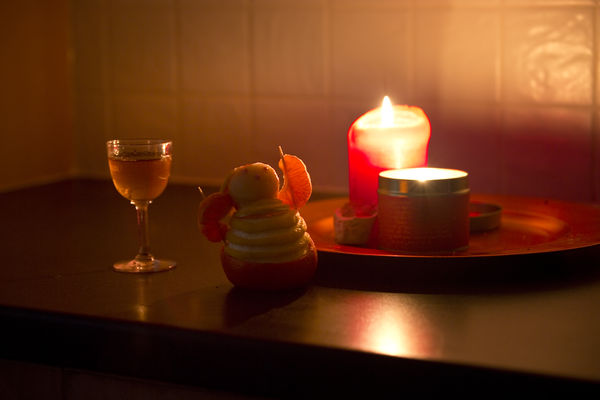
Looks good in the area of the glass..but the front of the candle has lost it red colour. This is the problem I have when editing any pictures....can make lots of changes and make it look different..but if it is any better or not it is so hard to tell
If you want to reply, then register here. Registration is free and your account is created instantly, so you can post right away.