How to use Photoshop or ??? to brighten this shot
Oct 5, 2012 11:55:39 #
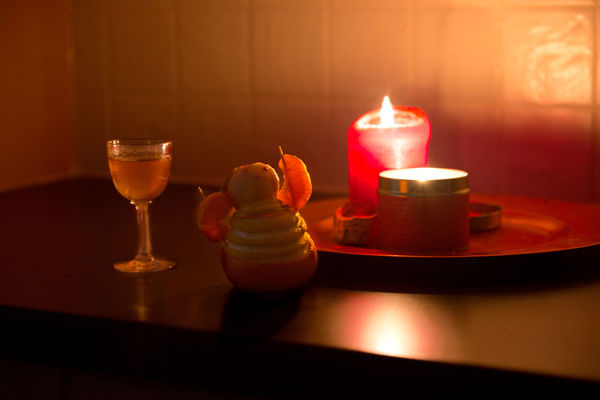
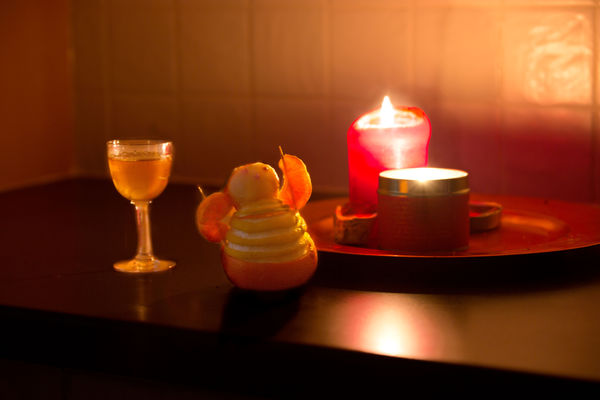
OK< second attempt at uploading this. tried first time with a JPEG and the original raw, but I guess a 22 mb raw is too big to upload, so here is an an already modified JPEG in Lightroom, and a JPEG of the original raw..totally un modified.
Info
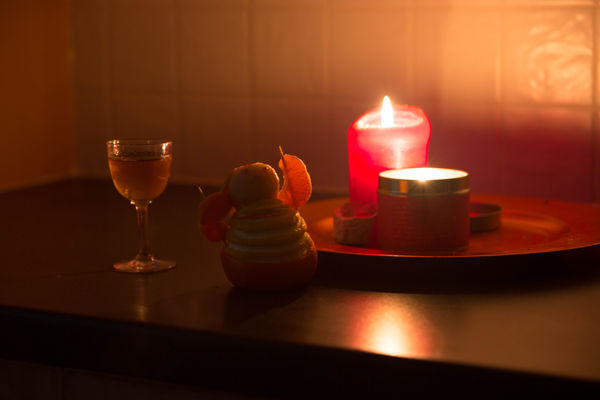
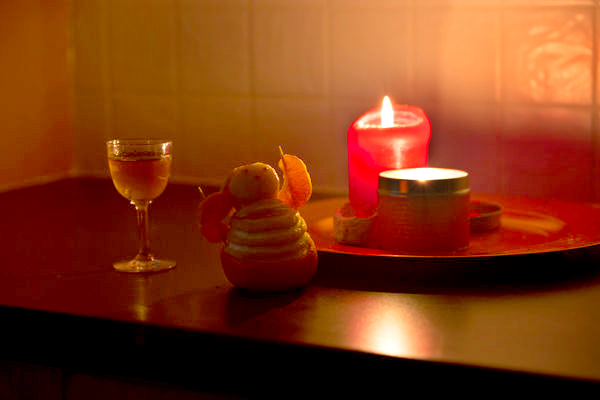
Canon 5DmKIII shot at 70mm f4 400 ASA with a 70-200 f 2.8.
Lighting was just the candles, with possibly a little spill light from the TV out to the left.
How would I go about bringing an bit of extra 'life' to teh reflection and colour in the glass.
I guess something to do with layers and masks etc, but no idea where to start
If you see this post early on as I try to post it, there will me no photo info..I am not typing a load of stuff only to have to do it again and again, and again..each time the upload fails.
Ok, so it has uploaded without 'Store original' ticked, so sorry but does not look like i can post to allow you to download...bloody crap internet connection..seems to time out even with a 1mb file up loading
Info
Canon 5DmKIII shot at 70mm f4 400 ASA with a 70-200 f 2.8.
Lighting was just the candles, with possibly a little spill light from the TV out to the left.
How would I go about bringing an bit of extra 'life' to teh reflection and colour in the glass.
I guess something to do with layers and masks etc, but no idea where to start
If you see this post early on as I try to post it, there will me no photo info..I am not typing a load of stuff only to have to do it again and again, and again..each time the upload fails.
Ok, so it has uploaded without 'Store original' ticked, so sorry but does not look like i can post to allow you to download...bloody crap internet connection..seems to time out even with a 1mb file up loading
Oct 5, 2012 12:30:01 #
Looks like the raw file did upload.
I have been trying with the brush tool in Basic section of Lightroom, to highlight just the areas I want, but think I need to do multiple layers..but no real experience with PS to see how to do it
I have been trying with the brush tool in Basic section of Lightroom, to highlight just the areas I want, but think I need to do multiple layers..but no real experience with PS to see how to do it
Oct 6, 2012 10:39:24 #
Open the original file in ps, make a duplicate layer and work on this. Click Image then adjustment then levels. The histogram will appear on screen. Just under the histogram on the left is a black pointer that you can pick up with your cursor and move to the righjt looking at your photo - it gets darker. On the right is the white pointer that you can move to the left with your cursor. The centre one mover the mid point (18% grey). Have a go and see! There is a natty trick to getting the points correct but that might confuse in the first in stance. Once you have done the best for the image click save. You can then compare the two versions by switching off and on the eye of each layer.
Oct 6, 2012 10:48:02 #
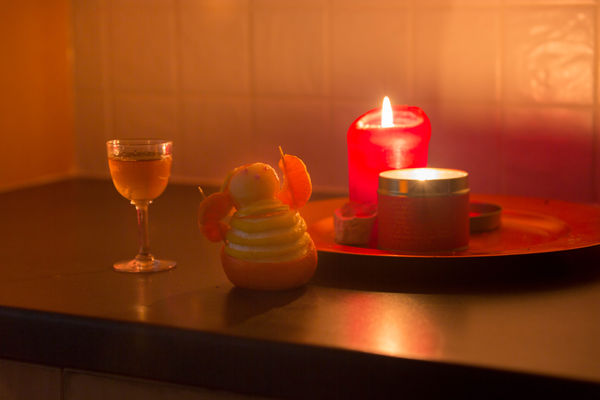
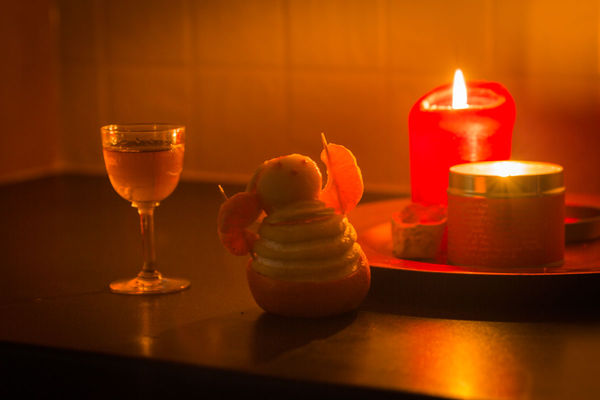
I have done what I posted to your image and used the burn tool on the tiles to the right and flame. The trouble with jpegs is that once the highlights have burnt out there is no way of getting it back.
See what you thgink
See what you thgink
Oct 6, 2012 11:50:51 #
The raw is there as well, the download link below the last image...22mb
I had already done a bit of adjusting with those tools in LR,m also used the brush, again in LR to lighten just the 'body and head' of the orange decoration, you can just see the slight halo effect around it in the second image.
I may be did not go in to enough detail about what i wanted to try and achieve.
I have seen someone the other day, doing as you suggest, creating a layer in soft 50% grey..adding a filter to it, then paintin gover in either white or black to allow through ..or block certain parts of the filter. I was hoping to do similar to the glass, but was not sure more than that as to what filters to use etc, which filter type etc etc.
As i say the raw is there, although the link is nto that obvious. Canon raw from 5D MkIII
Oct 6, 2012 13:04:17 #

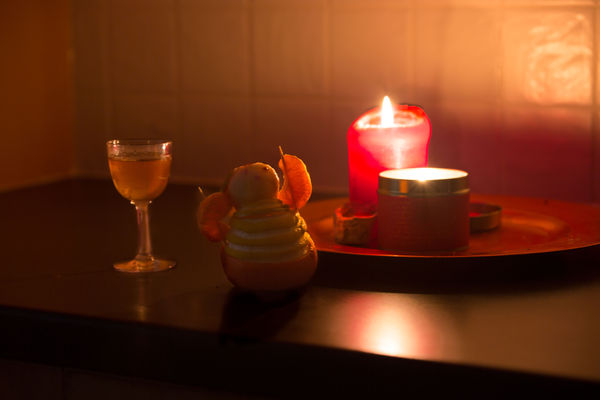
I tried my hand using ACR from CS6 only. I don't know if this is to your liking but if it is I'll try to tell you the settings I used. I didn't save the raw, just the save for web jpg. I should have opened it as a smart object and saved the raw data.
Table and Glass
Oct 6, 2012 13:35:39 #
What does a Smart object do? what is that..have seen the option but not sure what it was for.
That is getting towards the sort of effect I was after. But this is really just a 'learning to use LR or PS' photo rather one that I had any particular idea about.
Should have uploaded a better image, that was not the best, but I had tried maybe half a dozen times getting the uploads to work..the joy of a slow Internet connection :( Some of the other images had much better frontal light from the candles, with big shadows of the objects climbing up the walls
I think I had a better image at a smaller f stop that had greater DoF. but I am at work now, and not sure if I will get home tonight, looks like I am going to end u in a hotel for the night
Oct 6, 2012 17:01:26 #
Neilp wrote:
What does a Smart object do? what is that..have se... (show quote)
I don't know exactly what you were trying to do with this image but if it's just a practice thing then just practice. Maybe this image can't be changed in the ways you want to change it. If it takes more than about 3-5 minutes to get the look you are after then the subject probably needs to be captured again with the proper lighting, exposure etc. The changes I made in ACR can be duplicated in LR because they are basically the same raw editor in different clothes.
A Smart Object is complicated and can't be explained in a short thread. I suggest you Google CS6 smart object and watch some videos. They are quite useful and they allow you to edit and then re-edit non-destructively. With a click of the mouse you can go back to the original raw image in ACR and make more changes then click done to update the image in CS6.
Oct 6, 2012 17:18:37 #
The first image was done completely in ACR. The second one a bit of lightening in CS6.
Oct 6, 2012 18:45:07 #
Oct 7, 2012 00:19:10 #
Wendy2 wrote:
The first image was done completely in ACR. The second one a bit of lightening in CS6.
Very nice. You can't fix a dusty table though. :-)
Oct 7, 2012 00:21:16 #
Oct 7, 2012 00:23:37 #
jeep_daddy wrote:
Very nice. You can't fix a dusty table though. :-)
Wendy2 wrote:
The first image was done completely in ACR. The second one a bit of lightening in CS6.
Very nice. You can't fix a dusty table though. :-)
Thanks!
Dust....I try very hard to ignore that stuff. Unfortunately it is a daily chore in my home with two very active puppies.
Oct 7, 2012 00:30:42 #
Oct 7, 2012 01:08:59 #
A good way to brighten an image with immense control is to use mathematics on the pixels via blending modes.
To do an overall brightening: Simply open the file, select all, then paste. You should have two layers. On the TOPmost layer select the blending mode "Screen" to brighten, or, if you need to darken, choose "Multiply." Presto! Now, if things are not bright enough, you can duplicate that top layer. Make sure its blending mode is "Screen," and brighter goest the image.
If you think something is TOO bright, you can simply erase, or partially erase, that section on the topmost layers and it will darken accordingly. This technique can be surgically precise.
If you want to reply, then register here. Registration is free and your account is created instantly, so you can post right away.