Help with color
May 23, 2020 07:55:42 #

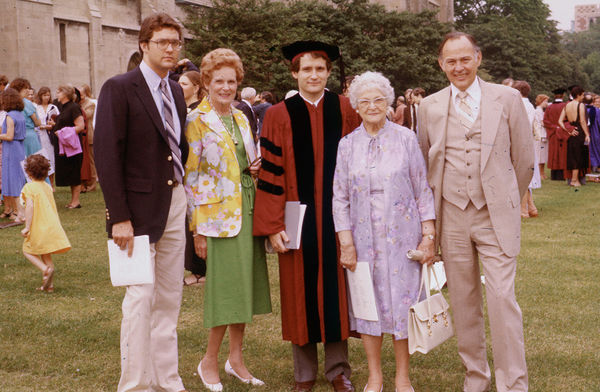
Looks like the proud guy just got his Ph.D. from The University of Chicago and standing on the east side of Rockefeller Chapel.
This does not apply to the question at hand but I scan color negatives as a negative and not as a positive and then adjust the separate RGB layers in Photoshop, I get a much better result than letting the scanner convert to a positive. Details upon request. I find this kind of adjustment in PS gives me truer colors than any other tood.
This does not apply to the question at hand but I scan color negatives as a negative and not as a positive and then adjust the separate RGB layers in Photoshop, I get a much better result than letting the scanner convert to a positive. Details upon request. I find this kind of adjustment in PS gives me truer colors than any other tood.
May 23, 2020 08:09:55 #

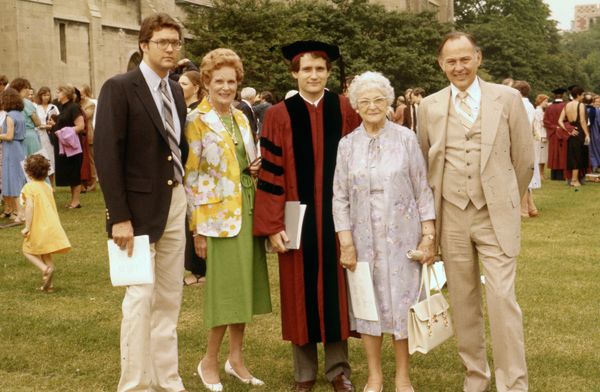
As you see there are different ways to do this. I opened the image in Photoshop and went to Adjustments and selected Match Color. I clicked Neutralize and then I moved the arrow to the right till the colors looked pleasant to my eyes.
The addition to the correction was to sharpen a bit, slight color saturation and contrast. Not perfect but much better than the original.
The addition to the correction was to sharpen a bit, slight color saturation and contrast. Not perfect but much better than the original.
May 23, 2020 09:18:16 #
Linda From Yakima wrote:
...To my eye, on my uncalibrated monitor, #1 is by far the best.
I thought #1 looked good from a white balance standpoint. However the guy on the left was not looking happy when everyone else was smiling. I moved his mouth around a bit. He's not really smiling, but at least he looks more neutral than he did before.

May 23, 2020 09:22:31 #
camerapapi wrote:
As you see there are different ways to do this. I opened the image in Photoshop and went to Adjustments and selected Match Color. I clicked Neutralize and then I moved the arrow to the right till the colors looked pleasant to my eyes.
The addition to the correction was to sharpen a bit, slight color saturation and contrast. Not perfect but much better than the original.
The addition to the correction was to sharpen a bit, slight color saturation and contrast. Not perfect but much better than the original.
Wow William this looks so good to me. I have never used this Match Color button or knew about it till you described it here. Went back and tried it and works just as you said. Thanks so much for teaching me something today.👍
May 23, 2020 10:11:27 #
Jim, Match Color is one of my favorite adjustments and I use it often although it will not work for some images. I believe I learned how to use it from Scott Kelby a few years back and as I said it has been my favorite ever since.
It is easy to use and the results many times do not need further adjustments.
It is easy to use and the results many times do not need further adjustments.
May 23, 2020 10:13:20 #
camerapapi wrote:
Jim, Match Color is one of my favorite adjustments and I use it often although it will not work for some images. I believe I learned how to use it from Scott Kelby a few years back and as I said it has been my favorite ever since.
It is easy to use and the results many times do not need further adjustments.
It is easy to use and the results many times do not need further adjustments.
Photoshop is a never ending learning curve.😊👍
Thanks again for pointing out this function.
Jim
May 23, 2020 10:39:51 #
Wow! I've learned more from 'Yall than from all the tutorials on this subject. I did get the images to an acceptable level. I can't thank all you UHHers enough for your time and knowledge. All the best, Bob
May 23, 2020 11:09:16 #
May 23, 2020 11:49:21 #
Hi Robert I had a play with your picture. Used PS camera raw filter to get the color ok, I selected and cut out the main people and blurred the background slightly to make them stand out. As there was a lot of black marks on the picture blurring the background helped. On the people I used the spot healing brush and went over them cleaning up the black marks..

May 23, 2020 12:06:32 #
nanaval wrote:
Hi Robert I had a play with your picture. Used PS camera raw filter to get the color ok, I selected and cut out the main people and blurred the background slightly to make them stand out. As there was a lot of black marks on the picture blurring the background helped. On the people I used the spot healing brush and went over them cleaning up the black marks..
Really nice job. Blurring the background really focuses on the subjects. Thank you, Bob
May 23, 2020 12:56:52 #
Two clicks in Photoshop CS6...Image>Auto Color. You can make your further adjustments from there.
May 23, 2020 18:39:45 #
Robertven wrote:
Really nice job. Blurring the background really focuses on the subjects. Thank you, Bob
You are welcome Bob, glad you like it...

If you want to reply, then register here. Registration is free and your account is created instantly, so you can post right away.