Using multiple layers of textures - share your tips and pics!
This topic is locked to prevent further replies.
Mar 27, 2019 18:46:26 #

LiamRowan wrote:
Linda, Linda, Linda . . . this is so excellent. And thanks, Claude, for adding more.
Linda your examples are beautiful, making the technical information so much more valuable.
Wm
Linda your examples are beautiful, making the technical information so much more valuable.
Wm
My pleasure!
Mar 27, 2019 18:52:21 #
Linda, I had been playing with an image and textures right when your thread was posted. My PS skills are so limited my efforts are more like Jackson Pollack throwing paint at a canvas with his eyes closed in the dark than the more expert process you and Claude demonstrate.
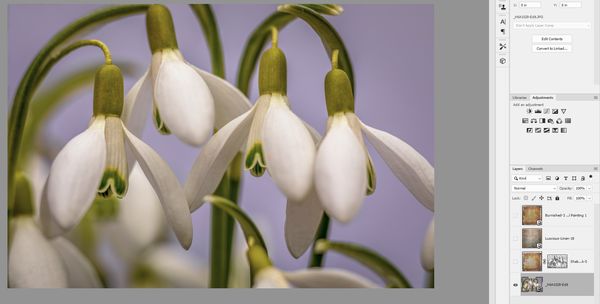
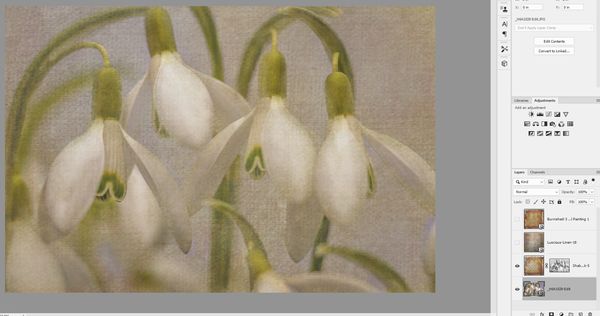
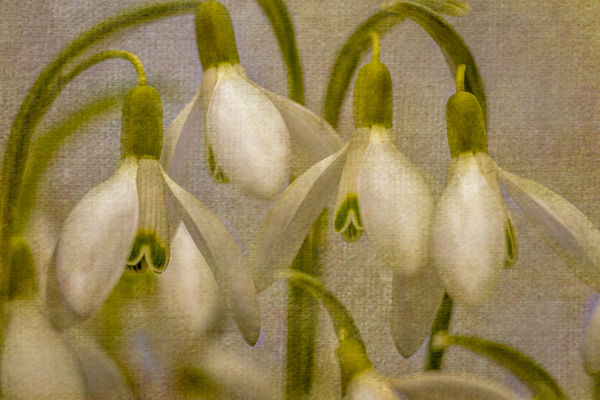
I started with an image of snowdrops, and added two textures, one of which was an oil painting-like canvas. But I couldn't figure out how to make the masks work the way they do in your examples, so after blending the masks, I flattened them, then brushed back in the snowdrops. Finally I opened the PS result in LR to tweak the results. Doesn't really look like a photo anymore.
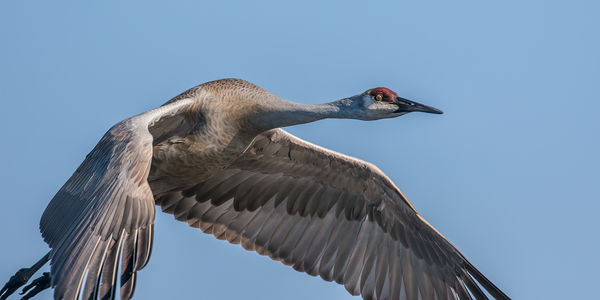
My dream is to be able to modify a boring blue sky to what you have done in the eagle image!
I started with an image of snowdrops, and added two textures, one of which was an oil painting-like canvas. But I couldn't figure out how to make the masks work the way they do in your examples, so after blending the masks, I flattened them, then brushed back in the snowdrops. Finally I opened the PS result in LR to tweak the results. Doesn't really look like a photo anymore.
My dream is to be able to modify a boring blue sky to what you have done in the eagle image!
(Download)
Added the original textures to the screen shot. The flattened layer is below them.
(Download)
After LR.
(Download)
Mar 27, 2019 19:32:57 #

LiamRowan wrote:
Love your description of your Jackson Pollack attempts Linda, I had been playing with an image and textur... (show quote)

What layer blend modes did you do for each of your textures? I am not sure what you mean by "after blending the masks..." I'm thinking you meant layers rather than masks? But it looks like there are textures on top of the snowdrops, so please talk further about that. Your result is hugely appealing, btw!
With the eagle there's very little masking, mostly from its head. If I knew how to repeat a mask (I never took the time to learn), I wouldn't have to create each separately as I added the texture layer

Having said that, for many images a mask may vary with each texture layer anyway, because the result is dependent on how you want the image to look, and also the blend mode and the colors of the texture you use.
Mar 27, 2019 20:22:41 #
Linda From Maine wrote:
Love your description of your Jackson Pollack atte... (show quote)
My wife just told me she HATES the result. HAHA! Well, I'm not much of a Jackson Pollack fan, either.
Yes, sorry, I blended the two layers shown in my first screenshot. The were above the flowers, so I brushed the flowers back in, leaving a lot of texture. I couldn't figure out how to work on each texture separately as in your example or as in Claude's how-to thread. I will study your thumbs carefully to try and figure it out. Honestly, that is precisely the look I want for the skies in bird photos! I HAVE to master this!
Mar 27, 2019 20:28:20 #
LiamRowan wrote:
Two ways:... I will study your thumbs carefully to try and figure it out. Honestly, that is precisely the look I want for the skies in bird photos! I HAVE to master this!
1. Add one texture, work on the image (mask whatever you want, if you want). Then add the second texture, rinse and repeat.
OR:
Add several textures at one time, then turn off (make inactive) all but the one immediately above your original photo. After working on that, then turn on (make active) the next texture up the stack. And so on. Keep what's below the "working" layer active, so they show.
Do either of those actions click for you? (btw, your wife and I are going to have to have a chat
 )
)As far as "precisely the look," you will only attain that with textures similar to what I used and beginning with the same color blue sky. I can post a couple textures for you tomorrow, if you don't have similar. Do you have a bird pic in mind?
Mar 27, 2019 20:46:06 #
Linda From Maine wrote:
Two ways: br br 1. Add one texture, work on the i... (show quote)
I think your description does make sense and I'll give it a shot.
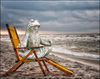
I have lots of bird pics in mind. Always wanted to "fix" the sky in this one. Sharing a texture you think appropriate would be GREAT! Thanks.
Mar 27, 2019 23:36:51 #
Guyserman
Loc: Benton, AR
I posted this earlier to this topic:
https://www.uglyhedgehog.com/t-584930-1.html
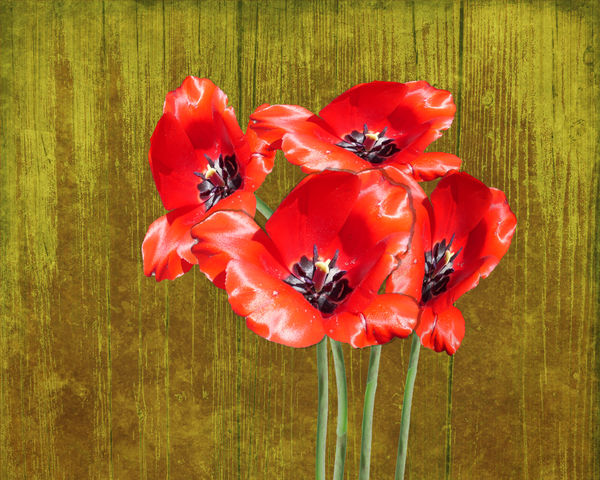
That was done hurriedly with a poor background. I have changed the background to three blended layers so now it is appropriate for this topic. This is a single bloom duplicated three times and transposed to appear differently.
https://www.uglyhedgehog.com/t-584930-1.html
That was done hurriedly with a poor background. I have changed the background to three blended layers so now it is appropriate for this topic. This is a single bloom duplicated three times and transposed to appear differently.
Mar 28, 2019 06:51:13 #
It's fun playing with Blend Modes. Tip: If you want to cycle through your blend modes without having to apply each one separately, when you are on an active layer hold down the "CTRL" key and use your down arrow key to go through each one.
When you find one that looks good, apply it. It's also a good housekeeping habit to name your layers in the layer palette with what adjustment or blend mode you used. This way, as your layers start piling up, AND they will as you begin to do more and more complicated edits, you will know what you did by reading the layer name.
When you find one that looks good, apply it. It's also a good housekeeping habit to name your layers in the layer palette with what adjustment or blend mode you used. This way, as your layers start piling up, AND they will as you begin to do more and more complicated edits, you will know what you did by reading the layer name.
Mar 28, 2019 07:26:49 #
Guyserman wrote:
I like this a lot, thanks! Which is your preference?I posted this earlier to this topic:
https://www.uglyhedgehog.com/t-584930-1.html
That was done hurriedly with a poor background. I have changed the background to three blended layers so now it is appropriate for this topic. This is a single bloom duplicated three times and transposed to appear differently.
https://www.uglyhedgehog.com/t-584930-1.html
That was done hurriedly with a poor background. I have changed the background to three blended layers so now it is appropriate for this topic. This is a single bloom duplicated three times and transposed to appear differently.
Mar 28, 2019 07:29:47 #
Fstop12 wrote:
Thank you very much! I will try the tip after breakfast It's fun playing with Blend Modes. Tip: If you wan... (show quote)
And an excellent reminder re naming the layers also.
Mar 28, 2019 07:43:32 #

The title of this thread should have the word tutorial somewhere in it. Nicely done for those who are green and not so green with your instructions.
Mar 28, 2019 07:49:43 #
NJFrank wrote:
Thanks, Frank. Several excellent tips have been provided by other members throughout the topic also. I must get better at note taking The title of this thread should have the word tutorial somewhere in it. Nicely done for those who are green and not so green with your instructions.
Mar 28, 2019 08:04:48 #

Mar 28, 2019 08:41:54 #
dpullum wrote:
Appreciate your generosity, Don, but I'm firmly in the middle of the pack What mastery our Linda has.
And that's good! I love being inspired by those more experienced and talented and it's gratifying to pay it forward with little assists to novices (whether new to creative pp, exposure triangle or understanding the importance of light).Mar 28, 2019 08:52:58 #
LiamRowan wrote:
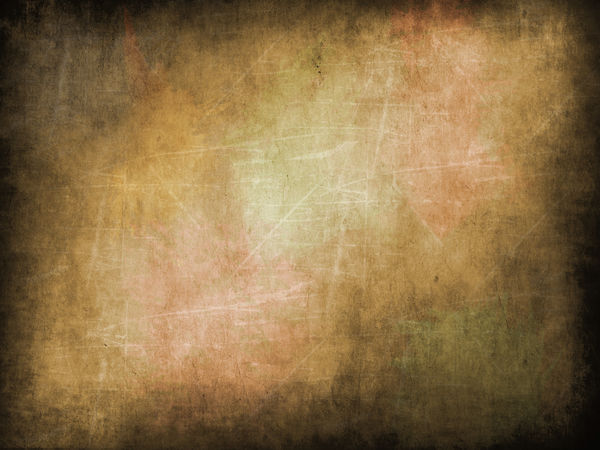
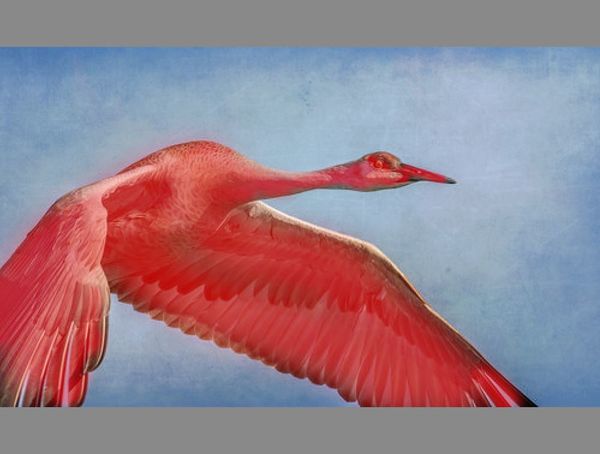
#1 is one of the textures I used on my eagle. At first glance you wouldn't think would work, but I found that in soft light blend mode over a light blue sky, it's kinda purty ... Sharing a texture you think appropriate would be GREAT! Thanks.
I also like the look without doing any masking on the bird, but #3 is included as a tip for masking usage. There is more info in the captions on the others.
Thanks much!
And remember: you can stretch or flip your texture file, change its color or saturation, blur it slightly or clone out "artifacts" - all before you slap onto the original. Save your changed texture as a new file for future.
(Download)
Soft light blend mode. No mask because I like the soft slightly yellow tint the bird now has.

(Download)
3. Do a layer mask if you want to keep the texture effect OFF the bird. Revealing where the mask has been applied makes for easy touch-ups.
(Download)
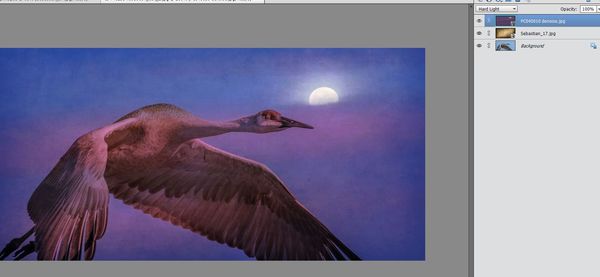
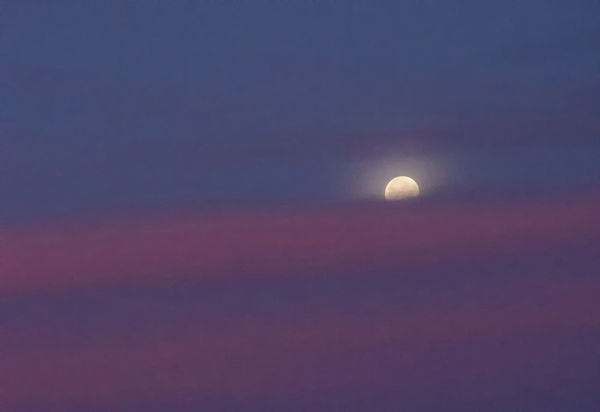
4. Awhile back I started playing with some of my moon pics as textures. This is hard light blend mode.
(Download)
5. #4 was too saturated for me, so I lessened the color. The second of these two has selective dodging and burning.
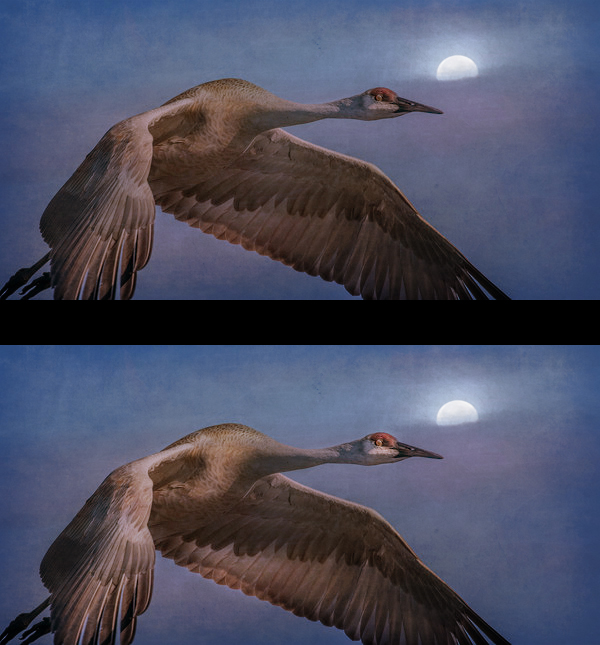
6. If anyone wants to play with this, you are welcome!
(Download)
If you want to reply, then register here. Registration is free and your account is created instantly, so you can post right away.