Creating a slide show that uses the same image as a "framing" device throughout
Jan 29, 2019 12:24:51 #

I was interested in trying the idea suggested by RiverNan in her January 9 topic here.
Kymarto's and Dirtfarmer's methods are different but conclude the same: using layers, you turn off visibility of the ones you don't want, flatten each and "save as jpg." You then place those individual jpg's into a slide show. Linary offered two links for slide show construction.
Kymarto's suggestion of using layer masks is convenient because it's so easy to adjust a mask. I like the ease of non-destructive "painting" with white or black (to reveal or conceal), and the ability to change opacity.
Dirtfarmer suggested making the center area transparent. The only way I knew how to do that was with the eraser tool. One tutorial: https://www.wikihow.com/Remove-Background-With-Photoshop-Elements
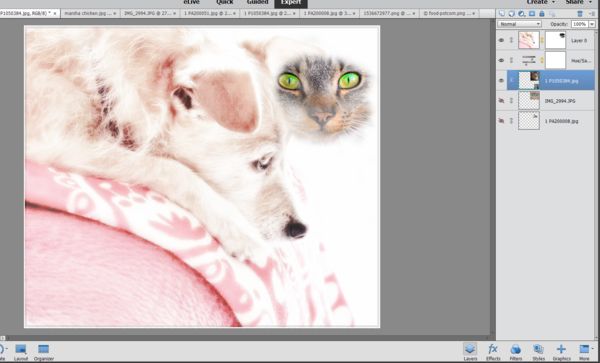
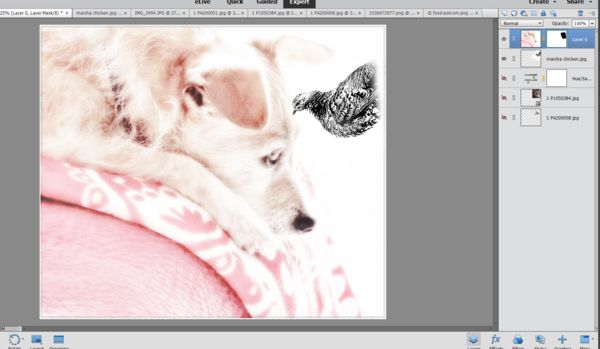
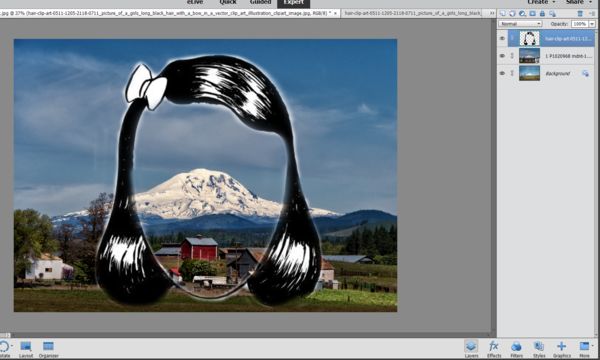
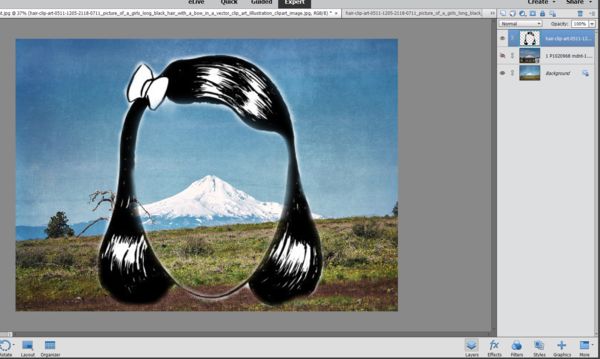
Below are screenprints using PS Elements 2018. They show each "image" as other layers are turned off.
The first two are with a layer mask. The second two are the empty face idea (I had to use a jpg clipart from the internet ). I erased the center and then made Mt Adams a layer and Mt Hood a layer. Simply hide the layers one at a time and save results as separate files (jpgs).
***With both methods, you may need to resize or re-position the photos. I used the move/transform tool.
Please share further suggestions, corrections, feedback and ideas. Your own screenprints or photos are welcomed as visual aids Many thanks!
.
Kymarto's and Dirtfarmer's methods are different but conclude the same: using layers, you turn off visibility of the ones you don't want, flatten each and "save as jpg." You then place those individual jpg's into a slide show. Linary offered two links for slide show construction.
Kymarto's suggestion of using layer masks is convenient because it's so easy to adjust a mask. I like the ease of non-destructive "painting" with white or black (to reveal or conceal), and the ability to change opacity.
Dirtfarmer suggested making the center area transparent. The only way I knew how to do that was with the eraser tool. One tutorial: https://www.wikihow.com/Remove-Background-With-Photoshop-Elements
Below are screenprints using PS Elements 2018. They show each "image" as other layers are turned off.
The first two are with a layer mask. The second two are the empty face idea (I had to use a jpg clipart from the internet
). I erased the center and then made Mt Adams a layer and Mt Hood a layer. Simply hide the layers one at a time and save results as separate files (jpgs).***With both methods, you may need to resize or re-position the photos. I used the move/transform tool.
Please share further suggestions, corrections, feedback and ideas. Your own screenprints or photos are welcomed as visual aids
Many thanks!.
Jan 29, 2019 13:11:22 #

If I want to start with a transparent screen I will open up DAZ 3D (Digital artist Zone), render an empty scene, then save the rendered file as a .png which can be opened up in photoshop to give you a transparent background (if that is what you want). Takes about 10 seconds. If you keep the original .png you only have to do it once.
You can then duplicate the background to create a new layer where you can drop or draw a border, or use any other images including ones with transparent backgrounds..
It gives you a lot of flexibillity.
I usually put something in my backgrounds. Like the example below.
.
You can then duplicate the background to create a new layer where you can drop or draw a border, or use any other images including ones with transparent backgrounds..
It gives you a lot of flexibillity.
I usually put something in my backgrounds. Like the example below.
.
Jan 29, 2019 14:41:13 #
RichardTaylor wrote:
Thanks very much, Richard. I can make a png (transparent background) in PS Elements by selecting and deleting the parts of the image I don't want, then save as png file type. The challenge can be with using the selection tool on difficult-to-separate elements prior to deleting. I'm playing around with that now; will let you you know how it goes If I want to start with a transparent screen I wi... (show quote)

Jan 29, 2019 14:50:53 #
Linda From Maine wrote:
...Dirtfarmer suggested making the center area transparent. The only way I knew how to do that was with the eraser tool...
(in PS)
Place your framing shot in a layer. Use the lasso tool (or whatever) to make a selection of the center area of the frame that you want to be transparent.
Then just delete it. (Ctrl-X in Windows). That leaves a transparent area where the selection was.
If you have the lasso or other selection tool set to feather the edge of the selection, you will get a feathered edge on the transparent area.
Another way is to make the selection as above, then invert the selection. That selects the frame rather than the transparent area. Then you click on "refine edge", where you can adjust the feathering and expand or contract the selection. Then save to a new layer with mask (one of the output choices for refine edge). The advantage of the second method is that you then have a masked layer and you can edit the mask in normal methods (painting white/black onto the mask).
Jan 29, 2019 14:59:45 #
DirtFarmer wrote:
Thank you! I was sort of directed that way by Richard, though I was on the path to making png files (in PS)
In PS Elements expert mode: change the layer function from "background" to "layer 0" by double-clicking the layer in the layers panel and selecting OK in the window that pops up. Then make the selection, then can click delete to leave transparent area.
If layer is left as "background," the selected/deleted area won't be transparent, it will be the active color of the color swatch (default is black or white).
(edit - oops, you wrote another paragraph. Give me a minute to digest that one.)
Jan 29, 2019 15:08:16 #
DirtFarmer wrote:
Got it! Works same in PSE. Many thanks!...Another way is to make the selection as above, then invert the selection. That selects the frame rather than the transparent area. Then you click on "refine edge", where you can adjust the feathering and expand or contract the selection. Then save to a new layer with mask (one of the output choices for refine edge). The advantage of the second method is that you then have a masked layer and you can edit the mask in normal methods (painting white/black onto the mask).
Jan 29, 2019 15:13:05 #
Yep. The key is to use layers rather than the background.
If you want to reply, then register here. Registration is free and your account is created instantly, so you can post right away.