photographing very reflective objects
Jan 9, 2019 13:47:57 #
Thanks for all your quick replies. I wasn't happy with the photos that I took, so I will try to play around with it. Almost every photo that I take is an experiment, and I'm constantly amazed at the different ways of photographing the same subject! Many thanks again!
Jan 9, 2019 14:37:16 #
Canpic78 wrote:
Thanks for all your quick replies. I wasn't happy with the photos that I took, so I will try to play around with it. Almost every photo that I take is an experiment, and I'm constantly amazed at the different ways of photographing the same subject! Many thanks again!
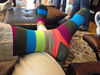
I just got back to my computer. This image was done in the darkroom and lit with the phone. It is a composite of 8 separate images. Almost every surface was blown out in at least 1 of the shots.
Jan 9, 2019 16:18:59 #
billnikon
Loc: Pennsylvania/Ohio/Florida/Maui/Oregon/Vermont
Canpic78 wrote:
Glitzy & patterned surfaces will reflect light in many different ways such as Christmas wrapping paper. Flash doesn't work out well, as it creates too much light in one spot, so I put the object in the shade. A bright gold color turned out green in some places. What is the best light for these types of photos?
When taking flash of objects that reflect AVOID direct flash. Aim the flash up and behind you. On the camera use manual exposure and use TTL on the flash. You can then fine turn your exposures using manual exposure on the camera or exposure comp on the flash.
Jan 17, 2019 19:17:44 #
Jan 17, 2019 19:40:48 #
`
Reject advice about how direct light toward
a shiny reflective subject. Diffusers are next
to meaningless, altho there is a secondary
reason to use diffusers. Aiming lights AT a
mirror-like surface is folly, even if the light
passes thru a heavy diffuser.
Ask yourself how to light and photograph a
mirror. Mirror-like surfaces cannot actually
be photographed. The surface "doesn't exist"
visually speaking.
What CAN be photographed is what' seen IN
the mirror, by reflection. IOW, your nominal
subject, perhaps a metalic coated christmas
tree ball, is not really your actual subject. It
is really part of your optics ... it "looks at", or
more precisely it redirects your camera lens
to "look at", various objects. Those objects
are your "subjects", they are what your lens
is seeing.
Back to the christmas ball: If you don't want
a fisheye picture of the surrounding around
the ball, but desire a picture OF the ball, you
must surround it with a smoothly lit expanse
of "walls" or a "tent". Acoarst you focus the
lens at the correct distance for ball, NOT for
the reflected surfaces.
Even a ball completely coated with sparkles
is still just a bunch of mirrors, all reflecting
whatever is surrounding them. You job is to
surround the ball with expanses of smooth,
textureless, colorless evenly-lit surroundings.
Often you'll add a few small colorful accents
to that environment, to add a few glints of
color to the overall image.
TO avoid describing too much detail here in
this text based environment, I will just say
tht I've seen helpful materials in print and
online about photographing polished jewelry
and your will find the proper advice there.
Main thing to keep in mind: A mirror-like
object is not your subject. It's part of your
optics. and whatever is reflected IN that
mirror-like surface. that thing [wall, tent,
faces, misc clutter, etc etc] is what you're
really lighting and photographing. Light
the tent ... no point in lighting the ball.
But do FOCUS on the ball.
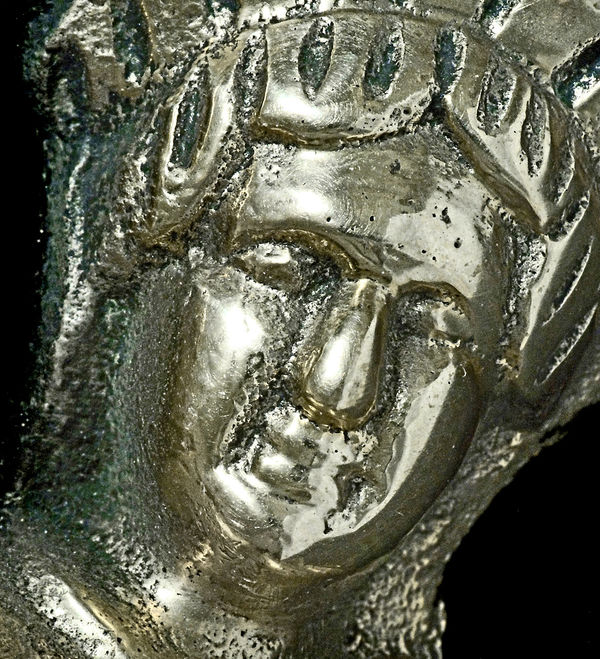
Not every "mirror-like" surface is purely
mirror-like, but the concept still applies.
Sample below:
Reject advice about how direct light toward
a shiny reflective subject. Diffusers are next
to meaningless, altho there is a secondary
reason to use diffusers. Aiming lights AT a
mirror-like surface is folly, even if the light
passes thru a heavy diffuser.
Ask yourself how to light and photograph a
mirror. Mirror-like surfaces cannot actually
be photographed. The surface "doesn't exist"
visually speaking.
What CAN be photographed is what' seen IN
the mirror, by reflection. IOW, your nominal
subject, perhaps a metalic coated christmas
tree ball, is not really your actual subject. It
is really part of your optics ... it "looks at", or
more precisely it redirects your camera lens
to "look at", various objects. Those objects
are your "subjects", they are what your lens
is seeing.
Back to the christmas ball: If you don't want
a fisheye picture of the surrounding around
the ball, but desire a picture OF the ball, you
must surround it with a smoothly lit expanse
of "walls" or a "tent". Acoarst you focus the
lens at the correct distance for ball, NOT for
the reflected surfaces.
Even a ball completely coated with sparkles
is still just a bunch of mirrors, all reflecting
whatever is surrounding them. You job is to
surround the ball with expanses of smooth,
textureless, colorless evenly-lit surroundings.
Often you'll add a few small colorful accents
to that environment, to add a few glints of
color to the overall image.
TO avoid describing too much detail here in
this text based environment, I will just say
tht I've seen helpful materials in print and
online about photographing polished jewelry
and your will find the proper advice there.
Main thing to keep in mind: A mirror-like
object is not your subject. It's part of your
optics. and whatever is reflected IN that
mirror-like surface. that thing [wall, tent,
faces, misc clutter, etc etc] is what you're
really lighting and photographing. Light
the tent ... no point in lighting the ball.
But do FOCUS on the ball.
Not every "mirror-like" surface is purely
mirror-like, but the concept still applies.
Sample below:
Jan 18, 2019 15:52:04 #

Bipod and User ID have the correct theories but here is the NUTS AND BOLTS in practice.
Place your ligh source, preferably an electronic flash MONO-LIGHT with a modeling light, in a soft box. A box or between 24 and 36 inches will due for most kinds of table-top and still life work. Suspend the unit as described on a BOOM STAND or other rig that will place the light source directly over the object and slightly to the back. THIS IS YOUR MAIN LIGHT. Fill light can be provided by reflectors made of white Foam-Cor boards. You can use the white surface as-is and affix some crumpled and re-expanded aluminum foil to the flip side. You now have the option of using the softer white side or harder and more reflective foil surface. The man light should be a close to the object as possible withou gettin into the field of view- the closer- the softer. If you require more contrast, you can move the main light further away. For more surface relief yo can move the main light to the side or further back and skim the surface with the edge of the beam.
Place the light so that it casts a soft "drop shadow" in front of the object. Feather the light so the edge of its beam strikes the reflector(s) which are placed near the camera/subject axis. Manipulating the reflector will determine the fill effect and the lighting ratio.
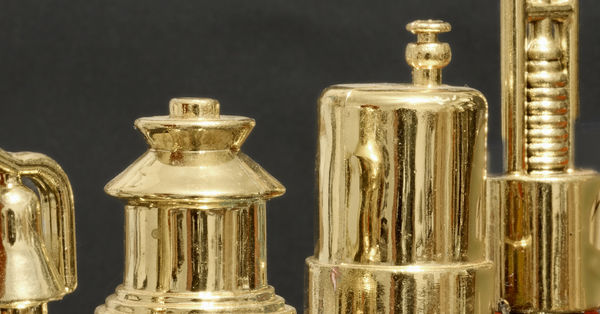
So here's the science. technology and geometry. The rule is the angle of incidence is equal to the angle of reflection. The exact light placement and it relationship to the camera's position will enable capturing the surface texture and brightness without distracting flashback reflections. You can photograph a mirror image with the light source at an oblique angle. When you are photographing a shiny or highly polished surface or object , you are photographing a mirror image of the light source- so if the light source is broad, soft and large enough you can capture a rendition of the surface and the dimensional shape of the object. You can also use simple white Foam-Cor boards or white seamless paper to construct a tent to surround an object with a LIGHT FIELD*- still using the overhead source as the main light. A round subject like an electric kettle or toaster with a "chrome" plated finish will require tenting.
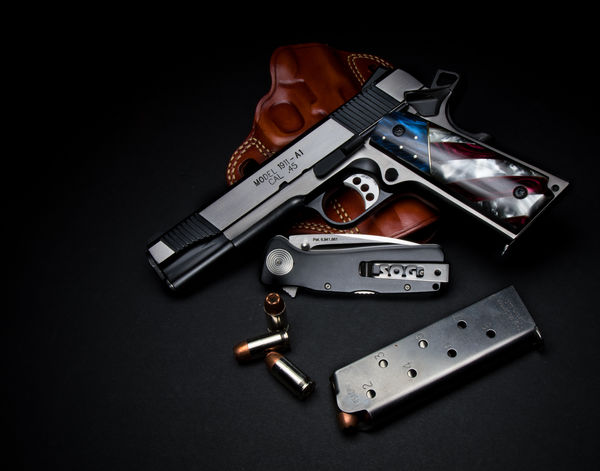
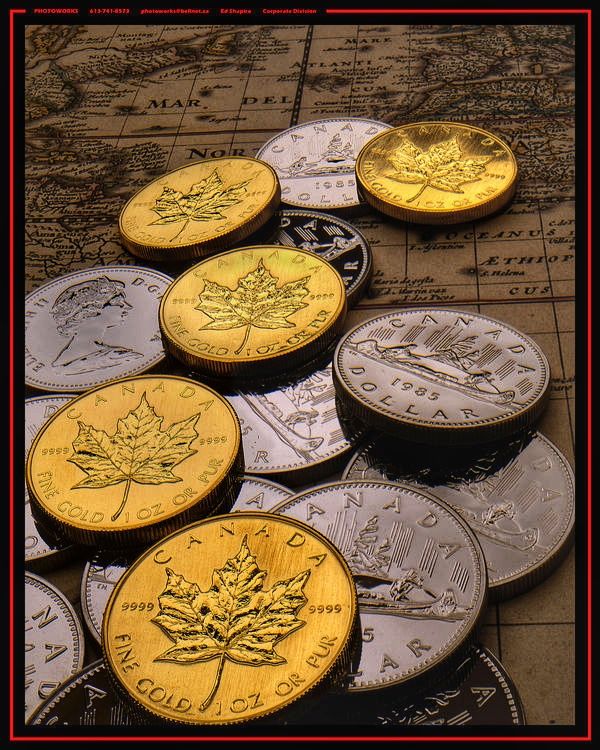
The angle of incidence is very critical. If you examine the attached image,you will notice that most of the coins are rendered in gold or silver- there natural metallic appearance.This is called LIGHT FIELD* lightning. At leas one of the coins seem BLACK with metallic outlines. That is the result of DARK FIELD illumination. Just slightly tilting of the coins changes the angle of refection. So- theses options are available to you when photograph objects like clock dials, coins, engraved surfaces etc.
CPL filters can assist in subduing or "removing" certain reflections in galas, plastics, wooden surfaces, foliage, water, etc. but are not completely or at all effective with metallic surfaces or metallic types of paint or aluminizers. They can enhance color saturation due to certain reinfections but the may also remove or subdue desirable highlights. In reproduction of paintings and cert other kinds of flat art work, CPL filters can curt through surface reflections, varnish etc. in conjunction with polarized light sources.
You can use any othere ligh source in the soft box but hot tungsten lights can set fire to the box but LED lights are a good alternative. The main require is either continuous ligh or a modeling lamp in the strobe so you can SEE exactly what your are doing.
Place your ligh source, preferably an electronic flash MONO-LIGHT with a modeling light, in a soft box. A box or between 24 and 36 inches will due for most kinds of table-top and still life work. Suspend the unit as described on a BOOM STAND or other rig that will place the light source directly over the object and slightly to the back. THIS IS YOUR MAIN LIGHT. Fill light can be provided by reflectors made of white Foam-Cor boards. You can use the white surface as-is and affix some crumpled and re-expanded aluminum foil to the flip side. You now have the option of using the softer white side or harder and more reflective foil surface. The man light should be a close to the object as possible withou gettin into the field of view- the closer- the softer. If you require more contrast, you can move the main light further away. For more surface relief yo can move the main light to the side or further back and skim the surface with the edge of the beam.
Place the light so that it casts a soft "drop shadow" in front of the object. Feather the light so the edge of its beam strikes the reflector(s) which are placed near the camera/subject axis. Manipulating the reflector will determine the fill effect and the lighting ratio.
So here's the science. technology and geometry. The rule is the angle of incidence is equal to the angle of reflection. The exact light placement and it relationship to the camera's position will enable capturing the surface texture and brightness without distracting flashback reflections. You can photograph a mirror image with the light source at an oblique angle. When you are photographing a shiny or highly polished surface or object , you are photographing a mirror image of the light source- so if the light source is broad, soft and large enough you can capture a rendition of the surface and the dimensional shape of the object. You can also use simple white Foam-Cor boards or white seamless paper to construct a tent to surround an object with a LIGHT FIELD*- still using the overhead source as the main light. A round subject like an electric kettle or toaster with a "chrome" plated finish will require tenting.
The angle of incidence is very critical. If you examine the attached image,you will notice that most of the coins are rendered in gold or silver- there natural metallic appearance.This is called LIGHT FIELD* lightning. At leas one of the coins seem BLACK with metallic outlines. That is the result of DARK FIELD illumination. Just slightly tilting of the coins changes the angle of refection. So- theses options are available to you when photograph objects like clock dials, coins, engraved surfaces etc.
CPL filters can assist in subduing or "removing" certain reflections in galas, plastics, wooden surfaces, foliage, water, etc. but are not completely or at all effective with metallic surfaces or metallic types of paint or aluminizers. They can enhance color saturation due to certain reinfections but the may also remove or subdue desirable highlights. In reproduction of paintings and cert other kinds of flat art work, CPL filters can curt through surface reflections, varnish etc. in conjunction with polarized light sources.
You can use any othere ligh source in the soft box but hot tungsten lights can set fire to the box but LED lights are a good alternative. The main require is either continuous ligh or a modeling lamp in the strobe so you can SEE exactly what your are doing.
Jan 18, 2019 23:18:59 #

E.L.. Shapiro wrote:
Bipod and User ID have the correct theories but he... (show quote)

Great explanation!
Jan 19, 2019 00:08:21 #
Jan 19, 2019 06:13:24 #

canon Lee wrote:
If there is no motion I suggest long exposures without any lights. Set to aperture priority, F8, a heavy tripod, bracket at +/- 1stop ( setting your camera to bracketing & use a trigger cable) Never touch the camera while bracketing. In post production use HDR. Shoot at different angles, and use soft light from a window if possible.
Jan 20, 2019 17:45:23 #
Diffusers are worthless--just as UserID said. So are the itty-bitty soft boxes marketed to consumers.
24" x 36" is big enough to do some good.
24" x 36" is big enough to do some good.
If you want to reply, then register here. Registration is free and your account is created instantly, so you can post right away.