Blown out sky...
Jun 20, 2012 12:28:16 #

Hi,
I was intrigued by your problem with burned out sky. I have had the same problem many times. Usually because I hurry the shot and don't consider a dark foreground under a bright sky. If I am in doubt I usually take two shots, one exposed for the sky and one for the foreground then combine the two in photoshop. A quick fix for these images might be to use your editing software by making a new layer, fill with a deep sky blue, change the blending mode to "Colour Burn" then simply erase the lower part with a real soft eraser to make it paler at the "horizon". I took the liberty of downloading your shot to give you an idea of how it would look. Although your original sky looked white, the original data was still there as those little wispy clouds became visible. Hope this helps.
I was intrigued by your problem with burned out sky. I have had the same problem many times. Usually because I hurry the shot and don't consider a dark foreground under a bright sky. If I am in doubt I usually take two shots, one exposed for the sky and one for the foreground then combine the two in photoshop. A quick fix for these images might be to use your editing software by making a new layer, fill with a deep sky blue, change the blending mode to "Colour Burn" then simply erase the lower part with a real soft eraser to make it paler at the "horizon". I took the liberty of downloading your shot to give you an idea of how it would look. Although your original sky looked white, the original data was still there as those little wispy clouds became visible. Hope this helps.
Jun 20, 2012 13:19:09 #
I can't find that anyone has mentioned a polarizer. If the sun is close to 90 degrees away from the sky in the photo you can improve the blue in the photo. Many good suggestions have been given, but like others mentioned I shoot skys when I see one I like. I try to get as few earth details as possible, but I'm not crazy about shooting strait up. Also take shots of skys with light from all directions so you can match the direction to your photo.
Jun 20, 2012 13:27:14 #

JimKing wrote:
I can't find that anyone has mentioned a polarizer. If the sun is close to 90 degrees away from the sky in the photo you can improve the blue in the photo. Many good suggestions have been given, but like others mentioned I shoot skys when I see one I like. I try to get as few earth details as possible, but I'm not crazy about shooting strait up. Also take shots of skys with light from all directions so you can match the direction to your photo.
Good point about the light direction. Examples have been posted on UHH where skies were dropped in and there were shadows in the picture that clearly couldn't have come from the adjusted light source, or where the sky colors didn't match up with the rest of the picture, e.g., a ruddy sky and cloudy/shady blue tones elsewhere.
Jun 20, 2012 13:37:47 #

dtcracer wrote:
I took these pictures on Fathers Day. The sky was blue, and I managed to over expose the photos. (My LED screen on my camera apparently looks darker out in bright sunlight!) I edited them in RAW, but I have been unable to bring the blue back into the sky. Any suggestions?
You cannot bring back the blue in these shots, but you can add it. In the regular (not Camera Raw) part of Photoshop pick a blue and make it lighter than the trees and other elements of the picture beyond which and through which the sky shows. Choose the pain brush tool. Set its blending mode to "darken." smear it all over the sky without regard to touching things that are not the sky. Only those pixels that are lighter than your chosen color will be affected. When you are finished the sky will be a uniform blue.
If you want variation in the values of the sky there are many ways to achieve this. I offer here one of y own.
1. duplicate the background layer.
2. darken the picture considerably with curves or some other tool or approach.
3.select a part of the sky you want to be darker, for example, the upper left edge.
4. Invert your selection.
5. Add a feathering of 250 pixels, the highest allowed.
6. Backspace the selection. The result is that the part of the sky you wanted dark retains the darkening you added in Step Number 2, while the rest of the picture is as it was after you added the blue to the sky. The feathering of 250 px makes the transition from the dark to the lighter parts of the sky very gradual and realistic.
Jun 20, 2012 13:54:44 #
RMM wrote:
I was a bit sloppy, my sky photo had some tree limbs sticking out. Still, it adds something to the image, don't you think? :)
I like it.............
Jun 20, 2012 15:07:30 #
Wendy2 wrote:
If you have Lightroom you could use the adjustment brush and "paint" the area (sky) that you want to adjust. You will be able to make some changes and maybe even make it blue.
I have a question; Is there a way to shoot this type of scene and get the blue sky without HDR? I know flash will work in some situations, but obviously not here.
I have a question; Is there a way to shoot this type of scene and get the blue sky without HDR? I know flash will work in some situations, but obviously not here.
A circular polarizing filter in place will blue up the sky.
Jun 20, 2012 15:10:24 #
Rustybucket wrote:
Hi, br br I was intrigued by your problem with bu... (show quote)
I like yours also..............
Jun 20, 2012 15:36:51 #
PNagy wrote:
quote=dtcracer I took these pictures on Fathers D... (show quote)
If the sky has some light cloud information that can barely be seen you can bring it out as follows in Photoshop:
1. In the Image menu drop your gaze until you find "apply image." Click on it. The entire picture becomes much darker, including the parts of the picture you do not want to darken. Don't worry about that; we will fix it soon. Meanwhile a window has opened with the "apply image" choices.
2. Drop your eyes a bit in the "apply image" window till you find "opacity." Increase and decrease it until you have found the setting you want for your sky. If you do not like this adjustment you can also go to the edit menu at the top of your screen. Four items down you will read "fade apply image." Click this open. A window appears with a slider that allows you to keep only the amount of the apply image adjustment that you want. Drag it back and forth till you find just how you want your sky to appear.
3. Go to the "history" menu. Click the last history state right before the apply image change. The image will revert to what it looked like before you began your changes.
4. Select the history brush and careful go over the parts of the sky that you want darkened. Be sure to avoid overly darkening any pixels surrounding the sky that you do not want to darken. The sky will now be darker, with clouds clearly visible, just as they appeared after your apply image adjustment, but the rest of the picture remains as it was before the procedure.
Jun 20, 2012 16:29:19 #
PNagy, many thanks for the tip about using the brush in Darken mode. I've learned a new PSE trick today!
Jun 20, 2012 16:39:32 #
Jun 20, 2012 17:31:52 #
Darken, as a layer mode, works with an sky overlayed also. Clouds usually ok but move as necessary.
Jun 20, 2012 17:58:23 #
I have never done it, but I have seen people use the "gradient" tool to simulate the graduated ND filter. If some knows this technique, I'd like to hear it.
Jun 20, 2012 18:19:43 #
mdeman wrote:
PNagy, many thanks for the tip about using the brush in Darken mode. I've learned a new PSE trick today!
You are so welcome.
Jun 20, 2012 18:25:39 #
jdcalabr
Loc: Orlando, FL
If you want to try to capture the sky as you saw it that day, you might try a HDR approach if your camera can do it. Take on shot with the sky properly exposed. Then take another with the foreground properly exposed. Assuming GIMP is a substitute for Photoshop try to combine the two images with the HDR routine.
Alternatively you could try this. I used the Background Eraser Tool in Photoshop to get rid of the blown out sky and then combined with a picture of the sky I took at another time. Again, assuming GIMP is a sub for Photoshop you might try this also.
Alternatively you could try this. I used the Background Eraser Tool in Photoshop to get rid of the blown out sky and then combined with a picture of the sky I took at another time. Again, assuming GIMP is a sub for Photoshop you might try this also.
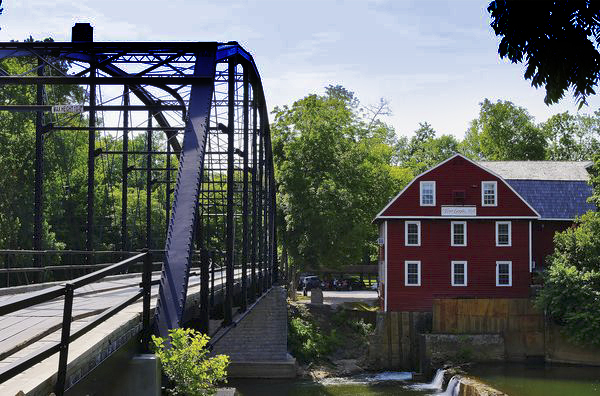
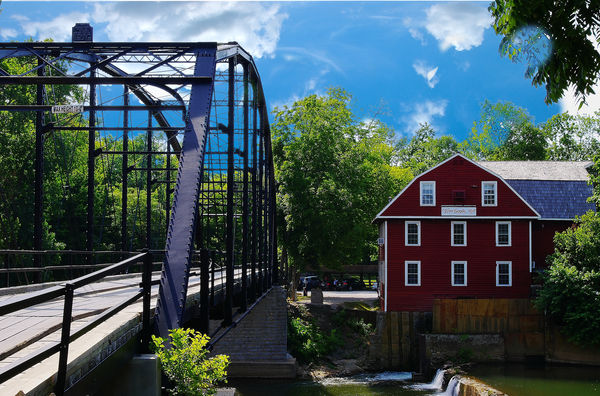
New Eagle Mill
Jun 20, 2012 21:11:44 #

Hi I am a new member and very interested in this topic. I have a canon 50D and I have the highlight alerts switched on. I keep having problems with the sky blow out and have tried using minus exposure settings and faster shutter speeds but it doesn't completley eliminate the problem. Can anyone advise me of alternative camera settings I should use. I have photoshop creative suite 4 but still wear "L" plates when using it!
I found this forum by sheer luck and have spent hours going through many of the topics. It's a shame you are all in the States and not closer to my backyard Australia.
Regards Hedley
I found this forum by sheer luck and have spent hours going through many of the topics. It's a shame you are all in the States and not closer to my backyard Australia.
Regards Hedley
If you want to reply, then register here. Registration is free and your account is created instantly, so you can post right away.