Indoor basketball photo
Feb 10, 2016 10:22:21 #
Feb 10, 2016 10:38:51 #
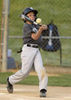
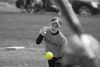
Fear not. Basketball is a tough sport to learn, and the best way to do that is practice. I prefer a faster lens for the sport and tend to shoot with a mixture of 50 and 85 f1.4 lenses with a wider one and a longer one thrown in for occasional use. I set my camera to maximum aperture, or close to it, to a minimum of 1/500 or 1/640 and I let it choose the ISO. Upon occasion, I meter the basketball floor, and set my camera in manual, dealing with any exposure issues in post. Depends on the gym and the lighting. For most of this season, the 85 is my go to. When looking for the point guards I will jump to a 180/2.8D lens from the film days which is one of Nikon's best (IMHO). Bump your speed, bump your iso, and practice, practice and practice some more. It will click! Best of luck.
Feb 10, 2016 10:41:42 #

cjc2 wrote:
Upon occasion, I meter the basketball floor, and set my camera in manual, dealing with any exposure issues in post. Depends on the gym and the lighting.
This is a good point to bring out. You DON'T want your exposure to be bouncing all over the place depending on where you point your lens.
Meter off of your palm at courtside, set your exposure manually, shoot away without thinking about that ceiling-fan of an exposure needle inside your camera :)
Viola! All exposures perfect, and all the same. Saves tons of time in post.
Feb 10, 2016 10:52:00 #
As mentioned before, the speed is of prime importance so as not a motion blur. I use the Sigma 70-200 f2.8 and find a manual setting of 1/800 sec speed works well. I'd like a bit faster but light is often not letting me. (As you are finding out.) I also go slower if the subject is not moving fast although that doesn't happen often.
As for f-setting, remember that all lenses have a sweet spot and 2.8 is at the far end for that lens. Anything you can do to get to a slightly higher number is well worth it. Somewhere around f-3.5 to 5.6 is minimum, light permitting. For me, f-2.8 is only used if necessary, (or I forget. LoL)
For an ISO value, I try to get as low as possible but for different schools there can be a big difference. My local high school is around ISO 2,500. (One of the better) Often I have to go 3,500. Although ISO 5,000 is needed at poorly lite schools, I never go that high mainly because I feel my sensor doesn't perform well at that high a number.
Use your histogram to perfect things. Even though I try to get complete coverage, many of my shots seem to cover only about the lower 3/4 of it. For some schools, only the lower half.
To recap; manual setting, speed 1/800, F-3.5 min, ISO 2500-3000.
Play around with the light balance but often auto is best. Some schools use fluorescent lights with a white balance of Daylight and that helps. For day games, some schools with sunlight added to the lighting, a cloudy setting, shadow setting or just auto setting work well.
Several shots might come out a touch dark. Don't expect everything to be perfect except you want to get the focus right. Reasonable lighting and white balance can be fixed in post editing. The program I use will clean up all of the shots with just one click.
Those are my settings and thoughts. Hope they help!
Feb 10, 2016 11:11:06 #

Dziadzi wrote:
I took some shots tonight of my eldest playing hig... (show quote)
When I was in high school, and later, when I worked for a yearbook company as a house photographer, I photographed a lot of high school basketball games. Here are some tips:
Stopping ALL action isn't necessarily a great idea. SOME limb blur or ball blur indicates subject direction and movement.
If you do want to stop action:
A shutter speed of 1/125 or faster will stop PEAK action.
A shutter speed of 1/250 or faster will stop MOST player action.
A shutter speed of 1/320 or faster will stop all but the most frantic action on the court.
Use SHUTTER priority You set the shutter speed. Let the aperture and ISO float (Use Auto ISO). OR,
Set both shutter speed and aperture and let Auto ISO float. OR,
If the lighting in the gym is nice and even, do metering and custom white balance off a gray card, set all three manually, and enjoy easier batch post processing from raw images.
Remember that focus AND camera movement AND subject movement ALL affect sharpness.
VC can reduce the affect of camera movement ONLY.
FOCUS makes your subject sharp
Getting closer with a wider lens improves depth of field, which helps keep the subject in a better zone of focus.
I used to get under the basket, or to one side of it, as close as was allowed, and use a 50mm or even a 35mm lens on full frame (35mm film). I seldom used longer than 85mm (50mm on APS-C or DX) for basketball. Your Tamron 70-200 is a FINE lens, but the AF is a little slow, and that range is just a little long if you're working court-side.
Stopping down almost any lens at least one stop will improve its performance, often dramatically. Using a prime f/2 lens at f/4, or an f/1.4 lens at f/2.8, is nearly optimal. You can improve Tamron 70-200 VC by stopping down to f/4 or f/5.6, but you may not have enough high ISO performance to get the shutter speed you want in a high school gym...
Subject movement yields blur, even if VC minimizes camera movement and the subject is in focus.
Faster shutter speeds minimize subject blur AND camera movement effects.
Panning minimizes subject movement blur, except for body parts that are moving (legs, arms), and, of course, the background.
Using a single tracking AF point aimed at your subject can keep the subject in sharper focus.
Turning on ALL AF points is a disaster. The camera will inevitably find the closest point on the floor in front of the camera, and focus there!
Using "zone focus" works great (disable AF and focus manually at a point on the floor, then fire when the subject gets there). It's all we had before autofocus! I used it for YEARS.
What you DO NOT want is motion blur that makes your SUBJECT unsharp. If you pan the camera with the subject, using a slow shutter speed, you can throw the background out of focus and create the illusion of speed.
Feb 10, 2016 11:21:21 #
ole sarg
Loc: south florida
Now that is an old trick I haven't seen mentioned in years.
rpavich wrote:
This is a good point to bring out. You DON'T want your exposure to be bouncing all over the place depending on where you point your lens.
Meter off of your palm at courtside, set your exposure manually, shoot away without thinking about that ceiling-fan of an exposure needle inside your camera :)
Viola! All exposures perfect, and all the same. Saves tons of time in post.
Meter off of your palm at courtside, set your exposure manually, shoot away without thinking about that ceiling-fan of an exposure needle inside your camera :)
Viola! All exposures perfect, and all the same. Saves tons of time in post.
Feb 10, 2016 11:21:52 #
rpavich wrote:
This is a good point to bring out. You DON'T want your exposure to be bouncing all over the place depending on where you point your lens.
Meter off of your palm at courtside, set your exposure manually, shoot away without thinking about that ceiling-fan of an exposure needle inside your camera :)
Viola! All exposures perfect, and all the same. Saves tons of time in post.
Meter off of your palm at courtside, set your exposure manually, shoot away without thinking about that ceiling-fan of an exposure needle inside your camera :)
Viola! All exposures perfect, and all the same. Saves tons of time in post.
The palm metering trick works okay for negative films and casual raw capture photography. It presents issues when using slide films or JPEG capture.
Metering typical Caucasian palms yields 2/3 to one full stop underexposure. Metering typical African American palms yields normal to 1/3 stop underexposure. (I don't have values for other racial skin tones). So your personal experience may vary...
Metering a $10 Delta-1 Gray Card, held in the same light falling on the key plane of the subject, gives you a normal exposure AND a Custom or Preset or Manual White Balance reference that will minimize off-color results from the metal halide discharge lamps in most gyms. It will also give you decent quality JPEGs when the lighting is decent.
Feb 10, 2016 11:25:01 #
burkphoto wrote:
The palm metering trick works okay for negative fi... (show quote)
I agree with the grey card thing, I wanted to make it as simple as possible without suggesting the OP buy anything else.
I never had an issue shooting jpgs using this method. In my experience, they are more resilient than folks give them credit for and keeping the exposure constant is a LOT better than the ceiling fan method of over and underexposure surprises that a person gets.
Feb 10, 2016 11:31:40 #
burkphoto wrote:
... Metering a $10 Delta-1 Gray Card, held in the same light falling on the key plane of the subject, gives you a normal exposure AND a Custom or Preset or Manual White Balance reference that will minimize off-color results from the metal halide discharge lamps in most gyms. It will also give you decent quality JPEGs when the lighting is decent.
... Metering a $10 Delta-1 Gray Card, held in the same light falling on the key plane of the subject, gives you a normal exposure AND a Custom or Preset or Manual White Balance reference that will minimize off-color results from the metal halide discharge lamps in most gyms. It will also give you decent quality JPEGs when the lighting is decent.
FYI:
Although it's been a few years since I've used a proper gray card, I do remember comparing it with paint chip samples from a hardware store. I seem to remember "Smoke Gray" as being the one that matched up almost exactly as a true photographic gray card and the sample cards are free.
Feb 10, 2016 12:20:19 #
Dziadzi wrote:
I took some shots tonight of my eldest playing hig... (show quote)
I disagree with many of these comments. I shoot about 5000 HS gym shoots every year for a local paper. I, and I believe most pros, prefer Aperture priority or Manual. Always shoot RAW. You will probably need at least 3200 ISO to get minimum speed of 1/320. Most newer cameras can handle this without too much noise. With this setting the speed floats. If speed drops below 1/320 you will have to shoot manual and lock in speed. Pictures will be dark but can easily be lightened in Lightroom. If you can get higher speed use it rather than lowering the ISO unless noise is terrible. I like 1/500 or so for basketball but usually can live with 1/320. Wrestling and volleyball are seldom a problem at 1/320.
Feb 10, 2016 12:21:20 #
Dziadzi wrote:
I took some shots tonight of my eldest playing hig... (show quote)
I disagree with many of these comments. I shoot about 5000 HS gym shoots every year for a local paper. I, and I believe most pros, prefer Aperture priority or Manual. Always shoot RAW. You will probably need at least 3200 ISO to get minimum speed of 1/320. Most newer cameras can handle this without too much noise. With this setting the speed floats. If speed drops below 1/320 you will have to shoot manual and lock in speed. Pictures will be dark but can easily be lightened in Lightroom. If you can get higher speed use it rather than lowering the ISO unless noise is terrible. I like 1/500 or so for basketball but usually can live with 1/320. Wrestling and volleyball are seldom a problem at 1/320.
Also use spot focus and be sure you hit his face or body.
Feb 10, 2016 12:24:03 #
Set your camera to Auto ISO and shutter speed priority. Then play with your shutter speeds. Do some test shots starting at 1/250th and then moving up the speed incrementally. Review the photos by blowing them up in your viewfinder, or go home and check them on your computer monitor. Then pick your best shots for sharpness and use the setting from those test shots for the future. Keep in mind that lighting from venue to venue can be different, but the settings changes should be minimal. Also, keep in mind that the kind of lighting may change from place to place and that can affect your white balance. Some of the lighting used in gyms, like the sodium lamps, can play havoc with your camera's white balance. If you can, shoot in RAW with Auto WB. That makes corrections easy in PP. Even then, remember to take some test shots that you can review on your LCD screen before the game starts. Then set your WB based on what you see. Or check your camera's manual for how to set a custom white balance.
Feb 10, 2016 12:26:09 #

Dngallagher wrote:
It would have been helpful to include a download for closer inspection, but I would think 1/200 is not quite fast enough of a shutter speed for sharpness and clarity of moving objects.
The third shot looks much sharper, but then the subjects are standing still, so a slower shutter speed works better.
The third shot looks much sharper, but then the subjects are standing still, so a slower shutter speed works better.
:thumbup:
Feb 10, 2016 14:08:00 #
Tony.mustang wrote:
Hi, to improve your shots for clarity set your camera to af c this allows the lens to continue to focus until u press the shutter all the way down. And yes to help move your speed up to 500 to be on the safe side. Good luck
Thanks, Tony, I did have it on AF-C.
Feb 10, 2016 14:12:52 #
rpavich wrote:
It appears that two things are going on.
1.) Motion smearing (as was mentioned)
2.) Missed focus. The ball looks to be focused more than his face in shot #1.
Additional observation. Get as close as you can and fill the frame rather than sitting at the back of the stands and wracking out your zoom. I'd get courtside if I could.
1.) Motion smearing (as was mentioned)
2.) Missed focus. The ball looks to be focused more than his face in shot #1.
Additional observation. Get as close as you can and fill the frame rather than sitting at the back of the stands and wracking out your zoom. I'd get courtside if I could.
Thanks, rpavich!
If you want to reply, then register here. Registration is free and your account is created instantly, so you can post right away.