three stars
Aug 24, 2015 09:45:59 #

pfrancke wrote:
LOL -- truthfully, I like a little dash in the stars. They move like hell! And it shows.
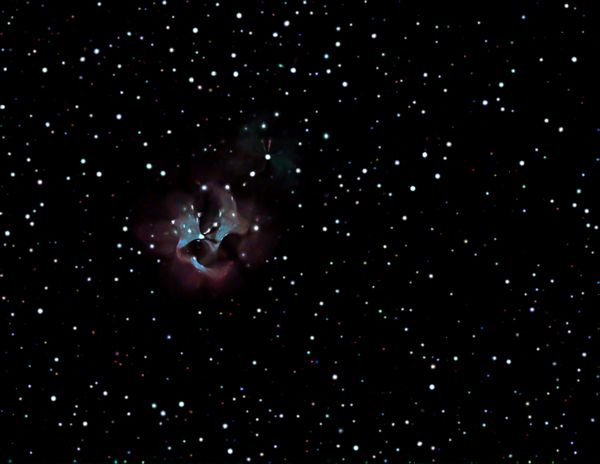
For doing stars, I do the following with StarTools
1. Open the file. I usually choose "Don't Activate Tracking"
2. Select "Mask" at top of screen. Screen turns green with the mask showing as a lighter green.
3. Select "Auto" then "Stars" then "Do"
4. Click on anything you don't want to include in the mask, then press "keep". Image will blink a couple times.
5. On the left side, press "repair" and then at the bottom, charge "warp" to "Redistribute, Core is Avg location", then press "do" at the top. Stars should now be round. Press "Keep"
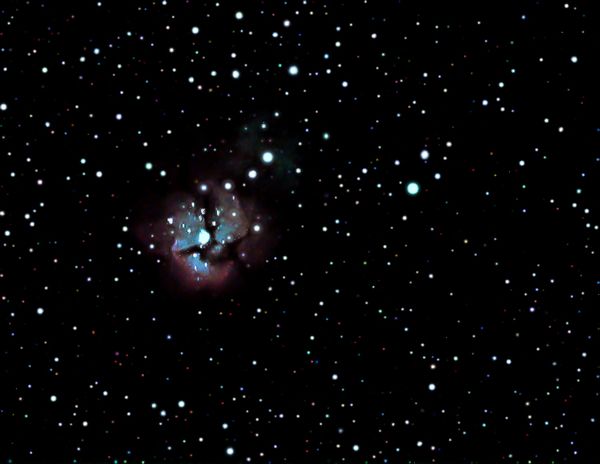
You can now save the image. I am using an example, I think this was from Craig, to show an example. It is also possible to shrink the stars also. I had removed the mask in the nebula and you see uncorrected star there.
I have also added a second example using a Photoshop filter called StarShrink (I am still using the 30 day trial). I used it to selectively pick the larger stars to reduce.
Aug 24, 2015 10:24:19 #
JimH123 wrote:
For doing stars, I do the following with StarTools... (show quote)
I very much like the startools result better. There seems to be greater variety in the size of the stars which results in the impression of dimensionality - (though of course the larger stars are not necessarily the closer stars in truth, though they appear that way).
Makes me wonder how it was ever figured out how far away they are - relative movement is all I can think..
Aug 24, 2015 11:04:35 #
pfrancke wrote:
I very much like the startools result better. There seems to be greater variety in the size of the stars which results in the impression of dimensionality - (though of course the larger stars are not necessarily the closer stars in truth, though they appear that way).
Makes me wonder how it was ever figured out how far away they are - relative movement is all I can think..
Makes me wonder how it was ever figured out how far away they are - relative movement is all I can think..
A really, really, really long measuring tape? :?
:lol:
Aug 24, 2015 11:10:16 #
I concur with Piet.
I like the StarTools example the best.
Reason being that the StarShrink example appears to have also reduced the nebula itself.
Now what kinda deal is that? :?
Could layering bring the best of the Nebula, to the best of the star background?
(Bearing in mind I am but a peanut in the gallery...)
I like the StarTools example the best.
Reason being that the StarShrink example appears to have also reduced the nebula itself.
Now what kinda deal is that? :?
Could layering bring the best of the Nebula, to the best of the star background?
(Bearing in mind I am but a peanut in the gallery...)
Aug 24, 2015 11:15:13 #
SonnyE wrote:
A really, really, really long measuring tape? :?
:lol:
:lol:
I HAD to google it, one way is triangulation, since the earth spins around the sun, our planet moves and we can look at different times and compare.
The other way seems fishy to me. Brightness as calculated by color and spectrum. Only seems fishy because I have no clue. I guess they are saying that certain size = certain color, and then measure brightness within that color to know how far it is.
Either way, considering the distances involved, doesn't seem like small changes in numbers will mean a lot.
Aug 24, 2015 11:28:51 #
pfrancke wrote:
I HAD to google it, one way is triangulation, sinc... (show quote)
Suffices for me to say they are yet another thing I shall never touch, but they are fun to look at.
Kinda like some women.... :twisted:
(Speaking of Heavenly Bodies...) :lol: 8-)
Aug 24, 2015 11:31:16 #
SonnyE wrote:
I concur with Piet.
I like the StarTools example the best.
Reason being that the StarShrink example appears to have also reduced the nebula itself.
Now what kinda deal is that? :?
Could layering bring the best of the Nebula, to the best of the star background?
(Bearing in mind I am but a peanut in the gallery...)
I like the StarTools example the best.
Reason being that the StarShrink example appears to have also reduced the nebula itself.
Now what kinda deal is that? :?
Could layering bring the best of the Nebula, to the best of the star background?
(Bearing in mind I am but a peanut in the gallery...)
Yes, layering could solve the distortion of the nebula. I used StarShrink on the image fixed by StarTools. So it started with round stars. But StarShrink does not use a mask. Instead, you have a slider that affects how large a star has to be before it is affected, and the white in center of the nbula was large enough to be affected.
With layers, I would do the shrink on the top layer, which would affect the nebula. And erase the nebula on the top layer so the one one the bottom shows through.
StarTools also had shrinking ability and does quite a good job, but I was doing this before heading out the door to go to work and did absolute minimum adjustments.
I also was starting with a JPG which I previously downloaded. And I turned it into TIFF for StarTools to work. Thus the detail in this file was already compromised.
If one were to start with the original and use StarTools, the result could be stunning.
Aug 24, 2015 11:38:53 #
JimH123 wrote:
Yes, layering could solve the distortion of the ne... (show quote)
Very Good, and Thank You Jim for your work and education on this.
I have downloaded StarTools, but haven't "cracked the book" open. :oops:
Thanks for showing what could be... ;)
Aug 24, 2015 11:39:05 #
pfrancke wrote:
I HAD to google it, one way is triangulation, sinc... (show quote)
Triangulation can work for closer stars. And there is a type of variable star that they use because it has a very dependable absolute brightness. And they can see these stars in nearby galaxies and compute distanece through calculations.
And for really far galaxies they measure the red shift and use that to compute distance.
Aug 24, 2015 11:41:58 #
SonnyE wrote:
Very Good, and Thank You Jim for your work and education on this.
I have downloaded StarTools, but haven't "cracked the book" open. :oops:
Thanks for showing what could be... ;)
I have downloaded StarTools, but haven't "cracked the book" open. :oops:
Thanks for showing what could be... ;)
Be sure to watch the YouTube videos. They really help. I still fumble along with it.
StarTool can even add those reflector scope spikes to the stars so you can make your refractor scope imitate a reflector.
Aug 24, 2015 12:29:38 #
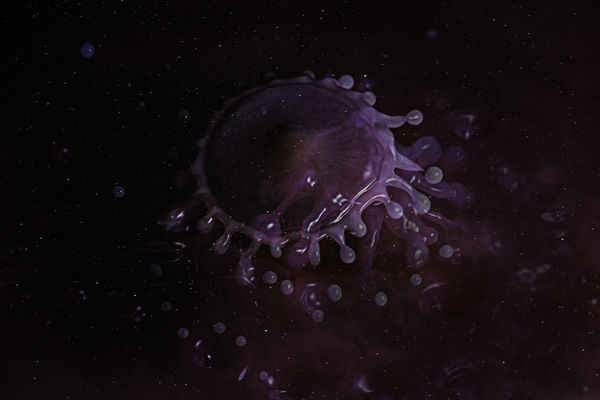
Edgar Allan Poe would love our technology - I think he would look at stars and take macro images also..
I think he would appreciate primordial particle soup
And I think he would have appreciated the Nikonian principle of gathering pixels while we may
The Conqueror Worm - also known as "The Red Shift")
By Edgar Allan Poe
Lo! t is a gala night
Within the lonesome latter years!
An angel throng, bewinged, bedight
In veils, and drowned in tears,
Sit in a theatre, to see
A play of hopes and fears,
While the orchestra breathes fitfully
The music of the spheres.
Mimes, in the form of God on high,
Mutter and mumble low,
And hither and thither fly
Mere puppets they, who come and go
At bidding of vast formless things
That shift the scenery to and fro,
Flapping from out their Condor wings
Invisible Wo!
That motley dramaoh, be sure
It shall not be forgot!
With its Phantom chased for evermore
By a crowd that seize it not,
Through a circle that ever returneth in
To the self-same spot,
And much of Madness, and more of Sin,
And Horror the soul of the plot.
But see, amid the mimic rout,
A crawling shape intrude!
A blood-red thing that writhes from out
The scenic solitude!
It writhes!it writhes!with mortal pangs
The mimes become its food,
And seraphs sob at vermin fangs
In human gore imbued.
Outout are the lightsout all!
And, over each quivering form,
The curtain, a funeral pall,
Comes down with the rush of a storm,
While the angels, all pallid and wan,
Uprising, unveiling, affirm
That the play is the tragedy, Man,
And its hero, the Conqueror Worm.
Aug 24, 2015 14:29:35 #
JimH123 wrote:
Be sure to watch the YouTube videos. They really help. I still fumble along with it.
StarTool can even add those reflector scope spikes to the stars so you can make your refractor scope imitate a reflector.
StarTool can even add those reflector scope spikes to the stars so you can make your refractor scope imitate a reflector.
Oy!
I just returned from cutting down a dead tree, hot and tired, but done.
I jumped back into StarTools and immediately fell on my face, yet again. :?
Went to DSS and stacked up a short stack of 4, then re-entered StarTools only to not only fall on my face again, but to have an implement fall on my head while I groveled.
Ouch!
I need Astrophotography for the hopeless.... :roll: :lol:
But I'll keep swimmin....
PS: The Youtube video's are of great help... They show me all sorts of good things.
Not that I can fathom how to do them, but if I play them back real, real, s_l_o_w.... I can at least read the captioning. :roll: :lol: :-P
And, BTW, pray tell why would I want my Triple APO scope to mimic a reflector?
Why, I'd might as well give up wearing my powdered wig. :lol:
Aug 24, 2015 15:02:08 #
SonnyE wrote:
Oy! br I just returned from cutting down a dead tr... (show quote)
Well, no one says you have to give up your powdered wig. But you could add those reflector spikes and make everyone thing you have a 20" reflector.
I'm not good yet with StarTool either. I seem to have mastered making round stars, but not much more. And I need to watch those videos again too.
But tool certainly likes to gobble up all the processing power your PC has.
Aug 24, 2015 16:06:13 #
SonnyE wrote:
Oy! br I jumped back into StarTools and immediatel... (show quote)
An unofficial user manual for StarTools:
https://www.google.com/url?sa=t&rct=j&q=&esrc=s&source=web&cd=2&ved=0CCMQFjABahUKEwiAr_T0wcLHAhWXLYgKHWOOADM&url=http%3A%2F%2Fdownload.startools.org%2FStarTools%2520Manual%2520V1_3_5%2520Unofficial.pdf&ei=tXjbVcCAFZfboATjnIKYAw&usg=AFQjCNEpgrXBYadjzt5ds2RLA4I-BcBM3A&cad=rja
Someone's step by step for doing an image with StarTools:
www.terrapins.co.za%2Ffiles%2FStep%2520by%2520Step%2520Processing%2520Guide%2520for%2520Eta%2520Carina.pdf&ei=dHfbVaewNorUoATZ1oKwDg&usg=AFQjCNFSRAQyXa95hT0YRO-eu43cH0eucg&cad=rja" rel="nofollow" target="_blank">https://www.google.com/url?sa=t&rct=j&q=&esrc=s&source=web&cd=4&ved=0CC8QFjADahUKEwinuo3cwMLHAhUKKogKHVmrAOY&url=http%3A%2F%2Fwww.terrapins.co.za%2Ffiles%2FStep%2520by%2520Step%2520Processing%2520Guide%2520for%2520Eta%2520Carina.pdf&ei=dHfbVaewNorUoATZ1oKwDg&usg=AFQjCNFSRAQyXa95hT0YRO-eu43cH0eucg&cad=rja
https://www.google.com/url?sa=t&rct=j&q=&esrc=s&source=web&cd=8&ved=0CEoQFjAHahUKEwjstt3rw8LHAhVPRIgKHY6tAfM&url=http%3A%2F%2Fstartools.prod.pdf.1stba.se%2F&ei=unrbVezxOs-IoQSO24aYDw&usg=AFQjCNEysLgEKu8ust-2q029Sm4HiUBkVw&cad=rja
Aug 24, 2015 18:02:14 #
If you want to reply, then register here. Registration is free and your account is created instantly, so you can post right away.