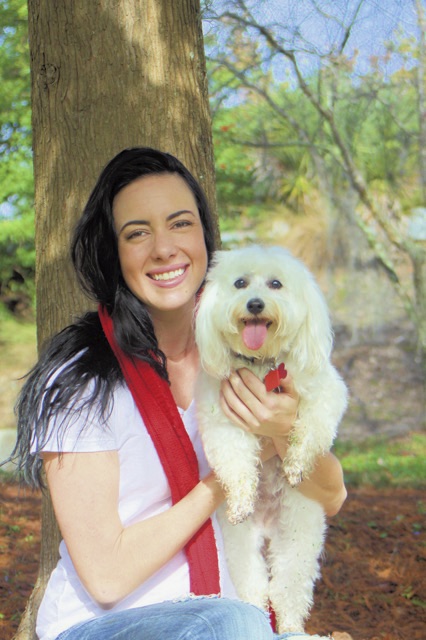
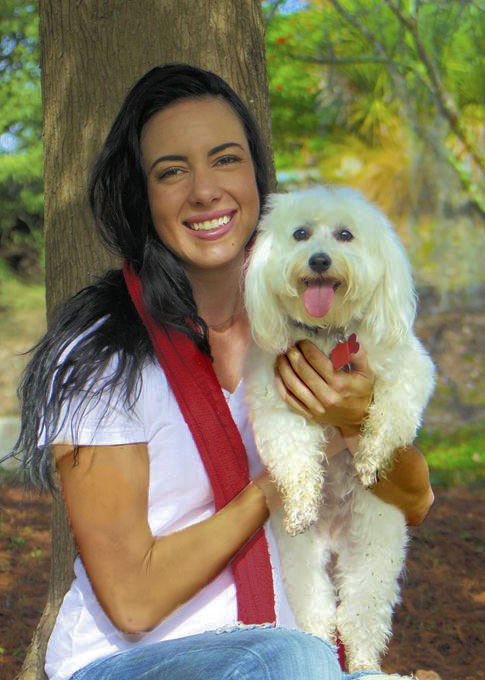
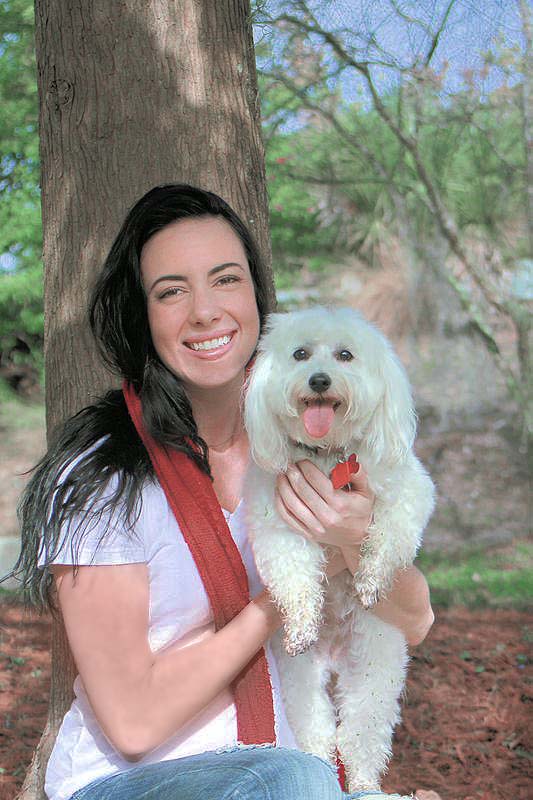
Is the color off or is it me?
Dec 10, 2014 22:32:31 #

I downloaded the image and tried to pull out any color cast in Photoshop C3 Curves. Had the Black eyedropper set to RGB = 10:10:10; the White eyedropper set to RGB = 245:245:245; and Midtone RGB = 133:133:133. Had to use a temporary Fill difference Layer to find the Midtone - they were few and tiny. Did Curves on a separate Layer and I must say any color cast must have been slight. What didn't come out was the faint greenish in the dogs head and ears hair. That breed would have white hair. Wonder how the green got there and nowhere else.
Dec 11, 2014 15:46:53 #
Is it too late to add my attempt to remove color cast? For now I'll just quote the RGB numbers I found.
Shirt near crook of arm:
original - 250:251:255
adjust - 255:255:252
blend - 243:244:246
Bridge of nose:
original - 208:177:130
adjust - 215:182:132
blend - 198:170:123
dog hair above right eye
original - 208:227:214 - greenish shading? how come, from where
adjust - 216:237:219
blend - 197:218:204
If you wish, I'll post my results.
Dec 12, 2014 00:40:52 #
jgreco wrote:
This was posted in the wrong place so I am re post... (show quote)
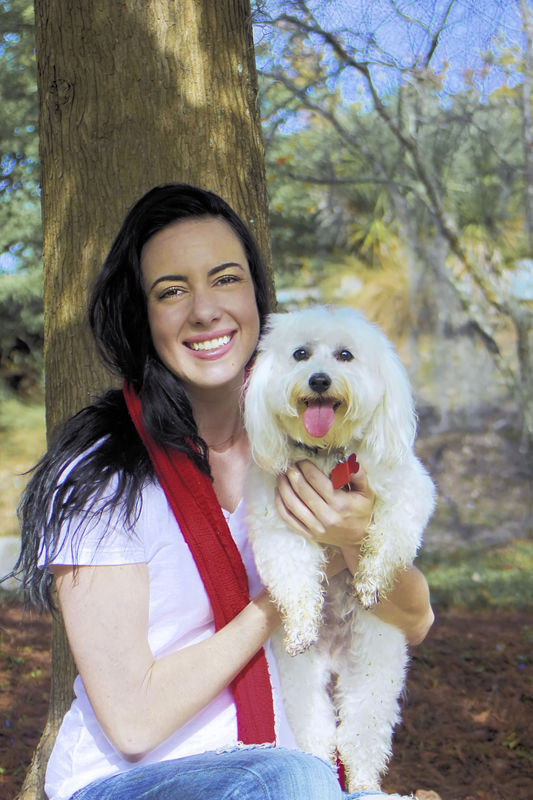
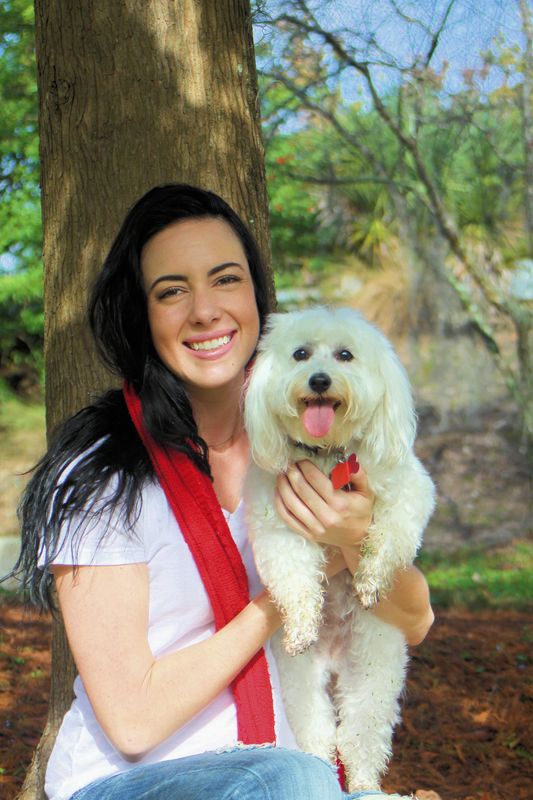
This version is removing quite a bit of orange and a bit of green using Adobe ACR, then having Perfectly Clear plug-in in Photoshop correct the photo the way it likes using it's "Beauty" preset.
Dec 12, 2014 20:59:01 #
Anthony P wrote:
I showed your fine photo in a different way. It's good practice for me working on photos that I see in a different way. Just did basic retouching and a tighter crop. Your fine photo now has a more welcome feeling while viewing.
Your eye stays to the subject and is not moved towards the sharper background. You can do the same in light room, I used "APERTURE". AP
Your eye stays to the subject and is not moved towards the sharper background. You can do the same in light room, I used "APERTURE". AP
Did you print it, spill water on the print, and then scan it back in to get that effect too? :lol:
Dec 12, 2014 23:49:25 #
Wallbanger wrote:
Did you print it, spill water on the print, and then scan it back in to get that effect too? :lol:
My print is not shown with the words that you speak. My print is a tighter crop, color corrected, and soft blurred background. It stands out from all the others made. AP
Dec 14, 2014 09:20:30 #
I too made some adjustments. Hope you don't mind. Might do better posting on post processing section.
Dec 14, 2014 13:09:13 #
Right On !!
rpavich wrote:
But more importantly; this raises the idea of getting the colors correct in camera before you hit the shutter button.
Trust me, no amount of "fixing" can replace truly accurate color.
My advice is to do a custom White balance in camera before you shoot, at least that much. That will get you MILES ahead of the mind-set of "fix it in Lightroom"
2 minutes with the camera saves 3 hours in Lightroom.
Trust me, no amount of "fixing" can replace truly accurate color.
My advice is to do a custom White balance in camera before you shoot, at least that much. That will get you MILES ahead of the mind-set of "fix it in Lightroom"
2 minutes with the camera saves 3 hours in Lightroom.
Dec 17, 2014 13:32:24 #
Dec 27, 2014 09:58:54 #

Reply to original post: The image is overexposed slightly but more importantly the contrast range is extreme. The dog is in full sun as is the girl's arm and white shirt. Her face is not as brightly lit.
First of all, the Photoshop or Elements Shadow/Highlight tool can be used to recover some highlight detail in the dog's fur. Second, the image is oversaturated. Reducing saturation somewhat helps considerably. Third, the arm (and shirt if desired) can be burned in using Elements or Photoshop. I don't find the shirt objectionable so I didn't darken it.
You have a LOT of images here to choose from. I fear some minor color variation in these images may be due to different monitor calibrations.
Anyway, here is my try at it.

Dec 30, 2014 00:52:17 #
All are very good corrections but, I'm still trying to figure out what's up with the sky :|
Feb 19, 2015 20:20:55 #
There are a few problems in the lighting. The upper part of the subject was in mottled shade and the lower part was in bright sunlight. There was a lot of yellow in the original and the red was over saturated. 72dpi does not help either and that is what is showing up in the sky. The arm is the hot spot and with the mottled lighting it makes it difficult to do much about it. Check out your white balance and do some experimenting with different settings. Hope that helps.
Mar 1, 2015 10:04:46 #
paulrph1
Loc: Washington, Utah
jgreco wrote:
This was posted in the wrong place so I am re post... (show quote)
I try to not do as much after as before. Why spend hours when a short fix before hand is adequate. White is not a good color to photograph people. Make the model change her shirt and expose for the face. Sometimes everything cannot be corrected afterwards.
Mar 8, 2015 16:59:41 #
I opened your jpg in Camera Raw and was able to perform some minor tweaks. I am not sure if it is what you were aiming for since each of us has their own set of eyes for what pleases them.
Mar 8, 2015 17:03:14 #
I put in the wrong file. I have attached my corrected file here
Mar 8, 2015 17:04:59 #
Also when shooting with harsh shadows it sometimes help to use a fill flash to even the lighting
If you want to reply, then register here. Registration is free and your account is created instantly, so you can post right away.