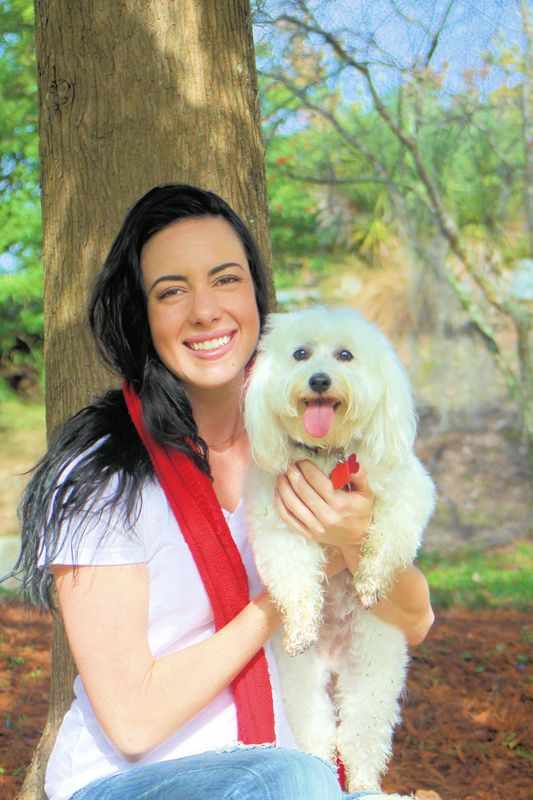
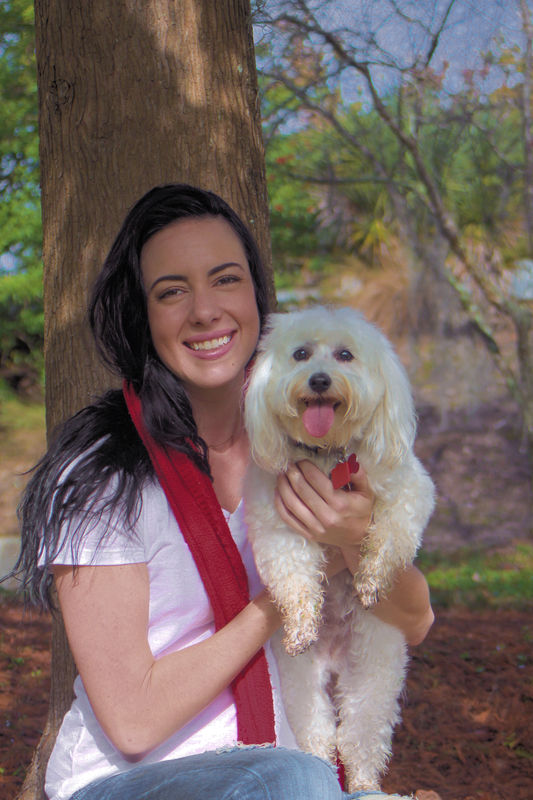
Is the color off or is it me?
Dec 8, 2014 07:08:26 #
This was posted in the wrong place so I am re posting it here. I seem to have saved it as jpeg in software and do not have the raw file as it was converted. As stated in the original post, I see red in the models face and greens on the dog. I know I have to clean up the green grass buds on the dogs paws and when I made some corrections it only got worse? I ask for your advise in how to fix this. I have lightroom 3.5 and photoshop 5 but they wont open raw files for Canon 50D so I use Corel paintshop 6 to import it and save as jpeg. I than go back to photoshop and open it to make corrections. I am unable to get raw file for lightroom 3.5 and they want me to join the cloud.
Dec 8, 2014 07:20:17 #
jgreco wrote:
This was posted in the wrong place so I am re post... (show quote)
You should be able to use the Temp and Tint controls to correct the color. I'm using LR5, so I don't know what your controls look like. It can be annoying when a program can't deal with raw. That's probably one of their tactics for getting you to upgrade. If I were you, I'd buy a stand-alone version of LR, rather than doing the $10/month thing.
I'm far from being a LR expert, and I know you'll get better answers.
Dec 8, 2014 07:30:52 #
Nice composition but the colors and contrast are off a little. Generally oversaturated, especially the red, yellow and green. White shirt and lady's arm are underexposed. Funky blue pattern in the sky looks strange.
Dec 8, 2014 08:29:10 #
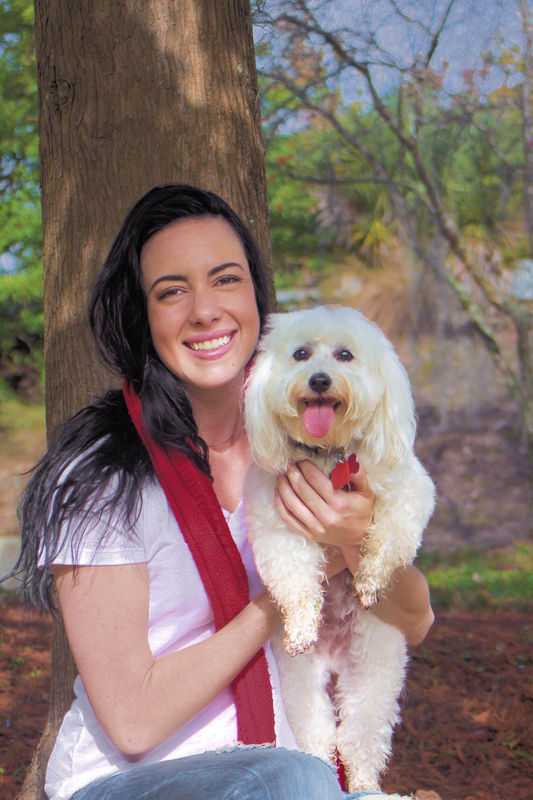
I tried to fix your picture in Photoshop CC. If you do not mind I can show you my result.
jgreco wrote:
This was posted in the wrong place so I am re post... (show quote)
Dec 8, 2014 09:07:15 #
Please do post it so I can dnload with your corrections Thank you sooooo much. I got frustrated trying to fix it and don't know why it even happened? The ISO was very low and the camera works fine. Perhaps the portrait setting was not the right choice.
Dec 8, 2014 09:26:29 #
This is my attempt to correct it.
jgreco wrote:
Please do post it so I can dnload with your corrections Thank you sooooo much. I got frustrated trying to fix it and don't know why it even happened? The ISO was very low and the camera works fine. Perhaps the portrait setting was not the right choice.
Dec 8, 2014 09:34:53 #
Thank you. Seems a little darker than orig. But facial color is much better. Was it darkened to fix the blowout on her right arm? I could lighten it in CS5. Thank you again. What do the others think of the change?
Dec 8, 2014 09:47:05 #
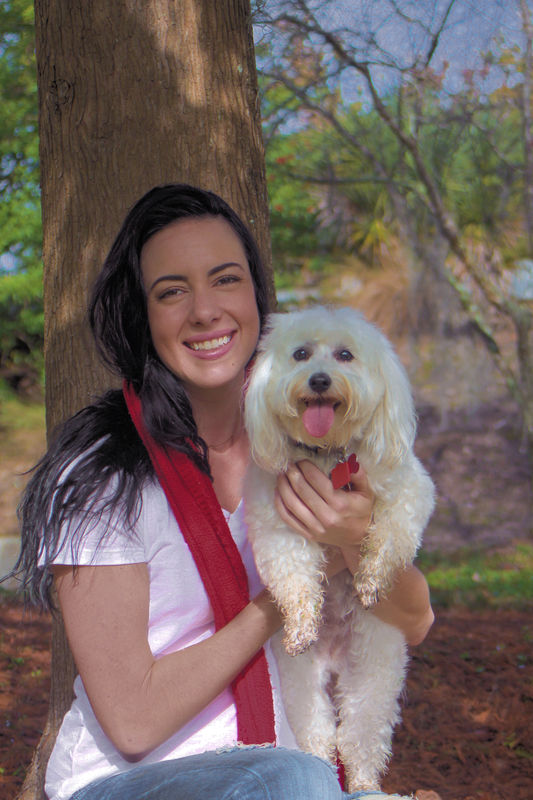
This is a little bit lighter.
jgreco wrote:
Thank you. Seems a little darker than orig. But facial color is much better. Was it darkened to fix the blowout on her right arm? I could lighten it in CS5. Thank you again. What do the others think of the change?

Dec 8, 2014 09:47:47 #
Didn't know that with the magic lasso tool you can select parts of pic and adjust brightness, so that's what I did to her face and the dog. Other than that I think it is getting better.
Dec 8, 2014 10:03:07 #
Now her right arm is darker.
jgreco wrote:
Didn't know that with the magic lasso tool you can select parts of pic and adjust brightness, so that's what I did to her face and the dog. Other than that I think it is getting better.
Dec 8, 2014 11:22:58 #
I know this was not part of your question, but when you converted to jpg from raw, the raw file is not lost. Do a computer search for the file name without the suffix.
Dec 8, 2014 11:52:55 #
Thank you all for all the advise. I ordered lightroom 3 as I am using xp and LR4 &5 require 7 or higher. I had a bootleg copy of LR3 already installed on the computer and did not know it would not update because of it. So I hope raw import works for the purchased LR3 and updates the raw files offered from Adobe to support Canon 50D & T5i. We shall see?
Dec 8, 2014 13:27:19 #

Searcher wrote:
.....when you converted to jpg from raw, the raw file is not lost. Do a computer search for the file name without the suffix.
And if you convert to tiff rather than jpg, the conversion is lossless.
Dec 8, 2014 13:38:50 #
jgreco wrote:
Thank you all for all the advise. I ordered lightroom 3 as I am using xp and LR4 &5 require 7 or higher. I had a bootleg copy of LR3 already installed on the computer and did not know it would not update because of it. So I hope raw import works for the purchased LR3 and updates the raw files offered from Adobe to support Canon 50D & T5i. We shall see?
LR3 will update to ACR 6.4 and that will support the 50D.
I do not think it will support the T51
Dec 8, 2014 14:51:42 #
jgreco wrote:
.....Perhaps the portrait setting was not the right choice.
If by "portrait" you mean one of the Scene modes, the camera would produce a jpg, not raw, so you haven't lost the raw because it never existed. And in Portrait mode the camera would have messed with the colouring (for the sake of the skin tones).
In LR5 I had partial success with Temp set to -7 and Tint set to +5, but I thought the individual colours still needed tweaking. And I thought the area round the dog's eyes was a bit soft, so I used contrast, clarity and sharpening applied with a well-feathered adjustments brush to de-soften that area. And I used an upside-down grad filter to darken the bottom of the shot.
If you want to reply, then register here. Registration is free and your account is created instantly, so you can post right away.