Technical question
Feb 7, 2012 11:57:23 #
pfredd wrote:
Oh yes when posting in the Photo Analysis section if you will include meta data, and what PP software program you have available. Though the later is not required it helps us try to help you if we have a feel for your expertise. When we must guess that we too often talk down to an experienced hand, or talk over the head of a relative newbie. Thank you,
P
P
Sorry about that I did add this later down in the thread
Biker_Chic wrote:
Good Morning all, br br I was as close as possibl... (show quote)
But I didn't add any meta data. I am a newbie / beginner hobbyist.
Feb 7, 2012 12:04:55 #
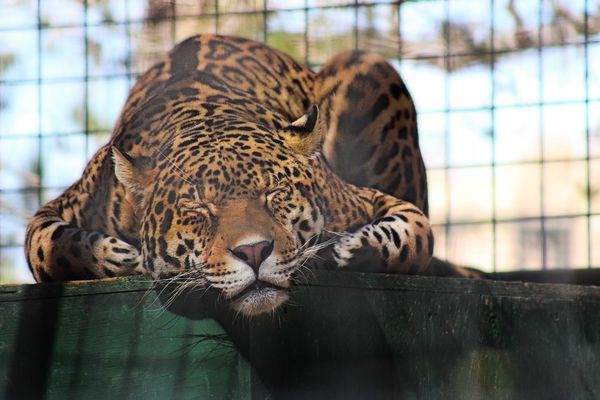
I got a nice little Photoshop tutorial on lightening eyes in today's Email. You may want to try it on the eye of the Tiger (couldn't resist that!)...for ones with their eyes open like your latest.
http://www.photoshopessentials.com/photo-editing/lighten-eyes/
It works almost the same in Photoshop Elements and is almost the same method Kelby and Klowkoski describe in Chapter 7 of their book.
The only dif I noted is that after you have the layer mask up you can press "Ctrl-I" to get the layer mask to black. The press X to switch the foreground color to white and then click on B to get the brush tool. The rest is the same.
Feb 8, 2012 11:29:59 #
MtnMan wrote:
I got a nice little Photoshop tutorial on lighteni... (show quote)
Thanks I will try the link soon.... as I started to work on "the eye of the tiger" :lol: my husband came home and presented me with flowers. A total surprise since he doesn't do that to often, so I decided not to be on the computer last night.
:thumbup:
Feb 9, 2012 00:05:59 #
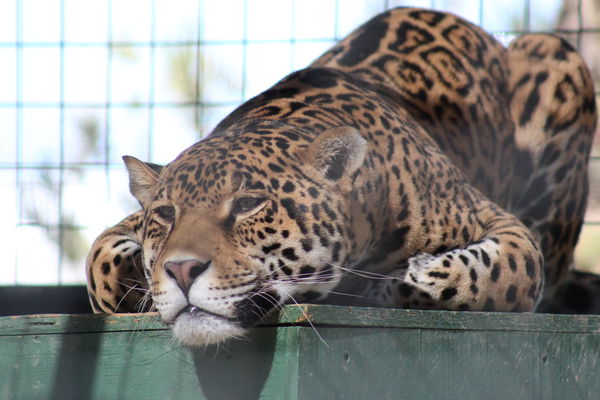
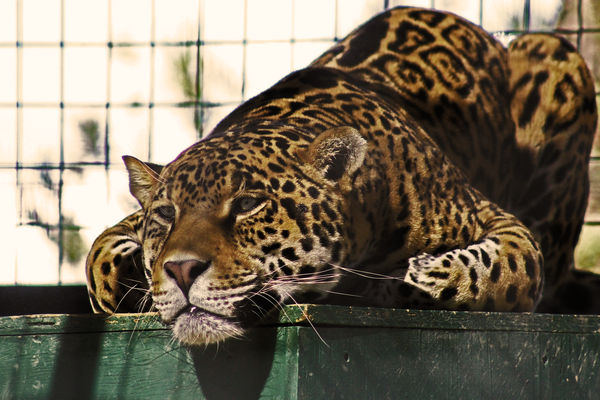
This is the result of my last attempt I took the suggestion to lighten the eyes. I added another layer and used the dodge tool to lighten the eye and then the burn tool on the pupil to re-darken it. I also lightened the color to make it less orange to try and bring it back to his natural color. I think I was able to achieve what I was trying to do. Thanks to all for the suggestions. Oh yeah the cool thing about this post is I learned something. I never knew what the Dodge and Burn tool was for and now I do. :thumbup:
Original
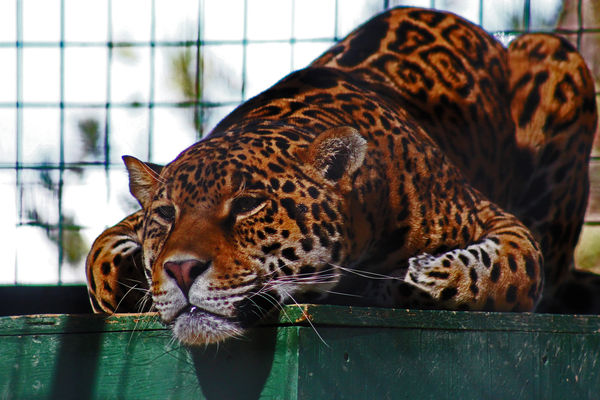
rough draft (too orange and eyes dark)
Last try
Feb 9, 2012 01:36:18 #
Great improvement!
I am still learning how to best use those tools also. I'm sure you noted that they continue to add the effect each time you brush over. So I think it is better to set the opacity relatively low (e.g. 10%) and take multiple passes where indicated.
With a little practice I think you'll be able to elminate the residual haze and make the eyes glow. "Tiger tiger in the night..." kind of thing!
Kelby and Klowkoski take another approach to brigtening human eyes in Chapter 7 of their Elements 10 book. It ought to work on tigers also. It uses layers and a layer mask. You may want to check that out.
Biker_Chic wrote:
This is the result of my last attempt I took the s... (show quote)
Feb 9, 2012 11:08:26 #
I saw a great technique that someone did with a tiger at a zoo. He did just the opposite of one of the suggestions. Instead of trying to "hide" the fence wire he focused it sharp. That is he used a small aperture (which gives the "artistic" effect Wolf suggests). But then in PP he cloned out the fence wire. Worked really great. I think in the future I will take one wide and one small so I have options to play with.
Feb 15, 2012 12:21:18 #
I used blending modes and layer masks to adjust contrast and shadows. Then used high pass to sharpen just a small amount. Hope this helps
Feb 16, 2012 10:53:25 #

I have used the clone option in Paintshop ProX4 and it works wonderfully. You need to put the clone where you want to replace the wire mesh and make your clone brush the correct size and commit to some time doing it but it can be done.
Good Luck :P
Good Luck :P
Feb 16, 2012 18:41:20 #

if u can ,get right up to the glass or cage with a shorter lense. in this case , u've got what u've got.
Biker_Chic wrote:
Hi I have a question about how to remove something... (show quote)
Feb 29, 2012 18:30:07 #

If you can't get right onto the fencing you'll have the same results. I've shot alot of pictures like you show in your examples, but I've learned to stretch as far as I can and then (with alot of luck)I try to put the most important aspect of the image into one of the spaces and shoot through that. If you get lucky you'll have an image you can possibly crop around or get creative and use your eraser in your photo program to help out. Try it; what have you to lose?
If you want to reply, then register here. Registration is free and your account is created instantly, so you can post right away.