Posts for: ticTOC
Oct 15, 2019 19:21:18 #
blacks2 wrote:
Thank you very very much.
Hey I love the shot......But there could be a down side, were any terrorists involved with that ship?

Dec 21, 2018 12:29:12 #
I didn't see it mentioned here, but a lot depends on the picture to be altered format!
If you're doing these alterations in JPEG then each time an altered picture has been saved, it has been but compressed. This compression is for each time you save the newly altered picture.
This compression will continually lesson the final quality. The more times that you open, alter and then save a JPEG format picture, the more it compresses the picture! I'd suggest that you use the "Tiff" format or a camera's raw format to make multiple alterations to a picture. Thus, the possibility of massive compression's can be avoided.
*** Note: Just the opening and closing of a JPEG picture will not alter it's compression.
*** Also: What has been mentioned by others here, the minimal alterations would make slight alterations of quality, not the 90,180, 270, 360 degree or flip type alteration because all of the original pixels are still in full use as they were shot.
Dec 7, 2018 14:32:07 #
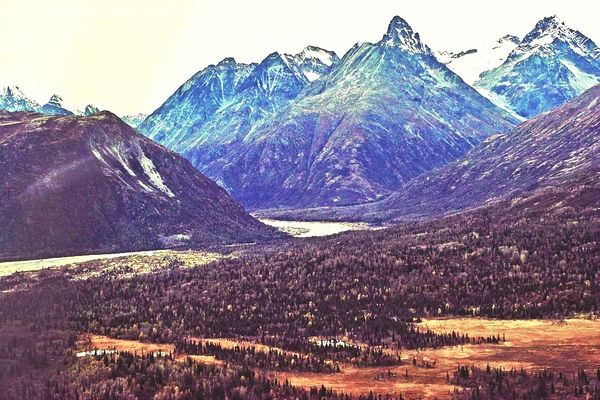
I'd like to say that of the 1st two, I liked the 2nd one best! However, in my case the more color full rock wasn't what caught my attention. The 1st thing that I noticed was the loss of the life in the tree line. It seemed to me that to much contrast was placed into the shot and the life/quality of the trees was being smothered a bit.
The 3rd shot was the best since the excessive amount of color in the single rock was well removed and the other rocks were being more brought to life and the tree life was more viewable. My only question to the 3rd shot is, what were you trying to give more life to? The fore ground rocks took over the shot and I'll bet you wanted the mountain to be a bit more of an eye catcher! However, I must say that the rock lines beauty should stay in the picture!
Rather than being such a negative of your shot, it/they were great! My hobby is photography and I live in the suburbs of Chicago so I don't get the ability around here to make these types of shots.
Jun 9, 2018 22:35:06 #
I must re-word my statement:
--DX camera--
When a 35mm DX lens is used on a DX camera it will be shooting a picture as a true 35mm lens.
When a 35mm FX lens is used on a DX camera it will be shooting a picture at 1.5x35mm, as a 52.5mm lens. This is showing a smaller field of view since all 4 sides of the FX lens's image have been cropped out due to the smaller receiving (DX) sensor size.
--FX camera--
When a 35mm FX lens is used on a FX camera it will be shooting a picture as a true 35mm lens.
When a 35mm DX lens is used on a FX camera it will be shooting a picture as a 52.5mm lens because the FX camera recognizes a DX lens and automatically uses a 1.5 cropping factor on the picture. This is showing a smaller field of view since all 4 sides of the FX sensor had to be cropped out due to the viggineting caused by a DX lens.
Jun 9, 2018 13:40:55 #
NO! Using a Nikon DX sensor vs FX sensor and Nikon DX lens vs Nikon FX lens of the same millimeter size!
*** Note for sharp cornered pictures. Since there is vignetting when using a DX lens on a FX sensor, there is a need for cropping of a picture.
I now understand that most, if not all FX format cameras automatically recognize a DX lens and do the cropping automatically.
When using a DX lens on a FX camera sensor, ~66% of the FX sensor receives light. (The center of a picture.)
Thus the automatic cropping factor of 1.5 is used for sharp corners, this is for the removal the viginetting.
When using a FX lens on a DX camera sensor, 100% of the DX sensor receives light.
However the FX lens is designed for a FX sensor 150% the size of the DX sensor so the picture viewed has been cropped due to the DX sensor size.
The actual lens millimeter size has not changed. However, it will look as if you've zoomed in on the picture taken.
The view of the picture has changed by a 1.5 cropping factor, making the picture/lens seemed to have been zoomed in on.
To better understand what I'm saying view: https://photographylife.com/using-nikon-dx-lenses-on-fx-cameras
Jun 4, 2018 11:10:58 #
I need to say this, that a DX format lens, i.e.
When a 35mm DX lens is placed on a DX camera it will be only a 35mm lens.
When a 35mm FX lens is placed on a FX camera it will be only a 35mm lens.
When a 35mm FX lens is placed on a DX camera it will be shooting at 1.5 x 35mm= 52.5mm lens.
(This is with a smaller field of view compared to a true 52.5mm DX lens (if a 52.5mm DX lens was available))
When a 35mm DX lens is placed on a FX camera shooting in MANUAL mode it will be at best 42mm DX lens (If a 42mm DX lens was available)
(This is with only a slightly smaller field of view), once you've cropped the picture manually (~1.2).
These lense powers may not make to much sense but it's the increased field of view size that explains it best.
When a 35mm DX lens is placed on a FX camera shooting in AUTO mode it will be acting as a 52.5mm lens because the FX camera recognizes a
DX lens and automatically uses a 1.5 cropping factor on the picture. (This is with a smaller field of view)
I hope I wasn't to technically oriented here for the average shooter!
Apr 22, 2018 11:02:52 #
Mar 13, 2017 20:44:12 #
jaymatt wrote:
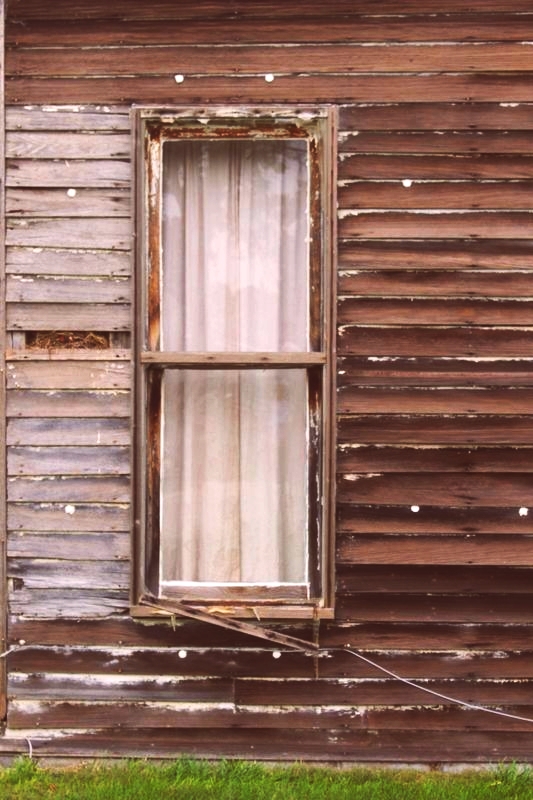
I was playing around with a pretty blah photo of a window in an abandoned house, and this is what I came up with after increasing the contrast, highlights, shadows, color saturation, color temperature, and sharpness. This is not the kind of thing I normally do, so, any thoughts?
It was quite an interesting alteration that you made to what I thought was a great picture. The shot's original colors were showing the age of the wood. If I were to alter the shot, I'd try to bring out the colors slightly. In the altered shot of your picture that I've attached you'll see what I mean. I used a free photo editing program, Irfanview, to make these slight alterations. I do not know if you were trying for slight changes or the more extreme/interesting changes you made.
I will attach the alterations as I made them.
Dec 23, 2015 22:07:38 #
DirtFarmer wrote:
IrfanView is a good program, well worth getting. A... (show quote)
You're right in that IrfanView doesn't save in the camera's raw format. However when I shoot in raw format and use IrfanView to PP, then I tell IrfanView to save in " *****.tif " format to avoid jpeg compression!
Dec 23, 2015 18:51:20 #
I'd like to suggest the IRFANVIEW software. This is what I use for PP and all I can say is that it does a heck of a lot in PP so since it's a freebee it would be well "worth" it to give it a try!
I hope you like what I've suggested here. If you do try IRFANVIEW and find that it doesn't do what you need I would like to hear what you needed that it didn't do!
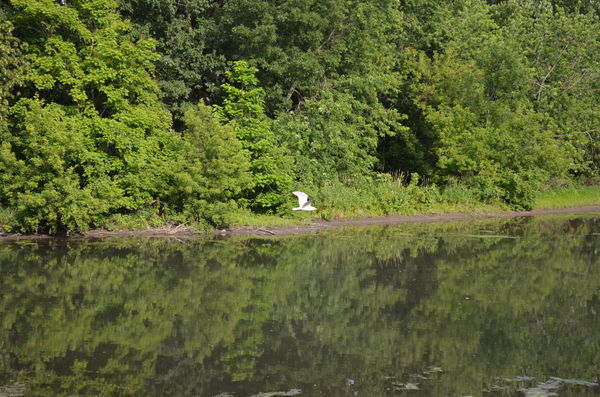
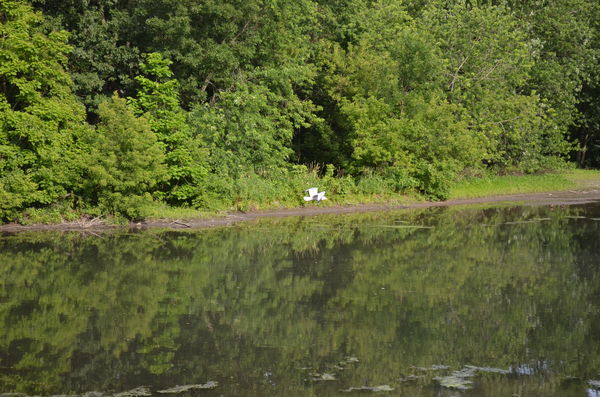
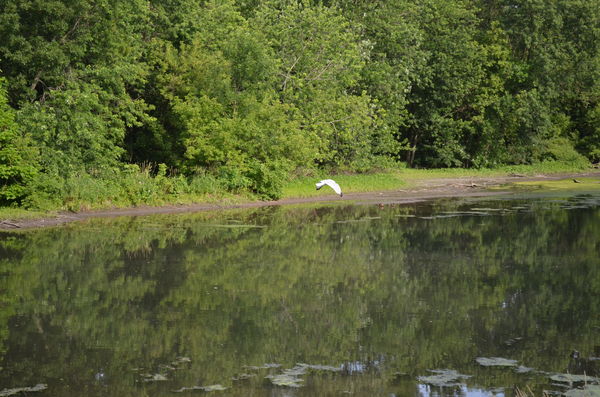
The attached pictures were multiple shots of one bird from which I made a panoramic shot to make it look like 5 birds flying together.
I hope you like what I've suggested here. If you do try IRFANVIEW and find that it doesn't do what you need I would like to hear what you needed that it didn't do!
The attached pictures were multiple shots of one bird from which I made a panoramic shot to make it look like 5 birds flying together.

Apr 10, 2014 10:47:54 #
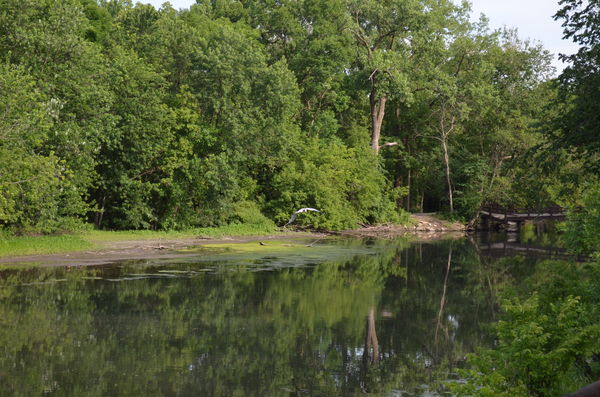
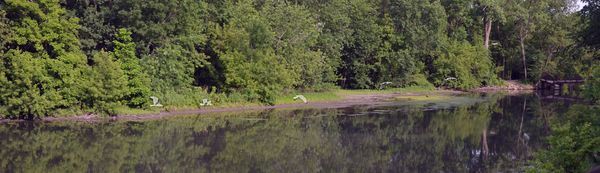
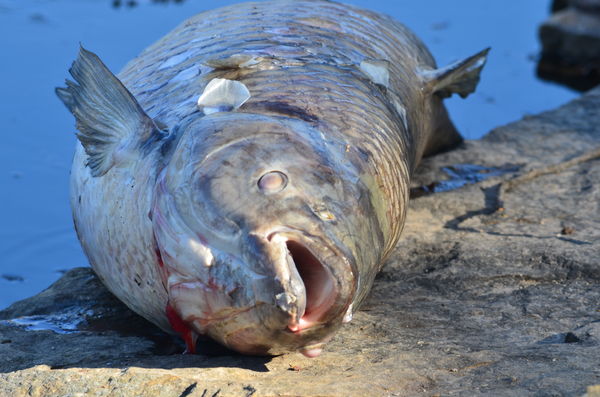
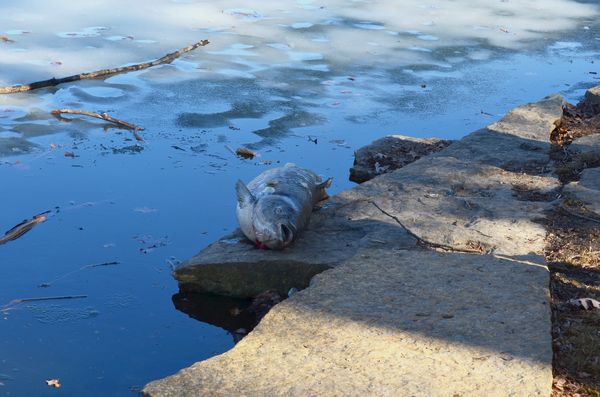
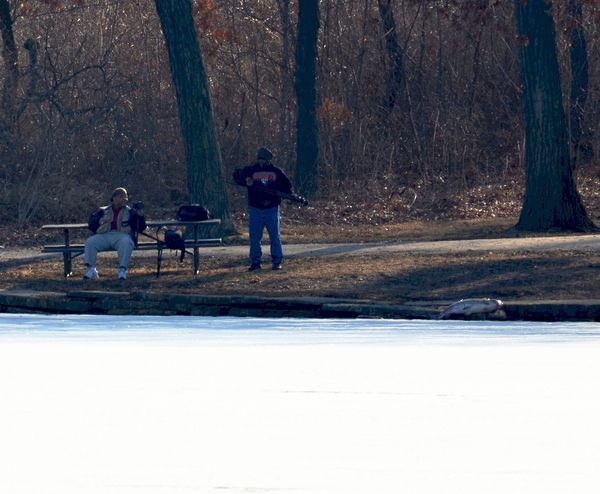
These shots were taken with a Nikon d5100 using a 55-300mm lens. I'll have to say that I was shocked at the size of the fish that had been in a rather small lake.
Notice the true size of this fish in the 3rd picture! What you're seeing the 3rd shoot, is a shot taken from about 450 ft.
You can see that this fish was what I would call huge, when comparing it's size to the fellas in the picture.
Notice the true size of this fish in the 3rd picture! What you're seeing the 3rd shoot, is a shot taken from about 450 ft.
You can see that this fish was what I would call huge, when comparing it's size to the fellas in the picture.
Apr 5, 2014 19:33:29 #
Pepper wrote:
I was explaining the exposure triangle to my granddaughter the other night and I was using the blinds on a window to demonstrate the shutter and the size of window to explain the aperture but when I got to the ISO and trying to explain that was how sensitive the sensor she wasnt getting it. Any simple analogies I could use to help her better understand ISO? Thanks guys.
Well, you could compare:
camera ISO light sensitivity (darkness -to- extremely bright)
to
hand temperature sensitivity (freezing cold -to- burning hot)
Camera ISO setting___-vs-___warming of freezing cold hands
amt-o-light sensitivity_-vs-___amt-o-heat needed
___100 Std. light.....-just fine-...hands are just fine
___200 need some...light/heat..go indoors to warm up
___400 " more............."/"..... " and rub hands softly
___800 " much more....."/"..... " " firmly
__1600 " a lot more......"/"..... " " vigorously
__3200 " great amt......."/"..... " " while using warm water
__6400 " extreme........."/"..... " " while using hot water
_12800 " excessive......."/"..... " while using the heat of a fire
So, on a photo location when there is good lighting(Std.) the ISO of 100 should be fine for the taking of a picture.
However, the dimmer the location the harder(more sensitive) the censer needs to be working.
An ISO alteration is used to make the censer more sensitive to a lower light location, allowing the lower lighting to be brightened up by the censer.
This is one of the ways to try to get the picture to look as if it were taken in a good lighting.
Feb 7, 2014 11:25:56 #
I'd like to say that you have some great shots here! They are sharp, colorful and I can't beat the beauty of the subjects.
Also as has been noted by others, there seems to be a strong "lime" tint in the 1st shot. I have downloaded this one to see what I could do to remove the tint that's found in the 1st shot using only a freeware (Irfaview).
Well, I will attach what I was able to do. The types of altering functions that I used were increasing the base colors by about 20%, adding to the contrast, increasing gamma, cutting overall brightness and cutting back on the color saturation.
These types of alterations were used at what I'll say were 3 levels.
i.e.: The downloaded photo was 1st Post Processed (PP1), then PP1 was PP again to PP2, and then PP2 to PP3.
I've attached the final version of my post processed picture, PP3.
I am always trying to see what I can do with a freeware editor.
Jan 31, 2014 11:46:52 #
Jan 30, 2014 10:04:10 #
Racmanaz wrote:
I saw this on FB once and had to share.
He'll have trouble keeping focus at that speed!!! And I hope his lens has vibration reduction!
:wink: