Posts for: dione961
Apr 22, 2019 19:14:18 #
rickster wrote:
We all know how Windows love to "update"... (show quote)
There is a down arrow below the Save As- click to open Save!
Apr 17, 2019 01:01:35 #
speters wrote:
I had no idea, mirrorless cameras taking over anything! I do know they do enjoy a bit of a comeback!
A novice's view, but a long-time photographer from Sports Illustrated that I met up during the Iditarod had a lot to say about mirrorless including that "everyone" at SI had ditched DSLR's, for work, some time back. An equally longtime veteran shooter for Australian Geographic recently ditched $50,000 worth of DSLR gear in favour of mirrorless.
Both guys gave the reason for the changeover as image quality. There is an extensive report from the NatGeo guy on this - don't have the link but it was a great read.
I have a Nikon 1 mirrorless & love it; & a DSLR & love the challenge of it. I couldn't afford to go "upscale" mirrorless so the DSLR is essential to what I'm working towards. Down here in the trenches it does feel like mirrorless is the future BUT only if you can afford it!
Apr 17, 2019 00:19:11 #
old hippy wrote:

Hi Ed, this is superb; it epitomises your tagline. I will be one happy, lucky person if I ever achieve this level of beauty in a photograph. Dione.
Apr 7, 2019 22:05:00 #
Just spent 18 months on a sailboat cruising & cycling Japan. If I had to recommend just one place outside Tokyo & Kyoto it would be Hiroshima & Miyajima (Itsukushima Jinja) which is a cheap short ferry ride from Hiroshima. If you had a week to wander about then it would be Miyajima Prefecture in SE Kyushu. Google what's there - unbelievable variety, beauty, history & culture (& Nagasaki is not so far off - the 21 temple walk back of the city there is incredible); trains are a snap everywhere but with a car it's dead easy as well - we had no trouble with road signs or in-car nav - all very simple.
Apr 7, 2019 20:53:20 #
E.L.. Shapiro wrote:
Of course, accurate exposure is important- it's bo... (show quote)
Hi Ed - a voice of sanity in the wilderness. This topic first posed the issue this way:
"Many folks here say or imply that getting the "correct" exposure is a must if you want to get good images. Many will add that you have to shoot in "manual" to get control of the camera and get that "correct" exposure. I'm wondering what message this sends to newcomers."
As some may remember, I'm very new to a type of photography where I make decisions about how to make an image. Many here advised me that understanding composition & exposure were key to capturing good images in camera. The triangular diagram used to explain the relationships between ISO, shutter speed & aperture seemed easy to follow & easy to remember. The message this advice sent me was invaluable- it made total sense to me that if I good get a good exposure in Manual I could get one in any other mode, so for me a recommendation to switch to Manual was fine. It doesn't make me feel "superior" to use Manual - I shoot totally alone - I'm on my own, learning on my own, with help from UHH members - there's no-one to feel superior to, even if I was that way inclined (very hard t image how a newcomer would ever feel that way though). Thanks to the advice I received here I feel more in control in the areas I'm working on & I'm loving what I'm doing.
Other newcomers may feel aperture priority is a better place to start. I think floating various options is fine - people will decide for themselves. Same with suggesting novices take a look at the triangular diagram used to show relationships between the elements of exposure - some people will appreciate the tool; others will already "get it" - intuitively. I'm a graphical thinker, so it worked for me. I don;t need it anymore - it's pretty much reflex now, what to change & why; but that's thanks to all the advice I had from you guys - & the time I had to try things out & see what worked for me.
PS: hope you keep posting Ed, you're needed. Dione.
Apr 2, 2019 14:47:59 #
PixelStan77 wrote:
Taken at "Out of Africa" photo workshop last month in Camp Verde Arizona. Looks like he did not like my D800. He growled MMMMIIIIOOORRRRRROOOR LESSSSSSS
Handheld so I could escape.
Camera: Nikon D800
Lens: Nikon 200-500 mm f/5.6
Shot at 500 mm
Exposure: Auto exposure, Aperture-priority AE, 1/6,400 sec, f/10, ISO 2000, Compensation: -1/3
Handheld so I could escape.
Camera: Nikon D800
Lens: Nikon 200-500 mm f/5.6
Shot at 500 mm
Exposure: Auto exposure, Aperture-priority AE, 1/6,400 sec, f/10, ISO 2000, Compensation: -1/3
Hi - super shot; was wondering about the settings though - as a novice, just trying to learn. Not saying there is any noise, but wondering whether lower ISO and slower shutter would also work this well, or is there a reason for this type of set-up? Thanks in advance.
Mar 31, 2019 21:35:01 #
olemikey wrote:
Instead of the "Exposure Triangle" of my... (show quote)
Hi Mike - I'm of much the same mind as you - focus 1st, then exposure, then pp, all as parts of the overall composition, only I don't have the "muscle memory" yet for how light & shadow will turn out and pp is proving tougher to get a handle on ATM than the camera was! What an adventure. Agree - great topic though. D
Mar 30, 2019 23:03:59 #
I'm a novice, just 6 months off full Auto & 1st time with a DSLR, so my opnions don't usually matter uch here, but since this topic seems aimed at the needs of novices, here's my 2 cents. I went to Manual with auto WB straight from full Auto precisely so I could learn the roles of aperture, ISO & shutter speed in making a good exposure. I figured if I could do that on a regular basis, I'd know when & why to use aperture or shutter priority.
6 months later I find I can make good exposures but what send most shots to the Trash is focus.
Ignoring the choice of artistic soft focus effects, it's very clear to me that without great focus I'm not going to end up with a good result no matter what I do, before or after the shot.
I'm finding it vastly more difficult to get a handle on a 51-point AF system than I did the exposure triangle, WB & composition.
Mar 29, 2019 17:24:43 #
Elements 2019, no internet much of the time!
Mar 25, 2019 17:31:24 #
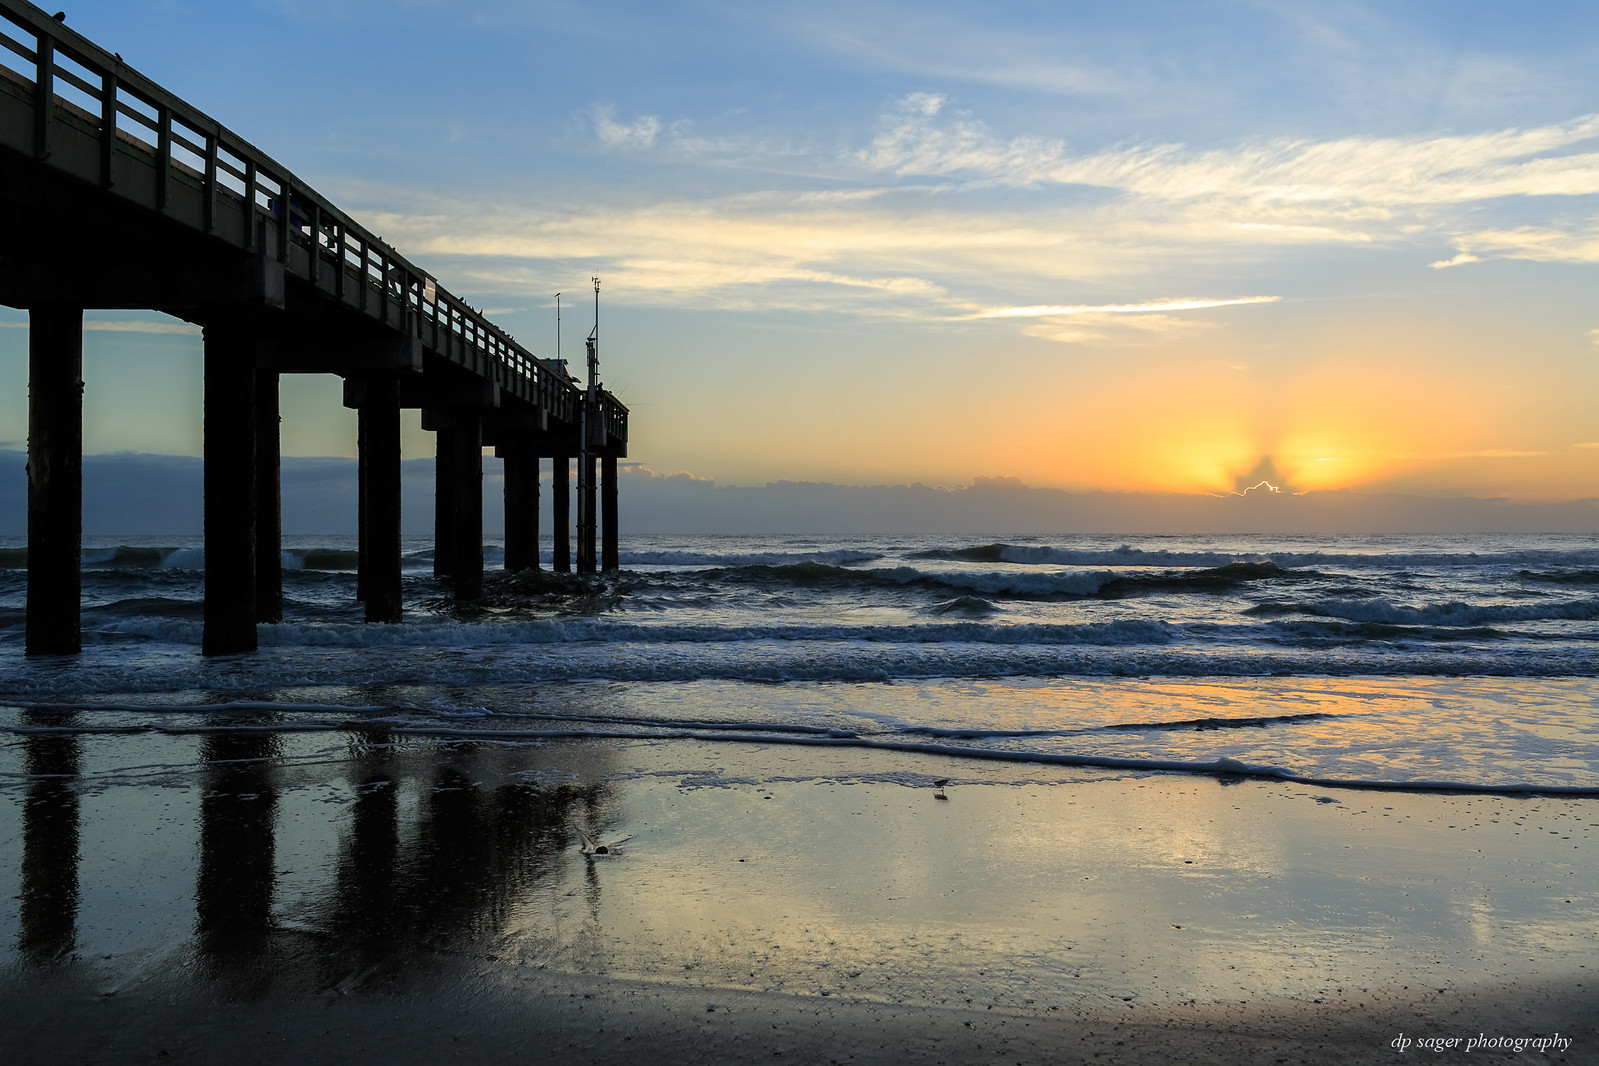
CHG_CANON wrote:
Founded in 1565 by Spanish explorers, St. Augustin... (show quote)


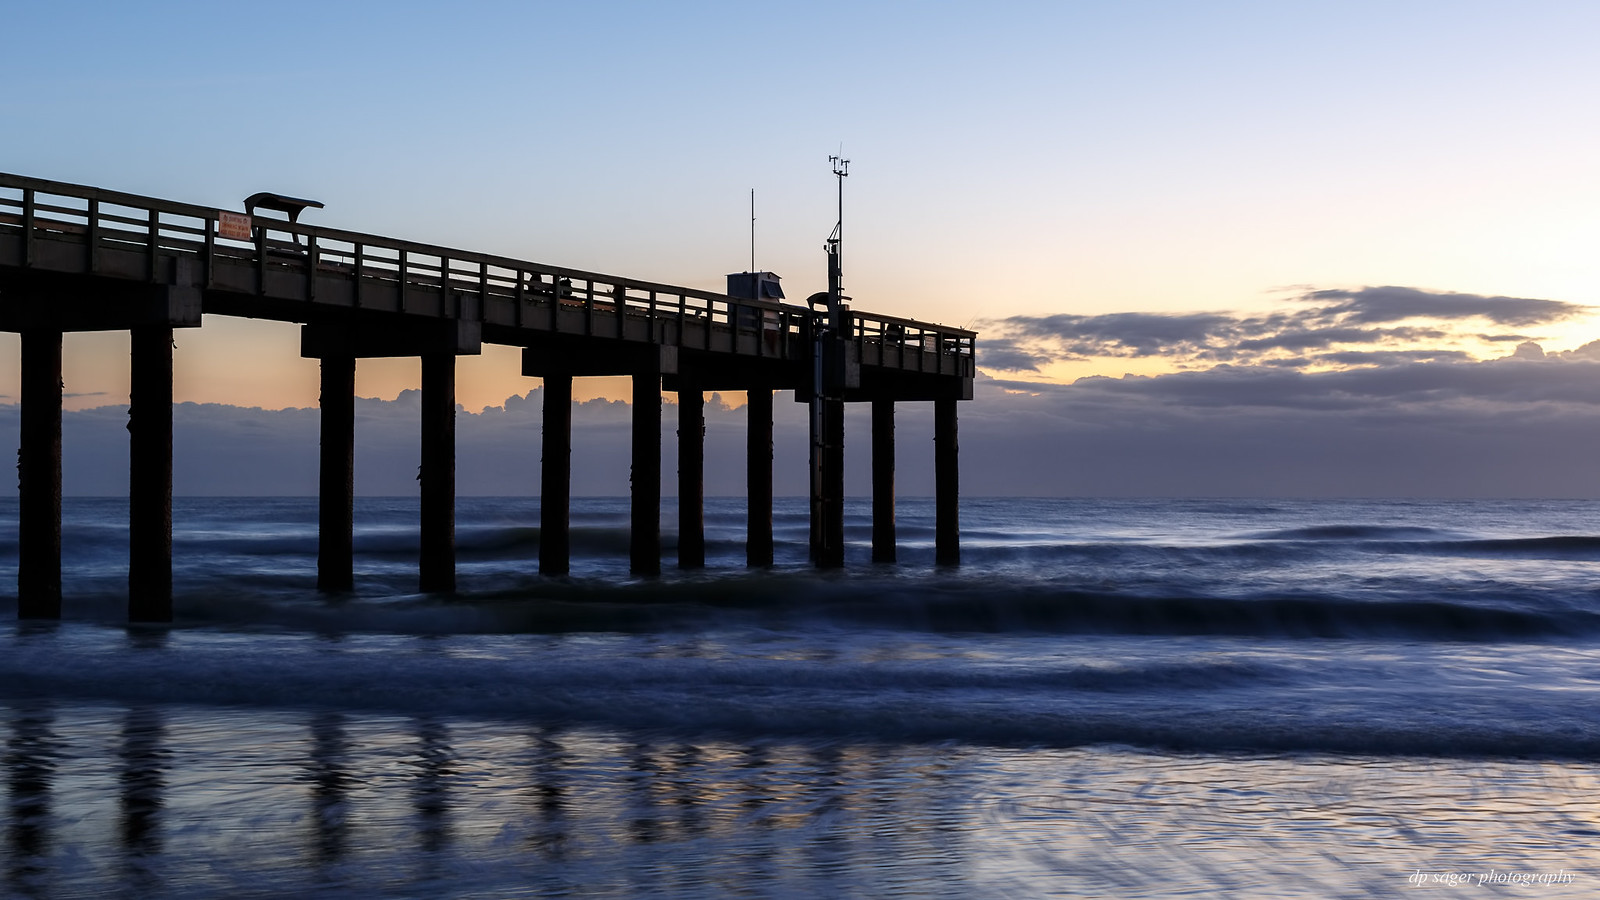
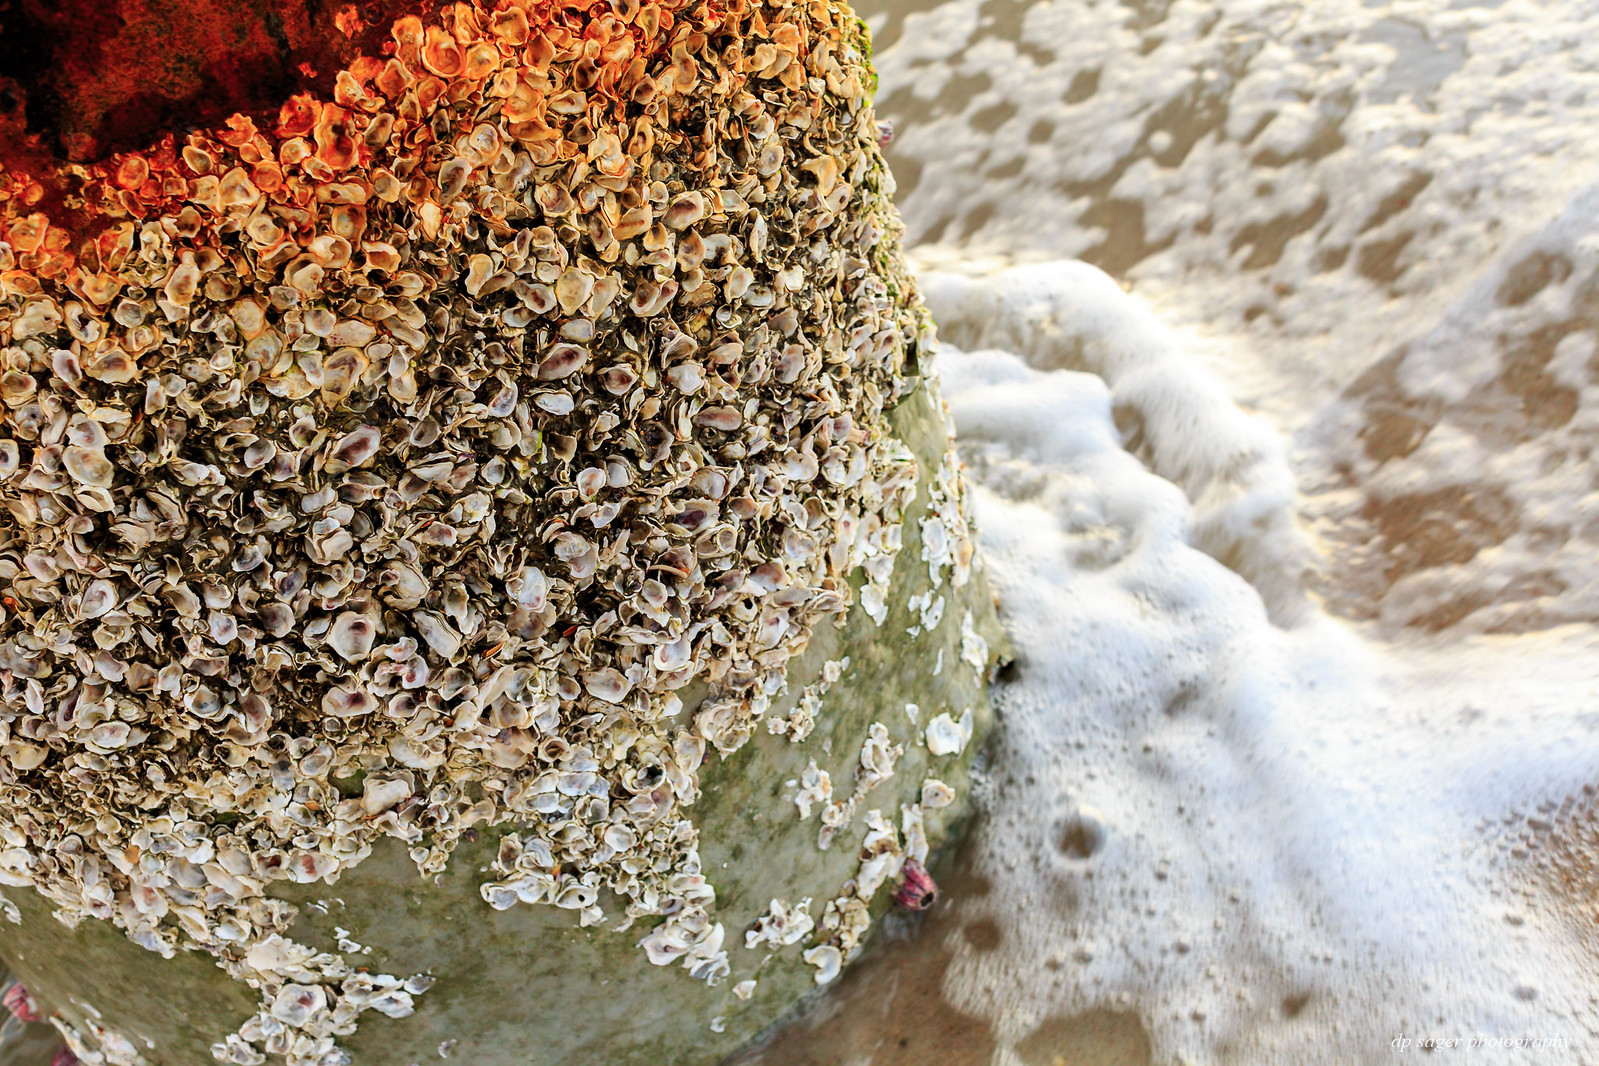
Hey Paul, thanks for posting these pics & history - it's interesting as a visitor to learn things like this. I'm unfamiliar with the camera & film info but I was most drawn to the 1st image. The light on the pier posts, hinting at a bright sunset low to the right out of shot, and the overall tones of the pier being so well reflected in the tones of the wave breaking between the posts, bottom left - these elements attracted my attention. I also love the shell-encrusted pier base. I tried zooming super-close to shoot just the shells in a similar view one time & the overall effect was great (well, I liked it but danged if I can find it now!).
One question, the grain in the top 2 shots - is that from scanning a photo, or slide, or is that from film, or...? Happy Monday!! D.
Mar 24, 2019 18:06:41 #
abc1234 wrote:
If you read my very long post, you will see I am i... (show quote)
Hi & thanks for posting - so kind of you to help out! Can you explain a little what is vibrancy & how does it differ from the other adjustments you mentioned? Thanks, D.
Mar 24, 2019 18:01:45 #
abc1234 wrote:
Welcome to the glorious world of post-processing. ... (show quote)
Hi & thanks for an awesome post - super generous of you to help. I hope it's OK, but I need to gather as much info as I can before I lose web access (see earlier post, this topic) & wondered whether you could explain the following, just so I can put the info into a guide to use as I progress:
1. Are XRite ColorChecker & ExpoDisc separate software to PSE - do I use them 1st, during or are they part of a PSE workflow?
2. When you say "apply to all similar lighting situations" do you mean I can set macros or presets in PSE to do the same task over many times?
3. How do you tell whether an image needs more clarity, tonal range, contrast or de-haze (what's the difference between them; eg, are de-haze & clarity the same thing?
4. In the pp context, is 'tonal range' the balance of colours in an image, or.......?
5. Is 'contrast' the balance between bright & shadow (or........) & how does contrast relate to colour saturation (if it does!!)?
6. What does a radial filter do?
7. What does linear gradient mean?
8. What does an adjustment brush adjust?
Boy, I sound like a 5 year old asking why? why? why? - sorry!! Whatever you have time to answer is totally fine - I get it that everyone has another life!! Thanks again, D.
Mar 24, 2019 17:46:16 #
R.G. wrote:
Basic editing can be condensed into four main are... (show quote)
Hi RG, great post - thanks!! Could you elaborate on the difference between Sharpening & Clarity; what is "HSL" (is that a Lightroom thing?) & what is a "JPEG artefact" - very new to it all!! Thanks, D.
Mar 24, 2019 17:39:42 #
Many thanks to all - a remarkable group of generous folk for sure. The straight-forward, concise guidance you have all provided - well you just can't buy that. I will copy everything into a set of notes to get started with.
I think I will take the same approach as I did when I joined UHH just a few months ago. Back then I had never used anything other than Auto & I simply decided to jump into Manual only, 'til I could achieve good exposures most of the time (I figured that if I could do that, I'd know enough to know when & why to use aperture or shutter priority). PP seems similar - until now I've ignored the raw's due to ignorance; now, I think I can ignore the JPEG's while I learn pp. That will meaning getting a handle on re-sizing as well, as the raw's are too big to post.
To answer one question, I learn best one-on-one & I have limited 'net access, so UHH is perfect to get started. On April 15 the sailboat is re-floated & we head back to sea around May 1st; then I will have to be guided mostly by books, as we won't have reliable internet access again until October (I will have time for pp practise though!).
Thanks again to all for such great starting guidance - you're all wonderful!! D.
Mar 23, 2019 23:36:51 #
Hi, new to PP (nearly as new to photography). Thanks to Linda for bringing up the PP section - I would have tried it sooner had I any clue at all (it feels like going to a meeting of race car drivers & not even being able to drive a car at all), but Linda's encouragement has brought me here.
It's evident I need to learn PP. I know I want natural-looking images - I like to try to show what I saw & tried to capture in the camera. I don't want to create super-saturated colours, grim skies, halos around things, etc. I have a 15.6" laptop right now (1920x1080) & PSE 2019.
My process is: download RAW's & JPEGS to Nikon ViewNXi; save each file type into separate directories named for the location of the shoot; view each JPEG & delete all the fails; then as needed, straighten, crop, lighten shadows & dial down highlights & that's about it (none of this in PSE - I haven't figured it out yet). I don't delete RAW files in case I can save some. So far I have only played with 1 RAW file.
I'd get into PP more if I knew how to approach it properly, so that's my question: how should a novice (given my preferences for what I see as a natural look) approach the pp task? How do people get started, what's a good process to follow? Thanks as usual to everyone.