Posts for: Smooth
Apr 15, 2013 16:07:38 #
BEST: "Nikon D800/D800E, A Guide to Digital SLR Photography," David D. Busch, 2013, Course Technology, Gencage Learning. 698 pages of full color examples following instruction.
BETTER: "Nikon D800, From Snapshots to Great Shots," Jeff Revell, 2013, Peachpit Press. 299 pages of color pictures and instruction that goes beyond basic camera reference books.
GOOD: "Nikon D800 & D800E, The Expanded Guide," John Sparks, 2012, Ammonite Press. 248 pages of basic and advanced details that follow very closely to the D800 instruction manual, but goes into practical depth, with accompanying color pictures. This guide is similar in format and physical size to the Magic Lantern Series, but "The Expanded Guide" is much, much better in that it doesn't simply repeat the manual. The little book even has a pull-out gray card and "quick ref cards."
Mar 20, 2013 20:24:44 #
I don't know if you know but if you want control over shutter speed for sharpness while shooting in "P", in the Shooting menu goto ISO sensitivity settings, set Auto ON then set your minimum desired shutter speed. The camera is then restricted to that setting as the slowest speed and make exposure adjustments with aperture until it reaches the limits of the lens when it will then fall back on ISO.
- winterrose
I still own an F80 and an F100 (film) - neither is any good to me, but I simply can't bring myself to "just giving them away" - and have owned a D70, a D100, a D200 and currently own a D300 and a D800, but I did not know your little tip above. I don't normally pick up anything this valuable and useable for me on UH. Many thanks.
Way back when (early 1980s), I did a lot of snow skiing and decided that I needed something more than a P&S to capture the magnificent action-shot scenes at the top of the mountain. I liked to take shots as I was heading down the hill. Not an easy thing to do with any camera. But I felt that I would have a better stab at it with something that I had more control with.
I really wanted a Nikon SLR, but thought that I couldn't afford it (about $500), so I let the local camera store talk me into a Canon AE-1. This was recommended over the Programmable AE, because 1) it was cheaper, and 2) it was shutter priority. Either my subjects or I, the shooter, would be moving most of the time.
I bought about three very nice Canon zoom and prime lenses and I was set. I didn't know it at the time, of course, but I really learned how to obtain a decent exposure by inherently learning what shutter speed to use. (It's been a long time, so I'm not sure that I could do that now.) Since I now shoot about 99% of the time in Aperture Priority, I have fairly well learned what "A" settings to use. I can't remember when I used "P," however, although I know I have.
Then Canon changed its mount, which made all of my nice Canon lenses obsolete. My AE-1 needed fixin' and there were no parts... not even used ones. So, I decided to punish Canon. I immediately switched to Nikon! :-) I have never looked back and have found that it was one of the best decisions of my lifetime. I can even use 50-year old lenses... on manual, of course. But my nice Canon lenses can be used only for sinkers on the end of a fishing line.
Obviously, with as many Nikons as I have owned and currently own, I have learned quite a bit about exposure. However, I have found that without "tack sharpness," no matter what kind of exposure or composition I get, it ain't going to be my best shot possible. Thus, I have become obsessed with trying to make all my shots "tack sharp."
Problem is, of course, that many times when I'm shooting in existing light in "A," the SS automatically drops to where it affects sharpness. A higher ISO will, of course, automatically bring the SS back up, but there are limits on the ISO, even on the D300. Thus, this was one of the main reasons that I purchased the D800.
But for low-light shots where either the subject is moving or I am moving, I have always simply "fixed" the ISO at some arbitraryly high number and shot in "A." So far, this has been okay, but your idea of shooting in "P," but setting the SS at whatever I think is adequate to "stop-action" that will give "tack sharp" images, then setting the ISO on Auto to let it seek the level it needs to give the best exposure, I did not know, and is the best thing I've heard of since nickel beer.
Can't wait to try it... on both my D300 and my D800.
Incidentally, I received an email from Nikonians that there will be two, full-day, consecutive sessions in May in Indianapolis giving all the instruction anyone will ever need on the operation of the D800 and D4.
When I use either my D300 or D800, I look like a monkey behind the controls of a spaceship. So, I definitely need all the help I can get. I'm planning to sign up for both "daze." It will be very interesting to see if the Nikonian instructors will know your little tip.
Thank much again.
Stan Boyd
Louisville, KY
Dec 3, 2012 09:32:12 #
Keeping it simple, because product photography can get extremely comples (that's why those photographers make the big bucks), I like to start with the basic principles of close-up photography:
1) Simple or unclogged brackground, white, black, monocolor that compliments subject, both on and back of horizontal platform (usually a small table)
2) camera mode: start with aperteur priority, with very small aperteur, say, set at f/20-f25 to obtain large depth of field - unless you want to focus on something specific and want all the rest to be out of focus; then open up lens to desired f/stop
3) metering and ISO: matrix and lowest possible on camera
4) tripod if lense is not equiped with vibration reduction (image stabilization, et al)
5) once ball-park exposure has been obtained, then switch camera mode to manual, leaving aperteur on original setting, and increase or decrease shutter speed off original that aperteur priority chose
4)
4)
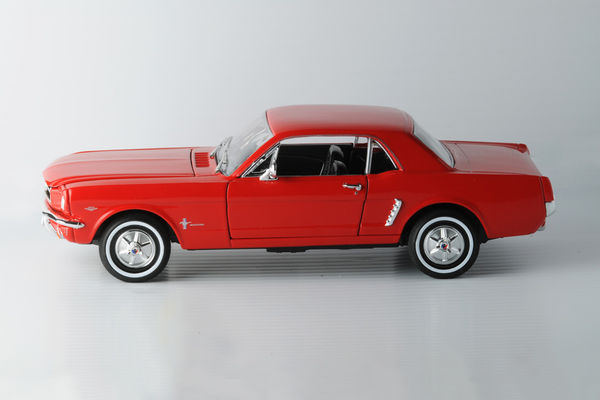
1964 1/2 Mustang

Nov 25, 2012 06:13:50 #
Ditto, Dave Ham. I have both the 1.8 and the 1.4. Also, just bought the D800 about a month ago, not to replace my D300, but to suppliment it.
I have used both lenses on both bodies, and while I don't see a lot of difference in the sharpness of the two, the 1.4 is definitely more useful in low light.. even with the D300.
I tried both at Churchill Downs, trying to capture the horses making the first turn. I had not paid attention about how fast the sun was setting, and all of a sudden, I found myself not being able to shoot in that light with the 1.8. Switched to the 1.4 and obtained excellent exposure and stop-action. Although the D800 gives little noise at ISO 6400, I always try to shoot at ISO 1000 max. the 1.4 allows this.
Nov 17, 2012 13:59:27 #
A little over a year ago, I was traipsing through some mountain woods, with no trail, trying to get to what was reported by the locals to be a scenic waterfall. Rather than a backpack, I decided to use my Think Tank belt on which I attached a long pouch to hold my new Nikon 70-200 VRII. On the opposite side, I attached a holder for my tripod. To a casual observer, I must have looked like a fat Wyatt Earp with a "hog leg" on one side and a triple-barrel shotgun on the other. (They do make triple-barrel shotguns, don't they? :-) ) And, of course, strapped around my neck, was my Nikon D300 loaded with a brand new Nikon 24-70. In another pouch on the belt, I had included a spare lithium camera battery and a few other necessary odds and ends.
The temp was a very cool 40-ish degrees, so I layered a rainproof jacket over a light wool sweater. I wore photo gloves, the kind you can stick your forefingers through.
To get to the "alleged" water fall, I had to ford the same little mountain stream three times by hopping across staggered rocks. The first two times were successful, but that third time, when I placed my foot on one of the rocks, it apparently was "moss-laden"... and swoosh! Into the drink!
With nothing to hold on to, I fell straight into the middle of the stream. And completely obeying Murphy's Law, the side I fell on was the side that I was carrying my long lens. The stream was less than a foot deep, but deep enough to completely submerge the pouches carrying the long lens and spare battery. Interestingly, I did not extend one of my arms out to the side to brace my fall; rather, I vividly remember holding my camera tightly with both hands. This must have been an instinctive move. But 5-large will cause that, also. :-)
The camera and lens were completely submerged, too, but again, I recall instinctively pushing the camera and lens straight up and out of the water. One entire side of my body (less head) was still underwater. It had rained the night before, and while I was lying there holding the camera and lens above me, I remember seeing little ice crystals along the edge of the stream.
Somehow, I managed to get up and out of the stream with no hands or arms to help.. and then - I am a fossil at 76 - when I realized what I had just done, I was sick all over... not from the cold and wet, but from being so dumb, dumb, dumb.
However, I was smart enough to forego the waterfall shoot, and I retraced my steps back to the lodge where I was staying. It was during this walk that I finally realized how cold it was outside.
"Back at the ranch," the very first thing I did - before removing my wet, cold clothes - I began checking my equipment. Water poured out of both the lens and battery pouches. I turned up the heat in the room, grabbed a towel and begin cleaning the outside of everything. I saw only a little grit on the barrels of both lenses. It easily wiped away with the towel. No problem toweling dry both the camera body and spare battery.
Next, I opened both compartments, which held the battery and flash card. All was completely dry, both inside and out! Nevertheless, I was still skeptical.
I placed all the equipment, open, on a table in the room and moved the table close to the heat duct. I touched nothing for about six hours.
When I returned home, I took the camera and lenses to a local camera repair shop and the report was that no moisture or corrosion was seen anywhere. There IS a God. Plus, Nikon DOES make good stuff.
Jul 5, 2012 08:20:52 #
I just drove through the area about two weeks ago on a return golf trip from Santee, SC. I notice that you live in Charlotte. I stopped there for lunch (neat city) then drove on to Hickory, where I spent the night. (Another nice town.)
I was told while in Santee that Blowing Rock, NC was a place to get some nice scenery shots. It's only about 2500 feet there, but the eastern continental divide is close by. (I have been over THE continental divide several times in Colorado and Wyoming, but, frankly, until I saw the sign, I didn't even know that there was an "eastern continetal divide." Makes sense, since the snowmelt and rain runoff from a mountain range doesn't just flow off one side. Duh uh.)
I left Hickory early so that I could shoot before 10 am and as soon as I blew into town, I drove up to the blowing rock. (pun intended.) I got lucky with a nice blew sky and cotton clouds. There's a small charge to see the "Blowing Rock," but the vantage points are numerous and easy to shoot from. (I'm no hiker by any stretch and my idea of "roughing it" is a Super 8 Motel.)
My destination that day was Ashville, so I left after lunch in downtown Blowing Rock. (Arty, nice quaint town) I chose to take the Blue Ridge Parkway, because about two years ago, I had taken Skyline Drive Parkway in Virginia and West Virginia, and captured a nice sunset. The whole area is a federal park, so the roads and area are well kept.
Unfortunately, on my way towards Ashville, just as I got to the higher elevations (4,000 ft.) of the Pisgah Mountain Range, a minor front was approaching, thus, the entire sky was overcast.
The Blue Ridge takes you all the way to the tallest peak east of the Missippi, Mt. Mitchell, almost 6900 feet. Again, unfortunately, the entire mountain top was totally covered in a cloud, but I should think that this would have to be one great vantage point to shoot from, especially early and late in the day when there is a cobalt blue sky, a few stray clouds and a hanging mist in the valleys. (As we all know, this is typical "Smokey Mountain stuff", hence the name.) There is side road off the Parkway that leads straight to the top of Mt. Mitchell.
While it's only about 30 miles (by way of the crow) from Mt. Mitchell down to Ashville, the drive takes a couple of hours, even if you don't stop much.
I couldn't believe how many dudes were riding a bicycle up that mountain range... and they were going UP when it was almost dusk. I couldn't help but ask myself where they were going to spend the night (they had no tent on their backs)... so were they going to pump all night or turn around and coast back to Ashville in the dark? :-)
Let me know if you find out.
Jun 28, 2012 06:21:16 #
Visualize a "white board, say, "2 ft high X 5 ft. wide mounted on an aluminum frame which has legs at the bottom of each end of the white board. The legs are 2 feet long and have aluminum square tubing 2 ft long attached to the end of these legs, but the tubing is perpendiular to the plane of the white boad. By being set perpendicular, these pieces of tubing then act as "feet" to the frame and prevent the white board from tipping over.
Okay, now with this vision of a standard white board, then instead of aluminum, make a rectangular frame out of PVC pipe and the associated PVC right angle fittings, all of which can be purchased relatively cheaply at Home Depot or Lowe's.
At the bottom corners of the frame, instead of using right angle fittings, use two T fittings. At the open ends of each of these T fittings, add a PVC pipe extension about two feet long for the legs of the frame, and on the ends of these extensions, add two more T-fittings and turn them perpendicular to the plane of the fram of PVC pipe, to serve as the feet to prevent the frame from tipping.
Now, you have an empty 2 X 5 frame on which picture frame wire can be strung between the vertical sides of the PVC frame. The wire can then be used to hang as many photos as is dictated by the width of each photo. If each photo is 30" wide, then three can be hung between the vertical posts.
For something to hang the photos with, simple clothes pins could be used. (Do they make those things anymore? :-) )
But the best thing to use would be 3/4" metal binder clips from Office Depot. A box of 12 is about a buck.
If the 2 x 5 frame I suggested would be too large for the principal's liking, then the PVC pipes could be cut to whatever length is required. The pipe is extremely easy to cut with a hacksaw. And the PVC fittings are easily installed. And the beauty of using PVC pipe and fittings is that the entire frame can be quickly disassembled, provided plumbers PVC glue has not been used to join the pipes to the fittings, and the disassembled parts can easily be placed in the trunk of a car for transportation.
Jun 25, 2012 10:22:24 #
Most of the replies before me are "spot on." (Pun intended.) And that is: 1) set the camera in Aperture Prioity mode and 2) the meter mode on spot. Follow by 3) placing the focus point directly on the bird, 4) press halfway down on the shutter button to set focus, 5) recompose if necessary, 6) then press the shutter all the way down. Voila! While the background is way-overexposed, the bird is no longer a silhouette, but quite a bit of detail can be seen.
Also as was suggested before me, all the above can be done supplimenting the exposure with either a built-in or external flash, but only as a "fill-flash." In other words, not a whole lot of flash is needed and as was said before me, it's amazing just how far a flash will reach when all that's needed is for fill.
Placing the focus point on the subject is pretty much standard stuff for most pictures, but if the subject is a human, animal, insect, etc. that has eyes - especially a race horse rounding a turn at the Kentucky Derby :-) - I always try to focus on those eyes... and the meter doesn't necessarily have to be in spot mode, except of course, if there is a strong backlight, as in the case of your friend's bird.
So, what to do about all that harsh background, once you've got a decent exposure on the bird?
Using a long lens is also a good idea, but not absolutely necessary. A long lens, set at the longest focal length and its aperture at its widest will yield a narrow depth of field, resulting in a soft or blurred background. If there is anything except raw sky in the background, whatever that thing is, it will be completely out of focus in the picture.
Once in post processing, say, in Photoshop, whatever little dark blur can be seen in the background, it can be cloned into other parts of the background to either remove or at least reduce all of that harshness. To the purist, that may be cheating, but we've all read that Ansel Adams could have been a poster child for cheating in his darkroom. (The jury may still be out on that one. :-) )
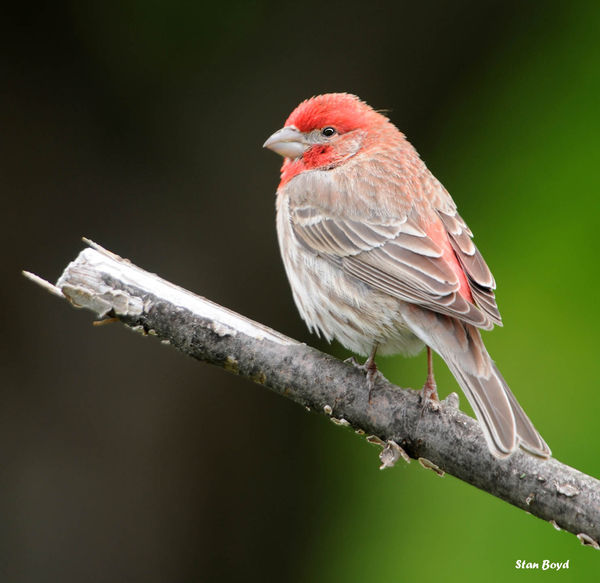
Attached is a finch I caught on a tree limb in my backyard. I grabbed my 200 mm lens, set the aperture at f/2.8 and the focal length at 200 and spot metered precisely on the bird's eye, then pulled the trigger. (I try to use an ISO of 200 ALL the time.)
While the background was very bright, since the sun was on that side of the house, there were also some green leaves hanging from a very dark tree limb above and around. By setting the lens at it maximum focal length and wide-open aperture, those leaves and that dark tree limb were completely out of focus, due to an extremely narrow depth of field.
A little cloning - actually, quite a bit of clonging - of those colors gave a decently soft, natural looking background.
Incidentally, to obtain the sharpest image possible, a tri or mono pod is a must, no matter how much light there is.
Also as was suggested before me, all the above can be done supplimenting the exposure with either a built-in or external flash, but only as a "fill-flash." In other words, not a whole lot of flash is needed and as was said before me, it's amazing just how far a flash will reach when all that's needed is for fill.
Placing the focus point on the subject is pretty much standard stuff for most pictures, but if the subject is a human, animal, insect, etc. that has eyes - especially a race horse rounding a turn at the Kentucky Derby :-) - I always try to focus on those eyes... and the meter doesn't necessarily have to be in spot mode, except of course, if there is a strong backlight, as in the case of your friend's bird.
So, what to do about all that harsh background, once you've got a decent exposure on the bird?
Using a long lens is also a good idea, but not absolutely necessary. A long lens, set at the longest focal length and its aperture at its widest will yield a narrow depth of field, resulting in a soft or blurred background. If there is anything except raw sky in the background, whatever that thing is, it will be completely out of focus in the picture.
Once in post processing, say, in Photoshop, whatever little dark blur can be seen in the background, it can be cloned into other parts of the background to either remove or at least reduce all of that harshness. To the purist, that may be cheating, but we've all read that Ansel Adams could have been a poster child for cheating in his darkroom. (The jury may still be out on that one. :-) )
Attached is a finch I caught on a tree limb in my backyard. I grabbed my 200 mm lens, set the aperture at f/2.8 and the focal length at 200 and spot metered precisely on the bird's eye, then pulled the trigger. (I try to use an ISO of 200 ALL the time.)
While the background was very bright, since the sun was on that side of the house, there were also some green leaves hanging from a very dark tree limb above and around. By setting the lens at it maximum focal length and wide-open aperture, those leaves and that dark tree limb were completely out of focus, due to an extremely narrow depth of field.
A little cloning - actually, quite a bit of clonging - of those colors gave a decently soft, natural looking background.
Incidentally, to obtain the sharpest image possible, a tri or mono pod is a must, no matter how much light there is.
Jun 8, 2012 08:15:37 #
I did the shoot about five years ago. Here's what I recommend:
1) Purchase from Barnes & Noble, Amazon, etc:
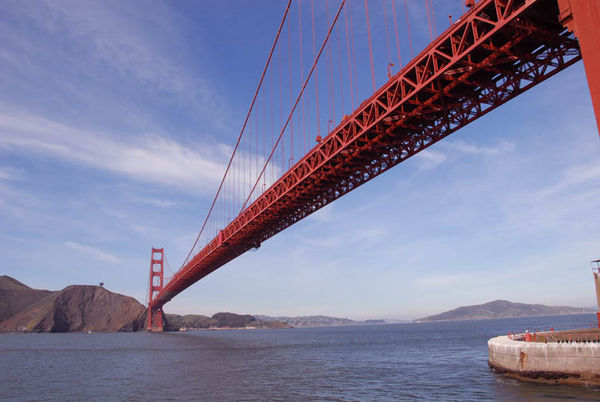
"San Franciso and Northern California - Top Ten Photographic Sights & How to Shoot Them," by Andrew Hudson. (A little paperback about 5x7, 120+ pages, ~$15 with a B&N card.) It not only lists the top ten sights, but:
* all the sights worth shooting. (Lombard Street a must, from both top and bottom, both day and night shots)
* sight's address and best vantage points (10 alone for GG Bridge, with 5 from across the Bay with the city in the background!)
* best time of day, month or year
* tips on how best to shoot the sight
* brief history of the sight
* very small, but detailed maps when necessary
* the classic shots in color, but some unique ones from differsnt angles
* where tickest are required and price
2) Purchase at local store or online:
* GPS that you can drop into shirt pocket. (Garmon Nuvi 1100, $75... absolutely do not need any more fancy-dan than this.)
3) Plug into GPS the address of sight and simply either drive or walk there.
* I did both, but walking the downtown (provided you can handle the hills and have good walking shoes) can easily consume two full days, because there are so many gorgeous buildings and other sights that the average "tooist" doesn't even know about.
* Each downtown sight is in the book and lists all of the above.
1) Purchase from Barnes & Noble, Amazon, etc:
"San Franciso and Northern California - Top Ten Photographic Sights & How to Shoot Them," by Andrew Hudson. (A little paperback about 5x7, 120+ pages, ~$15 with a B&N card.) It not only lists the top ten sights, but:
* all the sights worth shooting. (Lombard Street a must, from both top and bottom, both day and night shots)
* sight's address and best vantage points (10 alone for GG Bridge, with 5 from across the Bay with the city in the background!)
* best time of day, month or year
* tips on how best to shoot the sight
* brief history of the sight
* very small, but detailed maps when necessary
* the classic shots in color, but some unique ones from differsnt angles
* where tickest are required and price
2) Purchase at local store or online:
* GPS that you can drop into shirt pocket. (Garmon Nuvi 1100, $75... absolutely do not need any more fancy-dan than this.)
3) Plug into GPS the address of sight and simply either drive or walk there.
* I did both, but walking the downtown (provided you can handle the hills and have good walking shoes) can easily consume two full days, because there are so many gorgeous buildings and other sights that the average "tooist" doesn't even know about.
* Each downtown sight is in the book and lists all of the above.
May 28, 2012 11:00:19 #
I didn't read through all the replies to your question - they were all over the map, mostly correct - Depth of Field is the problem - so someone may have already given my 1-1/2 cents worth below.
A DOF problem can be easily resolved by using an online DOF calculator and table.
http://www.dofmaster.com/doftable.html. (This is one of many.)
Keeping it real simple and using the numbers that you listed, namely, Canon Ti3, aperture set at f/4.5 with a focal length on your lens set at 56 mm and shooting at a distance of 4 feet away from your subjects - neat kids, BTW - I used the above online depth of field calculator.
I plugged in the your 50 mm focal length, Canon Ti and "feet" for measurement, then hit the "calculate button" and perused the DOF table of shooting-distance on the left and f/stop on the top and came up with a DOF of about 4 inches. (You have to subtract the far point from the near point.)
This means that in your entire picture from where you were shooting, and as far as the eye could see, there was only one area that was IN-focus and that area was only 4-inches deep, thick, long or however you want to describe it. Everything else was either somewhat out of focus, like the kid in the background, or completely out of focus, like the far background itself.
Now assuming that both kids heads are about 7-inches in diameter and there was a little space (front to back) of about three inches between them, this adds up to be about 17-inches for the depth (front to back) of your subject.
But the calculator says that only 4 inches of that space will be in focus. The boy in front was in focus simply because that was where you were focusing. Had you had the focus squarely set on the boy to the rear, he would have been in focus and the boy in the foreground would been out of focus.
In order to solve this specific problem, i.e., to lengthen or increase the depth of field, you simply leave all the settings the same except the aperture. "Stop it down" to, say, f/8. The calculator computes the DOF for these settings to be a smidgeon over 2 feet. If you focus on either boy's face, you should get an image with both of them "in focus." But you will have to be "spot-on" as to where you place your focusing square. When shooting living things, I like to focus on their eyes... including race horses running around the track at the Kentucky Derby. (And no, I can't get you any tickets. :-)
There is no magic bullet or "rule of thumb," if you will, that you asked for. As you can see from the DOF calculator, the whole subject can get quite complex. Our eyes and brains - well some brains... mine drags sometimes :-) - do all of this calculating stuff automatically. Unfortunately, no one has invented a camera yet that meets the wonderfulness of an eye/brain combo.
That said, in the future when shooting close-ups of more than once person grouped together from such a short distance of 4-feet, before you hit the shutter button, do a simple pilots check-list to insure that your camera and lens are set at all of the following:
Mode: Av (Aperture Priority)
Aperture: f/8
Lens: 50 mm
ISO 200
Focus: Grid or whatever Canon calls its best focus)
Distance from you to subject: about 4 feet.
You can shoot all you want from 10 am to 2 pm with these settings and get really good images, provided that the subject in-focus. But it's a whole new ballgame if you decide to shoot at a greater distance than four feet and/or at different times of day.
I suggest as many others have: either go online or read a book and bone-up on DOF. There is slight learning curve, but the knowing the subject is necessary if you want to be able to take in-focus shots with good exposures... and to do the nice camera you have justice.
May 14, 2012 14:52:27 #
Thanks much, Jsinger. After I typed "removing telephone wires," it occured to me that I had done that before using the brush in NX2. So, that actually elimintes a step having to go to PS. (I really like your tinting the sky with the color control points.)
I had completely forgot about Hagan. He's the Nikon guru. I'll check him out.
Thanks again.
I had completely forgot about Hagan. He's the Nikon guru. I'll check him out.
Thanks again.
May 14, 2012 13:12:46 #
Yes, there are several very nice NX2 turorials, but I have yet to find one on subject. However, I will try again. Those things are added and changed daily.
Many thanks.
Many thanks.
May 14, 2012 12:26:43 #
I have several questions for fellow Nikon Aficionados out there. I like to shoot in NEF, grade and delete in Photo Mechanic, then do the rest of my workflow in Capture NX2. However, there are certain things that can't be done in NX2, for example, added text to the image or cloning. (By cloning, I don't mean adding a monster's head to a friend's body :-), but removing unwanted posts sticking out of someone's head, or cloning out telephone wires.)
Now, I know that after completing the workflow in NX2, the image can be saved and picked up in Photoshop, and I think, vice versa. But here are my questions:
1. How is this done?
2. Do I save the manipulated NX2 file in NEF to, say, a pre-named subject folder, then open PS and pick up that file in either Camera RAW or Jpeg, manipulate, then save as a jpeg in that folder?
3. If I find that I forgot to do something in NX2, do I save the changes I made in PS in NEF format, then open NX2 and bring up the NEF file just manipulated in PS?
All this sounds logical to me, but I am doing something wrong, because I can never find the NEF file I saved while in NX2.
I have found only three "How to" books on NX2, but none is very clear on this subject - at least to my feeble mind. Also, I have found no NX2 online tutorials that even mention my dilemma.
I would certainly appreciate any guidelines or suggestions.
Apr 28, 2012 10:48:15 #
Goldengirl, many of the replies, I ditto. But let me offer an answer that was given to me by a local photo-journalist friend of mine, who in his 38-year stint with the largest newpaper in the state, just happed to pick up a couple of Pulitzer Prizes along the way. (Please don't get me wrong. I'm neither in his league or travel in his circles.)
Several years ago, I asked him almost your same question, because I was concerned by an occasional frown as I looked through the viewfinder. That frown may not have been seen on sinatraman's 10-most-wanted poster, but you knever kown when that skowl might be from a married with another married, who are not married to each other. Morever, we all know there are a lot of crazies out there. (I guess that's when you need an 800 mm lens, and a giant Sequoia as a vantage point. :-) )
My guy's answer was, "In public, you can shoot all you want and whom and what you want. Personally, if it's really the shot I think it is, then I quickly shoot first, then walk up to the subject and show him/her/they in my LCD what I just captured. (Ah, the beauty of digital!). Ninety-nine percent of the time, any and everyone will like it. Then, without telling them that I'm with the paper, I ask if I may print it - and again, 99% of the time they not only approve, but are flattered. Now, if the scene is very personal, then I do same, but also tell them I'm with the paper and I would like to put the image in the paper. For example, one Memorial Day, I was given an assignment to shoot something patriotic and human. I went to the local cemetary where only soldiers are burried - including Zackary Scott. I spied a grave where a man and a woman were kneeled, holding flowers and with their heads bowed. I shot the scene first. Then I approached them when I thought it was the appropriate time. (The wait seemed like three weeks, becauase my deadline was almost up.) When they both looked at my LCD, they were overwhelmed and asked if they could have a print. I told them one better. I said, 'If you will give me permission, you can see it on the upper-fold of the paper tomorrow.' The picture was on the upper-fold and I mailed them a print."
Bottom line: if you do actually have the shot you think you have, then unless you have permission in writing from the subject, "it ain't likely" you'll ever get it printed in any major publication. That said, I have always wondered if Steve McCurdy ever got permission from the Afghan Girl before National Geographic printed it? Didn't it take him ten years to find her again for a second shot?
Jan 20, 2012 08:48:42 #
Really outstanding pix, fstop22. Can you tell me some of the camera settings,lens focal length, tripod, how far away?
Thanks,
Smooth
Thanks,
Smooth