Posts for: FuzMuz
Sep 25, 2011 09:48:58 #
notnoBuddha wrote:
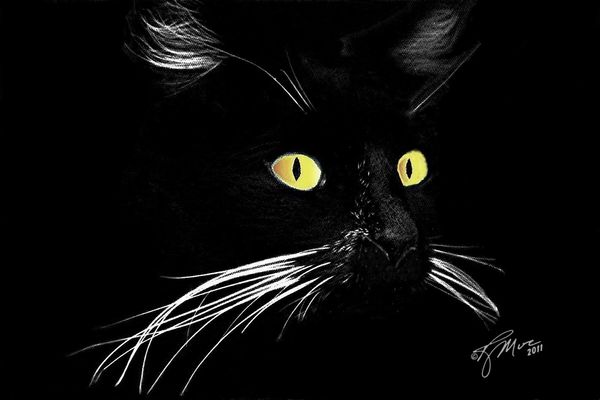
I too vote for the cat. I assumed this was done mostly with an invert option in the filters? Thanks for look.
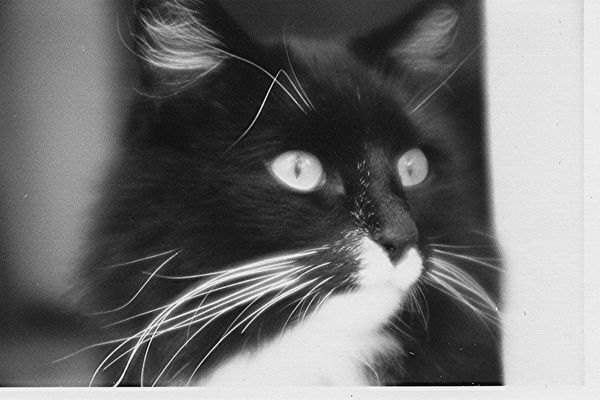
Not that easy. The original was scan from a grainy blk & wht 35mm. Here's the original
The real Jake
Sep 25, 2011 09:43:41 #
emmyweez wrote:
Wow! I love the shot of the Cat, awesome picture!
Thank you, Jake was "awesome". I have several stories about his escapades. He lived at least 9 1/2 lives.
Sep 25, 2011 09:31:42 #
Several members have liked my abstracts - I hope ya'll enjoy these as well
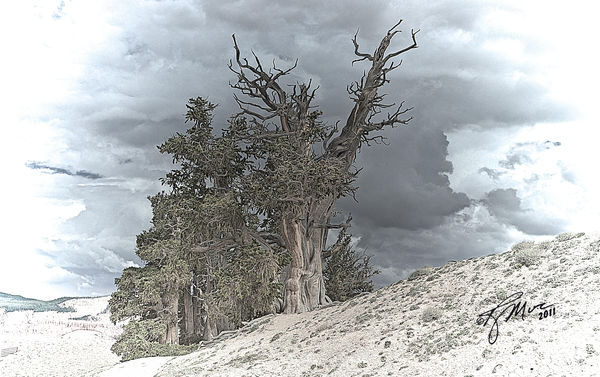
Another Bristlecone
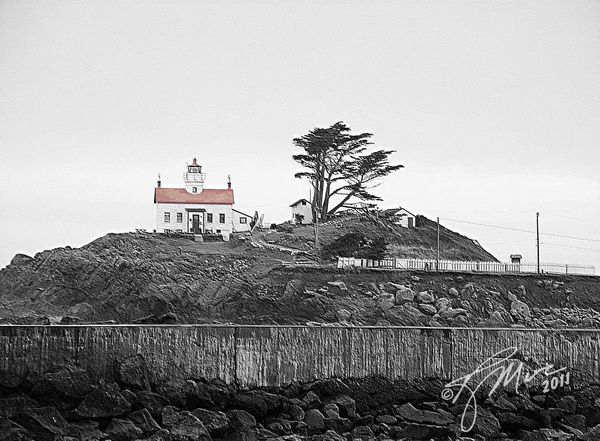
Bodega Bay guard station
Jake the tom cat
Sep 25, 2011 08:46:25 #
SusieB wrote:
I like the "fuzziness" of the background. It makes the pix almost "impressionistic" -- viewed "through the mist." I'm not arguing, just expressing a different view.
It is always nice to see the world through anothers eyes, thank you for sharing. You have prompted me to go back and take a second look at my beach pictures.
Sep 25, 2011 08:33:46 #
Kathi wrote:
FuzMuz, that link has great information for what I need to help me determine what to get. Thanks!
Whichever camera you get I strongly recommend buying Thom's user guide for that model. A friend bought one for her D300s. She convience me to get his guide for my D5000. That has been the best investment I've made in years. You get three items: a 600 plus page complete users guide, a spiral bound quick reference guide, and a CD for around $80.
Sep 24, 2011 23:05:18 #
FuzMuz wrote:
I concur the D7000 is DX(small frame) but at 16 mps. The would be a nice counter part to the D700 FX(full frame) at 12 mps. The D7000 has quick presets the D700 does not.
liv2paddle wrote:
D7000..lighter..DX ...great ISO capabilities...not on par with d700 but certainly a nice backup camera.plus shoots at 6fps...for $1200. or less. I love it!
I concur the D7000 is DX(small frame) but at 16 mps. The would be a nice counter part to the D700 FX(full frame) at 12 mps. The D7000 has quick presets the D700 does not.
Go to http://bythom.com/currentdslr.htm for Nikon comparisions. The chart implies the D90 & D300s use the same battery as the D700. Something to consider when lugging two cameras plus back up equipment.
Sep 24, 2011 22:54:54 #
liv2paddle wrote:
D7000..lighter..DX ...great ISO capabilities...not on par with d700 but certainly a nice backup camera.plus shoots at 6fps...for $1200. or less. I love it!
I concur the D7000 is DX(small frame) but at 16 mps. The would be a nice counter part to the D700 FX(full frame) at 12 mps. The D7000 has quick presets the D700 does not.
Sep 24, 2011 22:30:59 #
PalePictures wrote:
Three sample HDR produced images shot from outside a friend of mines back door. (Tripod of course). I'm just playing around with HDR and need some opinions. Thought I would try HDR in B&W. Please tell me what you think. I need at least a crop. I did add slight vignetting (I hope is spelled that right) to one of the photographs. I included the originals to make it easy. All pictures shot at 200mm at f2.8-- And I think at ISO800
Your photos are nice so don't let picky people -me- detour you.
The first photo is nice tho I am a bit surprise at the lack of detail in the foreground. HDR s/w should have corrected that. next time try increasing the number of f-spot you use for over & under expose
The second photo has a nice surreal effect in the sky coupled with the foreground detail missing in the first photo.
The third has a white ghost line outlining the background mountains. I have experienced this effect myself. It is usually caused by 'Quick selection tool' and oversaturation of the selected area.
Sep 24, 2011 22:04:51 #
Star wrote:
Driving around yesterday afternoon, we noticed this ultra lite plane, so I took some pics. Can anything be done to make this look better? This is the original. I have one I saved cropped and you can really see the passenger waving better, but not sure if I did it right so would love to see it done appropriately.... I'd appreciate it. Thanks
Try auto sharpen in Photoshop or Elements. Personally I like it as it is. You have used a couple of composition techniques - Rule of thirds and negetive space - nicely done.
Sep 24, 2011 21:58:12 #
SusieB wrote:
Forgive me if this is a repeat; I don't think my first attempt to post these succeeded.
I am an ex PNW native and have taken many, many pictures of the coastal beaches. Most have the same issue as I see in yours, that been loss of clarity in the background. At the beach there is a haze that one's eye can see through but the camera lens can not. Does anyone have a suggestion as to how to over come this problem.
Sep 24, 2011 21:44:13 #
suzanne wrote:
Chambord Castle in France. Taken on a rainy afternoon
I like the 'lomo' effect
Sep 24, 2011 21:00:48 #
photosbylaura wrote:
quote=FuzMuz quote=photosbylaura quote=FuzMuz H... (show quote)
In E9 from the 'Enhance' pull down select 'adjust color' (not the auto color correction) then select from the menu 'remove color'. Next go to the 'filters' pull down menu and select 'adjustments'. In the adjustents menu select 'Photo filter'. A new menu should pop up, select one of the 'warming filters' or further down the menu select 'sepia' then checkmark the 'preserve luminosity' box. Move the slider under 'Density' until you achieve the desired effect. If you don't like the results simply pull down the 'edit' menu and select 'revert' and start over. Before going to the next step you may want to 'crop' the picture. Next go back to 'filters' and select 'correct camera distortion'. In the screen that comes up the second and third sliders control vignetting; Adjust them until you get the desired snowy effect. Have some fun and try different settings
Sep 24, 2011 20:32:18 #
Ugly Jake wrote:
Fuz - this is the thumbnail - 600 x 300 - if I crop that, it would not look very good - I can't download your original unless you check the (store original) box when you upload.
FuzMuz wrote:
Hi Jake - You should be able to copy the photo and crop it on your own. Have some fun.
Hi Jake - You should be able to copy the photo and crop it on your own. Have some fun.
Fuz - this is the thumbnail - 600 x 300 - if I crop that, it would not look very good - I can't download your original unless you check the (store original) box when you upload.
Right mouse click on the picture / Select 'save picture as' / Choose a location on your computer / click save
Sep 24, 2011 14:09:46 #
mortonfarm wrote:
Going back and looking at your photos, I realize that #1 is ...well I don't know what it is, but I can't quit going back and looking at it...I really kinda grows on one...You realize the age and endurance of these amazing trees...I love photo art because it allows one to use their imagination, which is a gift in itself...you are good...Post more please...!
It is using Sepia tones to create an antique effect with a little vignetting thrown in for good measure. See attached
original

retouch

Sep 24, 2011 14:05:16 #
mortonfarm wrote:
Going back and looking at your photos, I realize that #1 is ...well I don't know what it is, but I can't quit going back and looking at it...I really kinda grows on one...You realize the age and endurance of these amazing trees...I love photo art because it allows one to use their imagination, which is a gift in itself...you are good...Post more please...!
It is using Sepia tones to create an antique effect with a little vignetting thrown in for good measure. See attached