Posts for: a6k
Mar 4, 2024 10:18:50 #
a6k wrote:
I looked at a DNG raw file from it with RawDigger and noticed it appears to be 16 bit. It has values up to 2^16. My Sony maxes out at 2^14.
What is actually going on here?
What is actually going on here?
I used MacOSX Preview app to view EXIF. It says 16.
Mar 4, 2024 09:53:32 #
bobbydvideo wrote:
I switchet to JPG in settings because I don't like Apple's format. When I shoot true raw I use my Cannon R6.
Thank for your opinion but it's really not what I asked.
Mar 4, 2024 09:52:49 #
Edawsoni wrote:
If the DNG you looked at was an Apple Pro raw file then it wasn't a raw file. Apple Pro raw isn't raw. It's a processed and demosaiced linear DNG.
I won't debate the assertion that the file is not a raw file. But RawDigger will not, it says, open a non-raw file. For example, it won't open a JPG or a TIF/TIFF.
It will open an Adobe DNG, it says.
More importantly, how then to explain the maximum value?
Mar 4, 2024 08:32:07 #
I looked at a DNG raw file from it with RawDigger and noticed it appears to be 16 bit. It has values up to 2^16. My Sony maxes out at 2^14.
What is actually going on here?
What is actually going on here?
Feb 29, 2024 13:08:53 #
terryMc wrote:
The most current version of Denoise I can find is 3.7.2 released in 2021.
I'm not sure how much benefit there is to comparing such old versions of software, especially given that Photo AI is currently better than any of the older versions of Sharpen and Denoise.
I'm not sure how much benefit there is to comparing such old versions of software, especially given that Photo AI is currently better than any of the older versions of Sharpen and Denoise.
I did for my own education, not to pretend to be a professional reviewer. Your point is valid in that context.
Feb 29, 2024 13:07:52 #
TriX wrote:
I notice you mention both a Radeon 4GB card AND on-board (on the CPU) Intel UHD graphics. Which is Topaz configured to use? (It’s under preferences)
Thanks for the tip. I turned on the use of the graphics card. It still took a full minute to process one ARW file of about 25MB. But I think that was an improvement.
Feb 29, 2024 10:51:23 #
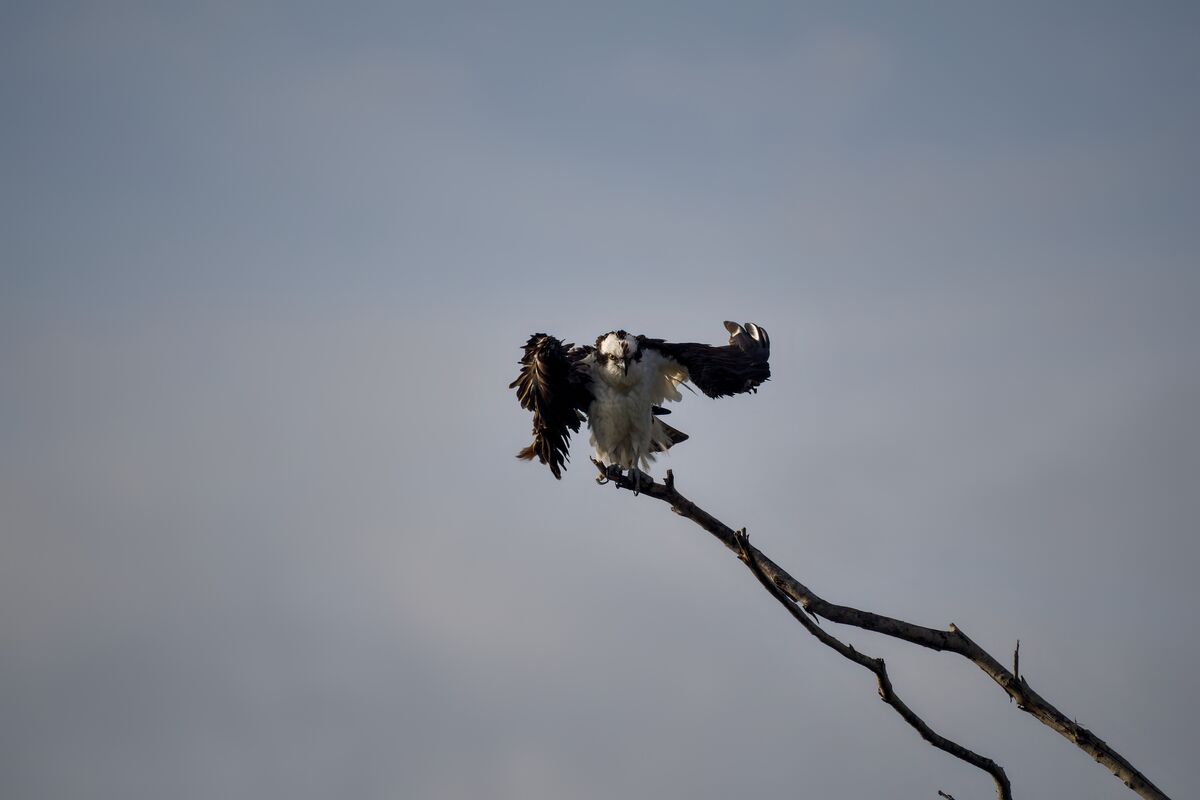
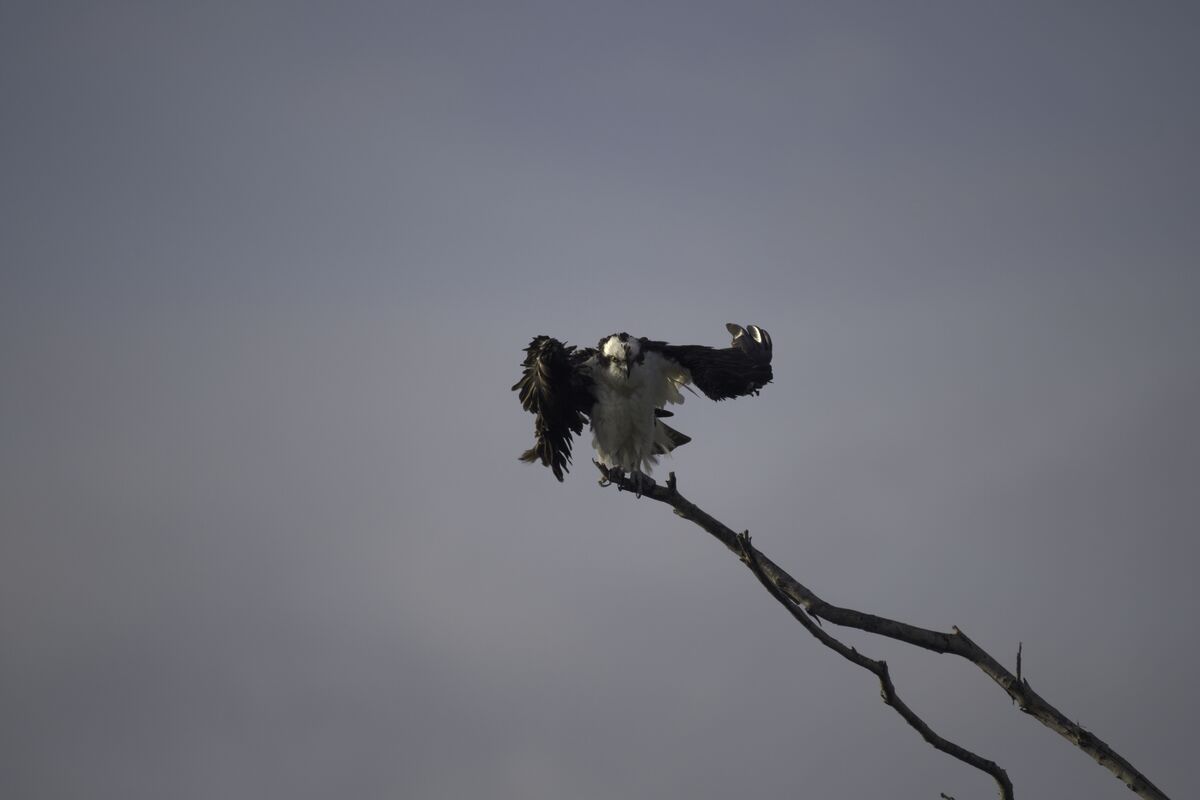
I saw a you tube video touting Topaz Sharpen AI. I found a slightly older version (2.2.2) already on my Mac. My go-to post processor is Pixelmator Pro (PP) which only runs on Mac. You Windows users can stop here.
I selected a picture that needed some help and compared the outputs of my older version of Topaz to my current version of PP. I had to make slight adjustment for exposure but otherwise only used the tools related to denoise and sharpen functions.
I tried to equalize the exposure of the background and did not adjust contrast, etc. The differences in color, contrast, etc. are due to the app alone.
The Topaz was incredibly slow. It also crashed a few times. My computer is a 2018 MacBook Pro with 2.9 GHz 6-Core Intel Core i9, Radeon Pro 555X 4 GB Intel UHD Graphics 630 1536 MB, 32 GB 2400 MHz DDR4. In other words, it's not a slow computer even today.
I found that neither was clearly better. Some aspects are better on one and some aspects are better on the other.
I noticed that the JPG file sizes are hugely different so this may not be the best comparison that can be done. My PP app has "super resolution" but I did not use it. I can also get the JPG output to be larger but didn't bother at the time.
I offer it FYIO. All 3 images can be downloaded so that you can pixel peep. In this case, that would be appropriate.
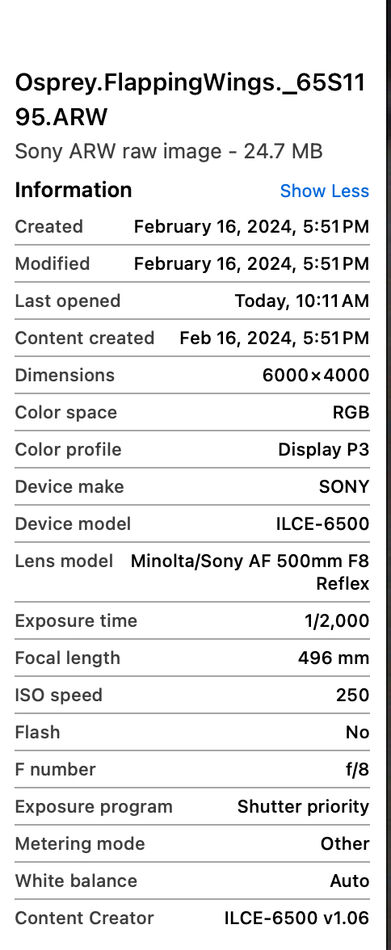
The current version of Topaz Sharpen AI is 4.1.0. The camera and lens don't matter in this case but I included some EXIF data anyhow.
I selected a picture that needed some help and compared the outputs of my older version of Topaz to my current version of PP. I had to make slight adjustment for exposure but otherwise only used the tools related to denoise and sharpen functions.
I tried to equalize the exposure of the background and did not adjust contrast, etc. The differences in color, contrast, etc. are due to the app alone.
The Topaz was incredibly slow. It also crashed a few times. My computer is a 2018 MacBook Pro with 2.9 GHz 6-Core Intel Core i9, Radeon Pro 555X 4 GB Intel UHD Graphics 630 1536 MB, 32 GB 2400 MHz DDR4. In other words, it's not a slow computer even today.
I found that neither was clearly better. Some aspects are better on one and some aspects are better on the other.
I noticed that the JPG file sizes are hugely different so this may not be the best comparison that can be done. My PP app has "super resolution" but I did not use it. I can also get the JPG output to be larger but didn't bother at the time.
I offer it FYIO. All 3 images can be downloaded so that you can pixel peep. In this case, that would be appropriate.
The current version of Topaz Sharpen AI is 4.1.0. The camera and lens don't matter in this case but I included some EXIF data anyhow.

Feb 23, 2024 15:49:56 #
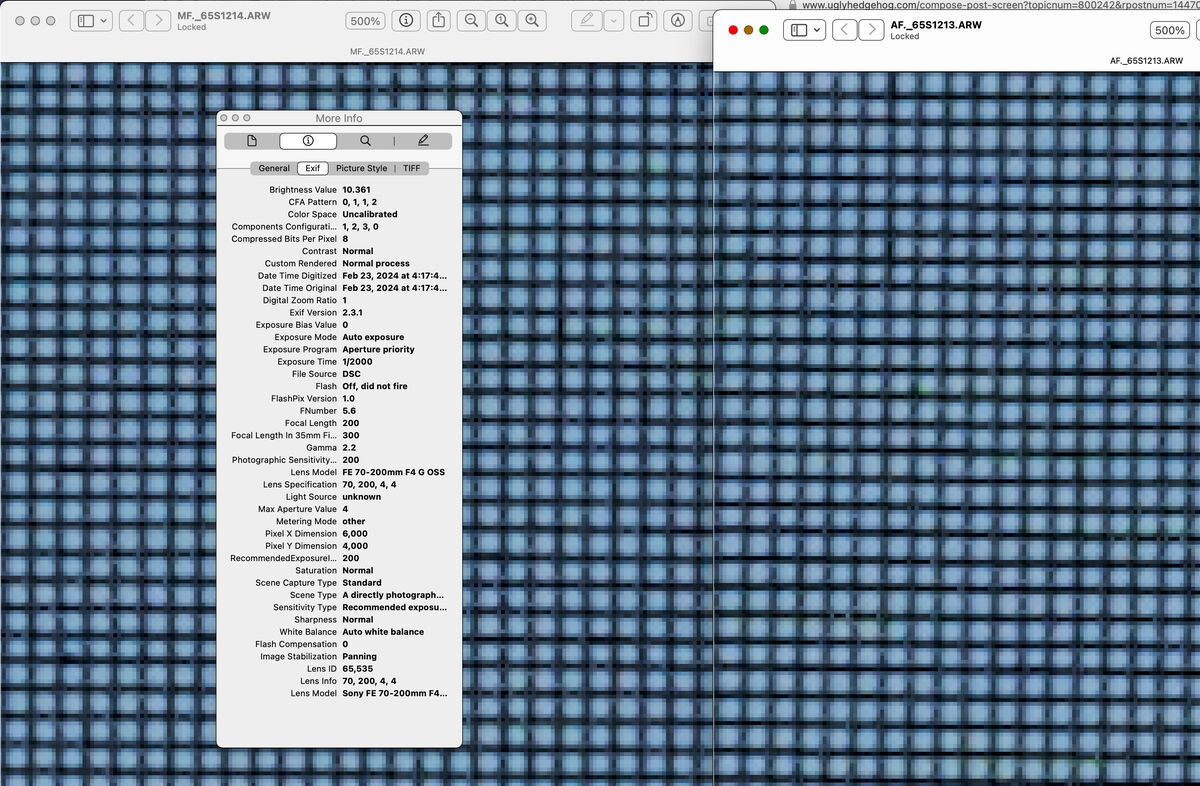
I was curious about the potential for perfect focus using manual focus with magnification and peaking. I mounted my Sony 70-200 F4 G lens to the 𝜶6500, put it on a tripod and shot some "noseeum" screening from about 30' distance with the lens set at F 5.6, 200 mm (wide open).
I took one shot with AF and one with MF using 11.7 magnification and finest, red peaking. Then I viewed the raw files at 500% and put them side by side, overlapping. I cannot see any difference either in sharpness or in measured RGB values. I first tried 100% then 200% then 400% and finally, 500%. If there is a difference, I can't see it and I conclude that it's essentially zero for any practical purpose.
This works very well with the Sony lens on this camera. Unfortunately, it is not a useful technique on the foreign lens that I described above.
The screening is called "20x20". I think that means 20 cells per linear inch but I'm not certain. If I'm right then the cells are slightly larger than 1mm (1" = 25.4 mm). If anyone is better at math than I am he or she can figure out the included angle of 30' and 1.27 mm. I held a good metal ruler up to the screen and I think these measurements are correct.
If anyone is really interested in checking my work, PM me and I'll convert the raw files to JPG or even TIF for you. Otherwise, I'm done.
Feb 22, 2024 13:48:49 #
Correction: Earlier, I said that focus assist magnification (FAM)doesn't work for the combination of the 𝜶6500 and The Minolta (A mount) 500/8 Reflex AF lens. This was in the context of using focus peaking.
I discovered that FAM does work, sort of. But it doesn't work the same as with other lenses. And more importantly the focus peaking doesn't show up when FAM is working. The second problem may be the result of insufficient contrast when magnified. But the example shown here is pretty good for contrast so I don't know why it doesn't show the peaking indications.
The Sony DMF focus mode is "invalid with this lens". In order to use FAM at all you have to 1) switch to manual, 2) press the user-configured button to activate FAM, 3) press the center button of the hat switch. Sony users will recognize that this is nothing like with normal lenses.
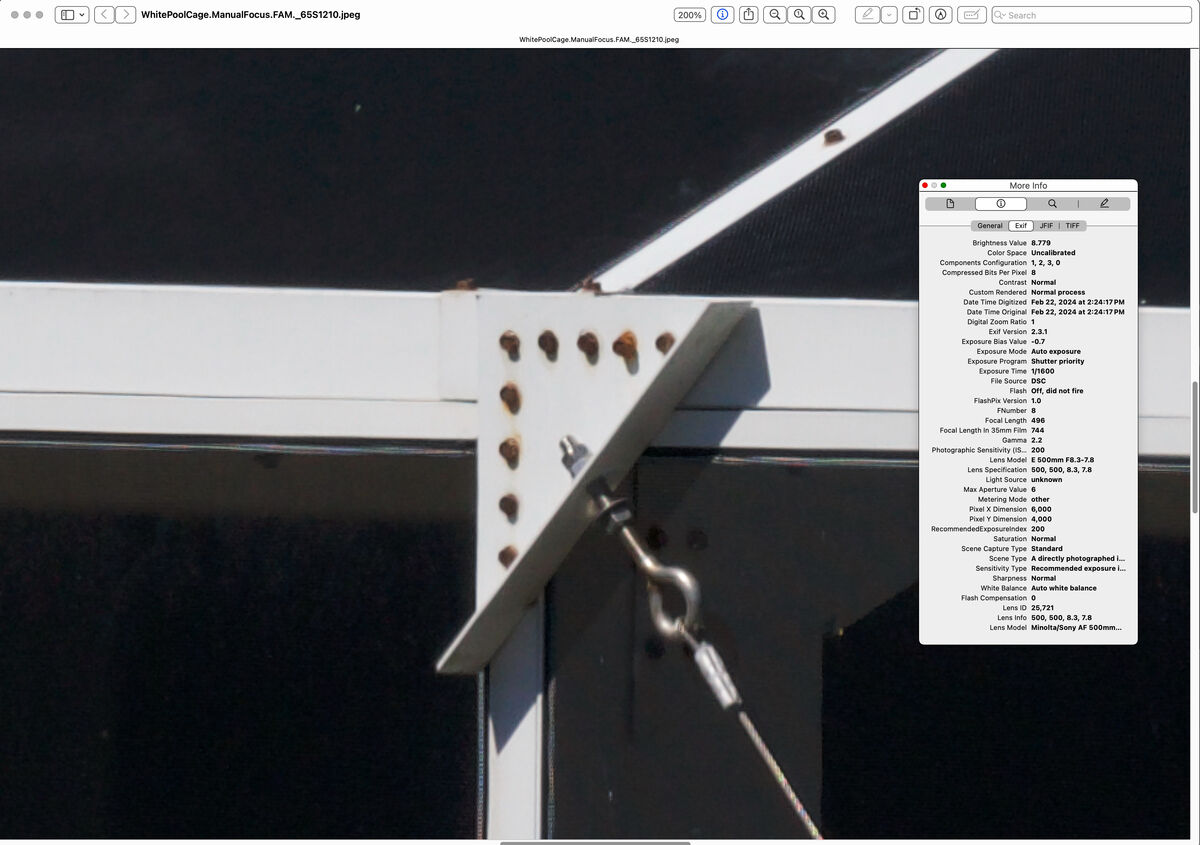
As a further experiment I put the camera on a tabletop tripod, manually focused with maximum FAM (no peaking) and took this one shot. For Paul, I included the downloadable version. The JPG you see here was created by opening the raw file with Mac's Preview and then Save-as a JPG at full quality/size. It is as sharp on the bolts as any other but the screening seems a bit less sharp. That may be due to the exact point at which the AF focused on the other shots.
The time was about 1:30 PM, location Sanibel, FL and the sky is bright and clear. F= 8.0, Shutter=1/1600, Auto ISO=200.
A screenshot with EXIF overlaid and viewing at 200% is also included for those who just can't help themselves but want it all done for them.
When I slowly pressed the shutter the FAM went away and the focus peaking was revealed nicely, just before the shutter activated.
Bottom line, For this camera, lens combination, FAM+Peaking is not available and FAM by itself is very cumbersome in this case and really useless for anything except static targets.
I discovered that FAM does work, sort of. But it doesn't work the same as with other lenses. And more importantly the focus peaking doesn't show up when FAM is working. The second problem may be the result of insufficient contrast when magnified. But the example shown here is pretty good for contrast so I don't know why it doesn't show the peaking indications.
The Sony DMF focus mode is "invalid with this lens". In order to use FAM at all you have to 1) switch to manual, 2) press the user-configured button to activate FAM, 3) press the center button of the hat switch. Sony users will recognize that this is nothing like with normal lenses.
As a further experiment I put the camera on a tabletop tripod, manually focused with maximum FAM (no peaking) and took this one shot. For Paul, I included the downloadable version. The JPG you see here was created by opening the raw file with Mac's Preview and then Save-as a JPG at full quality/size. It is as sharp on the bolts as any other but the screening seems a bit less sharp. That may be due to the exact point at which the AF focused on the other shots.
The time was about 1:30 PM, location Sanibel, FL and the sky is bright and clear. F= 8.0, Shutter=1/1600, Auto ISO=200.
A screenshot with EXIF overlaid and viewing at 200% is also included for those who just can't help themselves but want it all done for them.
When I slowly pressed the shutter the FAM went away and the focus peaking was revealed nicely, just before the shutter activated.
Bottom line, For this camera, lens combination, FAM+Peaking is not available and FAM by itself is very cumbersome in this case and really useless for anything except static targets.
Feb 21, 2024 20:06:39 #
CHG_CANON wrote:
Did you 'focus assist' to the details of any aspect of the image, like maybe the bolts in the center? Did you think to attach the image file to show the pixel-level details for confirmation of the focus in those details?
First question: focus assist magnification doesn’t work with the A-mount Minolta 500/8 reflex AF. That would likely help if enough time. But that’s the lens I’m most concerned with. The Tamron was rented. I do sometimes use focus magnification with my RX10m4.
Additional note: my Sony LA-EA4 adapter was modified with the Monster kit. I posted about that previously. It made the AF very accurate and no longer needing adjustment.
Second question: I thought you would be the one to ask that. In my post I tried to make clear that my only purpose in showing the picture was to illustrate what I used as a target. So I deliberately avoided pixel peeping discussion. I’m not trying to prove anything. Just offering one experience to help a discussion. The example shown was on AF as you may have noticed. Anyway, to compare and come to a conclusion would require many shots. That’s what I did. Several lenses over many weeks. Many shots. Lots of comparisons at 100% and beyond.
Feb 21, 2024 16:56:57 #
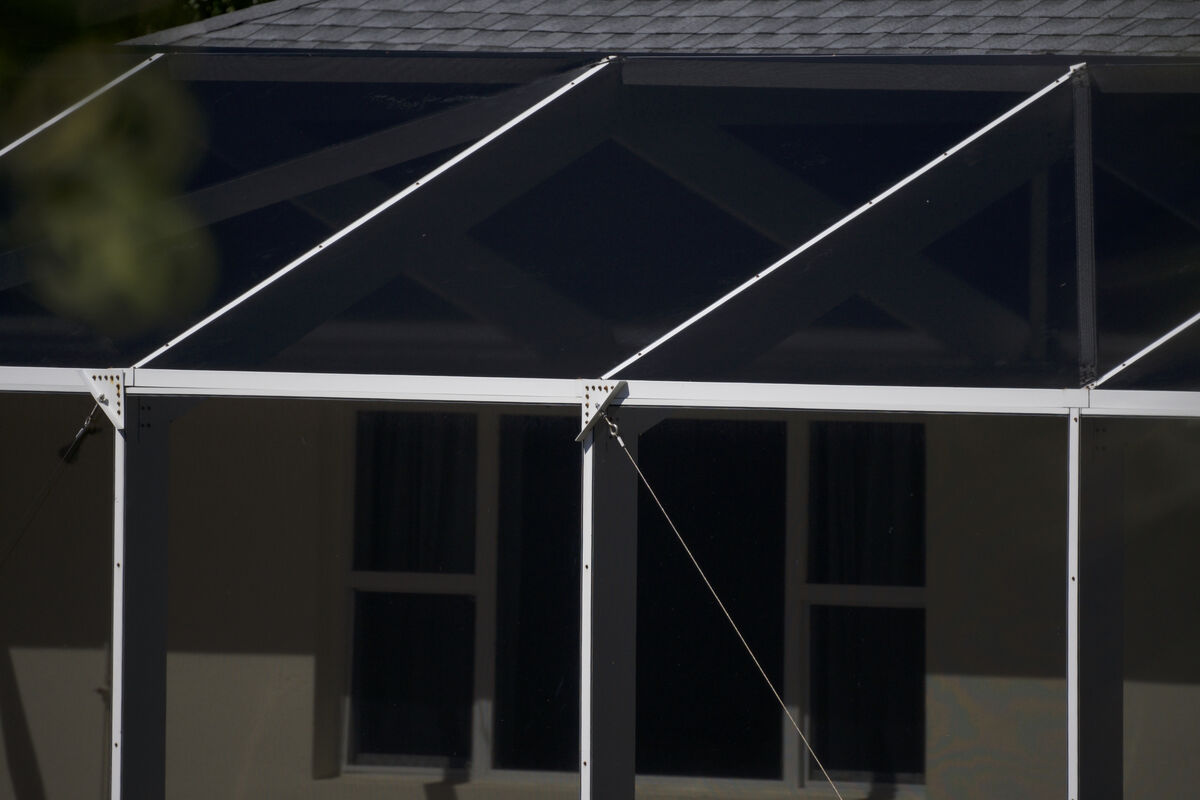
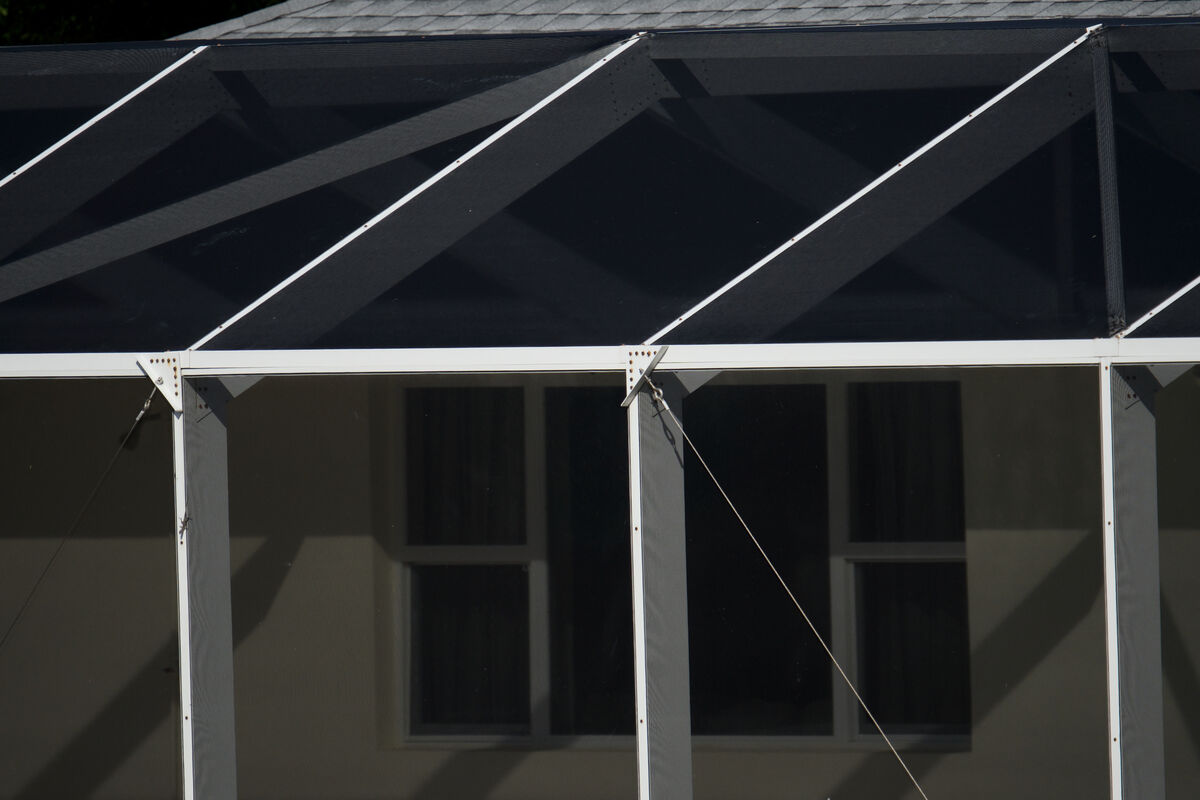
It may be only me and perhaps only Sony. Or both. I've spent a lot of effort on testing focus peaking on my 𝜶6500 including on a tripod. I have a favorite target for sharpness. It's a pool cage more than 200 feet away. The good shots show the threads on the brace wire fittings and the wires in the screens.
The autofocus is better than any manual focus I've been able to do.
Focus peaking, at least on my camera, shows a gradual transition from off to on to off. There isn't any "snap" like you'd get from my old Nikon FM2 prism, for example.
The DOF isn't really being shown but what is helpful is that it shows all the points that are in decent focus even if they were not where I was trying to get. That is something the old film technology in my SLR didn't do.
I've adjusted the focus peaking on the camera to its weakest in an attempt to make it more precise. It did that, but not to my satisfaction. Autofocus is simply better and being able to configure it to a small spot makes it even more so.
Sample shot merely to show what I use for a test target. It was one of the best I've been able to get. I don't know for sure but most pool cages around here are a special, fine screen because of "noseeums". This was AF. No sharpening done, just convert raw to JPG.
𝜶6500, Tamron 150-500. F8, 1/1000, auto ISO. Notice the tiny lizard.
Feb 16, 2024 11:53:59 #
I took some quick test shots using the big foot and with the monopod fully extended. It seems to help me to steady the camera but, of course, it's no match for a heavy, stiff tripod.
I don't know if three feet on the bottom would be any better but they would certainly be more expensive and more cumbersome. I can leave the big foot in place but to extend three separate feed would be time consuming and sometimes, even often, the birds don't wait.
I am thinking about modifying a traffic type cone next.
Feb 15, 2024 19:15:22 #
Update:
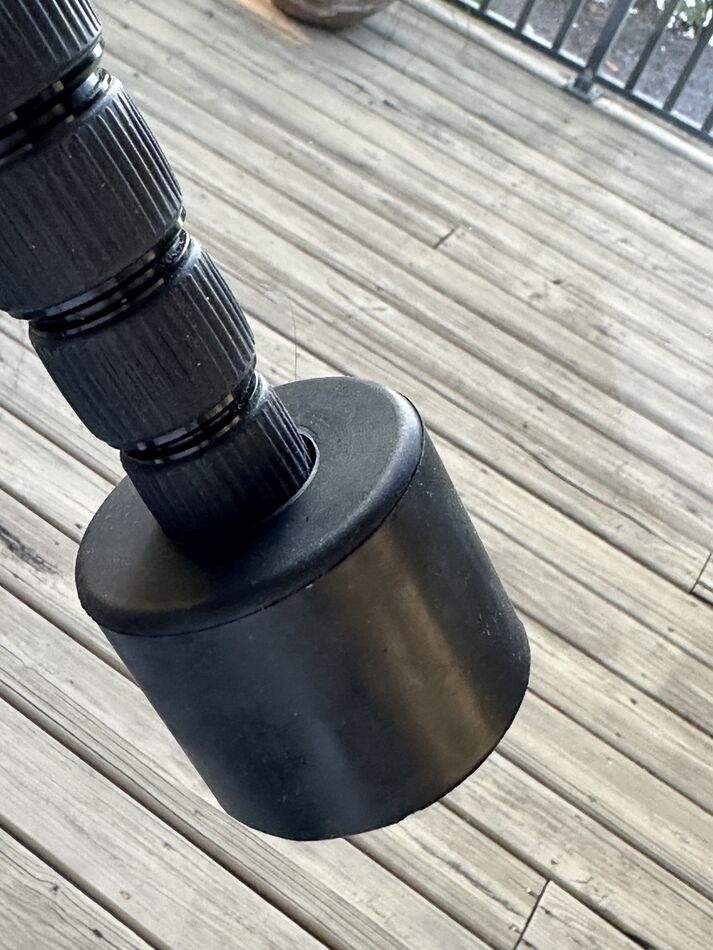
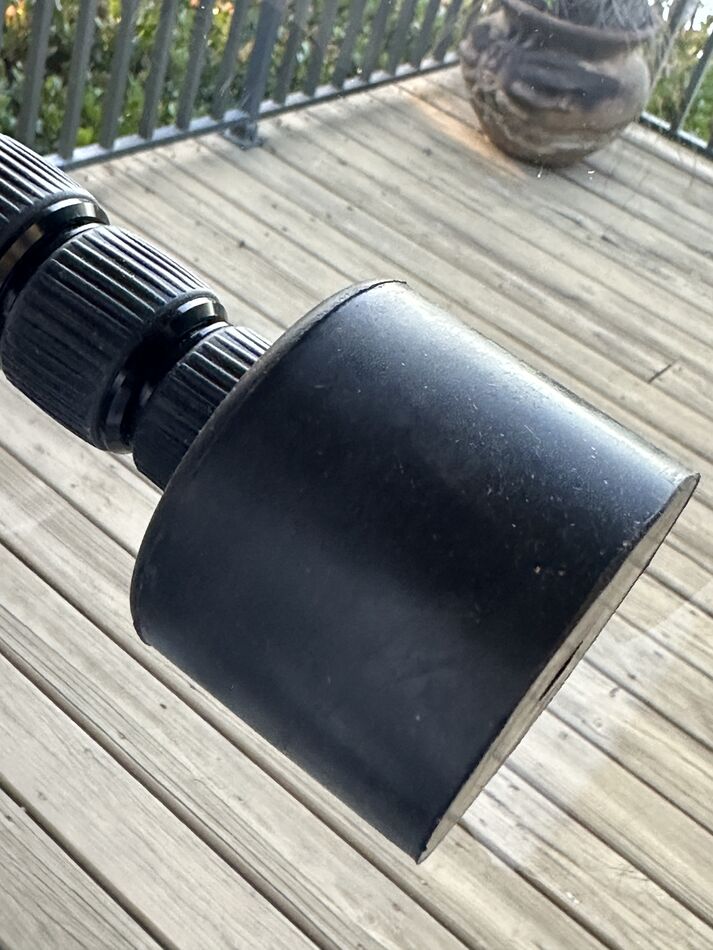
The rubber foot (x2) arrived today. I haven't had time to try it out yet but just on a table top it appears to help me greatly reduce camera motion. The non-removable Sirui rubber foot fits snugly into the hole in the rubber foot and that was what I wanted. So far, so good.
The rubber foot (x2) arrived today. I haven't had time to try it out yet but just on a table top it appears to help me greatly reduce camera motion. The non-removable Sirui rubber foot fits snugly into the hole in the rubber foot and that was what I wanted. So far, so good.
This is the Sirui end. Hole is where point comes out
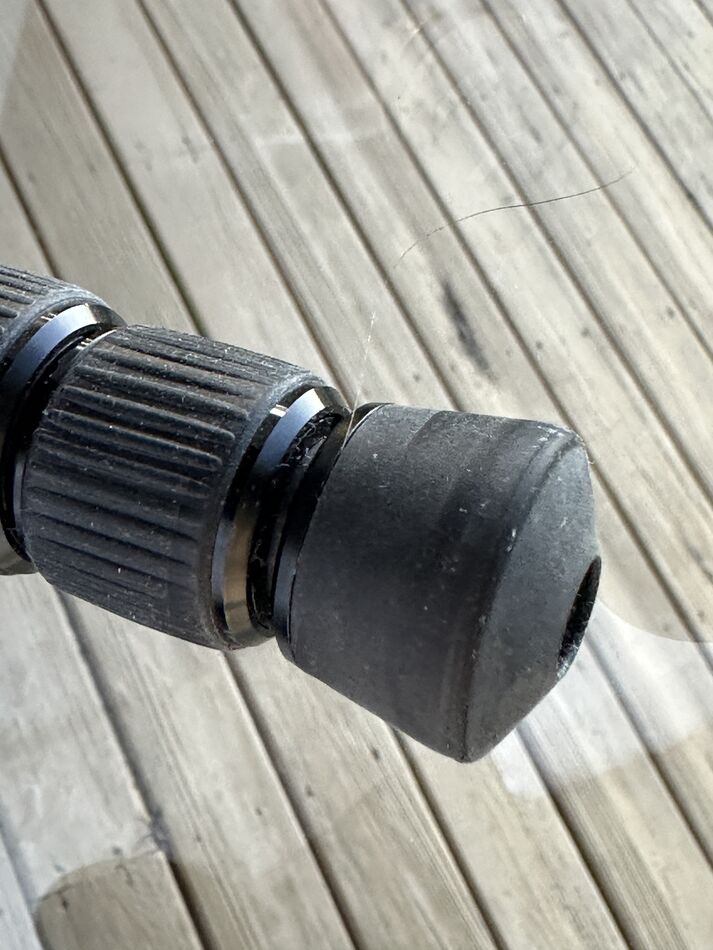
Showing monopod inserted into rubber foot
Showing flat bottom of rubber foot
Feb 13, 2024 11:42:46 #
flyboy61 wrote:
Gray card...I have 3 or 4...none of which is the same shade of gray! Thinking of shooting Manual and buying an Incident meter like I used to have...but...Naaaah...I did that for years in the "good old days" That's why I paid all that money for a camera that's smarter than me! I had a Gossen Luna Pro, which read 1/3 stop below what my camera did. Good meters!
The only difference between a white target and a good gray target is how much light it reflects. Use a high quality piece of printer paper that tells you its brightness. Or if you’re a perfectionist get some titanium dioxide paint. Or a white target from B&H. Then do some simple math. It’s around 3 stops.
97%/2/2/2 gets 12.12%. For example.
Many digital cameras are set for 12% not 18%. 95% and 3 stops gives 11.89. In photo terms it’s essentially the same.
Feb 12, 2024 14:20:26 #
The similar results really aren’t. I just wanted two examples of how the iPhone measures shutter speed. It’s not likely any more accurate in practical terms than the light meter app but it is very precise. That is the point. My guess is that it measures time very exactly since it has so many related time functions.