Photoshop for Dummies
Nov 1, 2011 11:07:32 #

That's just what I said "Their are 50 ways to do one thing in PS. It just depends on which one you like the best" ......
Nov 1, 2011 11:10:31 #
That's just what I said "Their are 50 ways to do one thing in PS. It just depends on which one you like the best" ......
Nov 1, 2011 11:16:50 #

merlin wrote:
Why don't you just use any selection tool you want to in Photoshop to select the pumpkin. Invert the selection and desaturate. You can do this if the picture that you are starting with is a color photo
OK---In little bitty baby steps, and step by step, please explain. I'm really, really slow at this tech stuff! :-) About all I 've figured out is how to adjust using the auto levels, and how to convert to b & w and do some minor adjustments there (and how to use some of the crazy, funky filters!)
Nov 1, 2011 11:16:56 #
Nov 1, 2011 11:18:17 #
Sorry I didn't read a book to learn Photoshop I was just trying to make it easier for someone who is just learning to do what they want to do.
Nov 1, 2011 12:12:33 #
WoW!!! Merlin, thanks for that. I've been going the long way around using layers with more frustration than success. This site is growing on me as I let my prejudices down. Thanks again.
Nov 1, 2011 12:17:06 #
Nov 1, 2011 14:40:28 #
When editing ANY photo, the first thing you need to do is create another layer from the background layer. Do this by clicking layer at the top across the menu bar. Then click new layer and name it whatever you want...like Retouch or Edits, etc.
This way, you are not causing any permanent changes to the original image that can't be fixed or changed back.
Next, click on the icon to convert to black and white. This should create a new layer itself that is black and white. In the layer's palette on the right side, you will see the background layer, the new layer you created, and the black and white layer.
Use the zoom to zoom in on the area you want to add color back to, so that you can see the detail and edges very well. Click on the eraser tool, and change your brush to a hard, smaller brush (small number, solid circle....the light circles indicate brushes that feather the edges when used.) Outline the area and small detail you want to recolor with the smaller brush...you will see the color return as you erase away the black and white. You can then change to a larger brush to fill in the larger areas.....and Voila!! You have selectively colored your photo!
sscooper38 wrote:
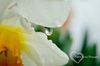
OK---I admit--I am NOT a techie! I've tried to watch several on u-tube, and read a few post on here, and I still get lost. I am trying to convert a portion of a B & W photo to color. Can someone walk me thru this in VERY, VERY, simple steps. Think little first grader---you can't be too basic! I am using Elements 8. THANKS!! sscooper (I've even attached the pic!)
One Of Mine.....
Nov 1, 2011 14:43:41 #
Wow, I have been doing it the hard way! That is why I love this forum....so many people to learn from!!
MH wrote:
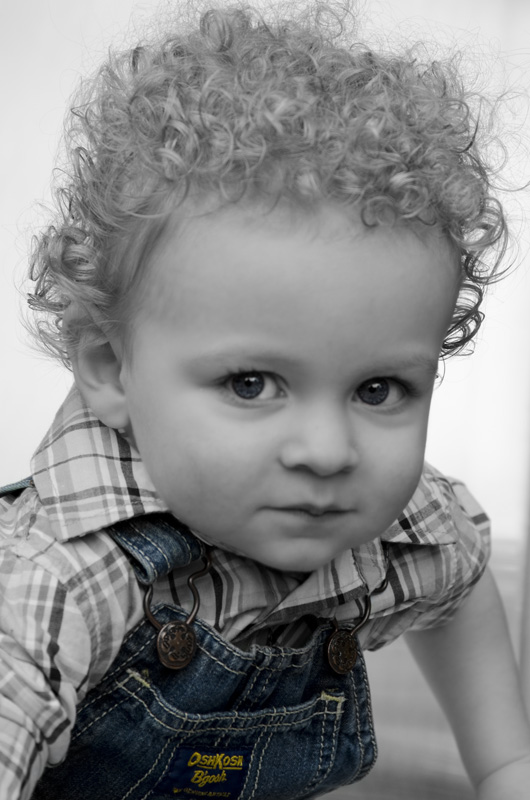
Open both pictures in PS. With the marquee tool make a full selection of the B & W picture. Select copy and then paste it into the color pic. You should have two layers now with the B & W on top. Withe the earser tool draw over the pumkin or what ever you want to colorize. This should get you where you want to be. Hope you don't mind but I tried it on the two pics you posted....
Nov 1, 2011 15:19:25 #
Nov 1, 2011 15:26:00 #
MH wrote:
Nice explanation !!!
I ALWAYS need things explained to me very simply....sometimes what makes sense to you doesn't always make sense to someone else.
Nov 1, 2011 15:29:52 #
Open your image in the editor, press "control-j" (or under layer menu choose "new"-"layer via copy". Press "B" (click on the Brush tool), click the options check-off and the mode to "color". Press "D" to set the foreground color to black and 'paint' away all the stuff you don't want to be colored. If you make a mistake, click the eraser tool and "re-paint" the parts you messed up on then go back to the 'brush tool' and finish removing the color.
good luck
good luck
Nov 1, 2011 17:55:03 #
I appreciate yet another way to see how to do this, and I see how to do everything in your directions, except for "click the options check-off" Where is the "options" located?
I have CS4....
I have CS4....
tkhphotography wrote:
Open your image in the editor, press "control... (show quote)
Nov 1, 2011 18:07:16 #
Merlin---when I said basic, I REALLY meant it! Where do I find the invert and desaturation??
merlin wrote:
I am glad it helped I have been doing it that way for years
Nov 1, 2011 20:00:05 #
Sorry it took so long to get back with you I am at work. After you make your selection go to the top where it says select on the drop down menu select invert. Then go to image adjustments and select desaturate. that should get you to where you want to be
If you want to reply, then register here. Registration is free and your account is created instantly, so you can post right away.