Home studio / table top unit
Jul 26, 2012 16:00:57 #
I get more people ask how do you get reasonable product and table top photographs of things maybe you want to put on EBay.
Most of the answers I have seen involve spending a couple of hundred dollars on a flimsy plastic "Tent" that you aim a couple of lights at, the tent material diffuses the light and gives a reasonable rendering of many items. Howver, many products look bad on a pure white backgound with zero shadows.
For many years I have use a set up described and illustrated below.
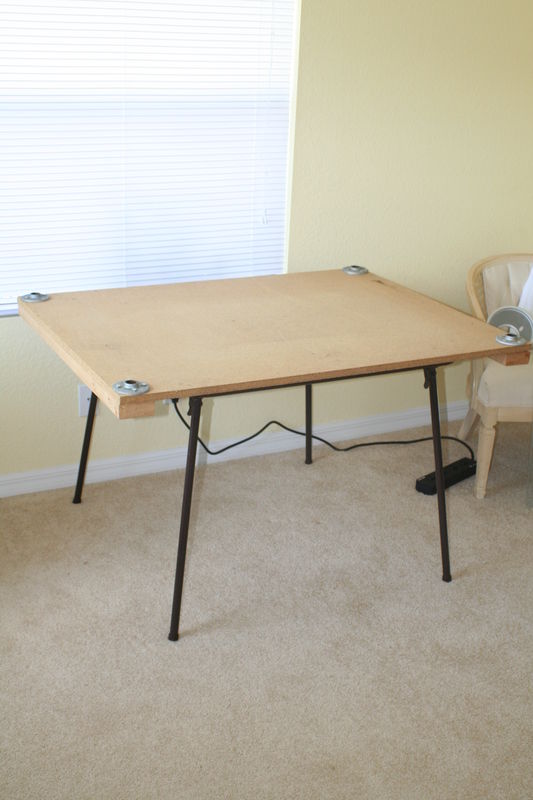
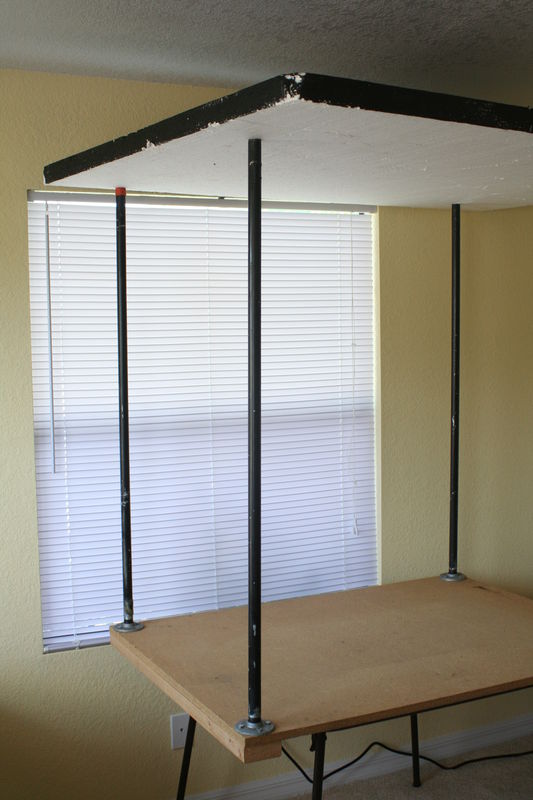
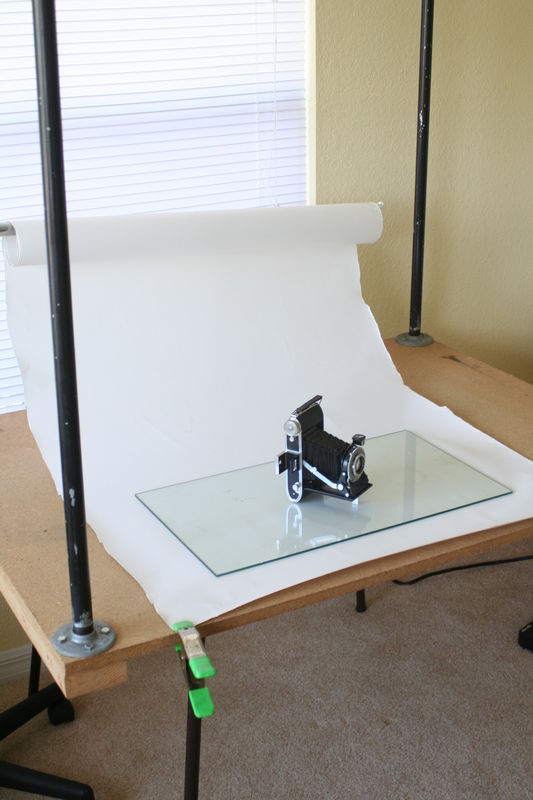
I purchase a sheet of 4x8 chipboard, cut it into a 5x4 piece.
Screwed 2x4 battons on the edges to give some strength.
Most wives are not happy if you paint the walls and ceilings matt black, but if you are into photographing glass or shiney objects thats the best course of action to prevent unwanted reflections in your prints.
However many times a white environment is preferable.
My tabletop settup allows both scenearios to be available.
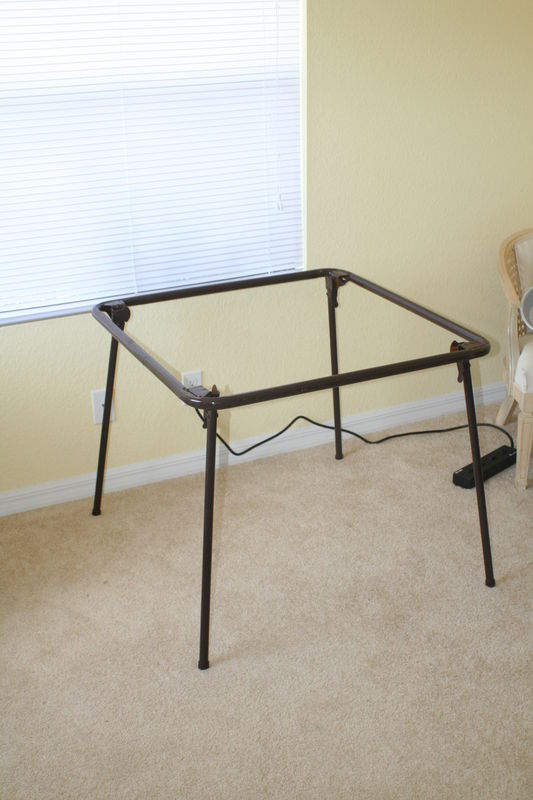
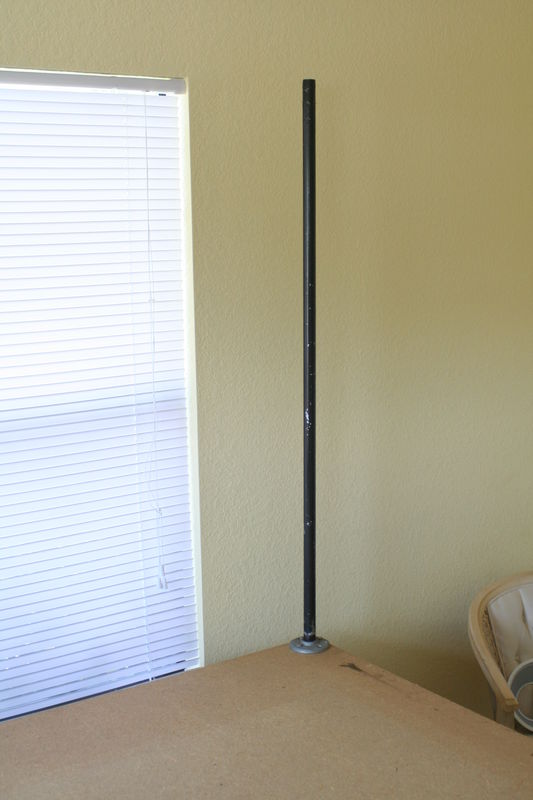
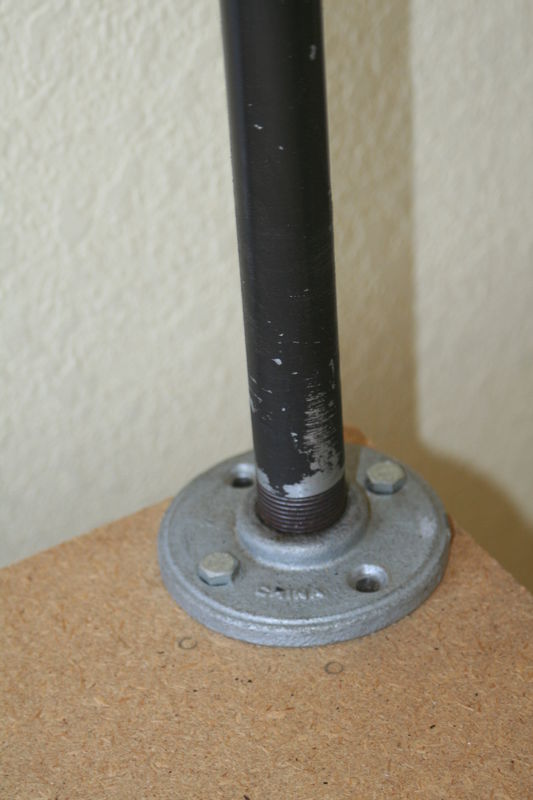
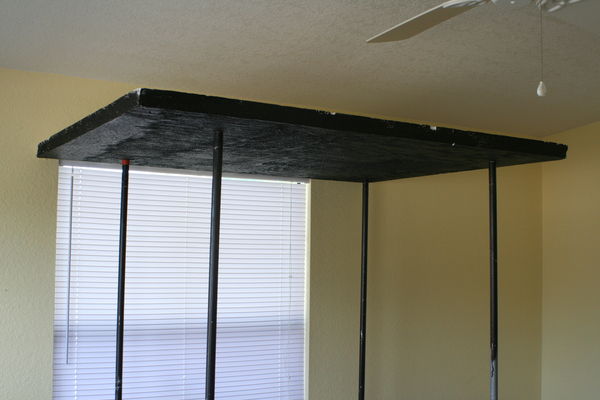
I screwed pipe mounts (1/2 half inch size in each corner of the board. Inti these I screwed a 4 foot iron water pipe.
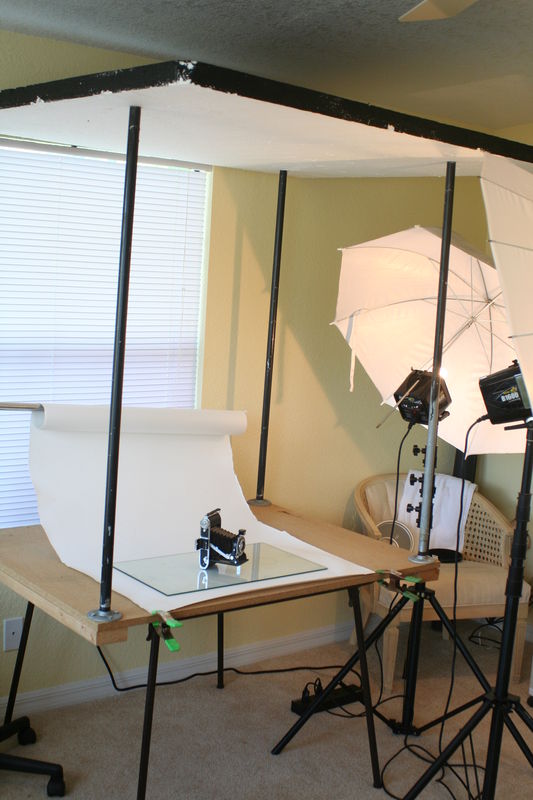
These pipes support a 5x4 sheet od 2" foam board from Home Depot. One sise of the board is white the other matt black.
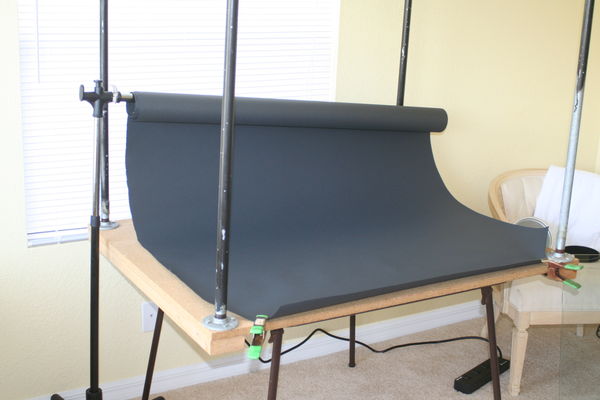
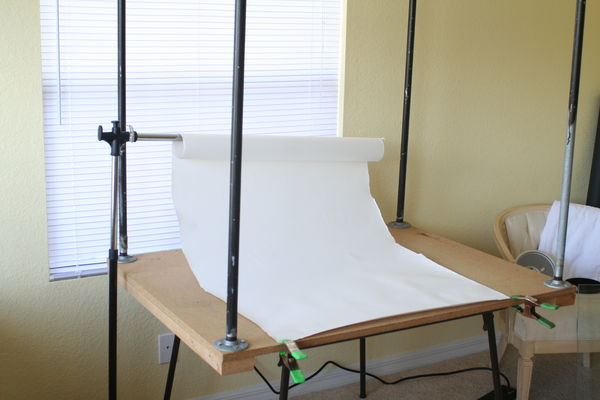
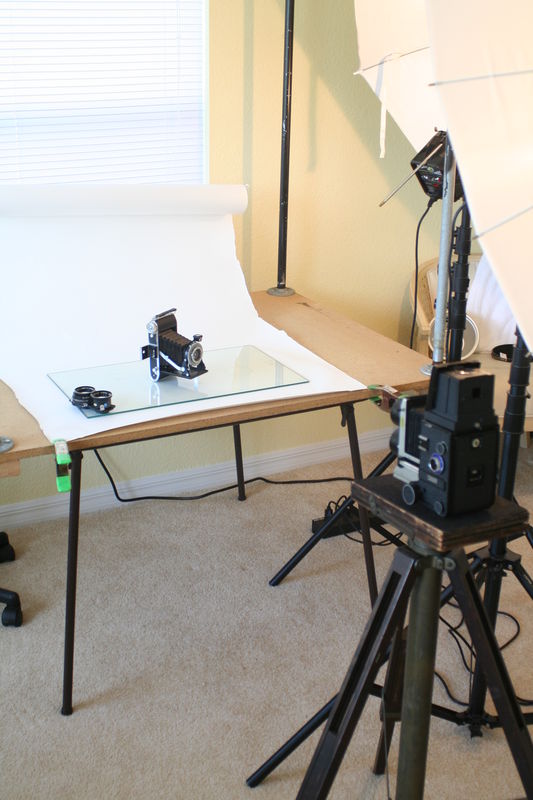
Some means of support ts all that is then required to support a roll of colored background paper. A sheet of glass can be laid down to give refections of the object you are taking photos of. A Mamiyaflex is shown in the last shot.
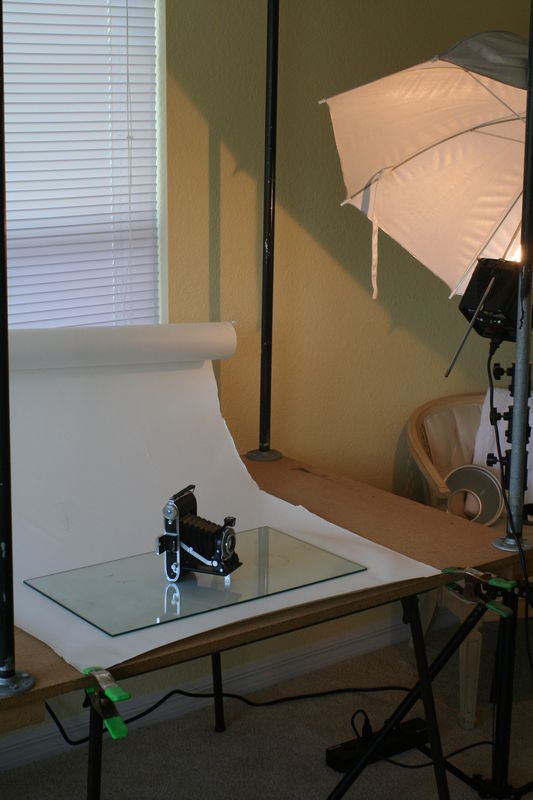
Remember with this if you need a relection free photograph, flip the ceiling board over to the black side conversly if you need a high key shot.
I also have a black sheet of material to hang over the edges, suspended from the foam board and a similar muslin sheet for the high key tent look!
Add some lights and your in business.!
Under $100 and you have avery versatile unit that will fulfill most photographic situations. Not bad eh!
And if you need a country or beach background for table tops, you can catty the whole thing and you can set up anywhere.
Ian
Most of the answers I have seen involve spending a couple of hundred dollars on a flimsy plastic "Tent" that you aim a couple of lights at, the tent material diffuses the light and gives a reasonable rendering of many items. Howver, many products look bad on a pure white backgound with zero shadows.
For many years I have use a set up described and illustrated below.
I purchase a sheet of 4x8 chipboard, cut it into a 5x4 piece.
Screwed 2x4 battons on the edges to give some strength.
Most wives are not happy if you paint the walls and ceilings matt black, but if you are into photographing glass or shiney objects thats the best course of action to prevent unwanted reflections in your prints.
However many times a white environment is preferable.
My tabletop settup allows both scenearios to be available.
I screwed pipe mounts (1/2 half inch size in each corner of the board. Inti these I screwed a 4 foot iron water pipe.
These pipes support a 5x4 sheet od 2" foam board from Home Depot. One sise of the board is white the other matt black.
Some means of support ts all that is then required to support a roll of colored background paper. A sheet of glass can be laid down to give refections of the object you are taking photos of. A Mamiyaflex is shown in the last shot.
Remember with this if you need a relection free photograph, flip the ceiling board over to the black side conversly if you need a high key shot.
I also have a black sheet of material to hang over the edges, suspended from the foam board and a similar muslin sheet for the high key tent look!
Add some lights and your in business.!
Under $100 and you have avery versatile unit that will fulfill most photographic situations. Not bad eh!
And if you need a country or beach background for table tops, you can catty the whole thing and you can set up anywhere.
Ian
Jul 26, 2012 16:36:38 #

Jul 26, 2012 16:43:35 #
Wahawk wrote:
:thumbup: :thumbup: :thumbup: :thumbup:
Thank you, 5 thumbs up is better than 2 fingers, Ha Ha.
Ian
Jul 26, 2012 16:56:04 #
ianhargraves1066 wrote:
I get more people ask how do you get reasonable product and table top photographs of things maybe you want to put on EBay.
That's a very nice setup, but than I need or want to build.
Jul 26, 2012 16:57:45 #
ianhargraves1066 wrote:
Thank you, 5 thumbs up is better than 2 fingers, Ha Ha.
Ian
Wahawk wrote:
:thumbup: :thumbup: :thumbup: :thumbup:
Thank you, 5 thumbs up is better than 2 fingers, Ha Ha.
Ian
Or one middle finger!! LOL!!
Jul 26, 2012 17:00:32 #
Wahawk wrote:
Or one middle finger!! LOL!!
ianhargraves1066 wrote:
Thank you, 5 thumbs up is better than 2 fingers, Ha Ha.
Ian
Wahawk wrote:
:thumbup: :thumbup: :thumbup: :thumbup:
Thank you, 5 thumbs up is better than 2 fingers, Ha Ha.
Ian
Or one middle finger!! LOL!!
I'm glad there's no emoticon for that here. ;)
Jul 26, 2012 17:04:20 #
jerryc41 wrote:
I'm glad there's no emoticon for that here. ;)
Wahawk wrote:
Or one middle finger!! LOL!!
ianhargraves1066 wrote:
Thank you, 5 thumbs up is better than 2 fingers, Ha Ha.
Ian
Wahawk wrote:
:thumbup: :thumbup: :thumbup: :thumbup:
Thank you, 5 thumbs up is better than 2 fingers, Ha Ha.
Ian
Or one middle finger!! LOL!!
I'm glad there's no emoticon for that here. ;)
You got that right!! Although there are some who comment so rudely and cruelly that they might deserve it.
For this post I would have chosen some 'diamonds' but couldn't find any!!
Jul 27, 2012 07:15:19 #

Very nice Demo ianhargraves1066 thank you for your time!
I use similar setup on location sometimes. Sometimes a factory purchased table or sometimes home made. I prefer to use a transparent table top material such as glass or perspex and have the white paper on top. This way it makes it easy to use underlighting adn any coloured gels for under lighting. If shooting an all white object on a white background you can light it in different ways from underneath to make it pop off the background. Black and white reflectors also useful that can simply be clamped to the sides of your type of table setup. White will add catchlights and reflections and a white edge and black will add separation giving a dark edge. As long as they are just out of frame. Sometimes I have shot and had to include them slightly due to space but easily cropped out in PP.
By the way I will often use oversized plotter paper rolls rather than buying background paper rolls. This will keep the costs down by a lot and is just as good.
This type of DIY setup is really useful as can be modified in anyway to suit needs. Can add bars and clamps to support things out of frame and you can even attach rods to the object itself with glue of tak to support them in any way fit.
Jul 27, 2012 14:56:51 #
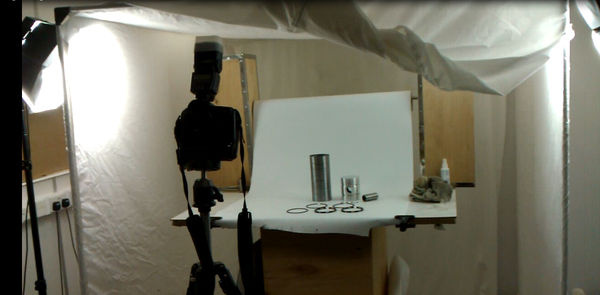
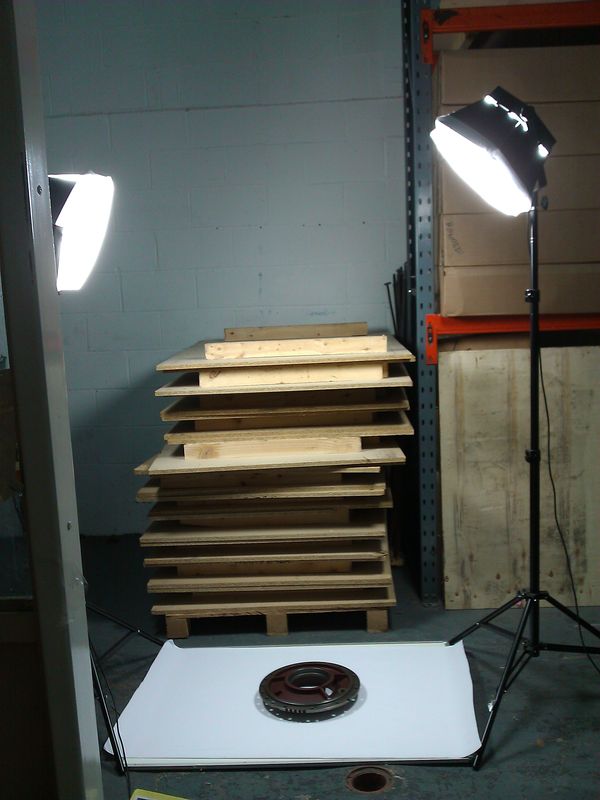
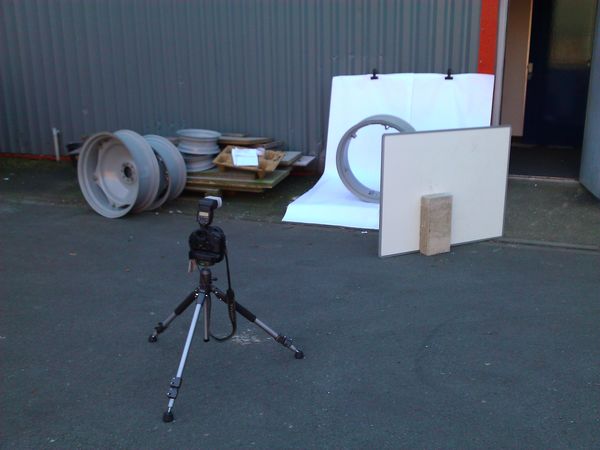
Here are a few of my dodgy DIY setups that worked well.
DIY table top
Inside a warehouse shooting straight down
Outside heavy object using mixed daylight and flash with reflectors
Jul 27, 2012 15:50:09 #

ianhargraves1066 wrote:
I get more people ask how do you get reasonable pr... (show quote)
_______________________________
Ingenuity trumps fiduciary means every time, imo.
If one can improvise, the sky is the limit.
Brilliantly described and incredibly informational! *beams*
It is still a bit large and bulky for my taste, but if I had a dedicated space for it, you can BET I'd be using it!
( The one outstanding effort I did... the lilies in a glass series... was achieved with a two-ft dia. glass outdoor table and a white foam-core board approx. 24"x36", outdoor light and on-board flash. Can't get any cheaper than that, unless you do like I did with the swallow's nest series and use a discarded poster from the trash! lol)
And that antique tripod... LOVE it and very glad you still have and use it! xoxoxo
Jul 27, 2012 23:23:15 #

ianhargraves1066 wrote:
I get more people ask how do you get reasonable pr... (show quote)
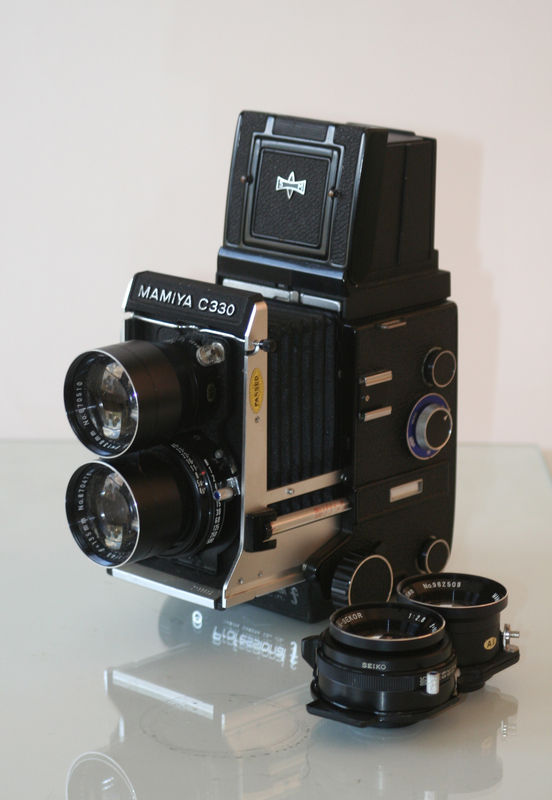
Very good set up Ian. But it brought a tear to my eye when I saw your 330. I sold the two I used for years in my wedding bisness. I loved those cameras. They were great for just about everything. Loved the doulble extention bellowes. They are keepers. Sorry I sold mine.
Jul 28, 2012 05:51:22 #
tilde531 wrote:
quote=ianhargraves1066 I get more people ask how ... (show quote)
Firstly, I never saw the one outstanding effort you talk about, ALL your efforts are outstanding.
Secondly YOU are the benificery of the Table I built as it will I know be somewhere in OUR new studio and will be in constant use so you can turn out both commissioned "product" shots and also your special brand of "Artistic" work.
Keep making the great macro stuff you are now producing too.
Much love and admiration.
Ian
YLAM
Jul 28, 2012 06:04:06 #
Hal81 wrote:
quote=ianhargraves1066 I get more people ask how ... (show quote)
I had the lucky pleasure of using a tlr once. Did a real on black and white the depth of the photo was something else. Quality was outstanding. I think digital is just about there to rival 35mm but not medium format. Also the viewfinder was so clear and it really was wysiwyg. Where as digital there is an element of guess work and luck involved.
Jul 28, 2012 08:04:56 #
Hal81 wrote:
quote=ianhargraves1066 I get more people ask how ... (show quote)
Yes I understand the emotions when you see a duplicate of a long lost friend. The Mamiya was a truly amazing camera and sadly all the nw photographers miss out on the magic of developing a 120 film and examing it closely. I know better to mess with a wet film but the temptation to get up close and examine the film before it was dry was always a thrill "to see what we got"
I still after 60 years of making prints in the darkroom get that "rush" as the image appears in the developer. Ink Jets just do not have the same effect on my senses!
Ian
Jul 28, 2012 16:37:16 #
ianhargraves1066 wrote:
quote=Hal81 quote=ianhargraves1066 I get more pe... (show quote)
I remember my first time in a pros darkroom, I was only 17. He was working on the enlarger threw an 8X10 in the soup and told me to take care of it. When it started to develope it was of a guy in his casket. Shook me up . I took a job with this guy because he went to this summer camp for kids twice a week to photograph the groups and the actives. My girlfriend worked there as a helper and thats the only way I could get to see her. The things you do for love.
If you want to reply, then register here. Registration is free and your account is created instantly, so you can post right away.