Ugly Hedgehog - Photography Forum
Home Active Topics Newest Pictures Search Login Register
Main Photography Discussion
Serious BIF'ers Please Reply
Page <<first <prev 4 of 6 next> last>>
Apr 12, 2018 10:21:30   #
GWZ Loc: Bloomington, IN
 
There are three locations that I constantly go to because I know birds will be there - geese, ducks, gulls, herons, egrets, and an occasional raptor (hawk or eagle), along with many song birds that I can hear but not readily see.

Many times I just bring a chair and some binoculars (no camera) and listen to the birds as they call to each other. Then I try to correlate their calls with any resultant action.

I am (slowly) learning that certain birds have specific calls they make just before they take flight. Other birds have a certain pre-flight ritual that they go through before taking off.
Other times I hear the standard calls of the song birds, along with other larger birds like the geese and ducks, change when a raptor appears on scene. This tells me that there may be some air-to-air combat in the offing. By observing their behavior I am able to be ready when I have my camera (quick re-check ISO, f-stop, and shutter speed, and pre-focus on the area that action will likely come from) so that I have a better chance of catching them in all aspects of flight.

Above all - I am learning to be patient; when BIF'ing I just never know if the birds will cooperate that day or not, so I enjoy being able to be outside during the lulls between activity.

Hope this helps - this is just my take on things.

Gary

Reply
Apr 12, 2018 10:24:52   #
Raz Theo Loc: Music City
 
Jerrin1 wrote:
Blimey, where to start! Well, as previously stated, Steve Perry knows what he is talking about and has a YouTube channel full of dead good videos. The problem is, you have not outlined your current kit or what, exactly, in the way of BIF you want to photograph. Kit can be quite a big factor: despite what some say about it being the person behind the camera, not the camera itself - well I'd like to see them take BIF shots with a Kodak Instamatic or Brownie 127. I use a Nikon D500 and either a Nikkor 300mm f3 PF VR + TC14EIII or Nikkor 200 - 500mm f5.6 and an Olympus EM1 mark II + Oly 300mm f4 (both with and without a 1.4TC). Depending on the available light I will set a shutter speed of 1/2000th, aperture f8, auto ISO and, depending on the colouration of the bird +/- 0.3 - 0.7 stops of compensation (in general). I will drop down to a shutter speed of 1/1250th if I feel the ISO is too high, or open the aperture to f4/5.6 - there are many variables. It is rare that I can ever go up to 1/3200th, as it's never that bright where I live. Some photographers like to have a blurr on the wingtips to show motion but I prefer to freeze the action. Once you have your camera set up, if you have a local park with a pond/lake practice on big slow stuff like geese, swans, herons etc., then move up to pigeons and ducks. Practice panning with these birds until you are happy with your results. Once you have it sorted go out into the bondhu and try your hand with some proper wild stuff. Manage your expectations; I've been doing this stuff for some time and it isn't always easy. Photographing swallows can be a real bugger because they are so fast, so it's just a case of practice. Generally, I just walk for about 7 hours and photograph BIF as I go along. I only bother with a tripod and gimbal when I'm in a hide (blind) at a waterfowl place and know the flightpaths. Good luck.
Blimey, where to start! Well, as previously stated... (show quote)


Jerren1, this is all great advice which mirrors my experiences. However I'm aware that one hitch in my process may be my "kit" as you refer to it: I currently shoot with a Nikon D7100 with a Nikon AF-S 70-200 2.8 VR, handheld and if I acquire a "good shot" I often rely on cropping. Much of the quality I search for depends on my steadiness at that moment. NOT a good plan. I think a long lens such as yours is in the offing and, once in a while, a good field tri/monopod, cumbersome as that might be. All else I conduct myself as you suggest, more and less.
Thanks for your thoughts and advice.

Reply
Apr 12, 2018 10:24:55   #
Vlemasters
 
I use the fastest shutter speed i can. Turn off image stabilization as it only slows down the camera at fast shutter speeds. Shoot in burst mode. The thing that helps me the most is to try to shoot on a very windy day as it slows down the birds flying into it.

Reply
 
 
Apr 12, 2018 10:25:55   #
Raz Theo Loc: Music City
 
fourg1b2006 wrote:
I'm sure everyone will have a different way of doing this. Hope you get what your looking for.


No kidding, thanks.

Reply
Apr 12, 2018 10:27:49   #
Raz Theo Loc: Music City
 
Tom M wrote:
I don't know if anyone already mentioned it, but I use 'back-button focus' and in AFC (continuous auto focus) mode. I also have been having better luck using 'Manual' with auto ISO (TAv for fellow Pentax users), keeping the speed up around 1/1000 s and aperture pretty much wide open (5.6 on my kit lens). I also highly recommend getting Steve Perry's eBook "Secrets to Stunning Wildlife Photography".


Almost precisely, my settings. Thanks

Reply
Apr 12, 2018 10:33:08   #
Raz Theo Loc: Music City
 
PMW603 wrote:
Great questions ... for starters try this recommended by Eduardo del Solar who teaches Bird Photography at Mass Audubon: with equipment ready go out early in AM or late afternoon, practice taking BIF using Gulls or other birds that congregate in your area such as ducks at water treatment areas and practice! From my experience, try setting up your camera as others have suggested, sports mode or manual with shutter speed at 1/2000-1/2500, f/8 and auto ISO (100-6400 range that can be set in menu on Canon 7D M2), use as long a lens you can afford and steadily hand hold. Have fun!
Great questions ... for starters try this recommen... (show quote)


PMW603, I beginning to realize, thru this forum, that one issue I have is slow shutter speed. I have been using a max 800 speed, especially on cloudy days, because I was afraid of noise (I do use auto ISO). But you and a few others are talking about, for me, sky-high speeds. Nevertheless, I'm gonna try it and the noise be damned.
Thanks very much.

Reply
Apr 12, 2018 10:34:23   #
via the lens Loc: Northern California, near Yosemite NP
 
Raz Theo wrote:
Before I give up on achieving the kind of quality BIF I see on this site, I would like a general discussion on how each of you go about your BIF craft.
Examples:
How do you prepare?
How much time you invest depending on what you are planning?
Go to location early? Sit on a chair, a rock or lock knees?
Your preference for tripod, monopod, handheld, heads?
Your handling of "complicated" wooded scenes vs "unencumbered" environments (seaside; riverside, etc.)?
Your most successful settings? Your equipment?
Whether you backpack your way in or shoot from your Jeep?

Well you get the idea. Any input would be more than appreciated and thank you in advance.
Before I give up on achieving the kind of quality ... (show quote)


Hi, I've attached a few examples so that you can see that I actually do photograph birds in flight at times. High shutter speed, a steady hand, a tripod if the situation will allow, a quality long lens, a quality camera with a fast buffer and the ability to take fast multiple shots, study the animal's habits, be ready and follow through, concentrate only on the animal, practice, practice, practice. Also start with the bigger, slower birds as they are easier to follow in flight. Watch out that the background does not negatively impact the subject. I use a Nikon D500 and either a Nikon 80-400 or a Nikon 200-500. Florida is a great place to photograph birds. All of the birds shown were photographed in Florida.


Reply
 
 
Apr 12, 2018 10:40:19   #
LittleRed
 
Raz Theo wrote:
Before I give up on achieving the kind of quality BIF I see on this site, I would like a general discussion on how each of you go about your BIF craft.
Examples:
How do you prepare?
How much time you invest depending on what you are planning?
Go to location early? Sit on a chair, a rock or lock knees?
Your preference for tripod, monopod, handheld, heads?
Your handling of "complicated" wooded scenes vs "unencumbered" environments (seaside; riverside, etc.)?
Your most successful settings? Your equipment?
Whether you backpack your way in or shoot from your Jeep?

Well you get the idea. Any input would be more than appreciated and thank you in advance.
Before I give up on achieving the kind of quality ... (show quote)


Contrary to what some have said, you are in fact just asking One ????, that is how to catch a bird on the wing. From my experience there is really no one answer to that question other than patience and practice. I could give you a multitude of settings which probably would not be relevant to what you are trying to do at the time you are doing it. There are just too many depends when it comes to BIF picture taking. It depends on the light available, the type of bird, the type of lens and camera etc, etc. One from the BIF section of this site told me to start with the camera set at F8, 1/800 and auto ISO and adjust accordingly depending on the circumstances. I have found that especially with larger birds if the day is bright this setting works well. But like I said, it depends on many other factors.

I have been playing with BIF for many years and with the advent of digital it has become IMHO much more easier than it was in the good old film days. With film you had to be damn sure of your settings as you usually had only a few chances to get it right before it became extremely expensive. With digital you just hold the trigger down and take a pile of shots of which maybe one will be the one you want. Sometimes when I am out playing with BIF's I may take 2 or 3 hundred snaps and perhaps get half a dozen that I like.
Almost all my pics taken as BIF's are hand held. I'm afraid I just dont have the luxury to go out and pay big bucks for a gimbal head or a professional type tripod. But like I said, with perserverance and practice you should be able to catch on. Like others have said previously, take a look at the section on BIF's here on the HOG. The people whom run that section are very helpful and the examples shown are excellent in showing what can be done.

There are a multitude of areas that you could easily visit to practice. Dont quite know where you live but I think it may be near Nashville. Check around for an area where gulls congregate. They are fairly easy birds to start out with, not being that fast of flyers and big enough in body for you keep your camera locked on it. If you want to move up then try the common pigeon at the local park. Smaller and faster as you will find out but still an excellent bird to practice on. These are but two birds that are usually easily accessible for practicing. Remember, the larger the bird, the slower the flight, the easier to get a successful picture.

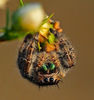
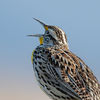
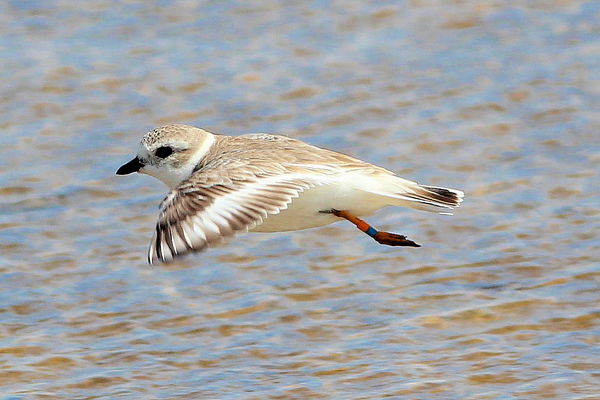
I've attached a few BIF's I have taken in the past few months. For the most parts they are OK, but could also be better. Age is creeping up on me and getting good pics of any kind is getting much more difficult. But still tis an enjoyable pastime and the only person I need to impress is myself. The first 2 pics of the Laughing Gull and Piping Plover were taken with the basic settings told to me by the folks at the BIF section on the HOG, that F8 @ 1/800 Auto ISO. I should also mention here that the Gull was flying into the wind which in most cases makes it a bit easier to catch a good pic. The Juvenile Pelican was taken at F4 @ 1/1000 auto ISO. These large birds are usually quite easy to catch in the air as they make no quick movements in their flilght. This usually holds true on most large birds (like Herons, Egrets etc) The last two (Common Redpoll F6.3 @ 1/1250 auto ISO and Pine Siskin F6.3 @ 1/2000 auto ISO) were taken in my backyard from a blind on a snowy, windy overcast day. These little buggers are much more difficult to capture due to the weather conditions along with their extremely quick movements but still were still possible. (practice and patience and multiple shots taken)

So, my recommendation is to practice, practice, practice if you are really interested in doing BIF"s. It's the only way you will become capable of doing so.
Thats what I had to do and I feel that now I'm at least a bit proficient. (I think :-O)

Best of luck in your future endeavors.

LittleRed (Ron)


(Download)


(Download)


(Download)


(Download)


(Download)

Reply
Apr 12, 2018 10:54:23   #
Raz Theo Loc: Music City
 
russelray wrote:
I prepare by eating breakfast, taking a shower, drying, getting dressed, brushing my teeth, shaving, drying my hair, and putting my equipment in the car.
I do BIF at the beaches, the San Diego National Wildlife Refuge (both locations), Ramona Grasslands, San Diego Zoo, Safari Park, and SeaWorld.
I get to the location whenever I get there. Sometimes, I'm delayed by traffic. I walk around and when I see something, I take a picture.
100% handheld.
I think seaside and riverside are more complicated and encumbered than the wooded scenes because there are so many more people at seaside and riverside. People are the complication.
Most successful setting is burst mode and P mode. Our cameras are more powerful than the computers that put man on the moon back in the '60s so I let them do their thing.
Equipment for BIF is a Canon 760D and Tamron 150-600 G2. I also have with me at all times a Tamron 90mm macro (for cool flowers and insects) and a Tamron 18-300 for landscapes and tall buildings and trees.
I drive to the location entrance and then walk the rest of the way. I have done 30 miles walking in one day at the San Diego National Wildlife Refuge and 15 miles in one day at the Ramona Grasslands where we have a pair of bald eagles nesting.
My "Dancing Bird" picture below is from the Ramona Grasslands on April 8. Birdies were in the middle of the lake. I have always wanted to catch BIF's landing and did this with my Tamron 150-600 G2 at 600 mm.
The second picture, "Hungry Bird," is from September 19 2017, San Diego riverside, right after I got my new Tamron 150-600 G2.
I prepare by eating breakfast, taking a shower, dr... (show quote)

russelray, I appreciate the extraordinary detail, especially the pre-shoot ritual Personally I think shooting is more challenging in the woods (which is why I referred to river/seaside). So far I haven't had time to manually focus (who would?) and auto focus can get confused more easily in the trees. But yours are wonderful shots which I'd be glad to call mine. So thanks.
BTW: Ramona Grasslands is a spectacular spot for photogs - I was there a few years ago while visiting friends in Escondido.

Reply
Apr 12, 2018 10:56:49   #
Raz Theo Loc: Music City
 
Feiertag wrote:
The more you do it the better you will get. You can read all the advise under the sun about this subject to no avail.

Look at the shots that worked out to be keepers and remember to repeat the same good practice, on the next trip out. What is equally important, is to look at the ones that failed and the next time, avoid making the same mistakes.

Good luck!

Feiertag, I agree. Thanks.
(Nice website by the way, wonderful images)

Reply
Apr 12, 2018 10:59:13   #
newtoyou Loc: Eastport
 
I posted Mother of an invention yesterday. I will try it today on gulls and ducks. It is 35mm, so no instant results.

Reply
 
 
Apr 12, 2018 10:59:15   #
Raz Theo Loc: Music City
 
patmalone51 wrote:
I've only been doing birds in flight seriously for a few months but feel like I'm getting better with practice. Here's what I've been learning:

Locations: It helps to find a really magical place like Corkscrew Swamp in Florida, where every time you turn around you're faced with another great shot (here is my album from visiting there a week ago on a quick trip: https://flic.kr/s/aHsmhamcQW ), but there are plenty of national wildlife refuges (many of them almost totally unknown and under visited even for nearby residents), Audubon sanctuaries, rivers, lakes, etc., all over our wonderful country. I shoot mostly in the DC area where I live and have discovered a number of spots that local birders know about but not so much the rest of us. Example: Dyke Marsh south of Alexandria Va: https://flic.kr/s/aHsm8xP3wY . There are state-specific birder listservs you can join to get tips.

Types of birds: They're all great, but to get them in flight, bigger birds like raptors and wading birds are a heck of a lot easier than sparrows and other small songbirds. You can get a songbird in flight at takeoff or landing without too much trouble but otherwise, they're just too fast, at least for me. Not that you shouldn't try: I got some meadowlarks in flight at a wildlife refuge in NM which you can see here (along with a bunch of raptors in flight): https://flic.kr/s/aHskue6amp . That was mostly luck. They say that luck favors the prepared, and that's true, but I don't do anything too elaborate. The main thing is to get to the site and keep the camera on and ready to shoot at all times. Try to keep the sun behind you and the birds facing you, but that's easier said than done. I don't have the patience to sit in one place for long times, but if you have that fisherman mentality, go for it. If you do that, you can set up what amounts to a stage and wait for the birds to do their walk-ons.

Lenses: You need a long lens, minimum 400 to 500. My current fave is the nikon 200-500. I can handhold with that, although it's a tad heavy. You can drop 12 big ones and get a 600mm f4E, but then you have to use a tripod which limits you from quick reactions. You can get a shorter lens like a 300 and use a 1.4 teleconverter to take it up to 420mm, but that really slows down your auto focus and you miss a lot of shots.

Camera body: I have been getting a lot more keepers since getting the new D850 - with faster auto focus and more pixels (so you can crop down if needed) and less noise in low light.

Settings: A lot of trial and error, but what I currently do and is fairly reliable:
* shutter in range of 1/1250 to 1/2500 -- faster speeds get you crisper focus but more noise. You need to go even faster if you want to stop a hummingbird's wings, for example.
* Aperture wide open or up to around f8 max.
* ISO Auto. So shutter and aperture are both on manual and only ISO fluctuates auto. You can experiment with where to set the upper limit of the ISO but on a body like the D850 you can go really high (like in five digits).
* Exposure compensation: This is hard to remember in the heat of the moment. But for darker birds I try to keep it at +0.7 to as high as +2.0 and keep checking the histogram to make sure I'm not too far to the right. For white birds, you need to go in the opposite direction: -1.0 or even more. Check your white clipping on the histogram until you're not getting any blinkies on the bird bodies.
* Auto focus set to D9 or something like that, and back button focus which works great once you get used to it. Steve Perry talks about how to set this up in his Nikon auto focus book.

One more important thing I just remembered: Check your focus on the display from time to time by setting a button to give you one-button 100% zoom on the image. Nikon has this easily with the center button. A lot of times what looks like good focus to the casual eye turns out to be not so crisp when you blow it up.

Persistence is a good thing. Obsession can be good too.

Hope that helps.
Pat Malone
I've only been doing birds in flight seriously for... (show quote)


Pat, Indeed it helps. Much I already practice. Much I must ponder. Much gratitude.
Thanks

Reply
Apr 12, 2018 11:04:53   #
Raz Theo Loc: Music City
 
markie1425 wrote:
"BIF"

Some insiders post this way-not just "BIF" but other acronyms or shortcuts.

Others who may use UHH to learn have no idea what you're talking about.

Please be courteous and let the rest of us know what your acronyms or shortcuts mean.

markie1425, being oafish or bad-mannered is the last intention on my mind. As I mentioned in an earlier reply, many members had answered that question for me by the time I had gotten back online. Besides, it is an established photographic acronym, to the point it's almost worn out.

Reply
Apr 12, 2018 11:08:38   #
Raz Theo Loc: Music City
 
MJKilpatrick wrote:
Hello Raz Theo,

There is a methodology to use. Bird flight photography is inherently a low success type of photography. Here is some info that might helps you.

1. As to the location: Find a place where your have a continuing and recurring flight of birds. The more recurring and continual the flights are the more you can practice over and over and the more opportunity you have in a shorter amount of time the quicker your skill develops. The one off opportunities can challenge to many folks if they are just starting to learn the techniques so a place where there are a lot of continual flights in a visit increases not only the aspect of continual practice when learning but also a greater probability of capturing the shots you are wanting. Where are good places? There can be many, or just some, depending on where you live. So here are some ideas: During spring and fall migrations, sea birds and ducks are flying up the coasts. On the right day standing on the end of the right jetty can bring continual opportunity. Here in NJ there are two places that are good examples. In October and November during the fall migration, there can be a continual flight of both Gannets and sea duck very near and sometimes over head on the Avalon, NJ jetty. World class sea duck viewing can be had at the Barnegat Inlet Jetty. In both cases the birds pattern out and can be see coming from a long distance. At the Barnegat Inlet Jetty, when the tides run, the ducks float down the edge of the jetty feeding on mussels. When they get to one end or the other, they then fly back and repeat. All you have to do is sit on the edge of the jetty and wait for that process to repeat over and over. Another place where you see flight paths as such are at nesting colonies and rookeries. Depending on the wind (and the boundaries set) you can stand, or sit off the colonies where those flight paths develop and have a continual and repetitive opportunity. In spring, there is no better place to get flight shots of Redknots, Semi-palmated plovers and other shorebirds than what is called the Reeds Beach Jetty. Light is perfect in the morning the birds are flying across in numbers. In all these cases, being there when the light is right is the key. So mornings at Avalon will give you all back light stuff, as you will be facing East. Afternoons, the light is perfect. This is the same with Barnegat. Reeds beach, its the morning, go in the afternoon it is all back lit as it faces to the West. So there are plenty of places where these flight paths develop and if you find a few, and visit at the right time of day, you will hone the bird in flight skill quickly as the opportunities are continual and numerous. St. Mary's in Newfoundland is a spot that is great for this and there are other well known places too. You can also find such places with species like Snow Geese and Brant. Both immediately go to bath and clean themselves up after feeding. Find where they go to do that, or be at a refuge when they are using an accessible spot by one of the drives, and you will have more opportunity than one can image and it brings that practice to hone skills quickly and it increases the odds of success.

2. Light.....follow the light. The brighter and stronger the light the better focus systems work. Keep the light at your back if you can. But remember some really nice bird in flight photos can be silhouettes so if you have a beautifully colored sky you can go in opposite direction.

3. Settings.......high shutter speed is needed so the f/stop is usually not set on the higher range. f/5.6 to f/8 is more than likely the range you will use. Which you choose depends on what you like. Try all through the range and see how they perform, that will tell you where to pre-set or what to jump to when dealing with a one off opportunities. But on recurring and continual opportunities you will have plenty of time to change settings to compare. I suggest doing this as there are plenty of effects that can be produced by different f/stops and especially different shutter speeds. You want the shutter speed to be the minimal speed that freezes the head and body of the bird (it can differ to some degree as different species fly at different speeds) Remember you have varying velocity in the movement in different parts of a flying bird, particularly the wings. The more you raise the shutter speed over than minimum that freezes the head and body, the less wing blur. The range of shutter speeds usually start at 1/800th of a second and a minimum and then up, with the more probable shutter speed that works as a minimum being 1/1000 or 1/1250th as a starting point. You have to recognize that there are aspects of relative velocity at play. So a bird flying left to right across your field of view where you can pan the lens with it , needs a lower minimum shutter speed to capture the bird than one angling to you or straight at you where the bird is changing distance from you quickly (unlike when flying across your field of view) and will need a higher minimum shutter speed. Also remember that the farther the bird is away the less it is changing position in relation to the camera, the nearer it is the quicker it is changing position in relation to the camera though the bird is moving at the same velocity.

3. Autofocus settings. Usually the continual focus is used and the focus points lowered to the least you can. You want the focus system to continually focus on the subject as it is changing its position in flight, especially if it is also changing the distance from you as it is flying. The more focus points you have the more the camera can jump the focus from your subject to something in the background, or from the head area to a tail of wing. The bigger the bird the easier it is to keep the focus point on it. This is both a product of the size of the bird but also the distance away. A large bird far away is relatively small to the camera. A small bird very close is relatively large to the camera. So there is a range of distance that works best, not to far that the subject is tough to hold in focus, but not too close that it is moving so fast you cannot keep up with it. This is what makes getting shots of smaller birds like sparrows in flight challenging, the closer they are the faster they are in relation to the camera and hard to keep on the focus point, but if they are farther away they are just spots in the sky. This is why starting and practicing on larger birds is what you see recommended.


4. I usually just hand hold but will sometimes use a tripod and a ball head to track some that may be a bit farther away or if I know I may have a busy background. If using a tripod, Gimbal heads would be the thing to use. Think about hand holding when photographing a bird in flight is similar to wing shooting techniques (skeet). Look at some shooting competitions on TV, if you can, and watch how the competitors hold and swing. It is from the hips not the arms. Work at finding that posture that works and then always bring the camera up to the eye in that same posture then swing from the hips as you pan. If you have a hood and it has a tightening screw, you can you use it as a sight by placing it at the top of the lens and sight it between the two sides of the flash shoe on top of the camera. When you do this on a bird, versus trying to find it in the view finder, it gets the camera on the bird quick. On my set up, when I do this, the bird is located just below the view finder so all I have to do is quickly raise the lens an inch of two and the bird ends up right in the middle of the frame. It is quicker than searching for the bird once you put the camera up to your eye. Its a simple sighting technique that works well, there are some red dot sighting systems you can attach to the camera too but I do not know much about these and have never used one.

5. Focal length: I use a 500mm f/4 lens and it works well for me. The longer the focal length the greater the working distance and the greater the working distance the less the relative velocity. So I like to use longer focal lengths. That being said, I know many places and species where it is almost impossible to keep that 500 mm on the subject like fall flights of warblers that fly by quickly and reasonable close. They are moving so fast it is tough to use a 500mm and sometimes a 400mm. This happens where I live at a place called Higsbees Beach that has morning song bird flights in the fall. There is a dike that allows standing very high and more level with the path of the birds. Its a small subject, moving in full flight and the flight can be varying......a 300mm is the lens that works really well though no matter how skilled one may be, there are way more failed photos than successful ones. It is inherent. So depending on the situation, sometimes longer focal lengths work better, sometimes they are of great disadvantage. That being said, use what you have and find a place where bird flight is repetitive and continual and you will see things improving simply through a rapid repetition of trial and error.

6. Backgrounds: the more complicated the background the more probability that the focus will jump. Open sky background is the place to start so you get the other skills developed....it takes some development of motor skills to keep that focus point on the bird. Then start working with backgrounds. You definitely do not want to work on situations where there are foreground elements.......or a lot of them. That gets really tough. The farther your subject is spaced away from the background elements the better. If you are having trouble with birds in flight with busy backgrounds know that we all do. And backgrounds can be deceiving. A duck flying across the water does not seem like it is against a busy background but all those ripples and waves on the water provide a texture that can cause the focus to jump.......most water is not still......a still and flat water background is more like an open sky background but water surface is usually not still. The best way to deal with a busy background is to keep the focus point on the bird the best you can.

7. Use continual drive, especially on busy backgrounds. I like to burst through a flying bird. One technique is to get locked on the tail and then slowly pan through to the head. This brings your motor skills in relation to the birds velocity, but I shoot through the entire bird on continual drive and when I hit the head I regulate my movements to stay on the bird all while keeping the finger on the shutter. So you definitely always want to be on continual drive if you have it on your camera.

8. Preparation: I do not do much on preparation per say as it pertains specifically to birds in flight, its the same preparation for all bird photography. I do know where to go for flight shots of different species and that is a matter of study and visiting those sites over and over so I tend to be prepared for where I am going instinctively but when learning I studied sites in relation to what is there and when, how the birds use the habitat, where I can get to, when to be there (when the light is right) and other elements like migration times, movement of birds on the radar screens, etc. One defining factor is the wind direction. Birds tend to move more into the wind than with a tail wind in local movements though in migration they love a tail wind for longer distance flights. The wind will tell me when it is likely migratory birds are moving through the area and it also tells me what those approach flight paths may be on a site. So for me, preparation is much more a thing that links to behavior than my equipment other than being sure I have the equipment I expect to use with me. It is the case, from time to time, when I go grab that tripod out of the trunk of the car that I forgot I took the head of and used two days ago on the tripod I use in the mud and water. Its not fun having the right tripod with you but having the head sitting at home.

I hope this helps. I don't think I numbered my responses to the order you asked. Don't give up, its not an easy thing......and nothing that came quick or easy brings as much a feeling of reward as those things that challenge us more.

With My Best
Hello Raz Theo, br br There is a methodology to u... (show quote)

MJKilpatrick, your generous reply is a textbook. I would like to humbly express my thanks and inform you that you now reside in my documents file which I can read at leisure.
Again, thanks

Reply
Apr 12, 2018 11:09:32   #
BrentHarder Loc: Southern California
 
via the lens wrote:
Hi, I've attached a few examples so that you can see that I actually do photograph birds in flight at times. High shutter speed, a steady hand, a tripod if the situation will allow, a quality long lens, a quality camera with a fast buffer and the ability to take fast multiple shots, study the animal's habits, be ready and follow through, concentrate only on the animal, practice, practice, practice. Also start with the bigger, slower birds as they are easier to follow in flight. Watch out that the background does not negatively impact the subject. I use a Nikon D500 and either a Nikon 80-400 or a Nikon 200-500. Florida is a great place to photograph birds. All of the birds shown were photographed in Florida.
Hi, I've attached a few examples so that you can s... (show quote)


Most BIF photos here are less than desirable in my opinion. Yours are one of the few exceptions. It's very refreshing to see quality photos of BIF here.
You have a lot going for you with the photos you have posted:
1. focus (sharpness)
2. composition
3. interest
4. rich color
5. contrast
Bravo!
I hope the other BIF photographers learn from you and improve their photos because of you.
Thanks for posting.

Reply
Page <<first <prev 4 of 6 next> last>>
If you want to reply, then register here. Registration is free and your account is created instantly, so you can post right away.
Main Photography Discussion
UglyHedgehog.com - Forum
Copyright 2011-2024 Ugly Hedgehog, Inc.